


- Recurring subscriptions
- One-time payments
- Free trials
- Refunds (for voiding partner commissions)
- Cancellations/churn
- Usage expansion
Installing the Dub Stripe integration
1
Find Dub on the Stripe App Marketplace
Navigate to the Dub Stripe Integration on the Stripe App Marketplace.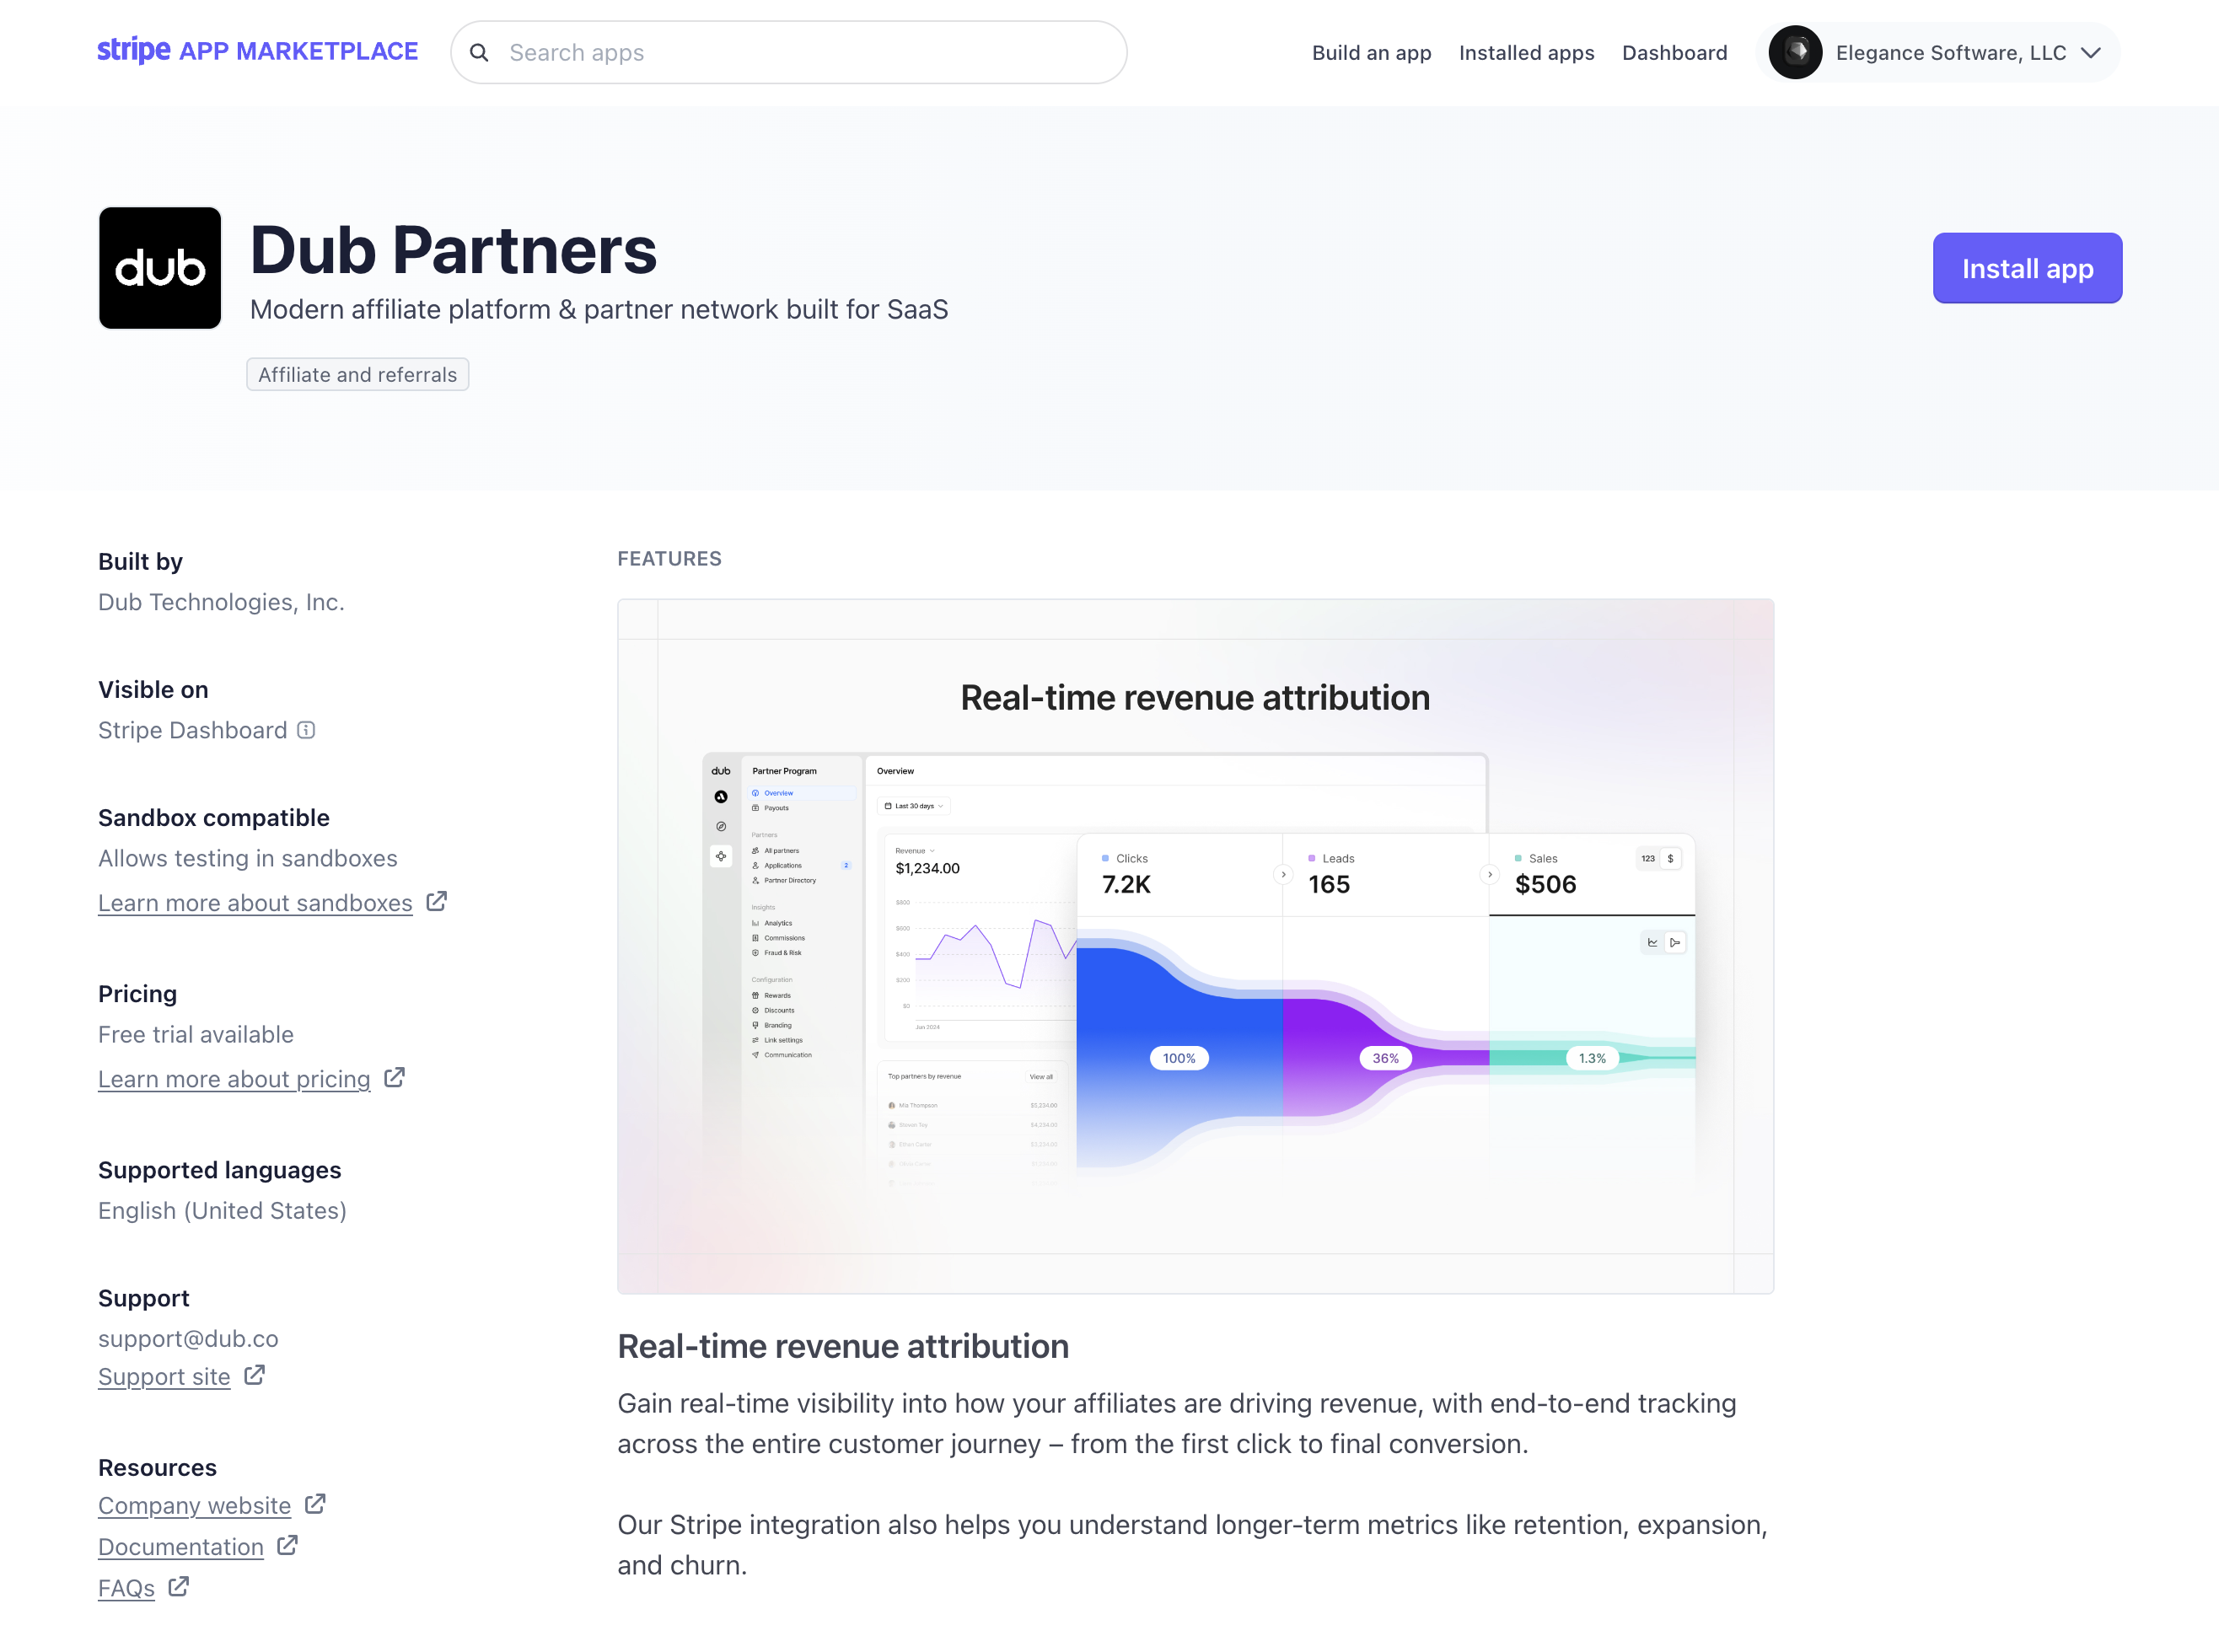
2
Install the Stripe app
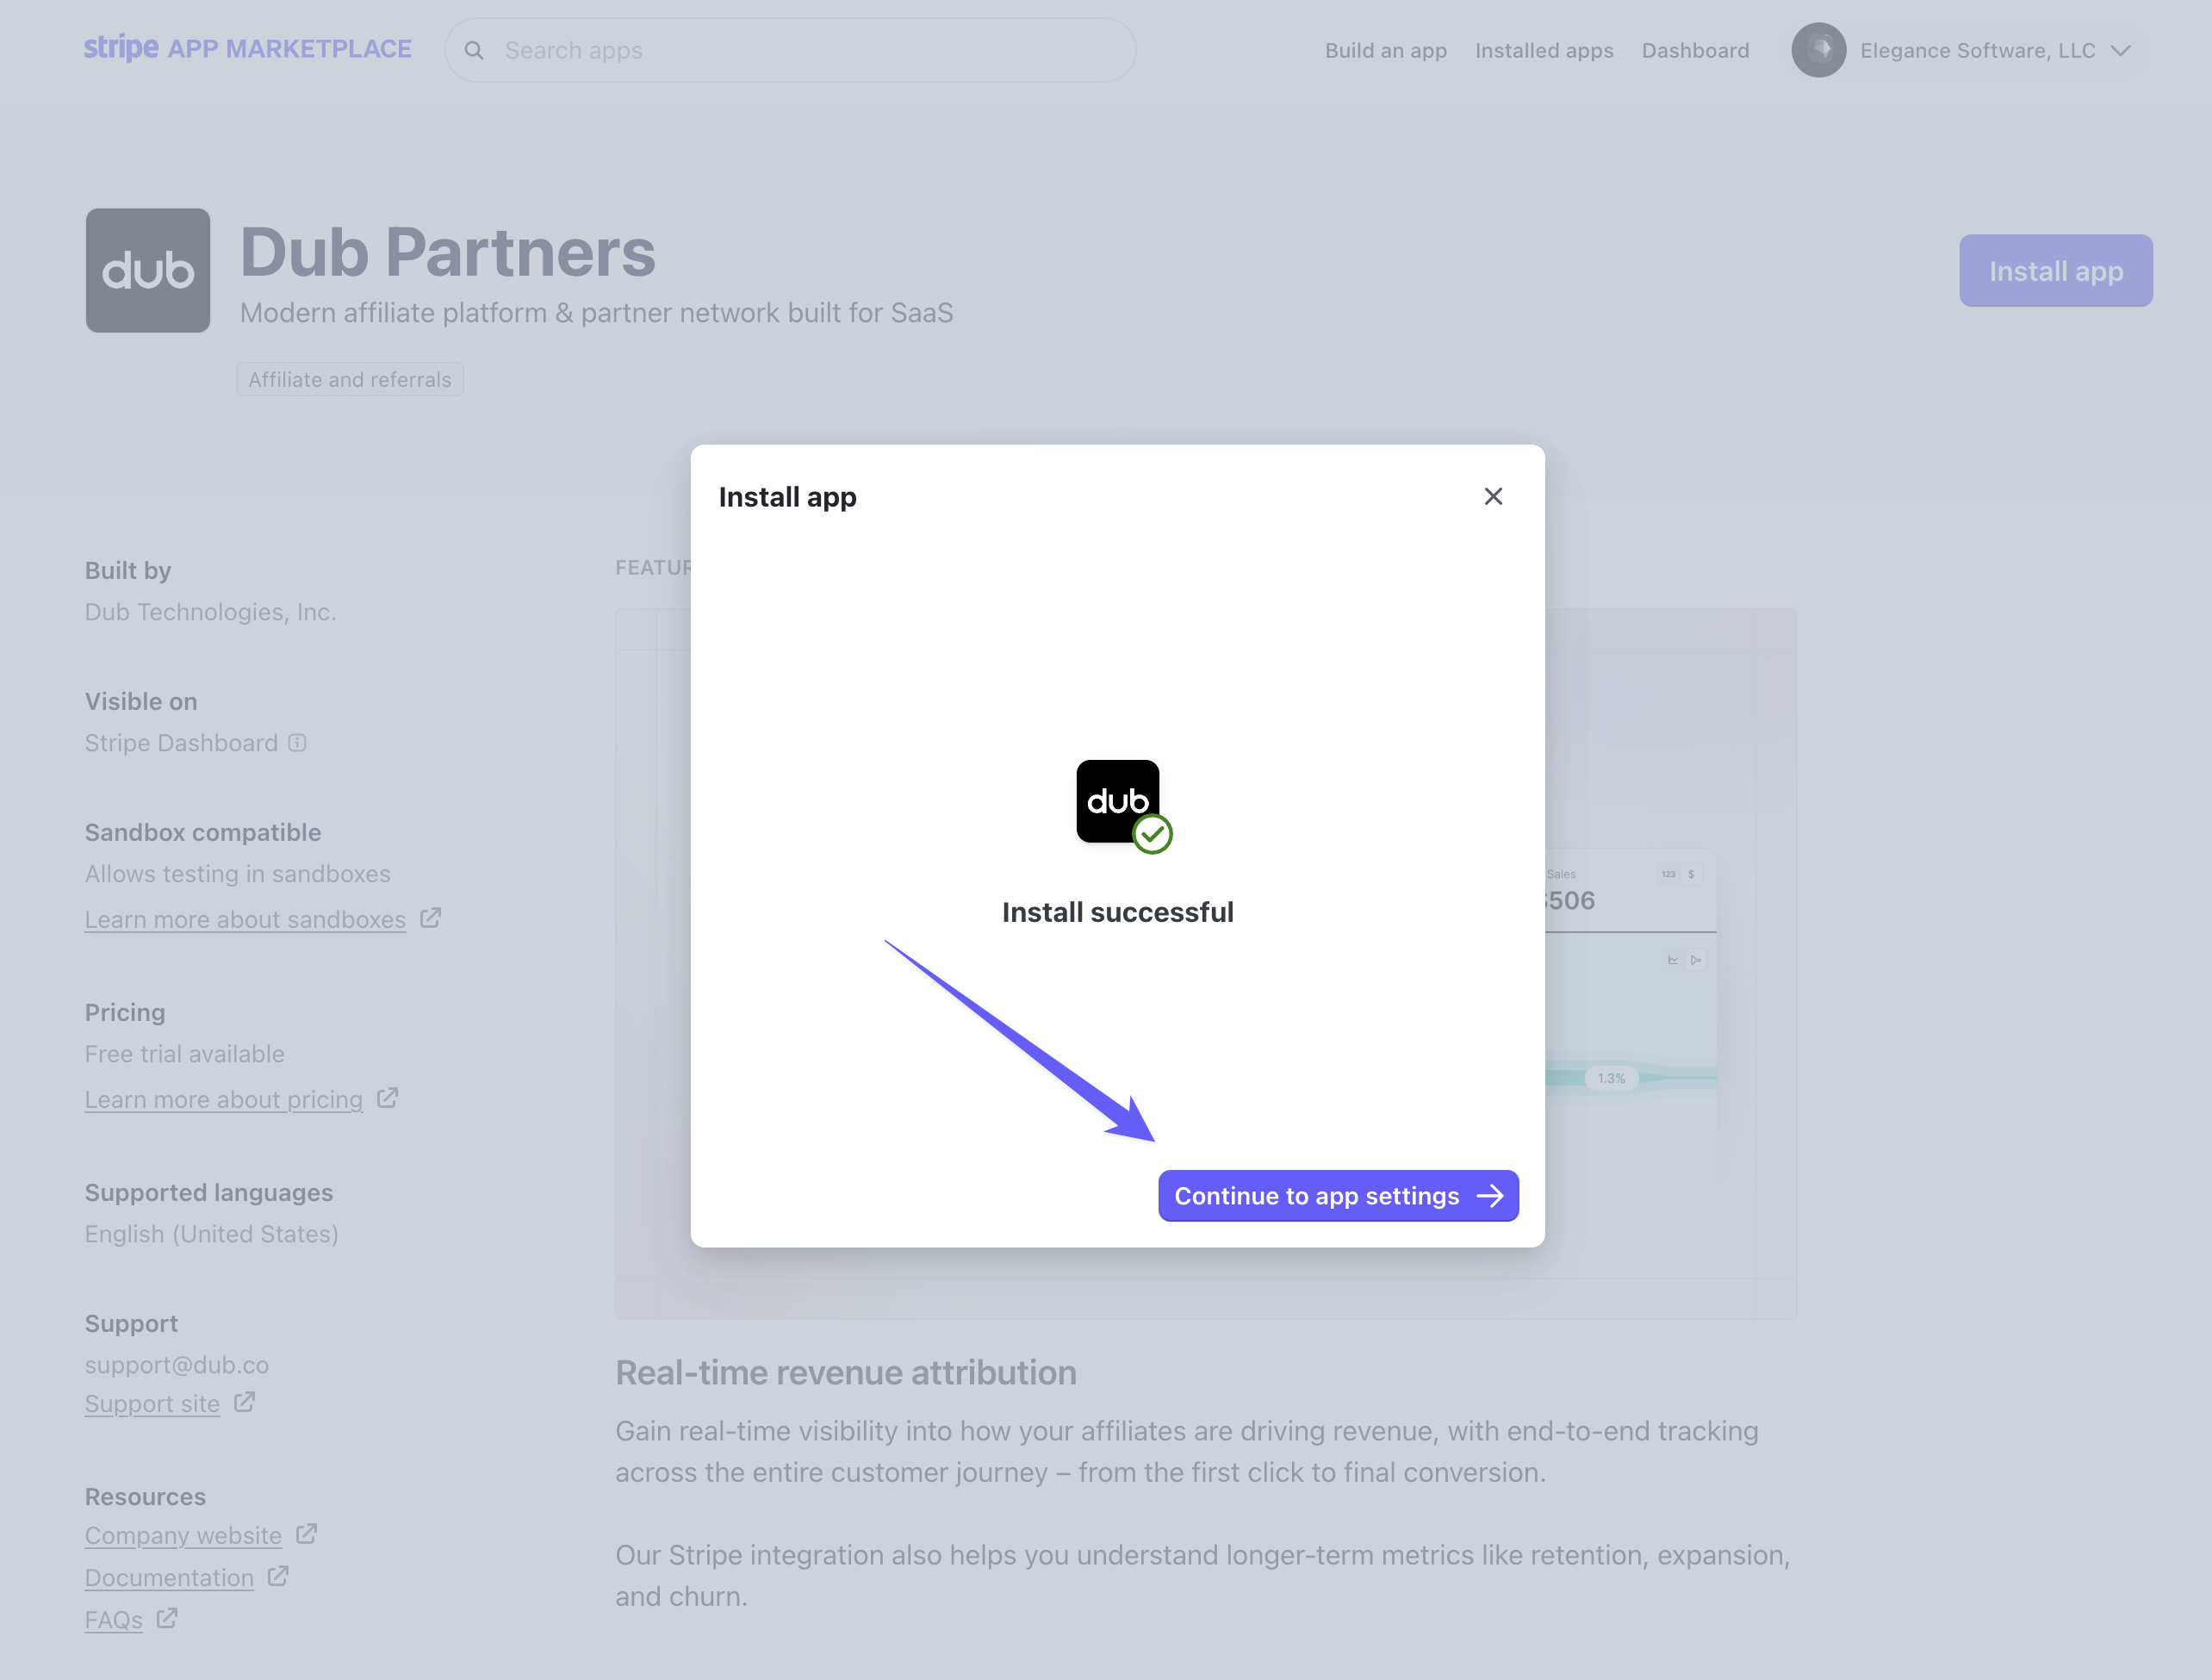
On the top right, click on Install app to install the Dub app on your Stripe account.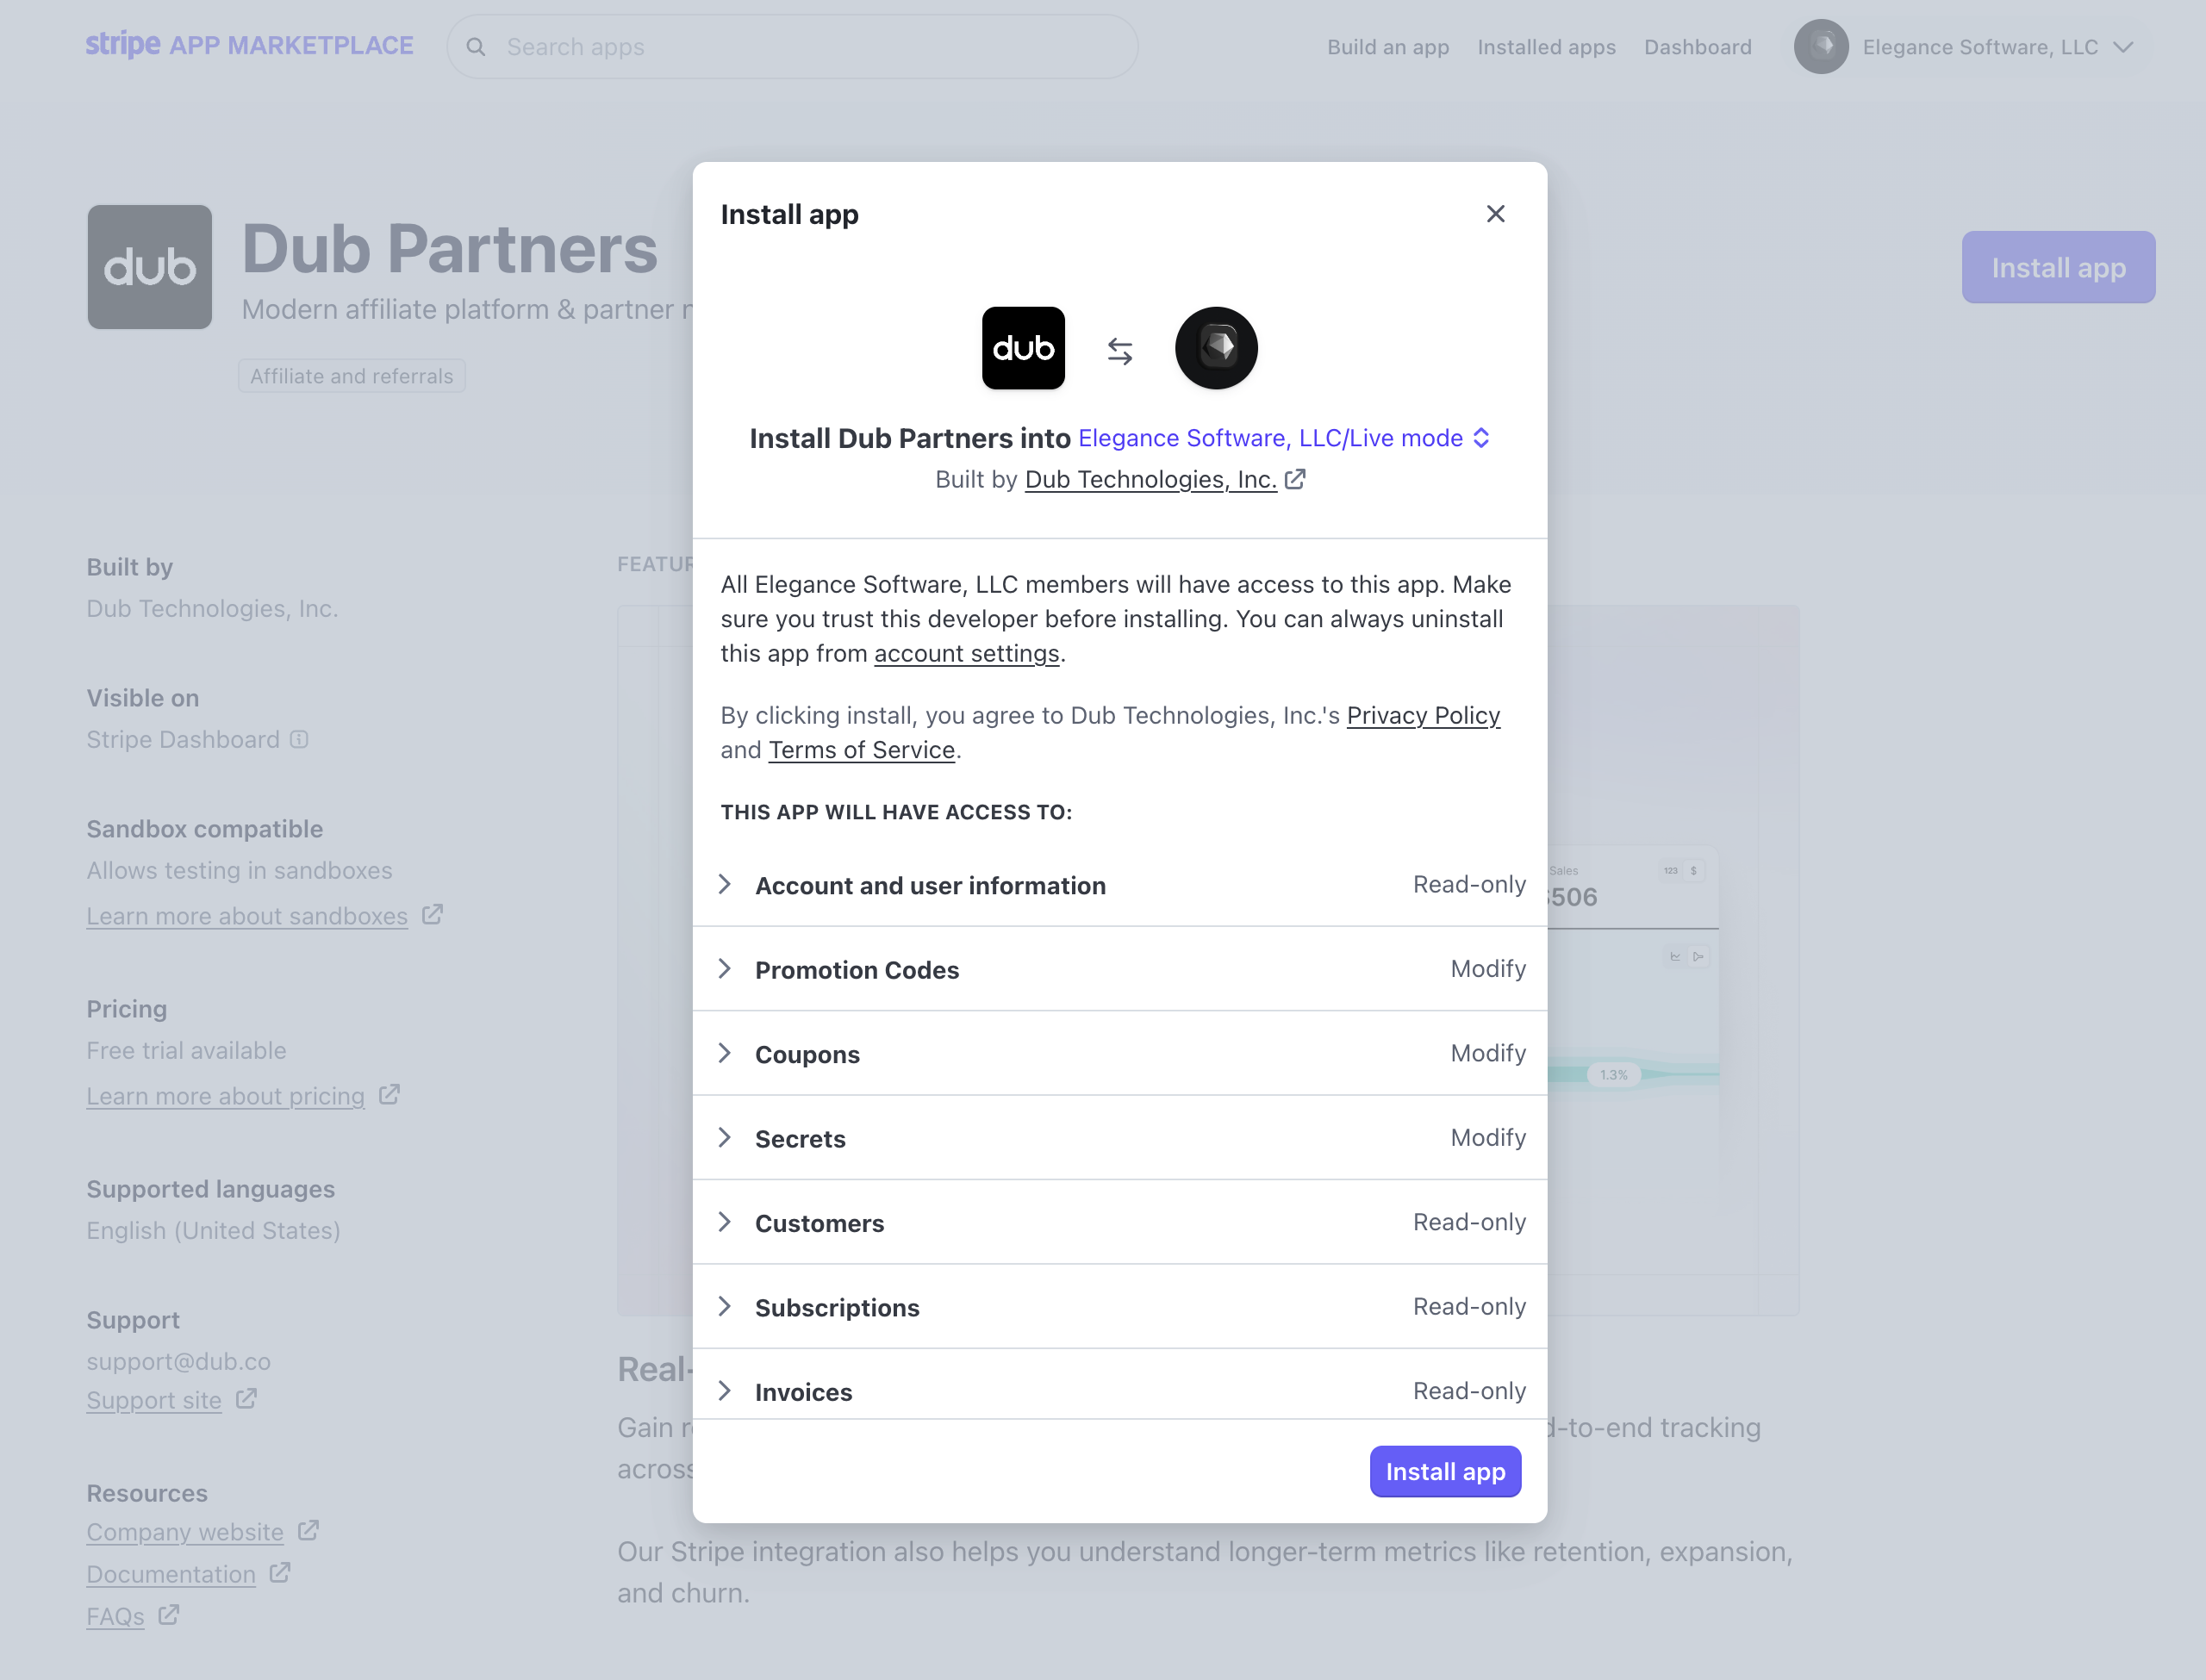
3
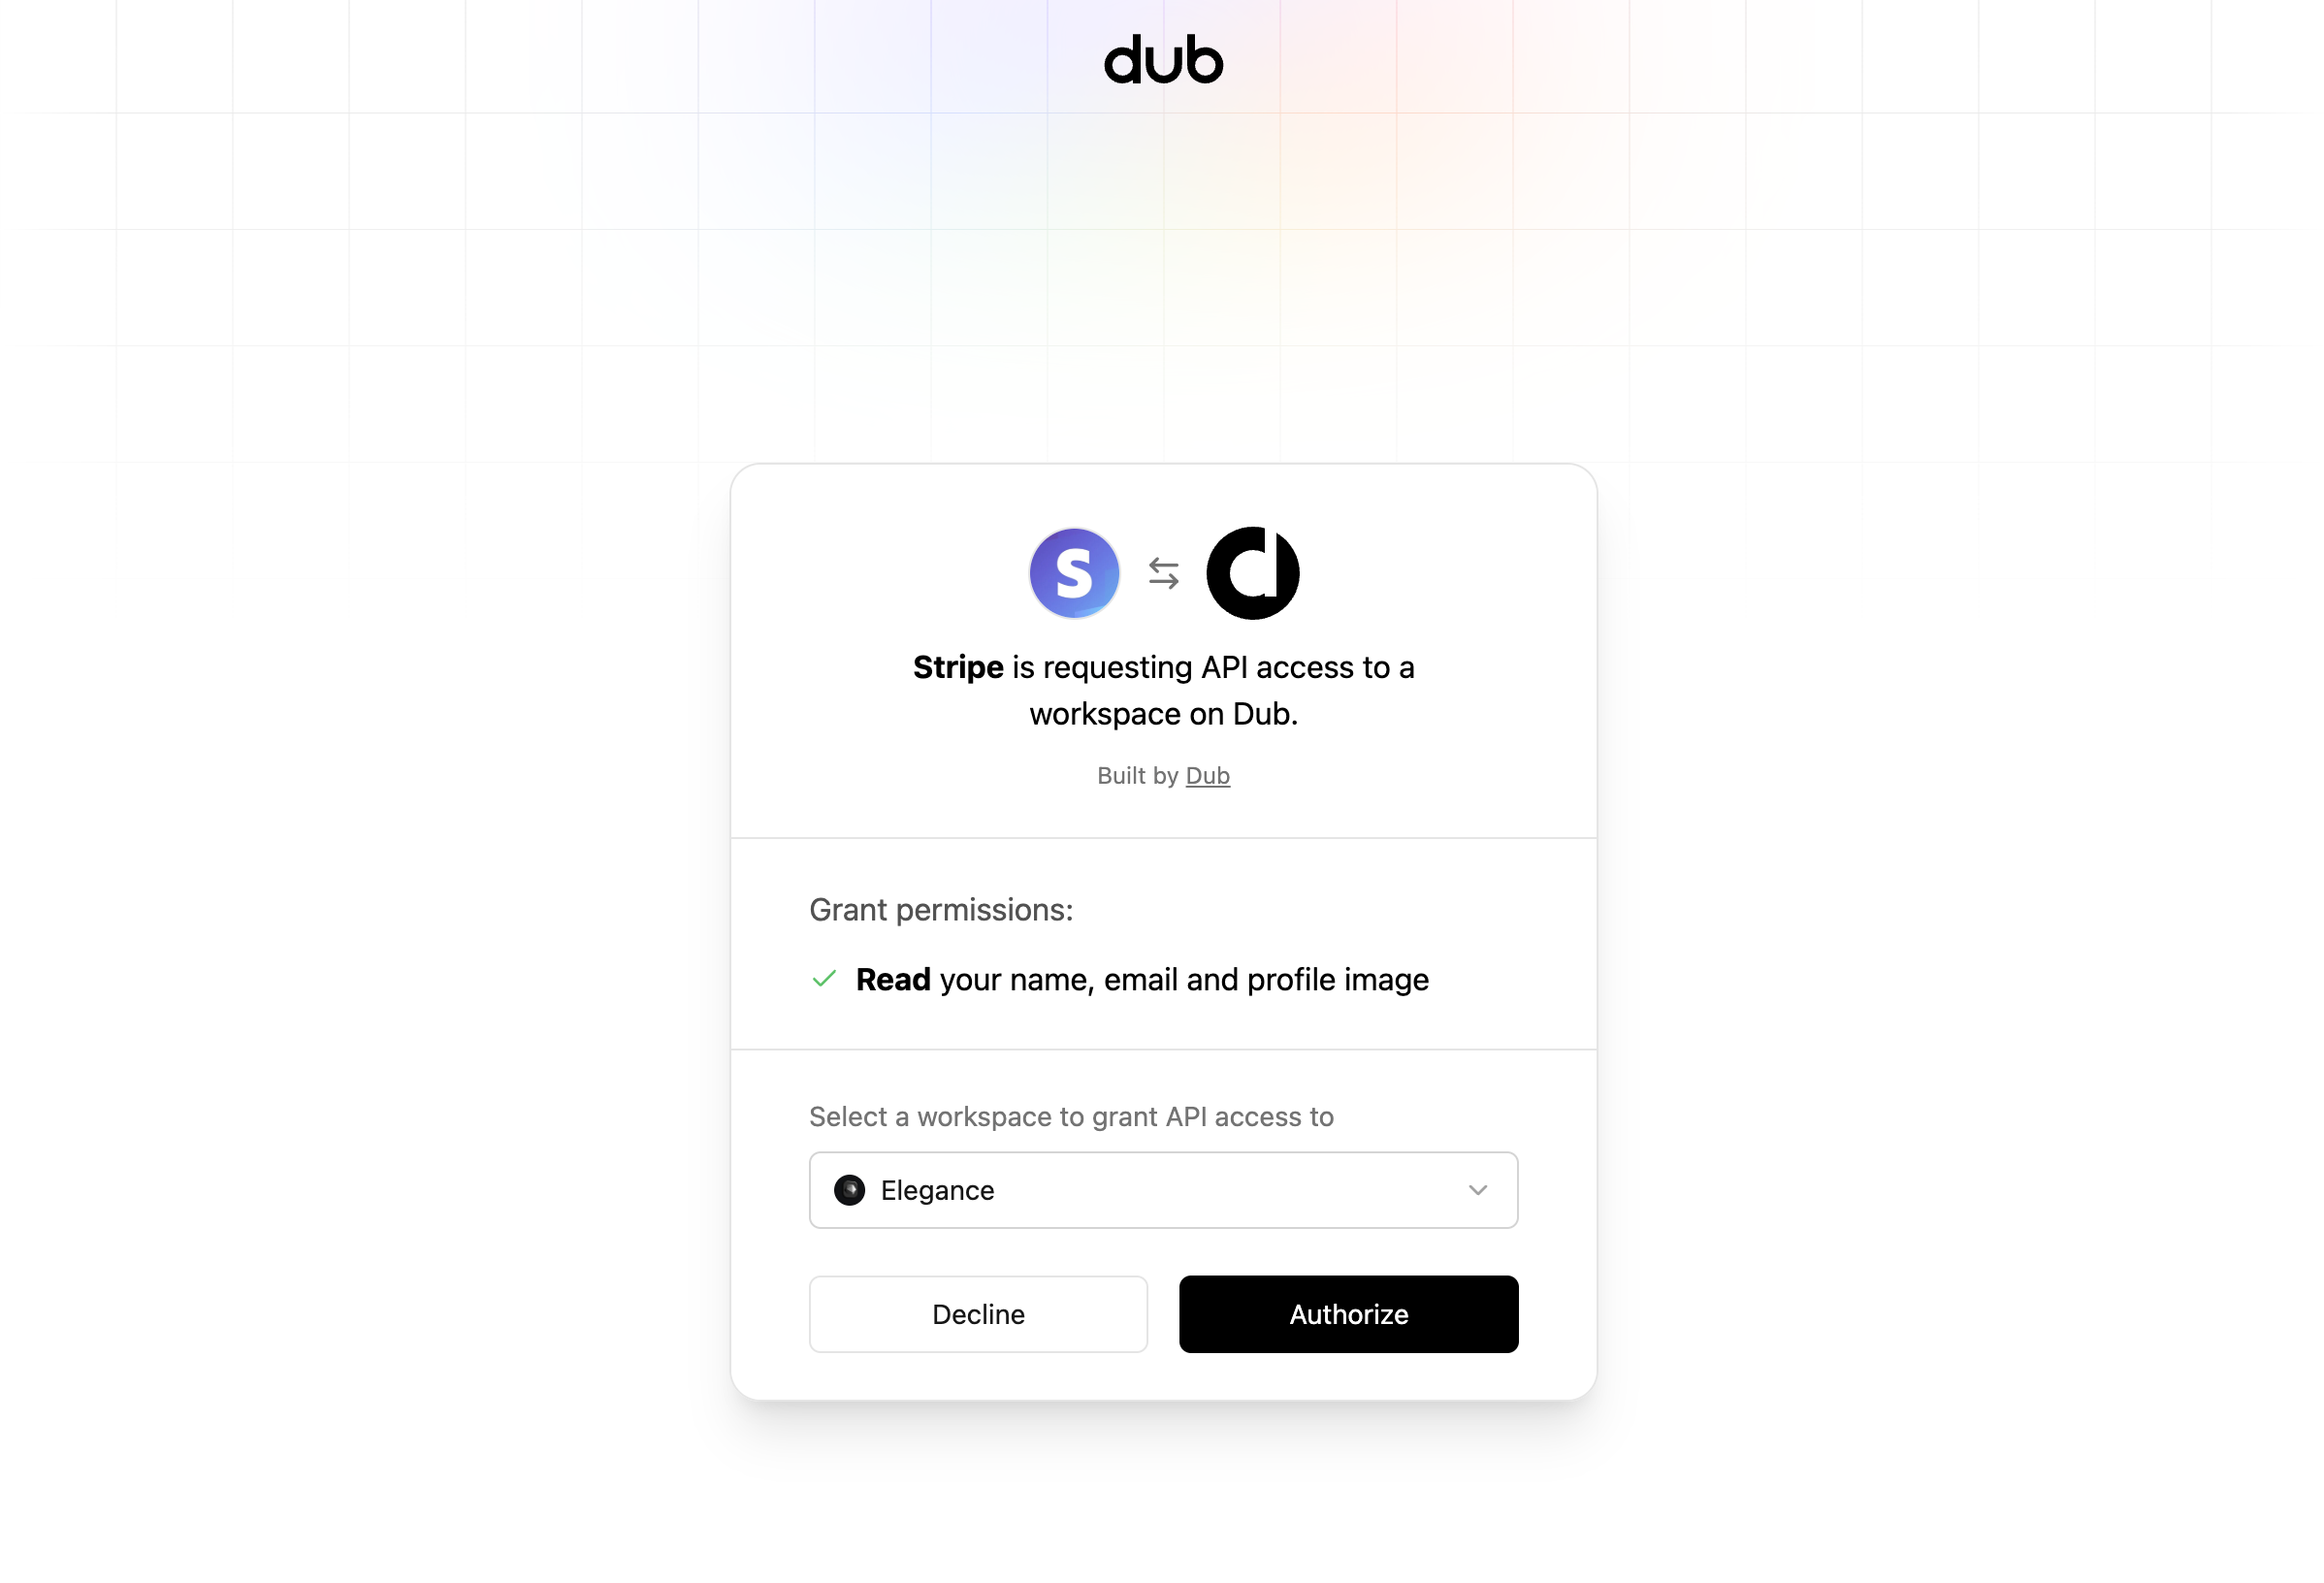
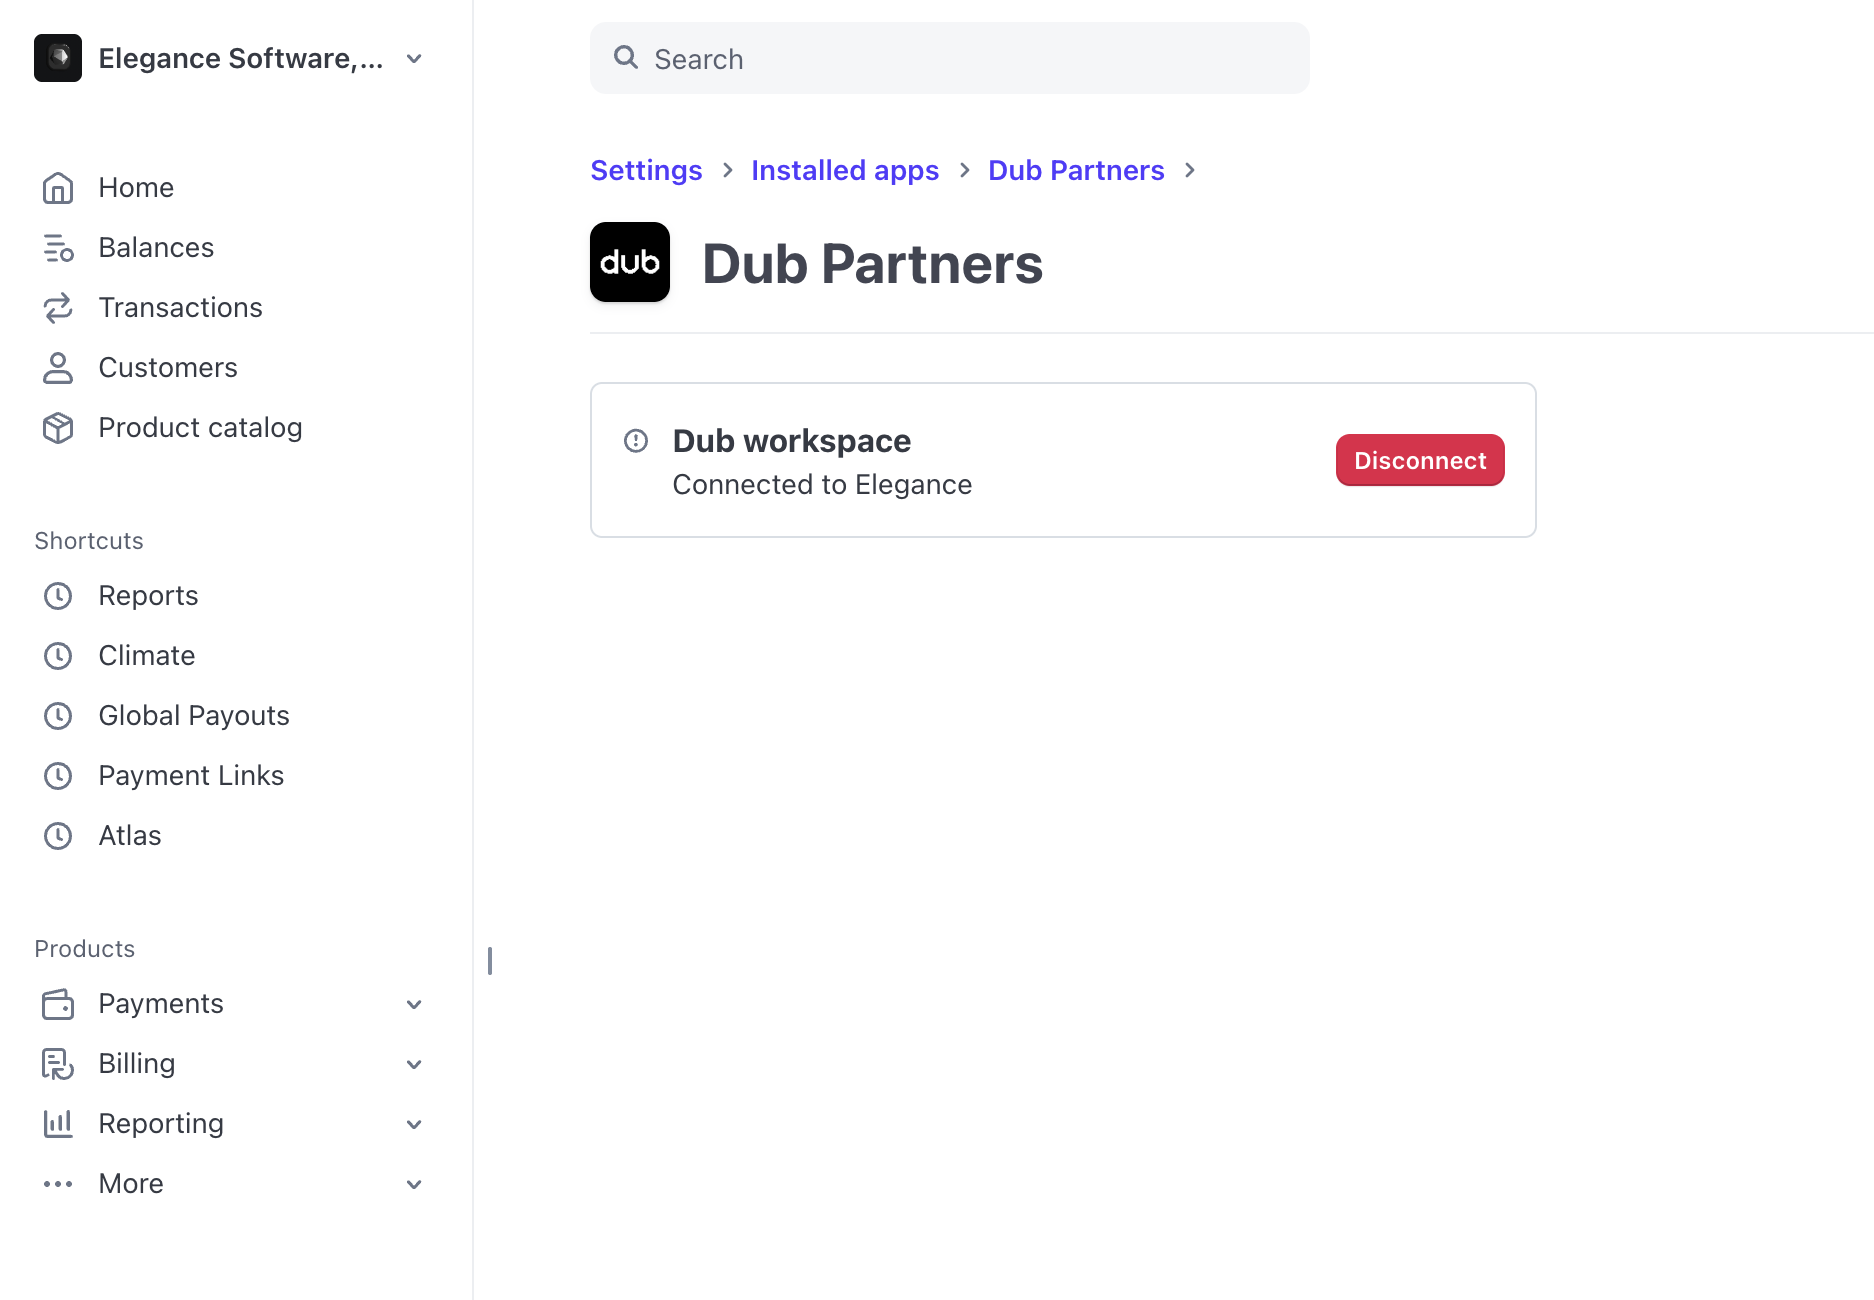
Connect Stripe to your Dub workspace
In the app settings page, click on Connect workspace to connect your Stripe account with your Dub workspace.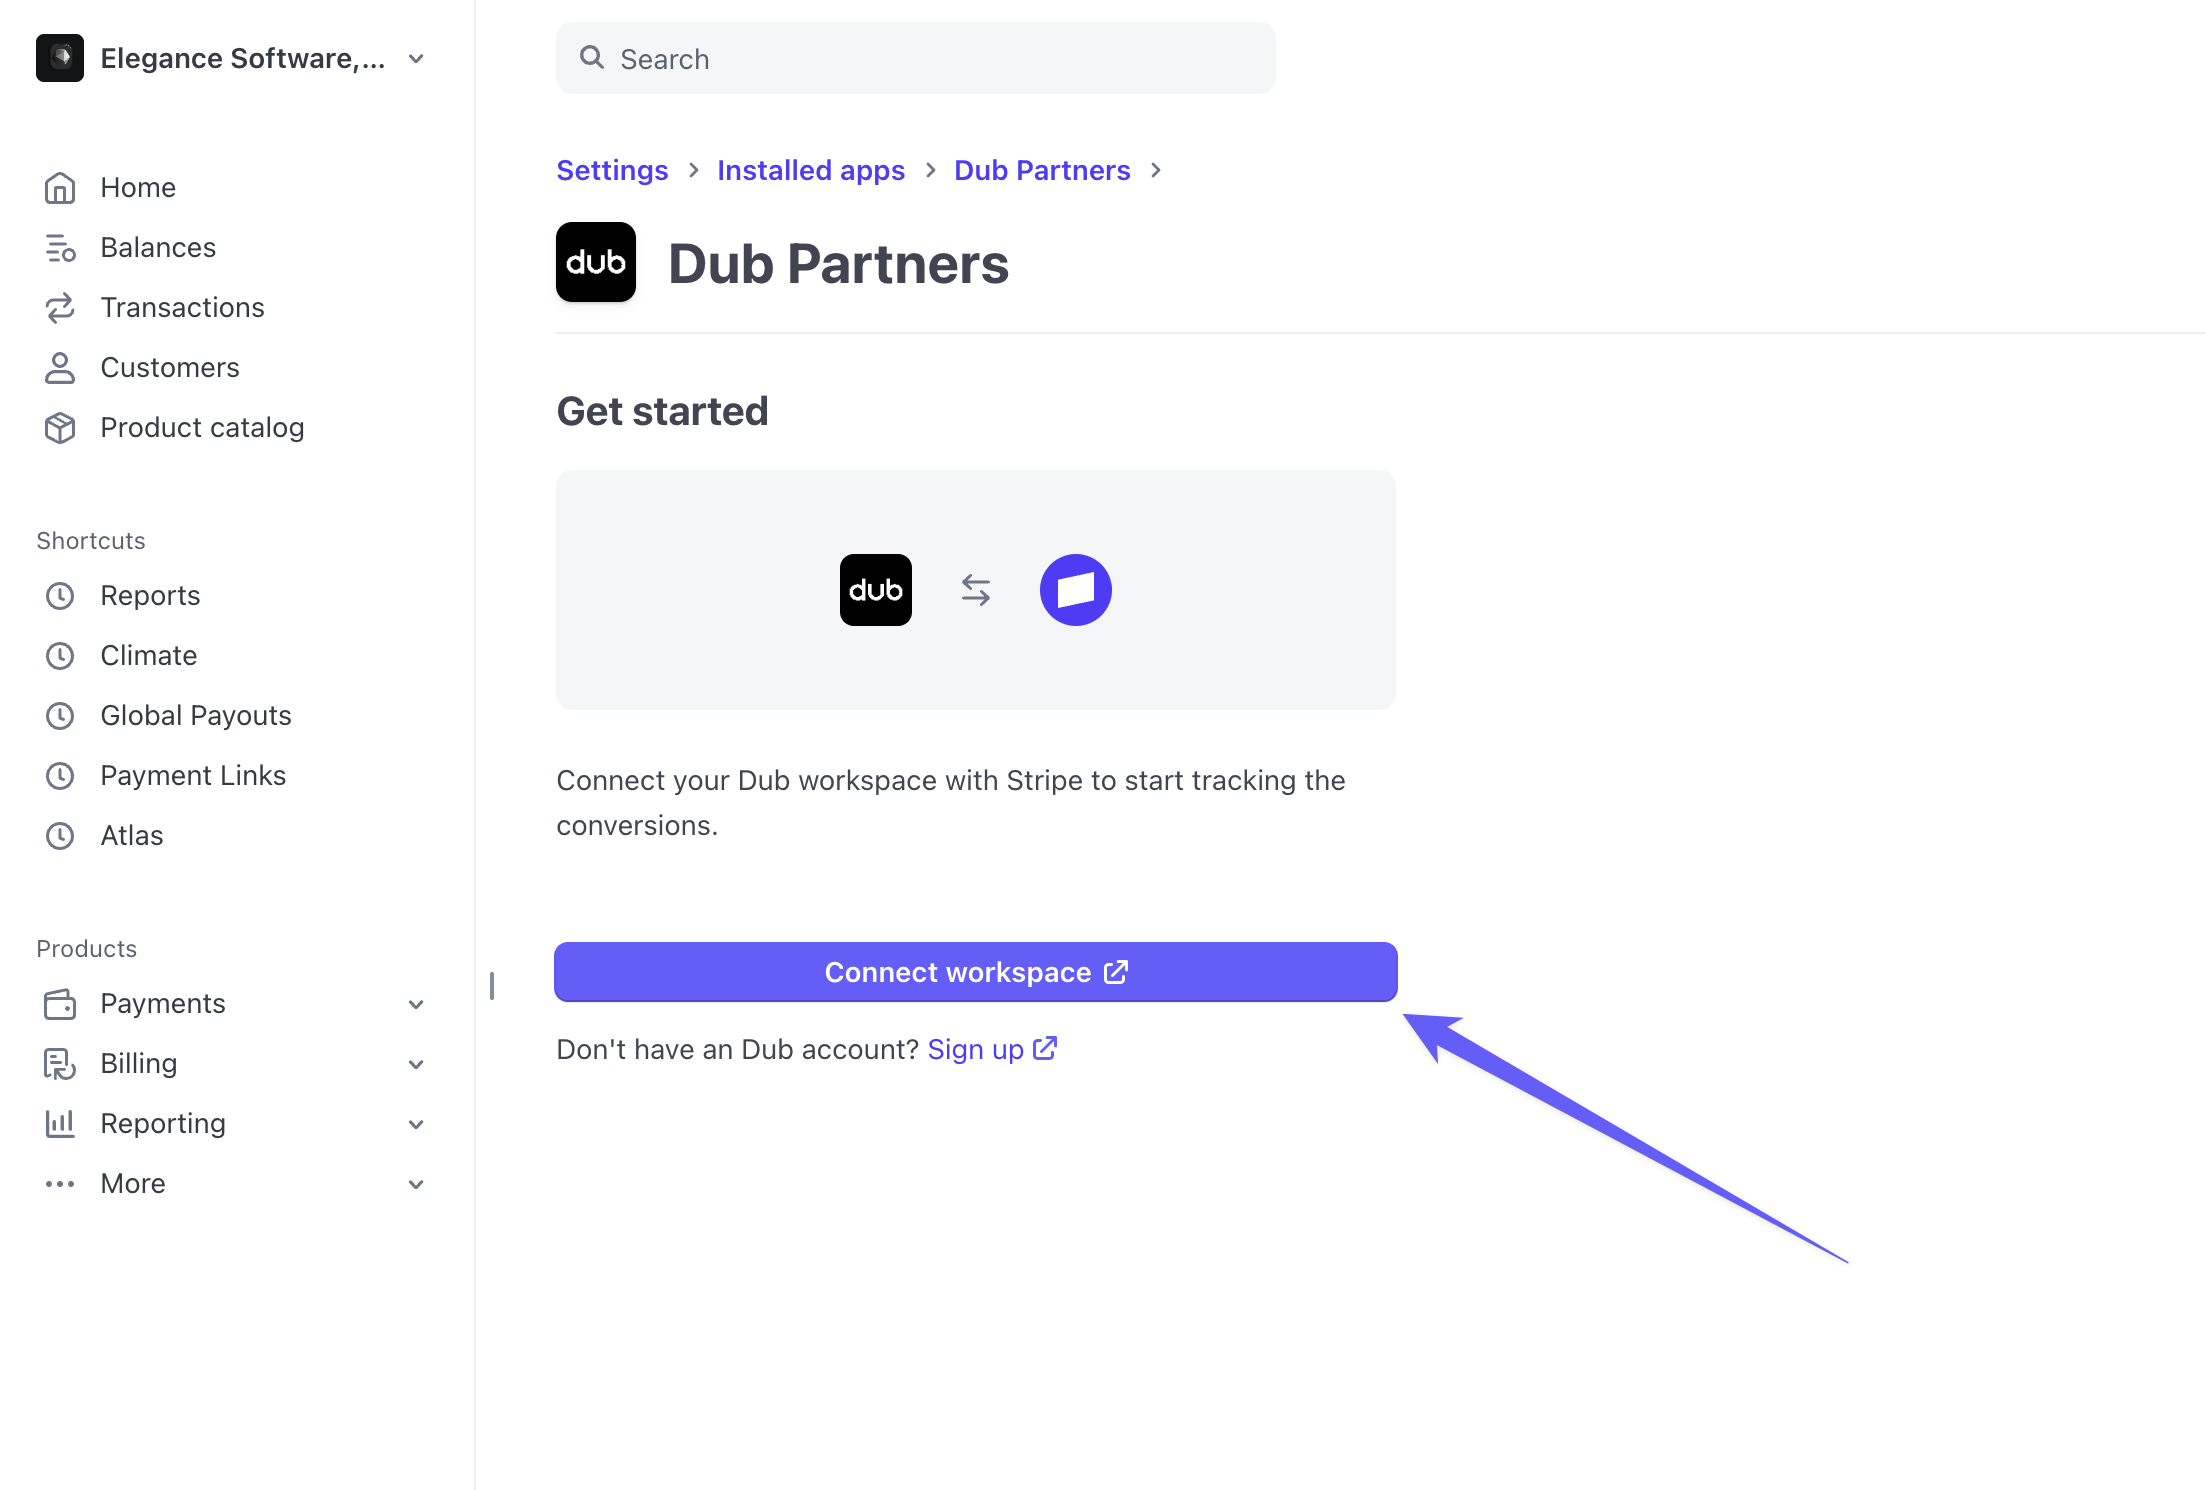
customer.created: When a new customer is createdcustomer.updated: When a customer is updatedcheckout.session.completed: When a customer completes a checkout sessioninvoice.paid: When an invoice is paid (for tracking recurring subscriptions)charge.refunded: When a charge is refunded (for voiding partner commissions)
Tracking sales with the Dub Stripe integration
Depending on your setup, there are a few ways you can track sales with the Dub Stripe integration.- Option 1: Using Stripe Payment Links
- Option 2: Using Stripe Checkout (recommended)
- Option 3: Using Stripe Customers
Option 1: Using Stripe Payment Links
When using Stripe Payment Links, lead and sale events are tracked but lead
webhooks and lead
rewards will not be
generated. Sale
rewards (both
recurring and one time rewards) will still be generated as usual.
?dub_client_reference_id=1 query parameter to your Stripe Payment Link when shortening it on Dub.
Then, when a user clicks on the shortened link, Dub will automatically append the unique click ID as the client_reference_id query parameter to the payment link.

customerExternalId with their Stripe customer ID for future reference.
Alternatively, if you have a marketing site that you’re redirecting your users to first, you can do this instead:
-
Install the Dub Analytics script, which automatically detects the
dub_idin the URL and stores it as a first-party cookie on your site. -
Then, retrieve and append the
dub_idvalue as theclient_reference_idparameter to the payment links on your pricing page / CTA button (prefixed withdub_id_).
What if I'm using Stripe Pricing Tables?
What if I'm using Stripe Pricing Tables?
If you’re using Stripe Pricing Tables – you’d want to pass the Dub click ID as a
client-reference-id attribute instead:What if I'm using Stripe's Checkout Sessions API?
What if I'm using Stripe's Checkout Sessions API?
If you’re using Stripe’s Checkout Sessions API for a recurring subscription service, you might want to check out our Stripe Checkout option instead.If your setup doesn’t involve a lead/signup event and goes straight to the Stripe checkout flow (e.g. for one-time purchases), you can simply pass the Dub click ID (prefixed with
dub_id_) as the client_reference_id parameter to enable conversion tracking with Dub.Option 2: Using Stripe Checkout (recommended)
If you have a custom checkout flow that uses Stripe’scheckout.sessions.create API, you’d want to associate the Stripe customer object with the user’s unique ID in your database (which we tracked in the lead conversion tracking step).
This will allow Dub to automatically listen for purchase events from Stripe and associate them with the original click event (and by extension, the link that the user came from).
How does this work?
How does this work?
Remember in the lead conversion tracking guide, we passed the user’s unique user ID along with the click event ID in the Under the hood, Dub records the user as a customer and associates them with the click event that they came from.Then, when the user makes a purchase, Dub will automatically associate the checkout session details (invoice amount, currency, etc.) with the customer – and by extension, the original click event.
dub.track.lead call?Node.js
dubCustomerExternalId value in the metadata field.
Node.js
Option 3: Using Stripe Customers
Alternatively, if you don’t use Stripe’s checkout session creation flow, you can also pass the user ID and the click event ID (dub_id) in the Stripe customer creation flow.
First, you’ll need to complete the following prerequisites:
- Install the Dub Stripe integration
- Enable conversion tracking for your links
- Install the Dub Analytics script
dubCustomerExternalId value in the metadata field.
Node.js
dubCustomerExternalId and dubClickId values in the metadata field of the Stripe customer update flow:
Node.js
When using Stripe Customers, lead and sale events are tracked but lead
rewards will not be
generated. Sale
rewards (both
recurring and one-time rewards) will still be generated as usual.
Tracking free trials
Dub supports tracking subscription free trials as lead events on Dub. This is useful for products with free trials since you might want to track trial activations as part of your attribution flow. To enable free trial tracking, go to your Stripe integration settings and enable the Track Free Trials option: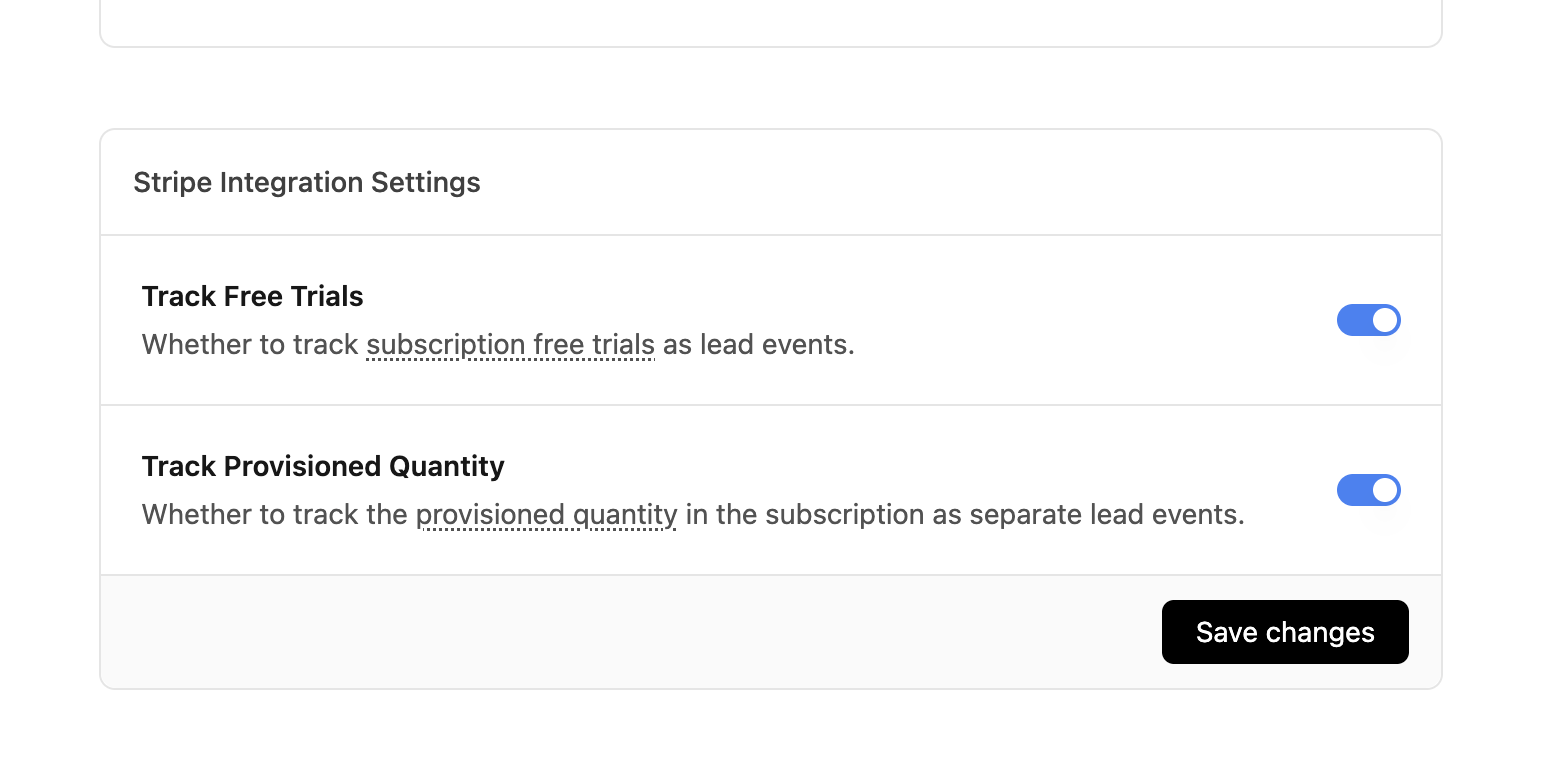
To differentiate between manually tracked lead events and free trial lead events for lead reward types, use the 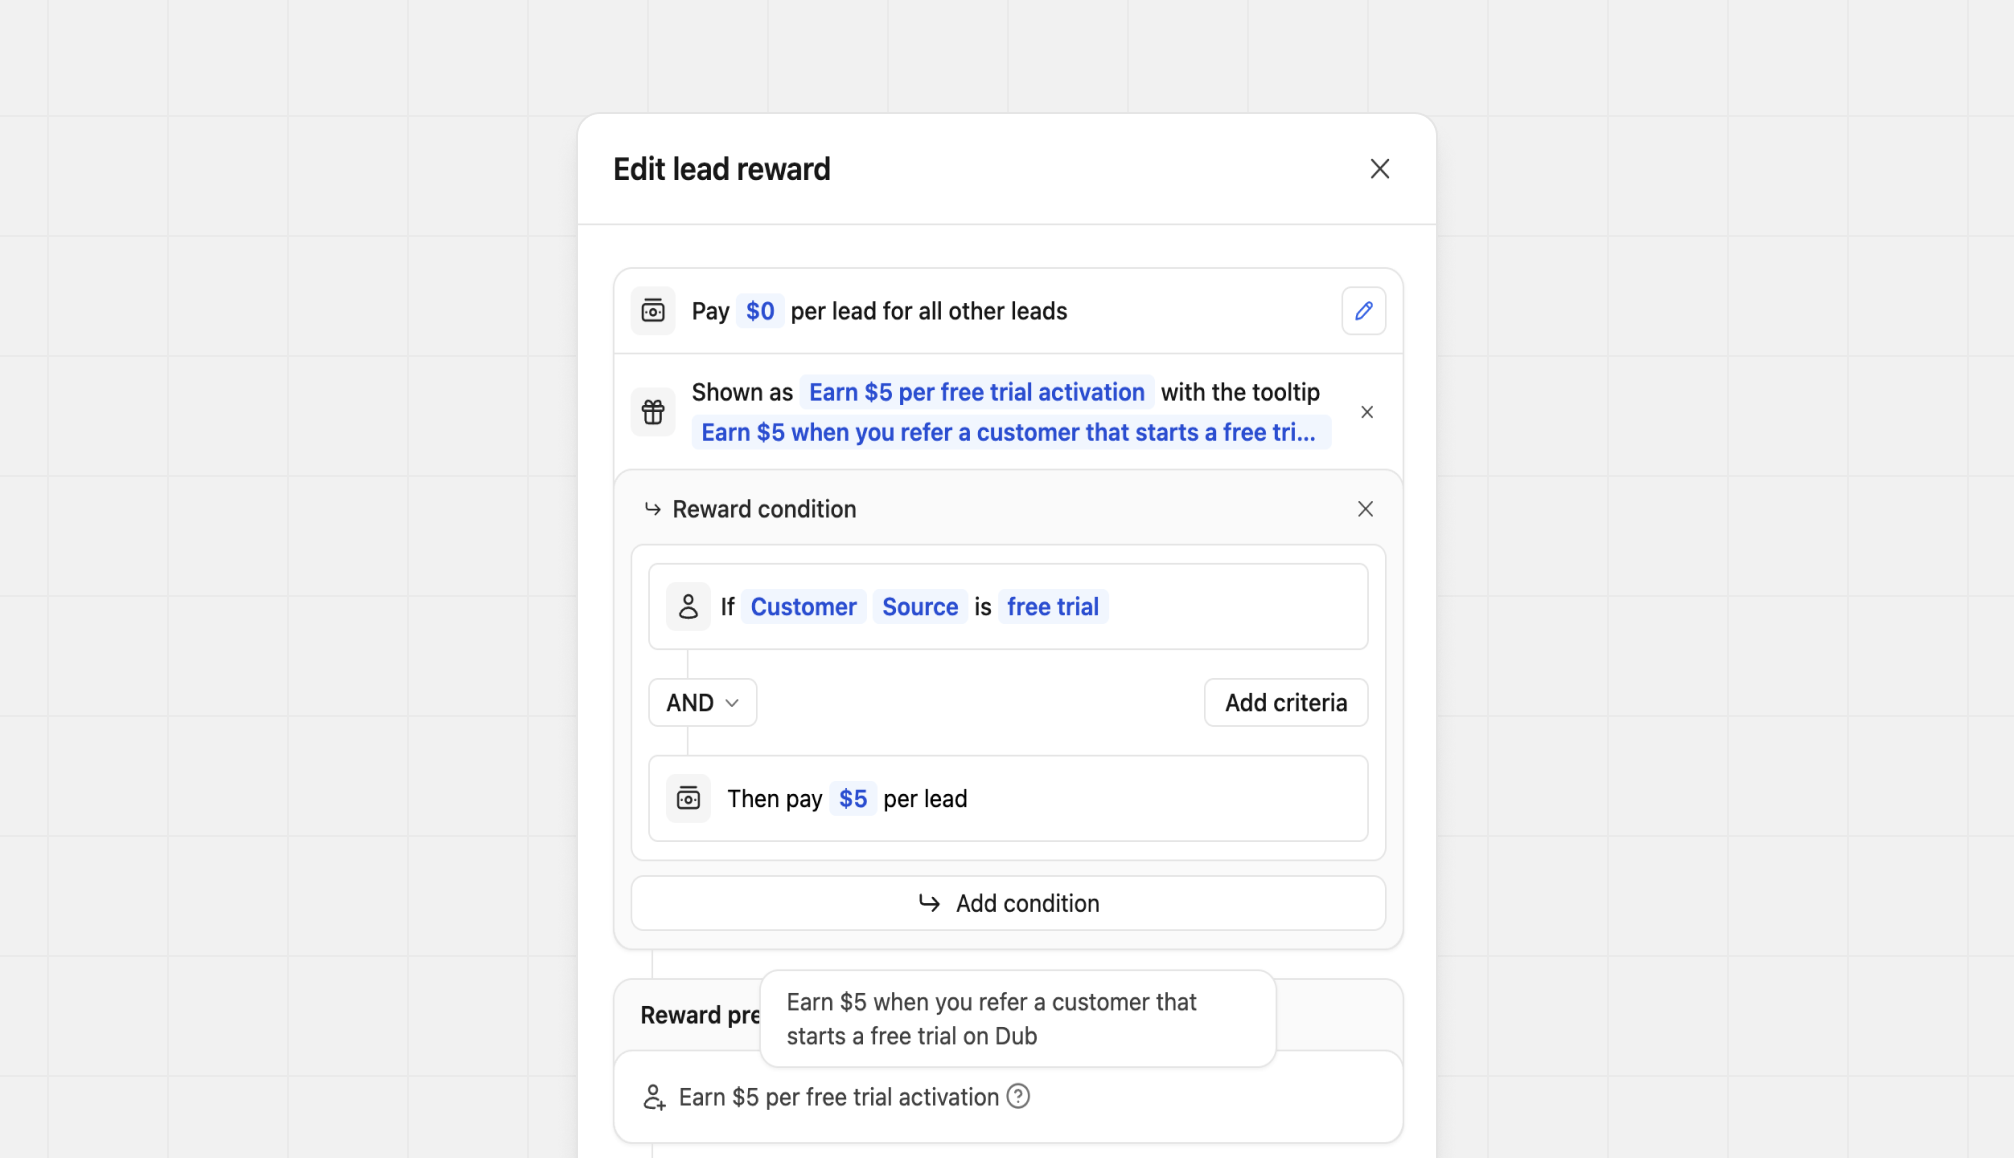
Customer Source reward condition to filter for free trial lead events:Tax handling
When tracking sale conversions from Stripe, Dub automatically excludes taxes from the final sale amount to ensure accurate revenue reporting. For checkout sessions, Dub calculates the sale amount by subtracting the tax amount from the total:total_excluding_tax field when available:
- Revenue tracking and reporting
- Partner commission calculations
- Analytics and conversion metrics
Tax amounts are automatically excluded from all sale events tracked through
the Stripe integration, including one-time purchases, subscriptions, and
recurring invoices.
Currency conversion support
If you’re using Stripe’s Adaptive Pricing feature, Dub will record the sale amount using the currency of your Stripe account:checkout.session.completed
checkout.session.completed
The default currency for all Dub workspaces is currently set to
USD. We will
add the ability to customize that in the future.Multiple line items per invoice
When a Stripe invoice or checkout session contains multiple line items (e.g. a base subscription plus an add-on, or several products purchased in a single transaction), Dub processes each line item individually to calculate the correct commission amount. For each line item, Dub:- Resolves the Stripe product ID for that line item.
- Matches it against any product-specific reward modifiers configured for the partner’s group.
- Calculates the commission for that line item using the matching reward rate (falling back to the default reward if no modifier matches).
saleAmount recorded on Dub still reflects the full invoice total (after tax exclusion and currency conversion), so your revenue analytics remain accurate.
View conversion results
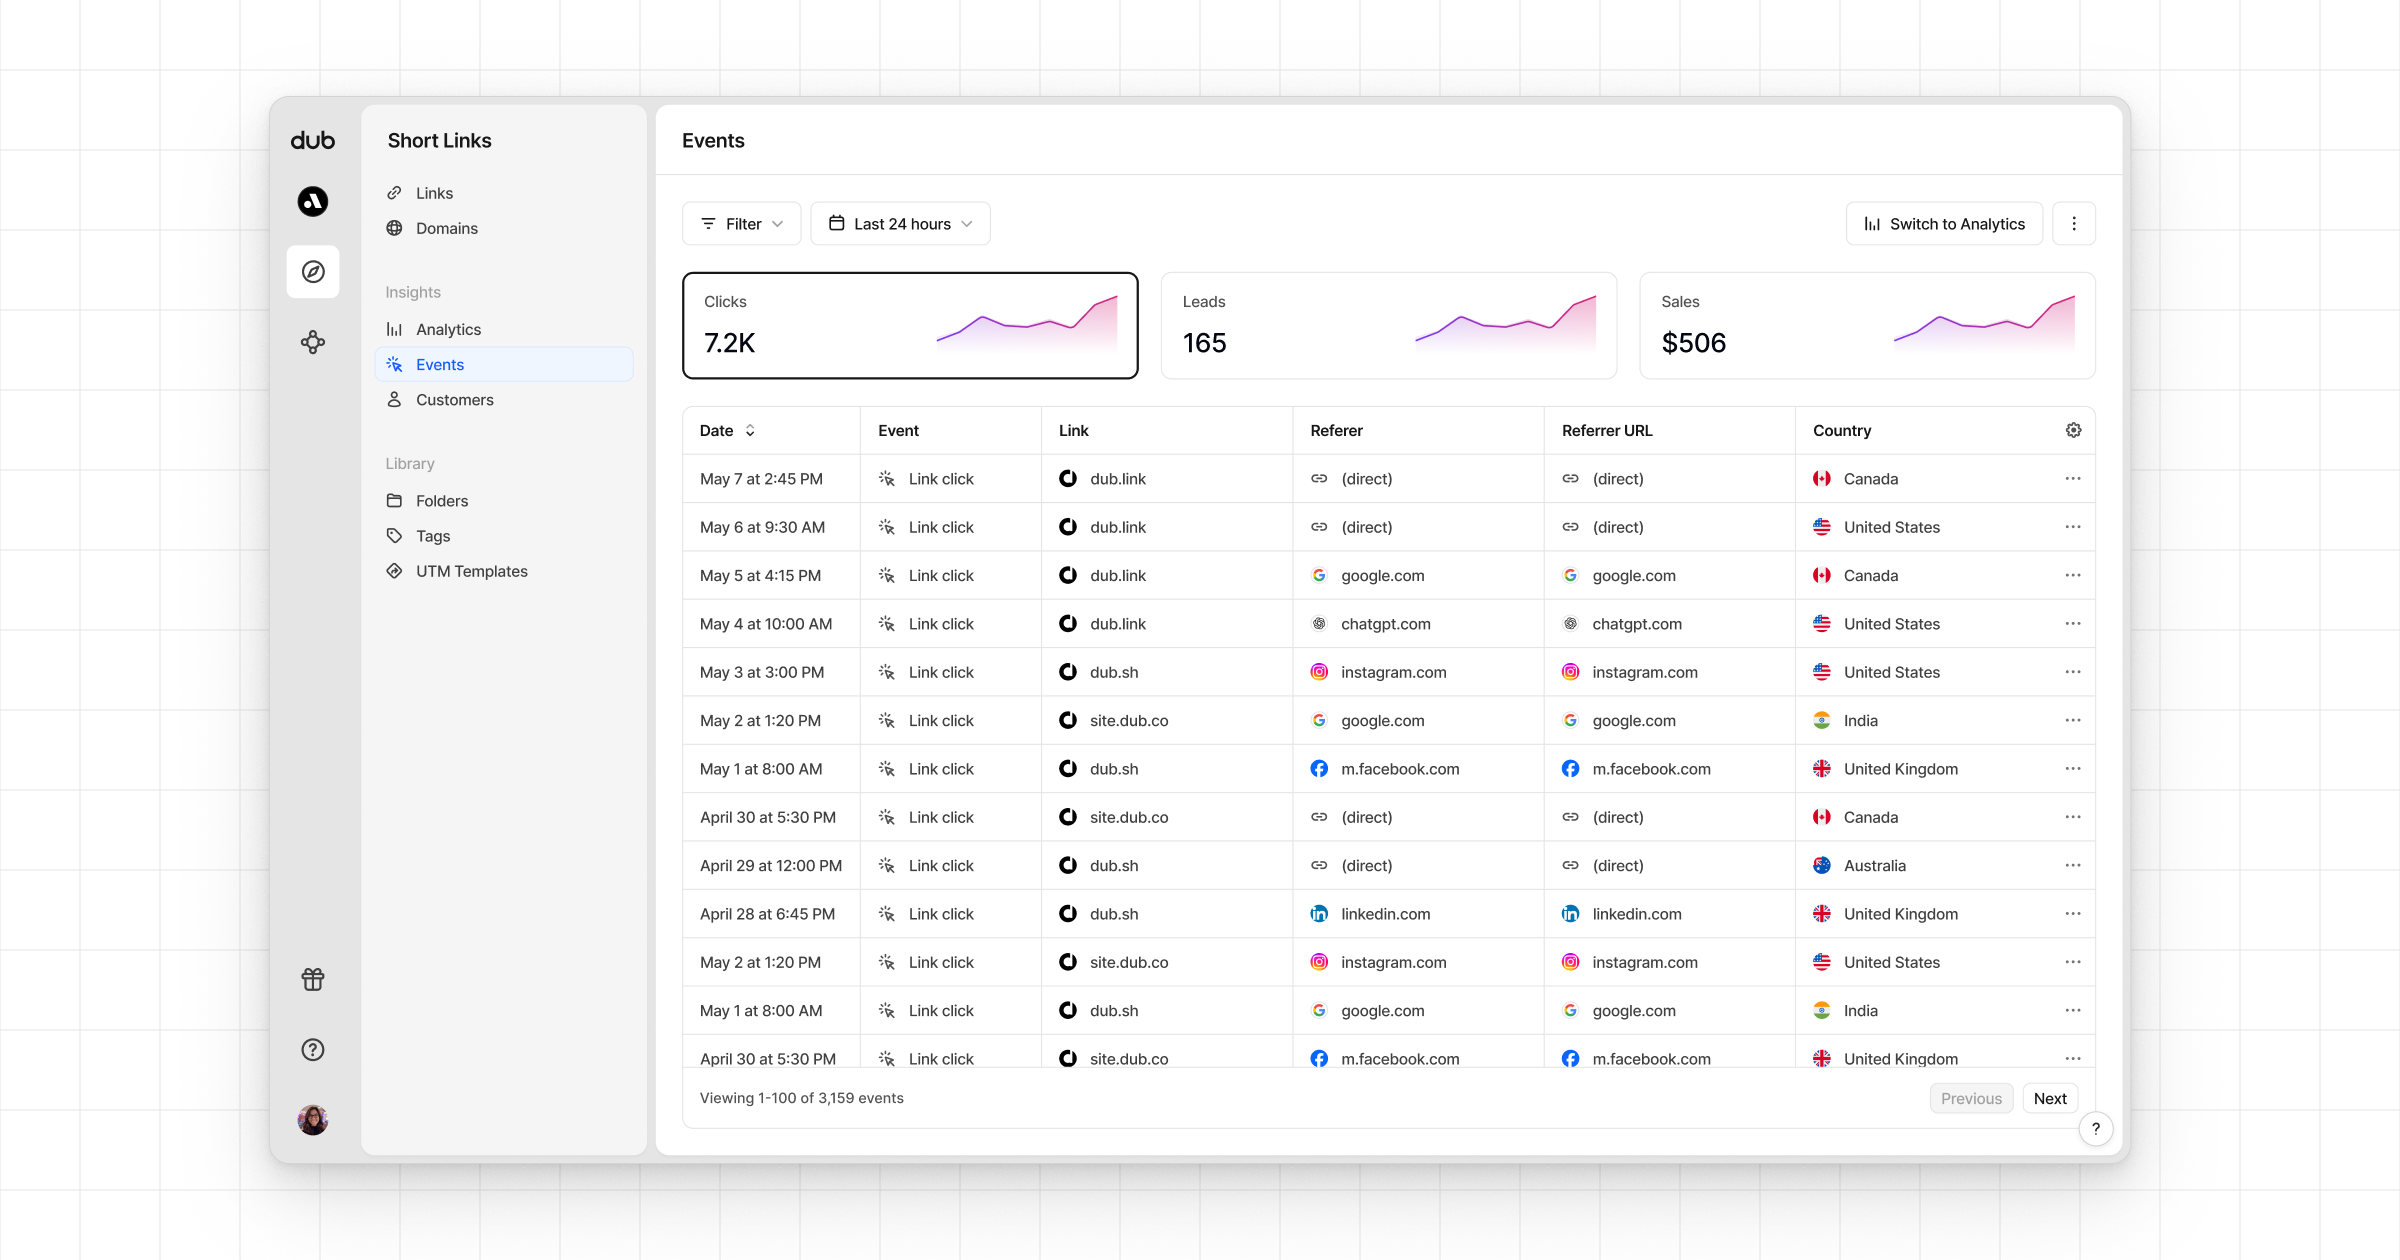
And that’s it – you’re all set! You can now sit back, relax, and watch your conversion revenue grow. We provide 3 different views to help you understand your conversions:- Time-series: A time-series view of the number clicks, leads and sales.
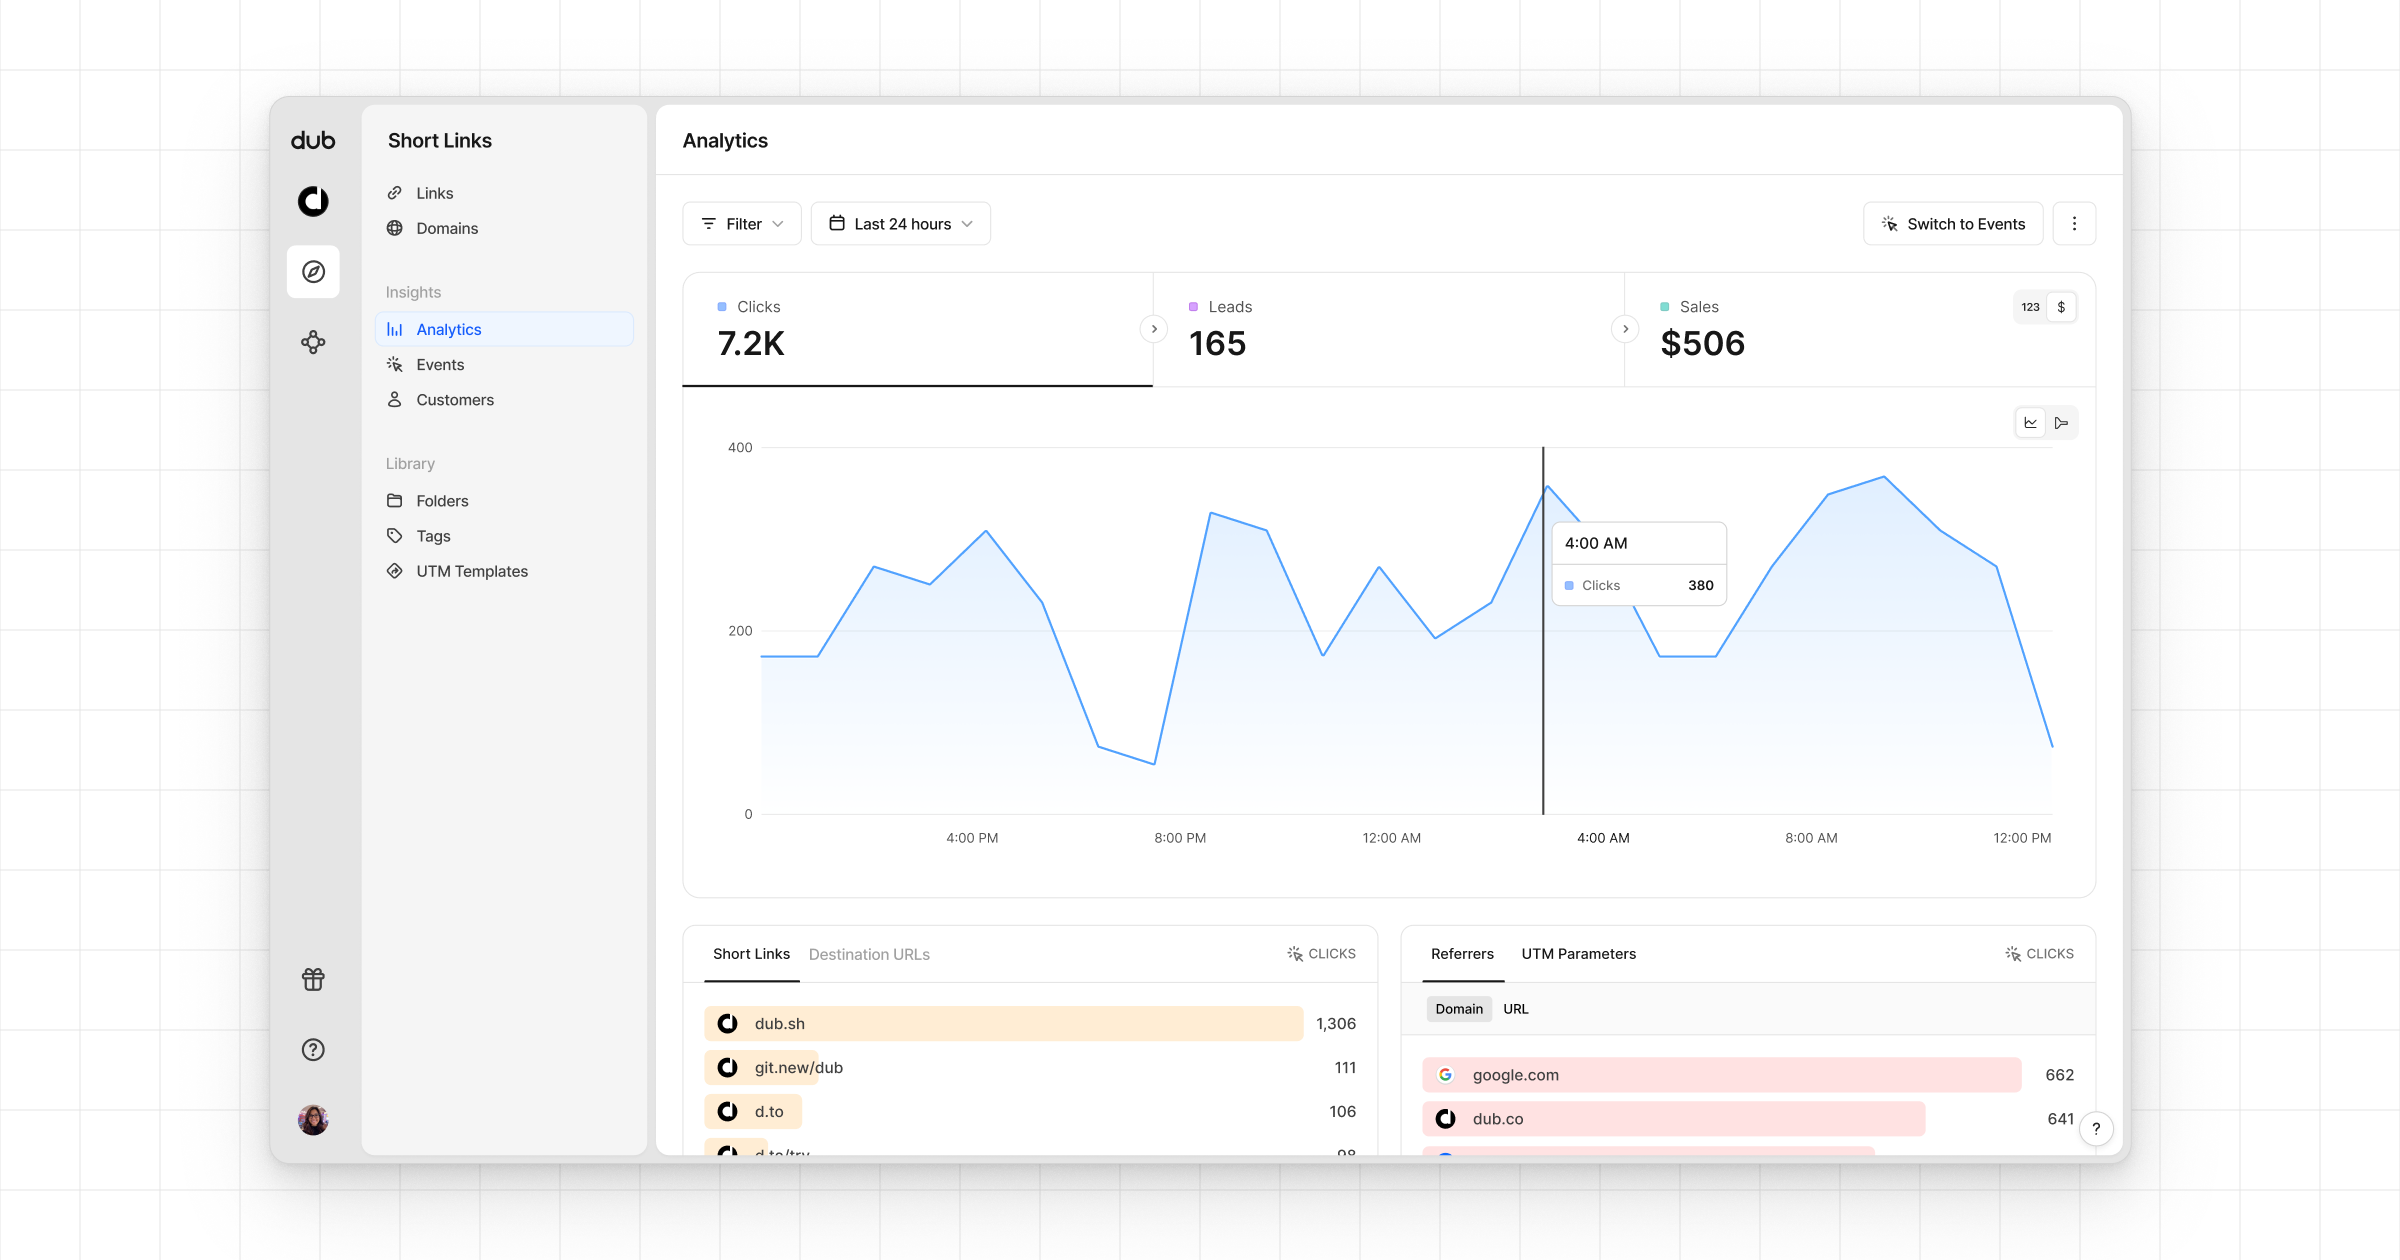
- Funnel chart: A funnel chart view visualizing the conversion & dropoff rates across the different steps in the conversion funnel (clicks → leads → sales).
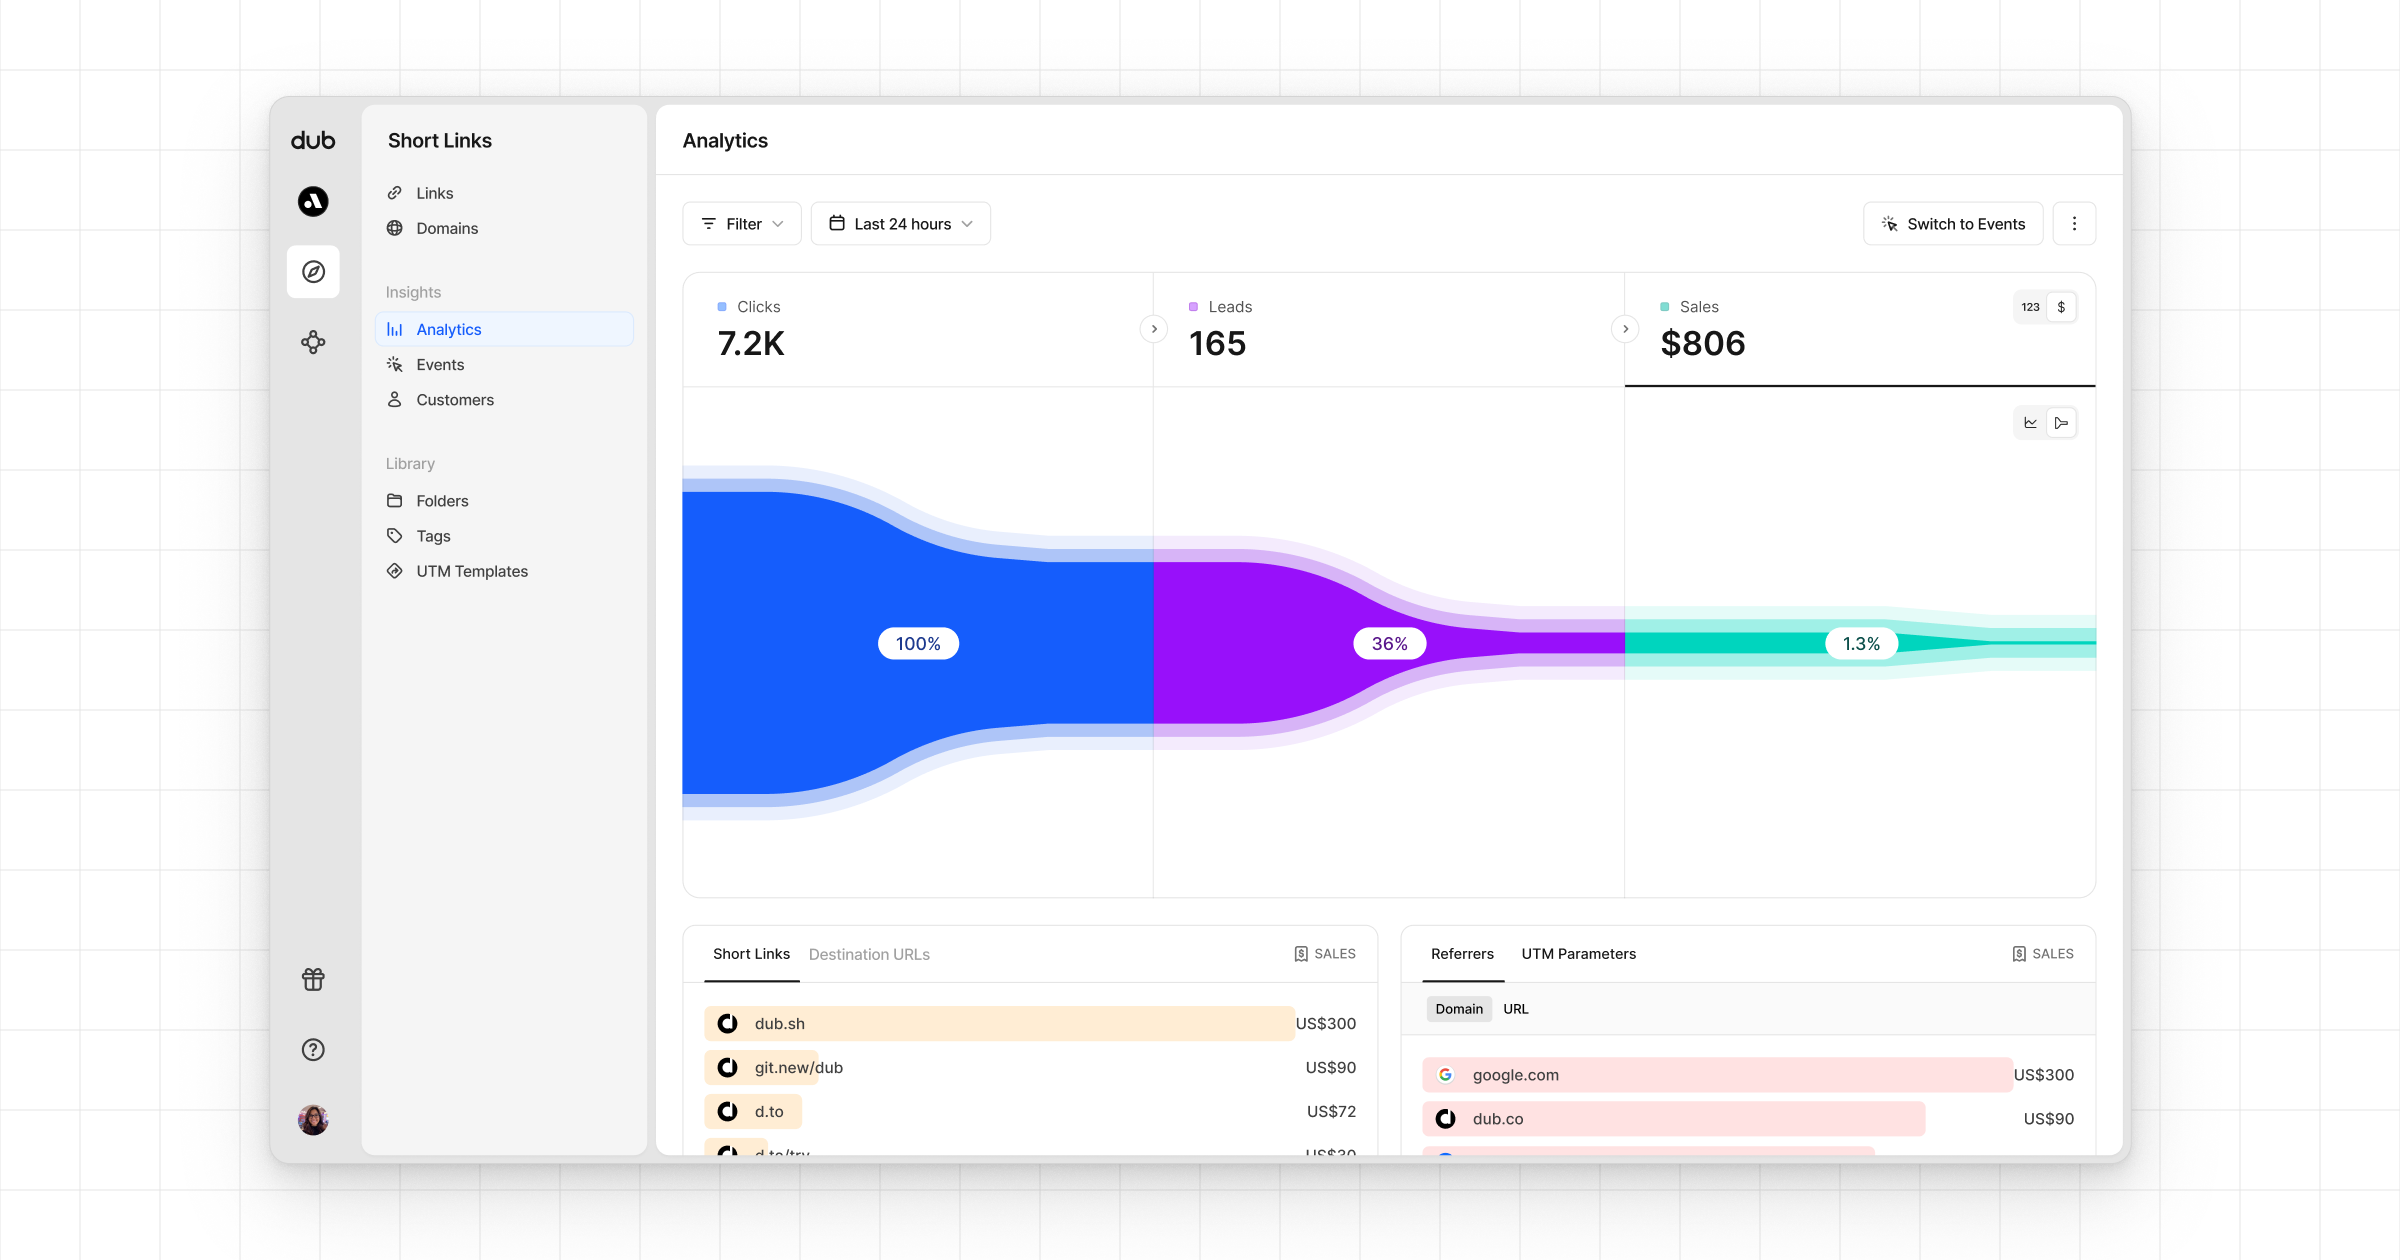
- Real-time events stream: A real-time events stream of every single conversion event that occurs across all your links in your workspace.
Example apps
Dub + Stripe Demo App
See the full example on GitHub.