sale event happens when a user purchases your product or service. Examples include:
- Subscribing to a paid plan
- Usage expansion (upgrading from one plan to another)
- Purchasing a product from your online store

When to use direct sale tracking
Direct sale tracking is ideal for scenarios where:- You don’t need to track leads separately (e.g., one-time purchases)
- You want to attribute sales directly to clicks without intermediate steps
- You’re tracking sales for users who haven’t signed up or created an account
If you’re tracking both leads and sales in your conversion funnel, refer to
our server-side tracking or client-side
tracking guides instead.
Prerequisites
First, you’ll need to enable conversion tracking for your Dub links to be able to start tracking conversions:Option 1: On a workspace-level
Option 1: On a workspace-level
To enable conversion tracking for all future links in a workspace, you can do the following:
To enable conversion tracking for all future links in a workspace, you can do the following: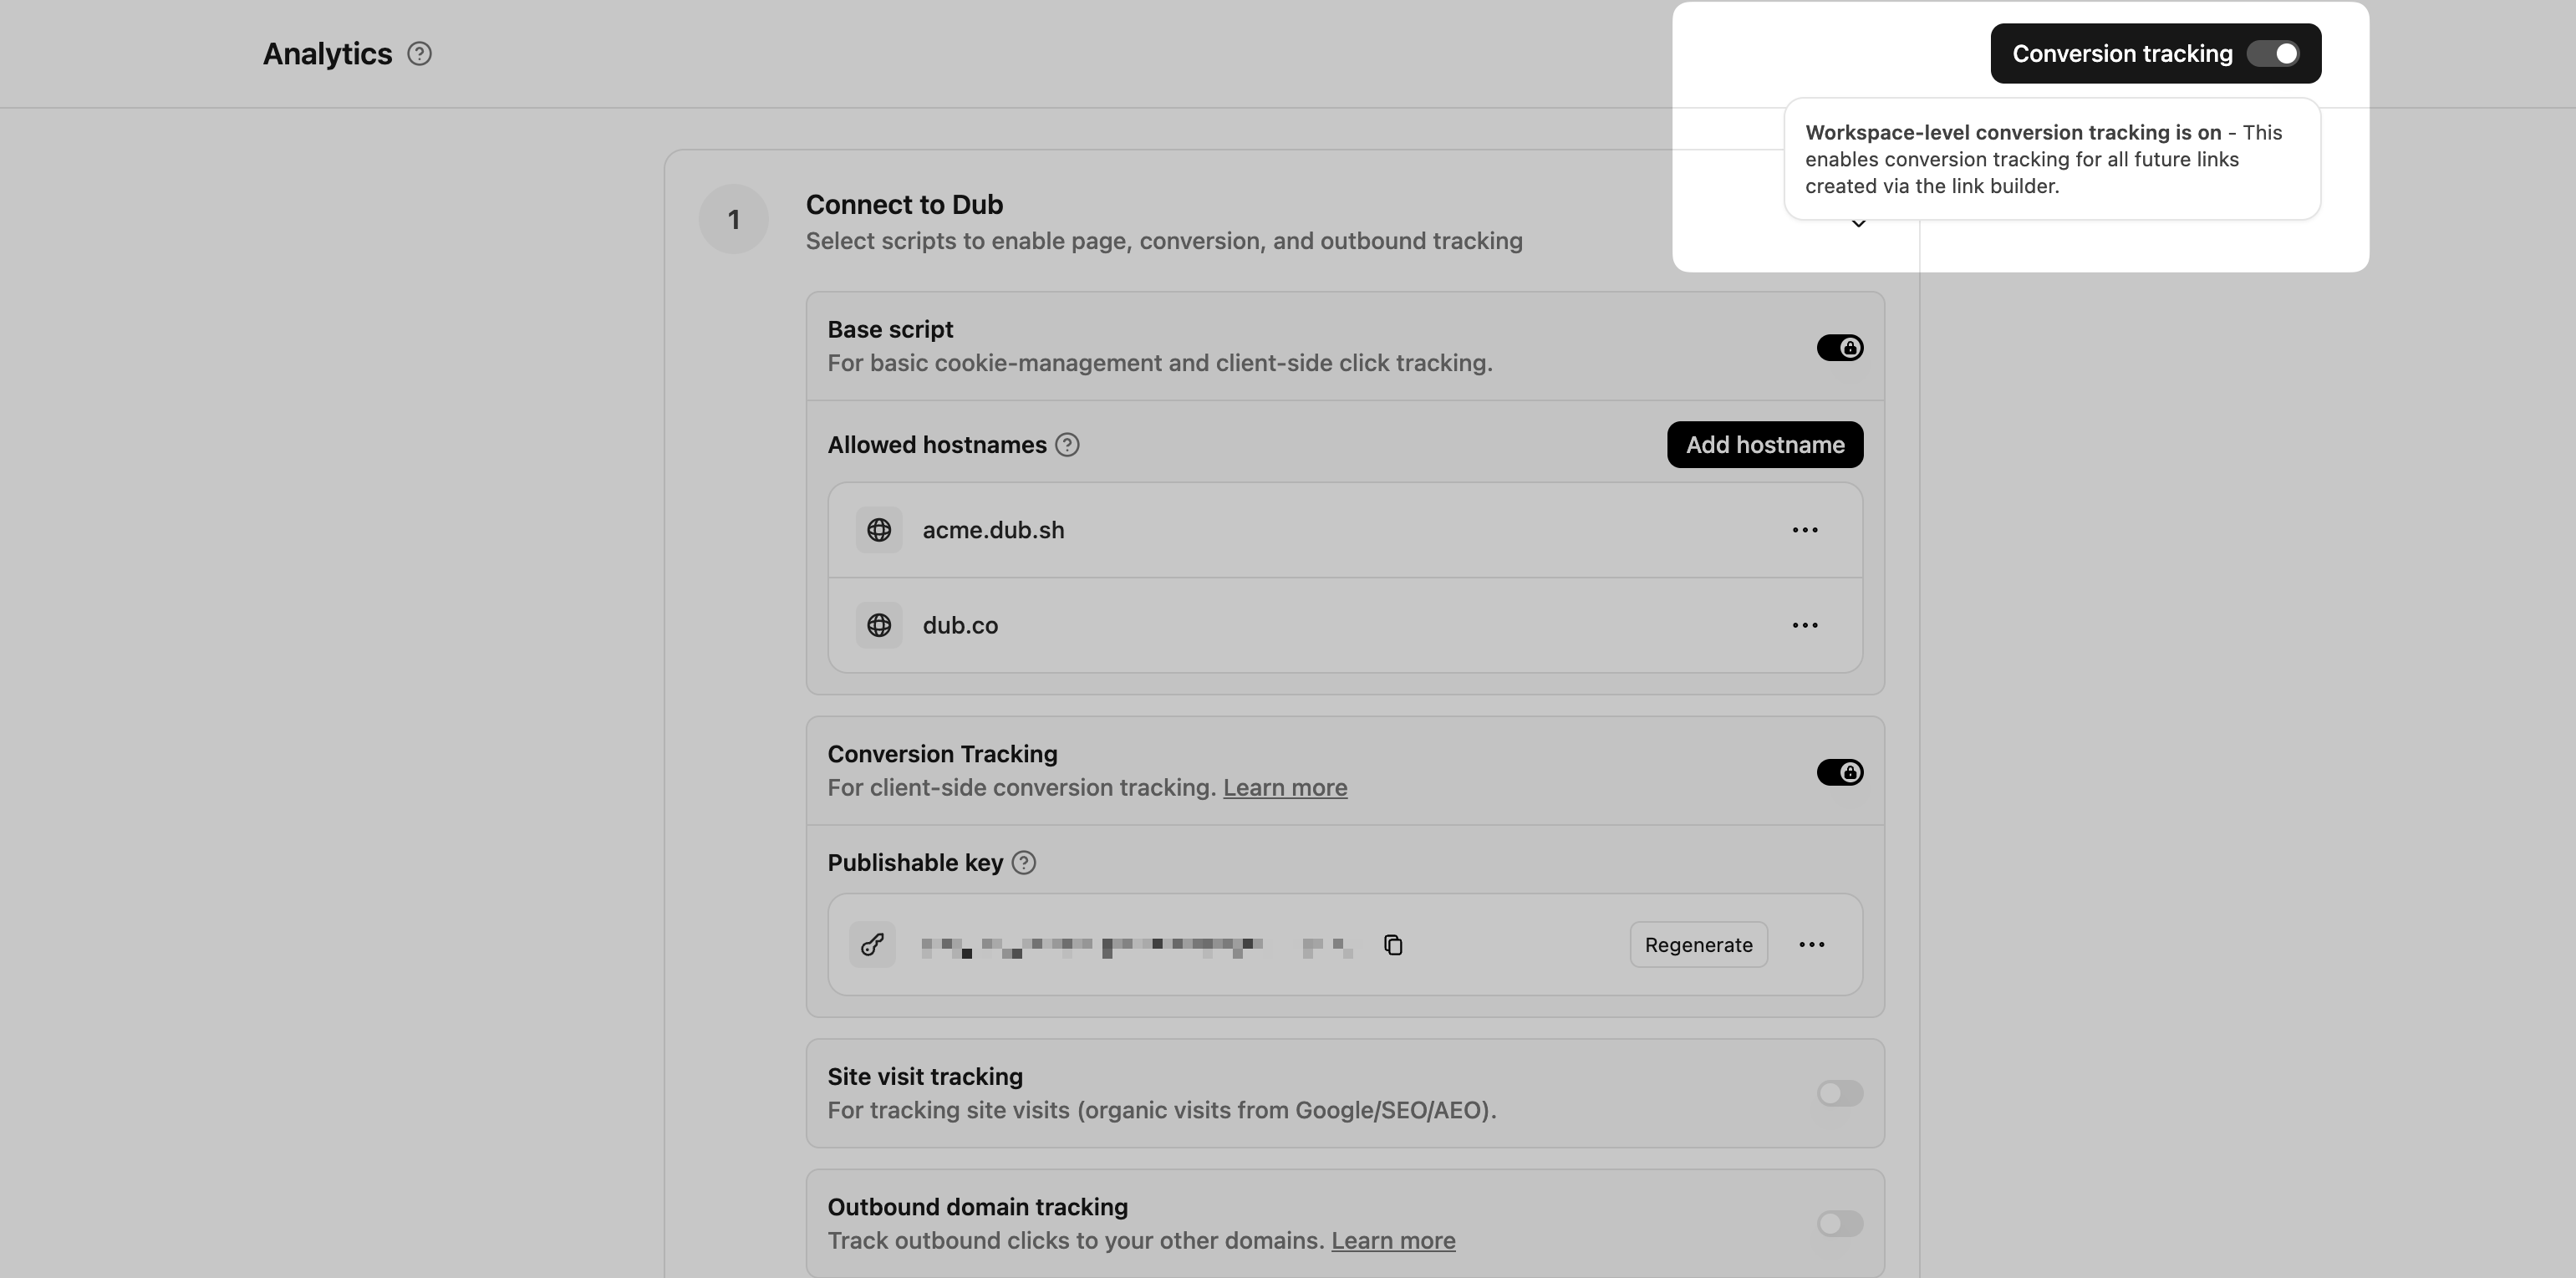
- Navigate to your workspace’s Tracking settings page.
- Toggle the Workspace-level Conversion Tracking switch to enable conversion tracking for the workspace.
Option 2: On a link-level
Option 2: On a link-level
If you don’t want to enable conversion tracking for all your links in a workspace, you can also opt to enable it on a link-level.To enable conversion tracking for a specific link, open the Dub Link Builder for a link and toggle the Conversion Tracking switch.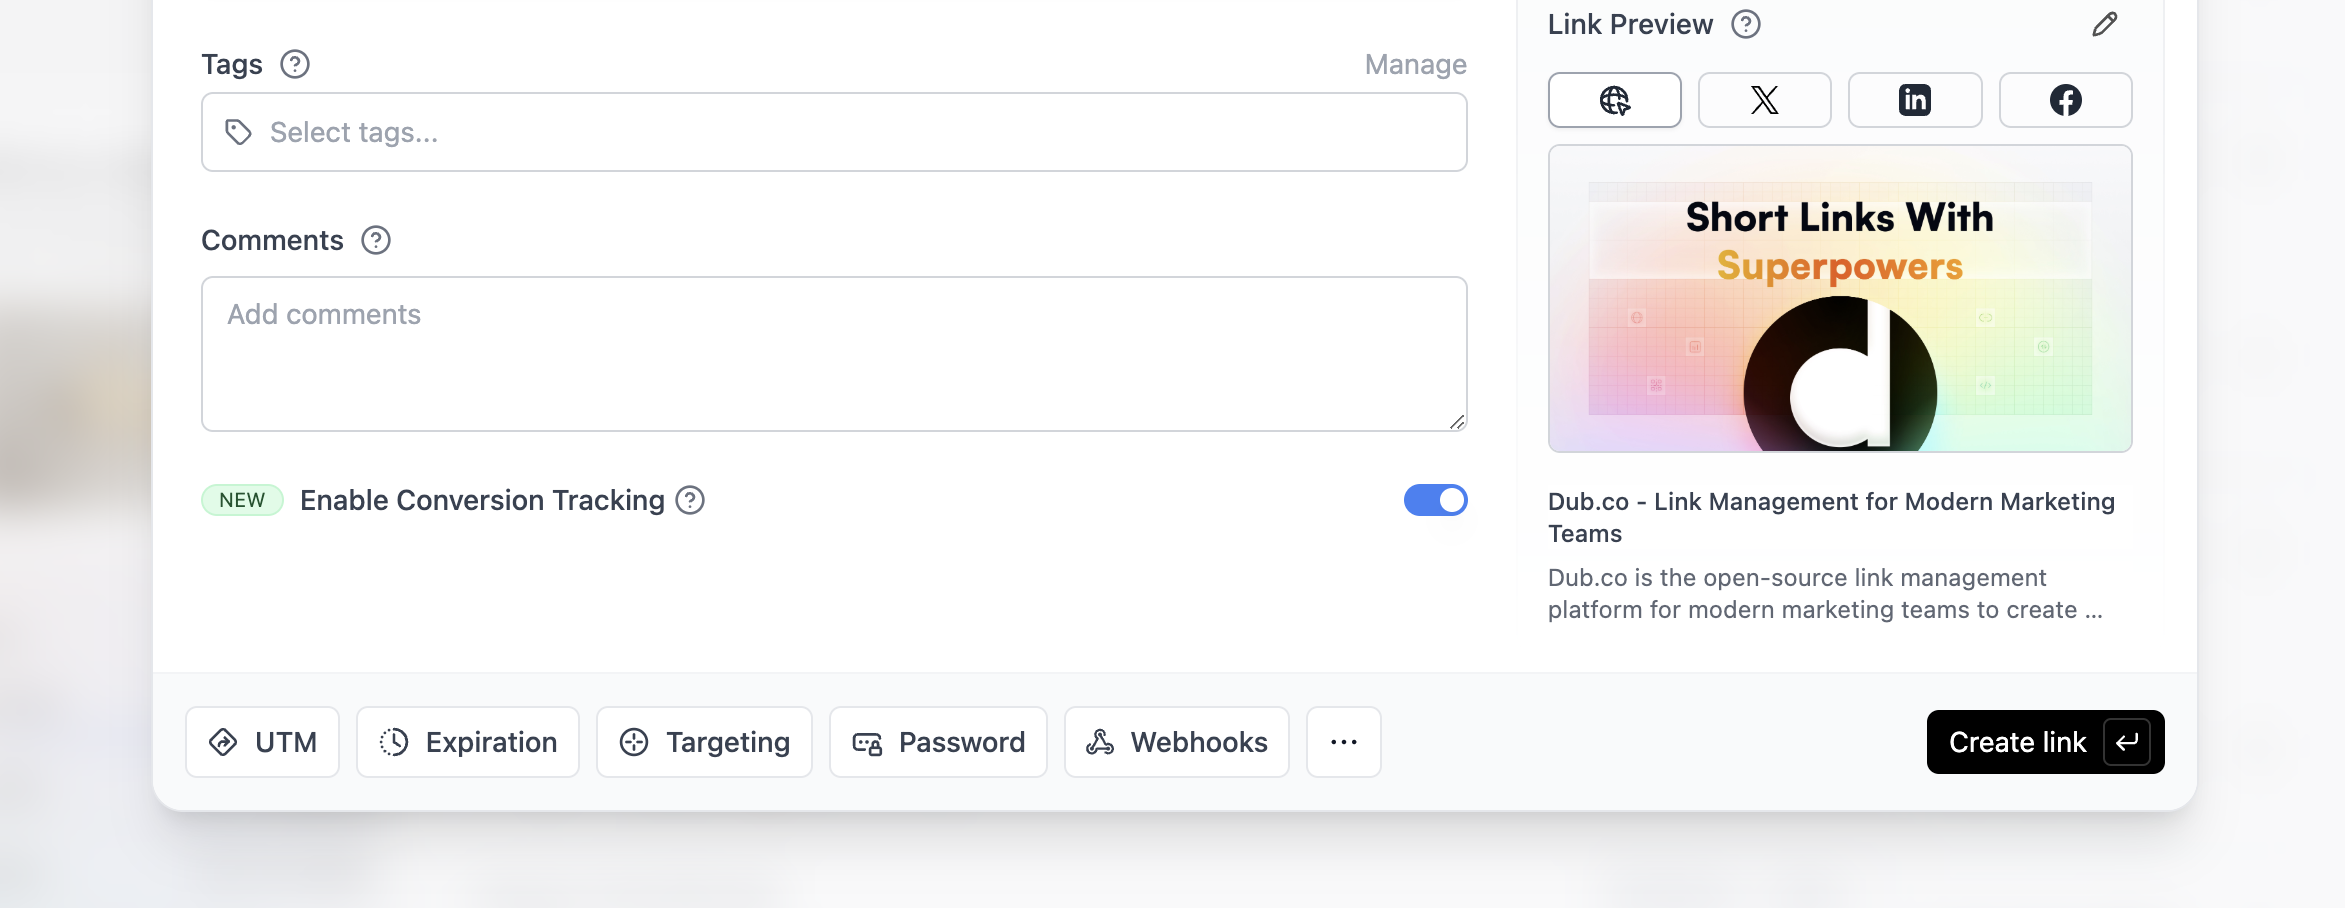
Option 3: Via the API
Option 3: Via the API
Alternatively, you can also enable conversion tracking programmatically via the Dub API. All you need to do is pass
trackConversion: true when creating or updating a link:1
Allowlist your site's domain
Then, you’ll need to allowlist your site’s domain to allow the client-side conversion events to be ingested by Dub.To do that, navigate to your workspace’s Tracking settings page and add your site’s domain to the Allowed Hostnames list.This provides an additional layer of security by ensuring only authorized domains can track conversions using your publishable key.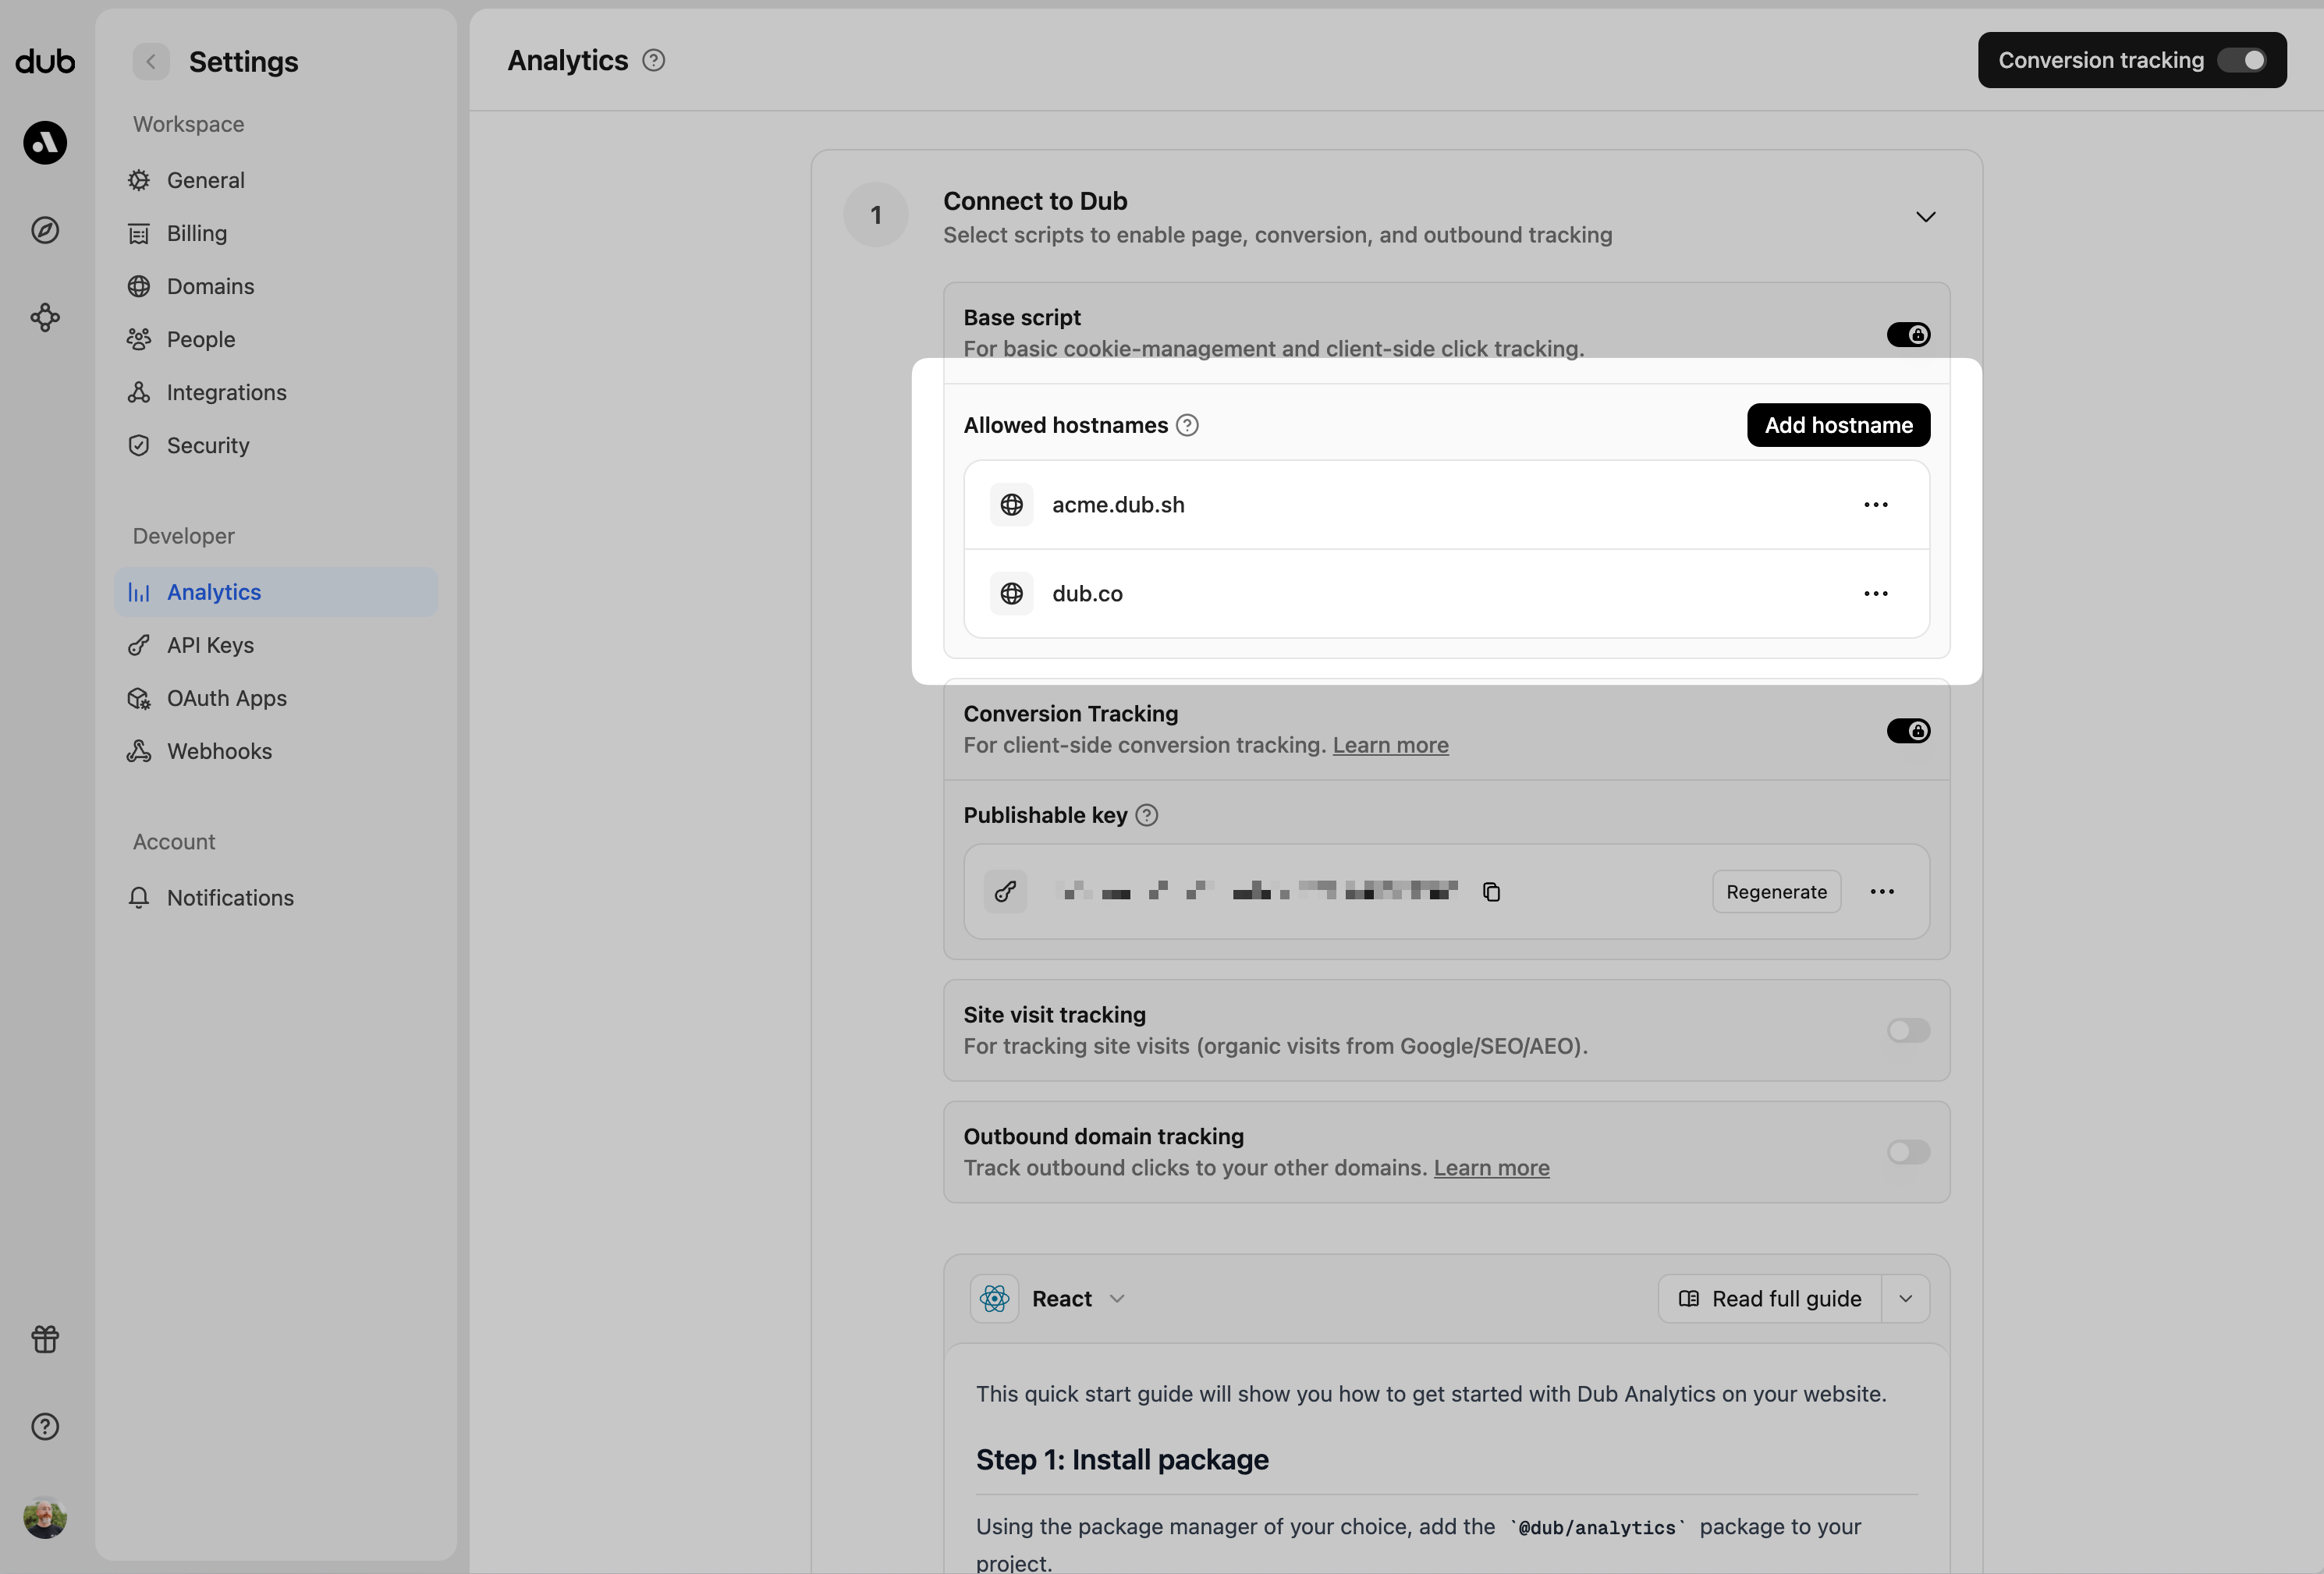
example.com: Tracks traffic only fromexample.com.*.example.com: Tracks traffic from all subdomains ofexample.com, but not fromexample.comitself.
2
Generate your publishable key
Before you can track conversions on the client-side, you need to generate a publishable key from your Dub workspace.To do that, navigate to your workspace’s Tracking settings page and generate a new publishable key under the Publishable Key section.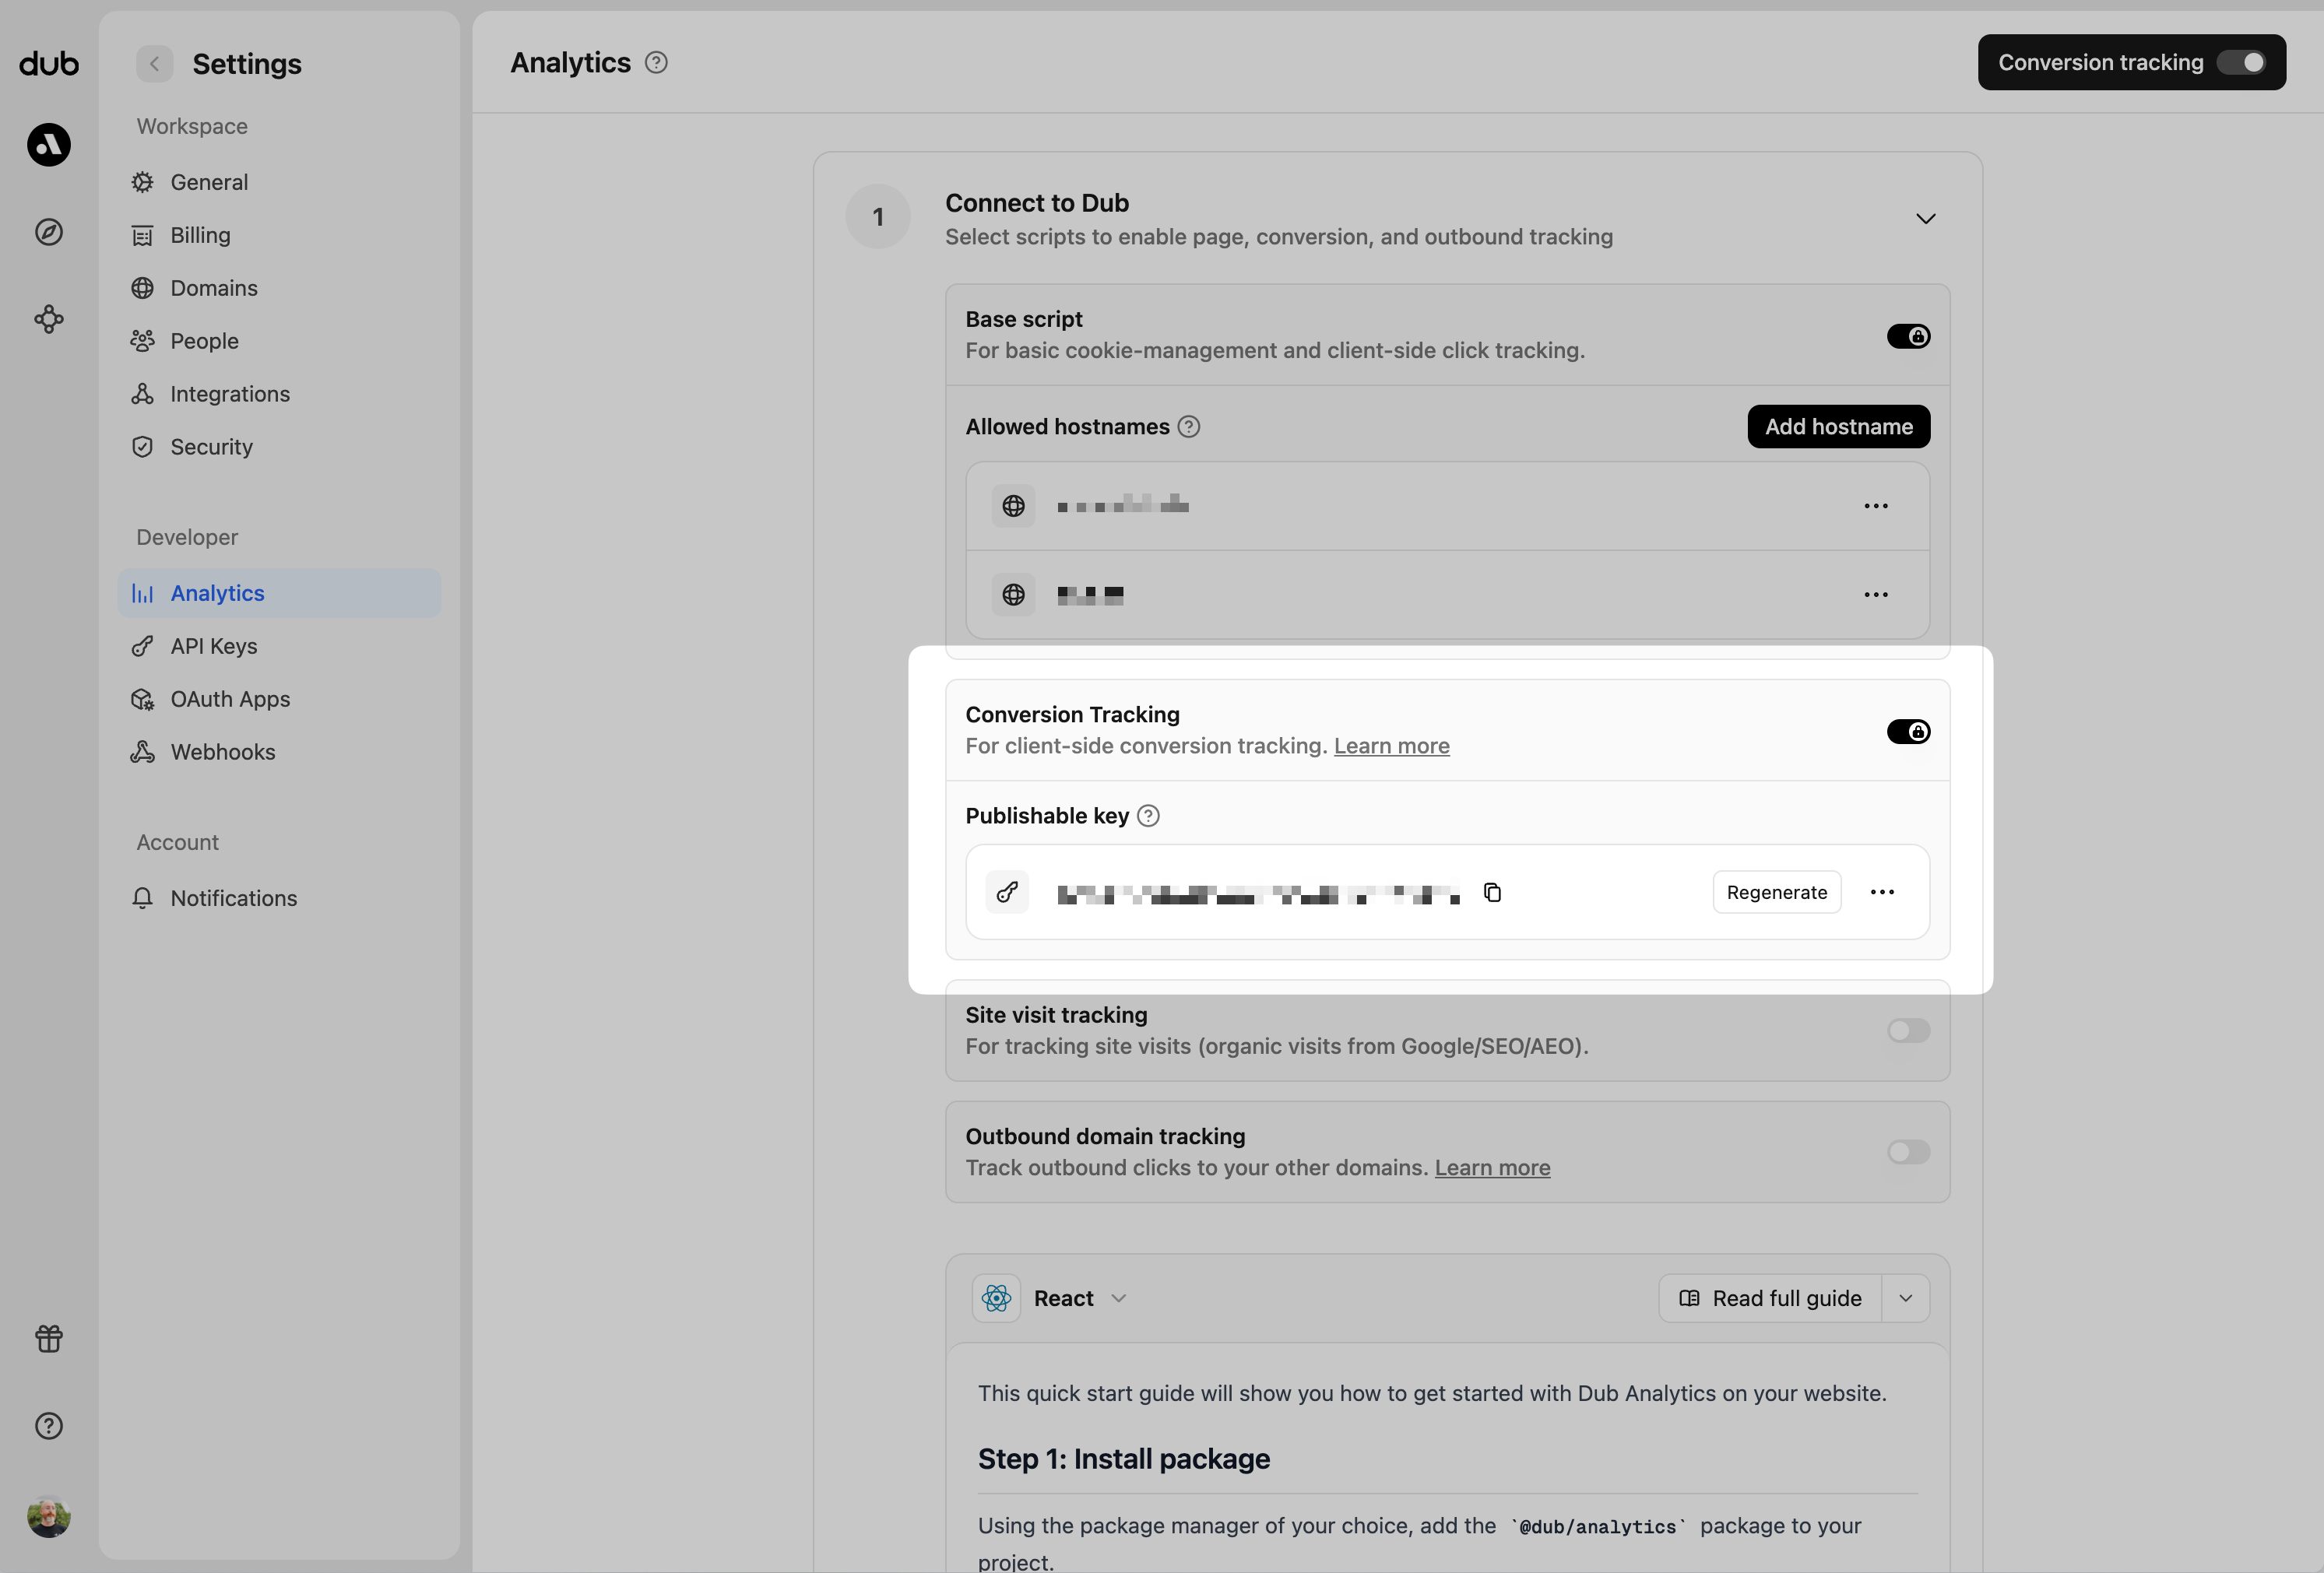
3
Install Dub Analytics script
Next, install the Dub Analytics script on your website/web application.You can install the Dub Analytics script in several different ways:
React
Manual installation
Framer
Shopify
WordPress
Webflow
Google Tag Manager
You must configure the publishable key you generated in step 1 when
installing the analytics script. Without this key, client-side conversion
tracking will not work.
Track direct sale conversions
To track a direct sale, you need to pass theclickId parameter along with customer information when tracking the sale event. The clickId can be read from the dub_id cookie that’s automatically set when a user clicks on your Dub link.
Track direct sales from URL query parameters
If you redirect users to a confirmation page after a successful purchase, you can track direct sales by reading query parameters from the URL and thedub_id cookie.
Track direct sales from form submissions
You can also track direct sales when users complete a checkout form on your website.Server-side direct sale tracking
You can also track direct sales from your backend by passing theclickId parameter when calling the track sale API:
When to track sale: Track sale events only after a user successfully
completes a purchase or payment-related action. Ensure the event is triggered
only after the backend confirms the payment was successful.
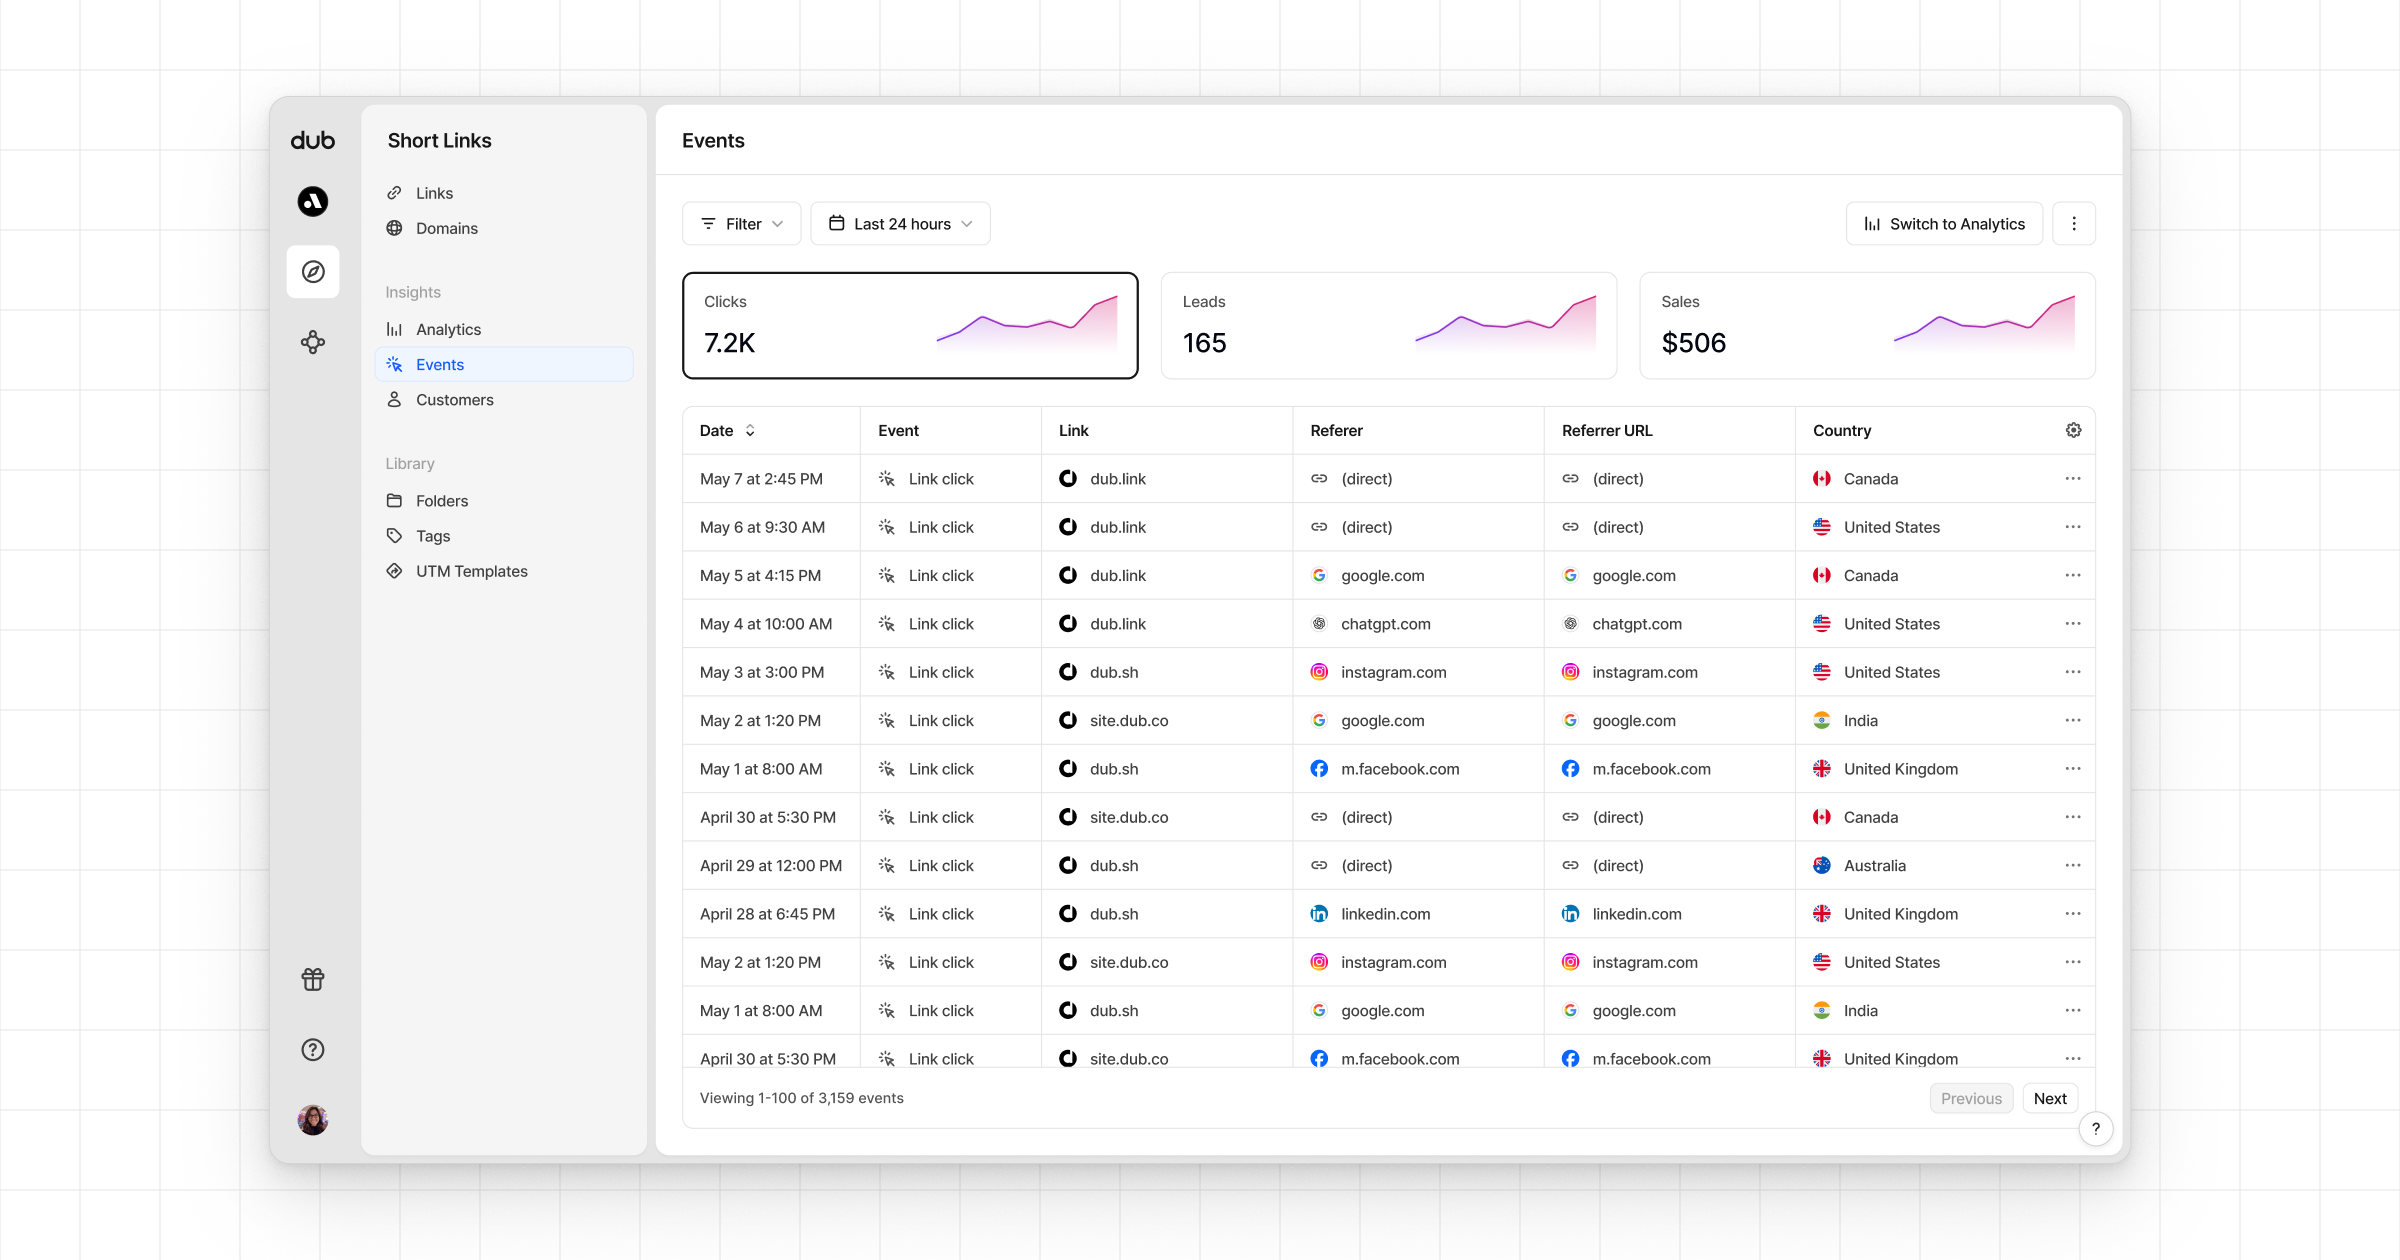
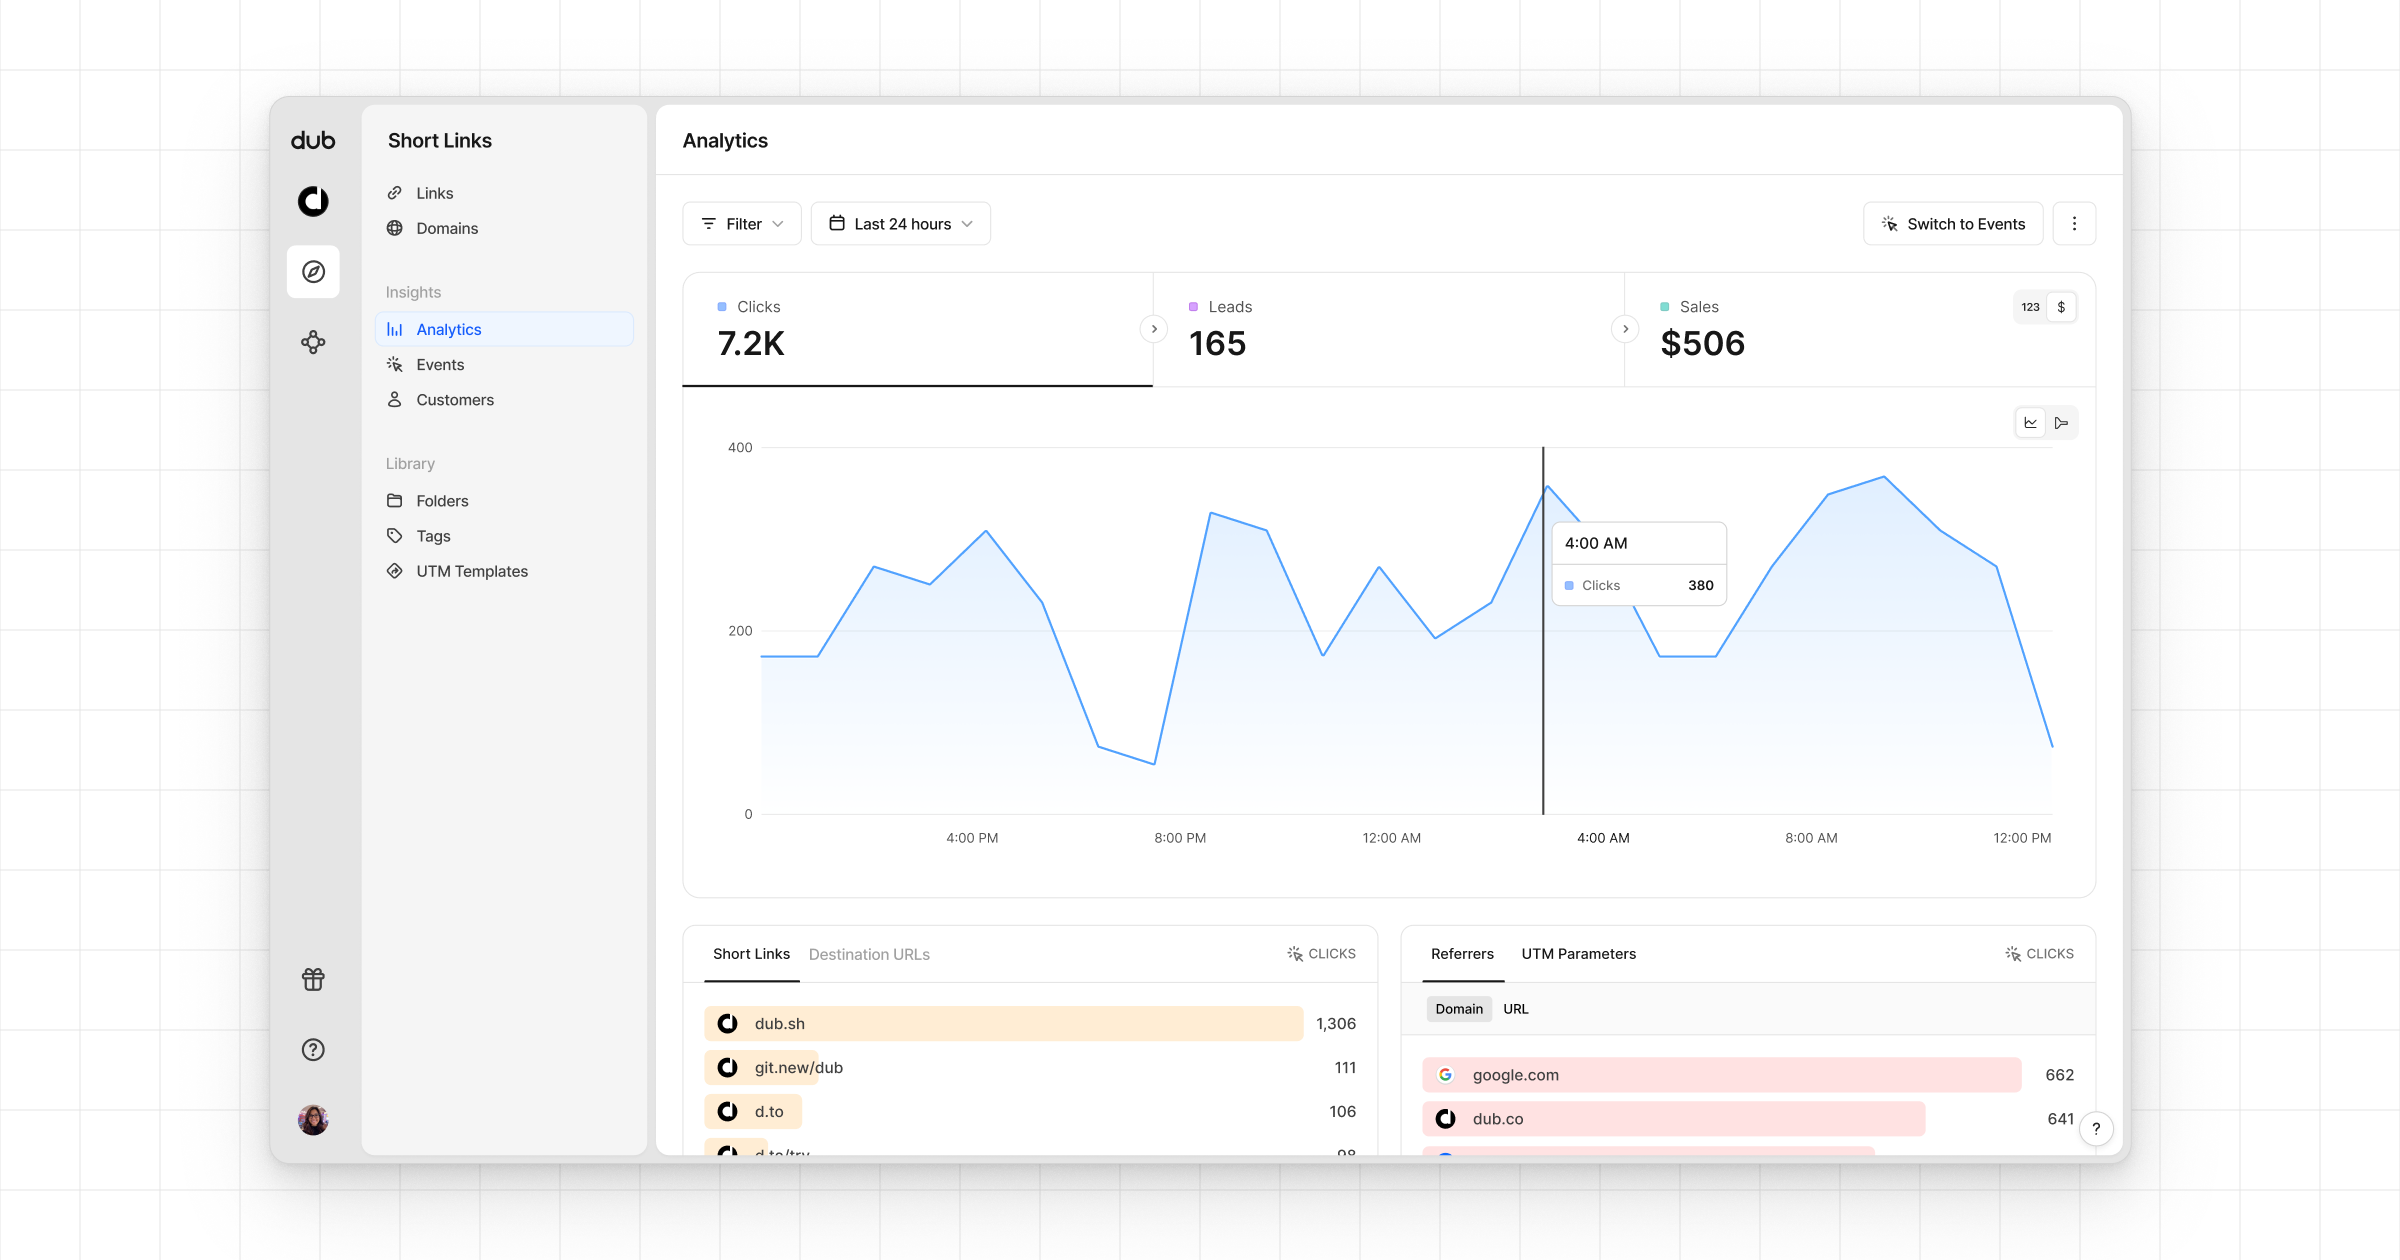
View your conversions
And that’s it – you’re all set! You can now sit back, relax, and watch your conversion revenue grow. We provide 3 different views to help you understand your conversions:- Time-series: A time-series view of the number clicks, leads and sales.
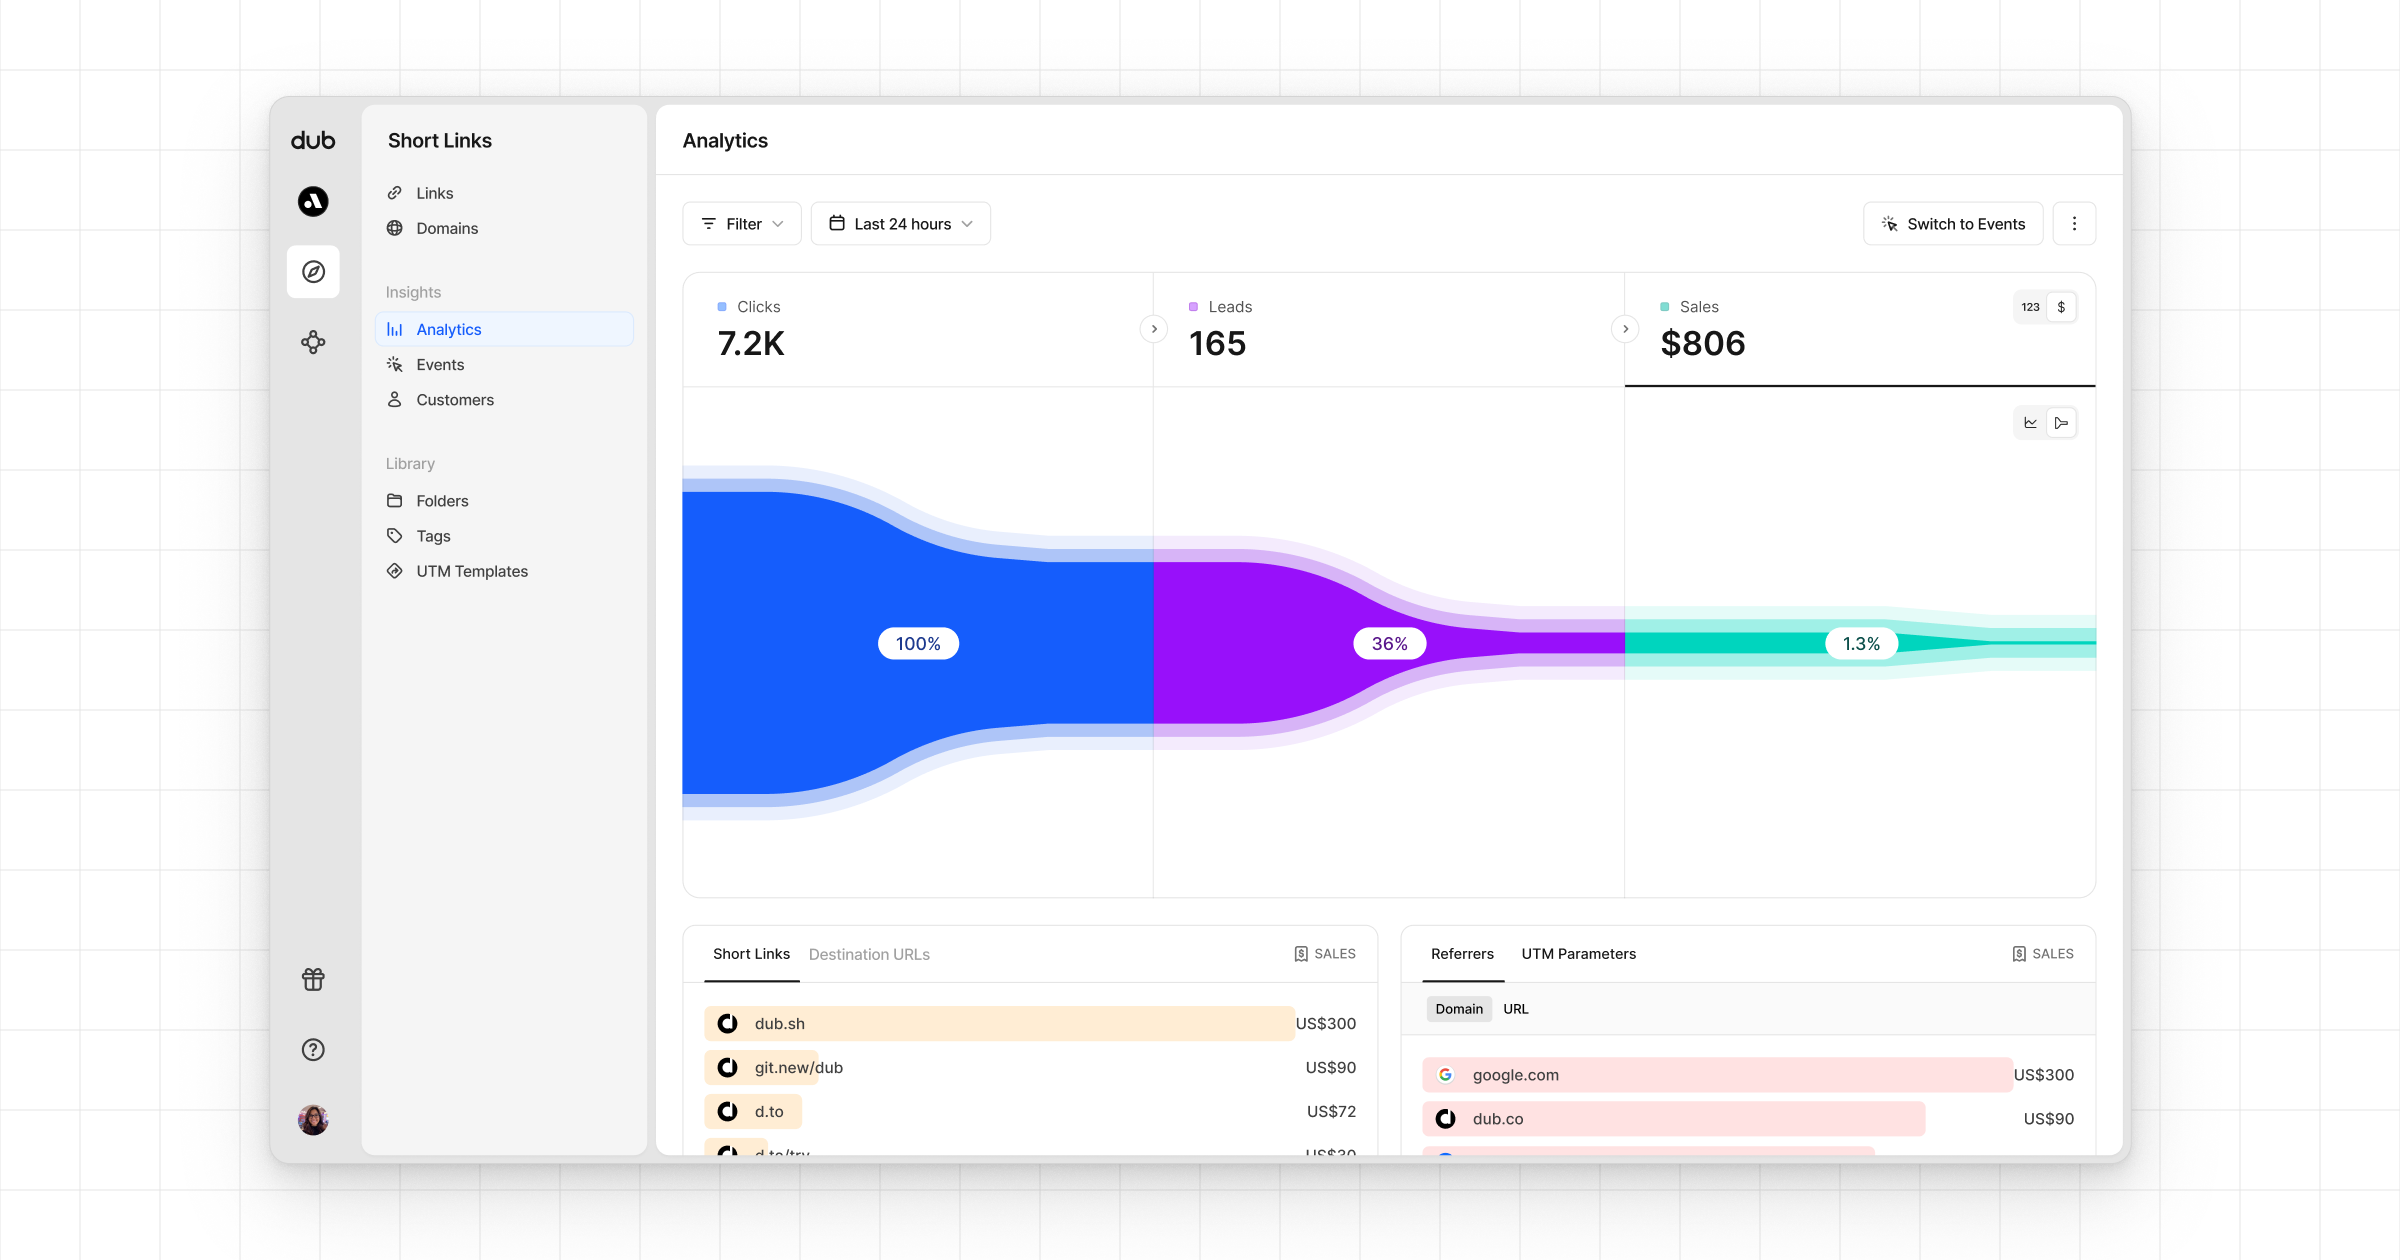
- Funnel chart: A funnel chart view visualizing the conversion & dropoff rates across the different steps in the conversion funnel (clicks → leads → sales).
- Real-time events stream: A real-time events stream of every single conversion event that occurs across all your links in your workspace.