

Prerequisites
First, you’ll need to enable conversion tracking for your Dub links to be able to start tracking conversions:Option 1: On a workspace-level
Option 1: On a workspace-level
To enable conversion tracking for all future links in a workspace, you can do the following:
To enable conversion tracking for all future links in a workspace, you can do the following: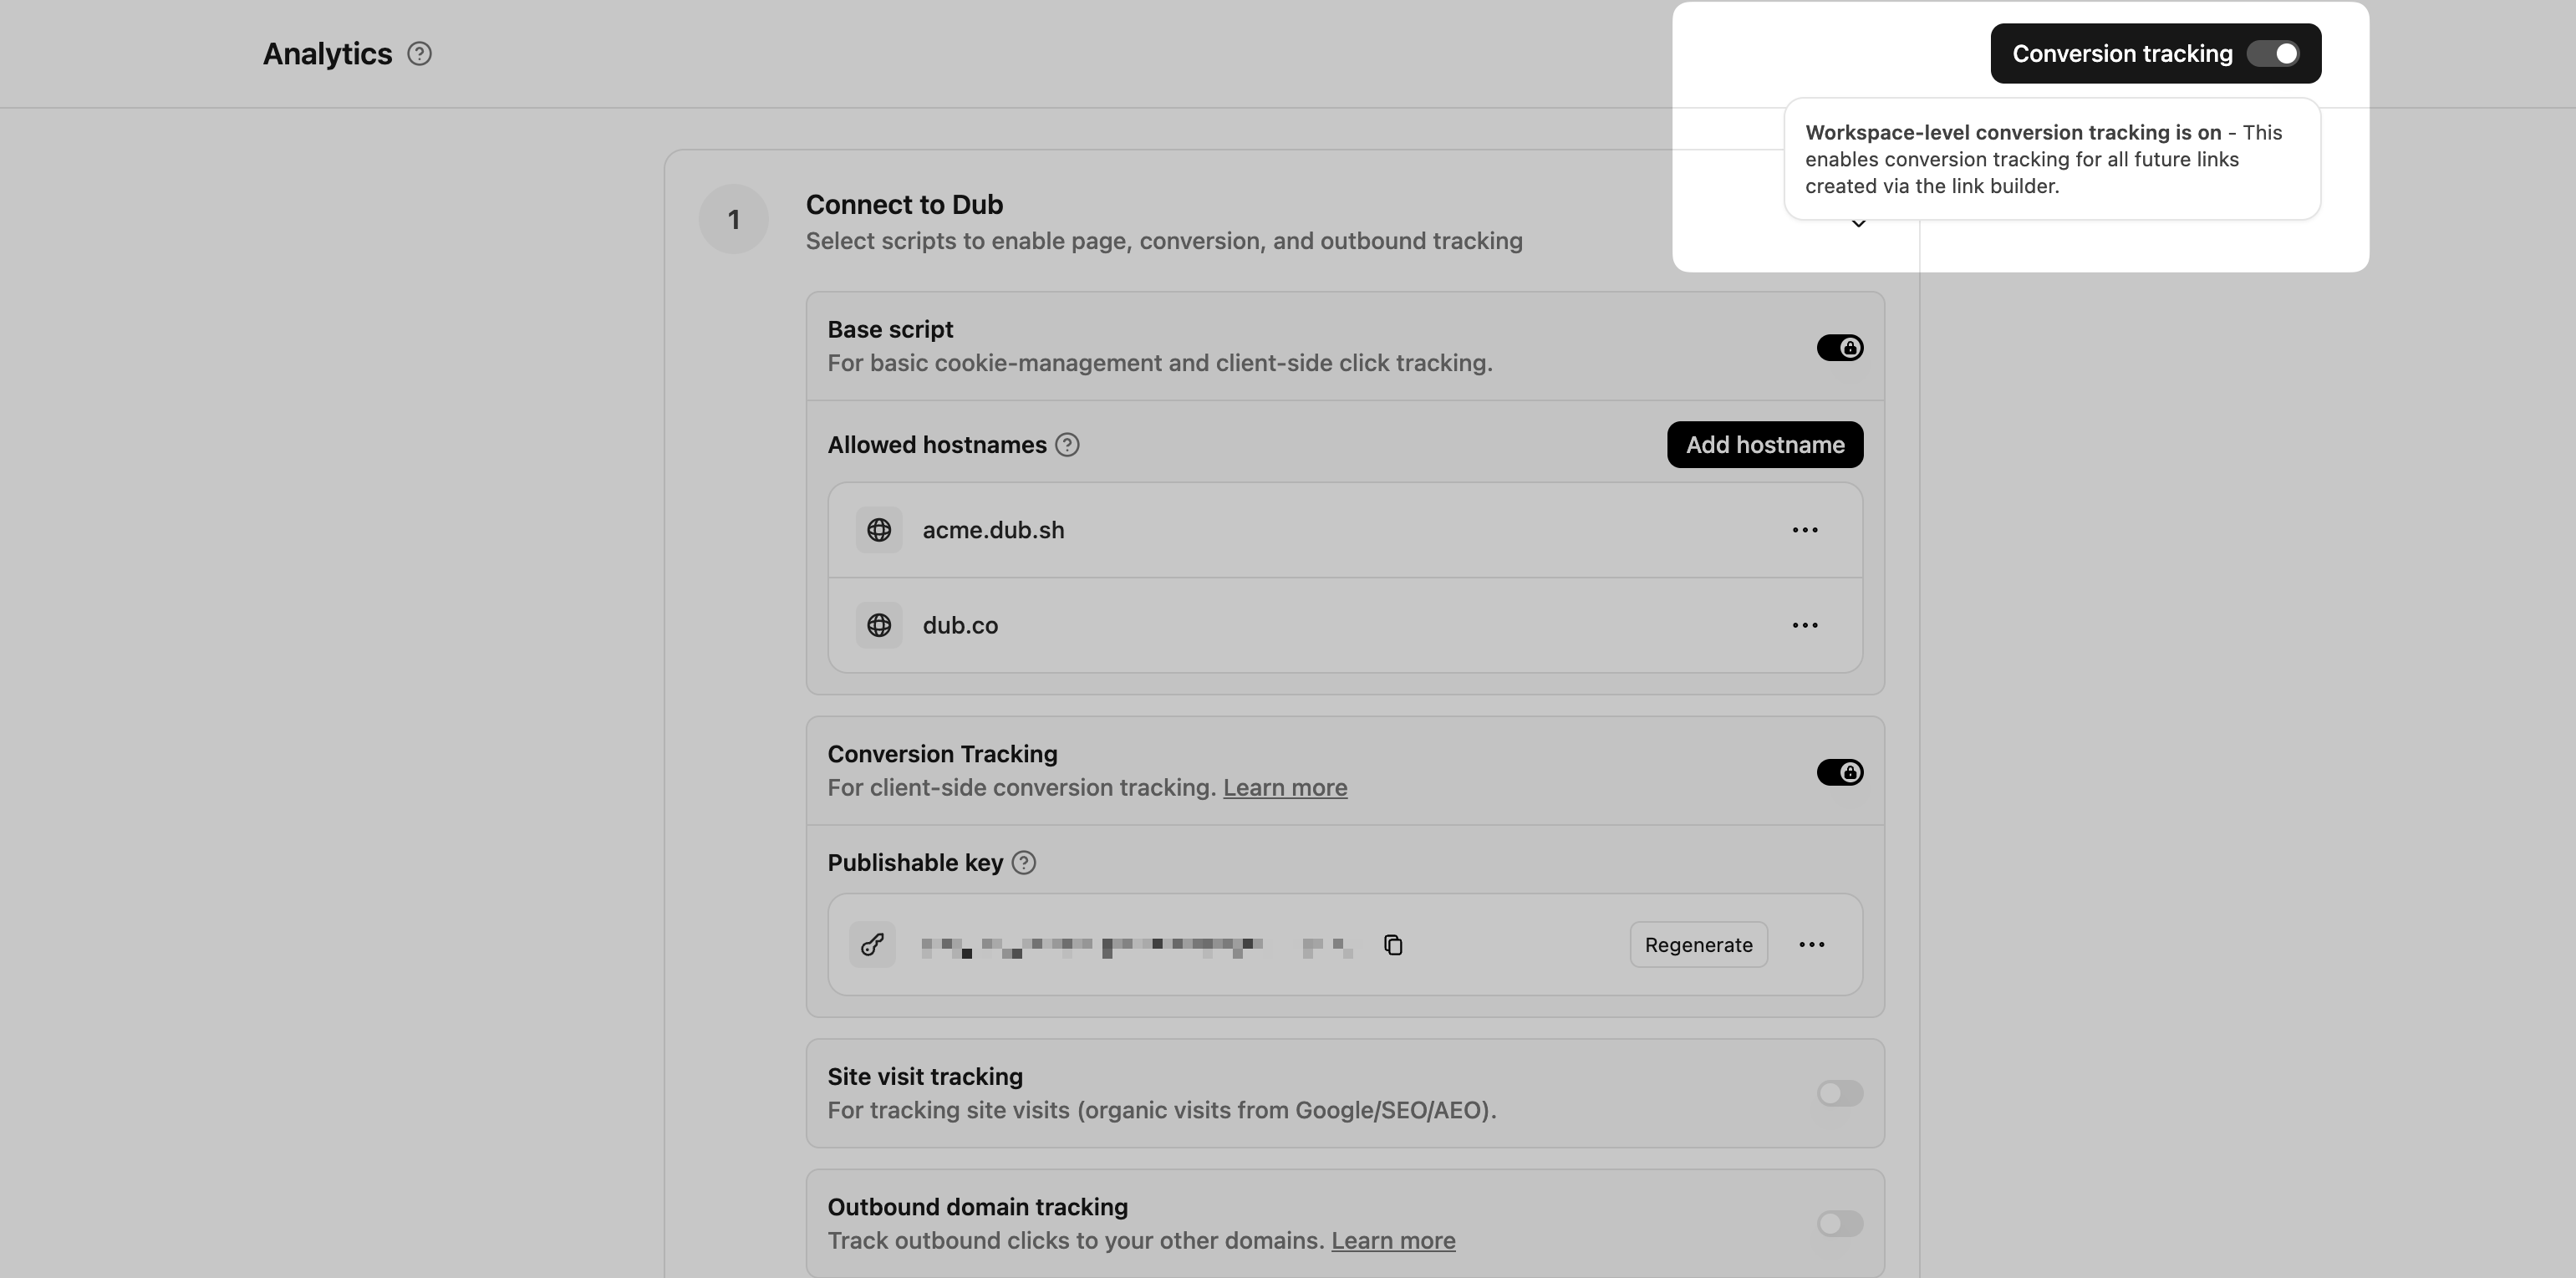
- Navigate to your workspace’s Tracking settings page.
- Toggle the Workspace-level Conversion Tracking switch to enable conversion tracking for the workspace.
Option 2: On a link-level
Option 2: On a link-level
If you don’t want to enable conversion tracking for all your links in a workspace, you can also opt to enable it on a link-level.To enable conversion tracking for a specific link, open the Dub Link Builder for a link and toggle the Conversion Tracking switch.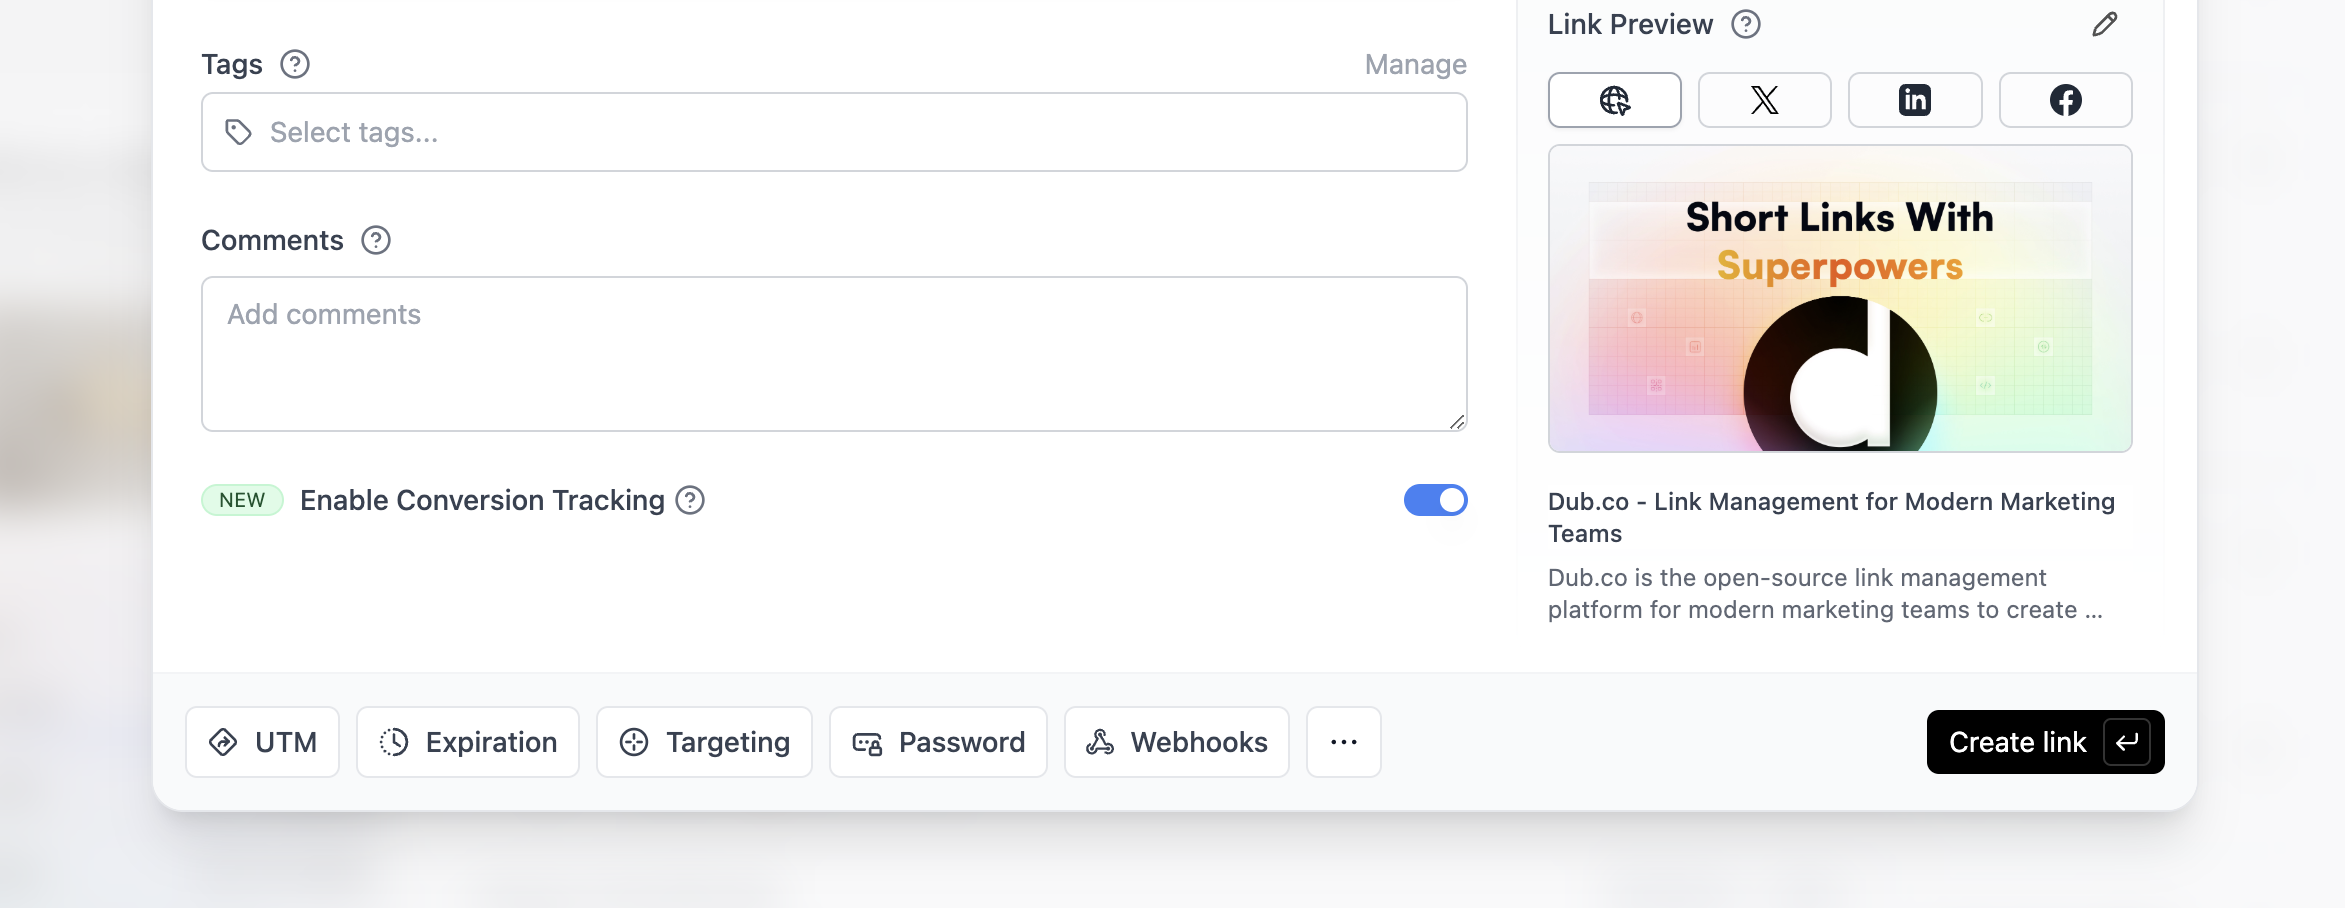
Option 3: Via the API
Option 3: Via the API
Alternatively, you can also enable conversion tracking programmatically via the Dub API. All you need to do is pass
trackConversion: true when creating or updating a link:Install Dub via Google Tag Manager
There are 2 steps to install the Dub Analytics script via Google Tag Manager:Step 1: Add Dub Analytics script to GTM
First, you’ll need to add the Dub Analytics script to your website using Google Tag Manager. In your GTM workspace, navigate to the Tags section and click New to create a new tag.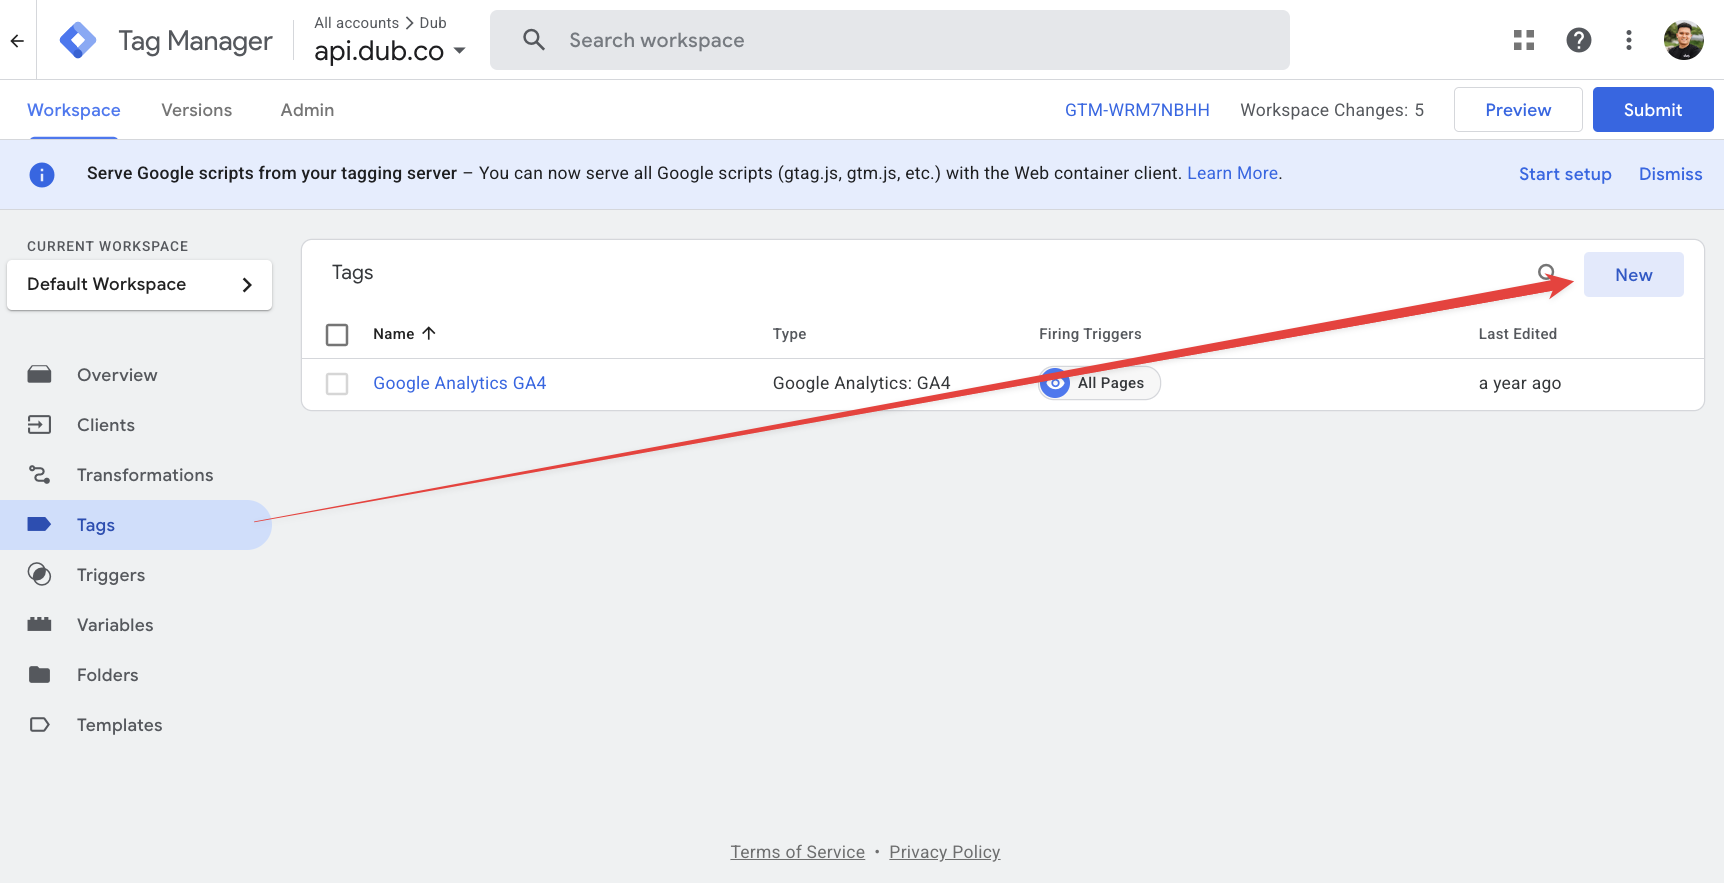
Step 2: Create User-Defined Variable for dub_id Cookie
To read thedub_id cookie that Dub Analytics script sets, you’ll need to create a User-Defined Variable in Google Tag Manager.
In your GTM workspace, navigate to the Variables section and click New to create a new variable.
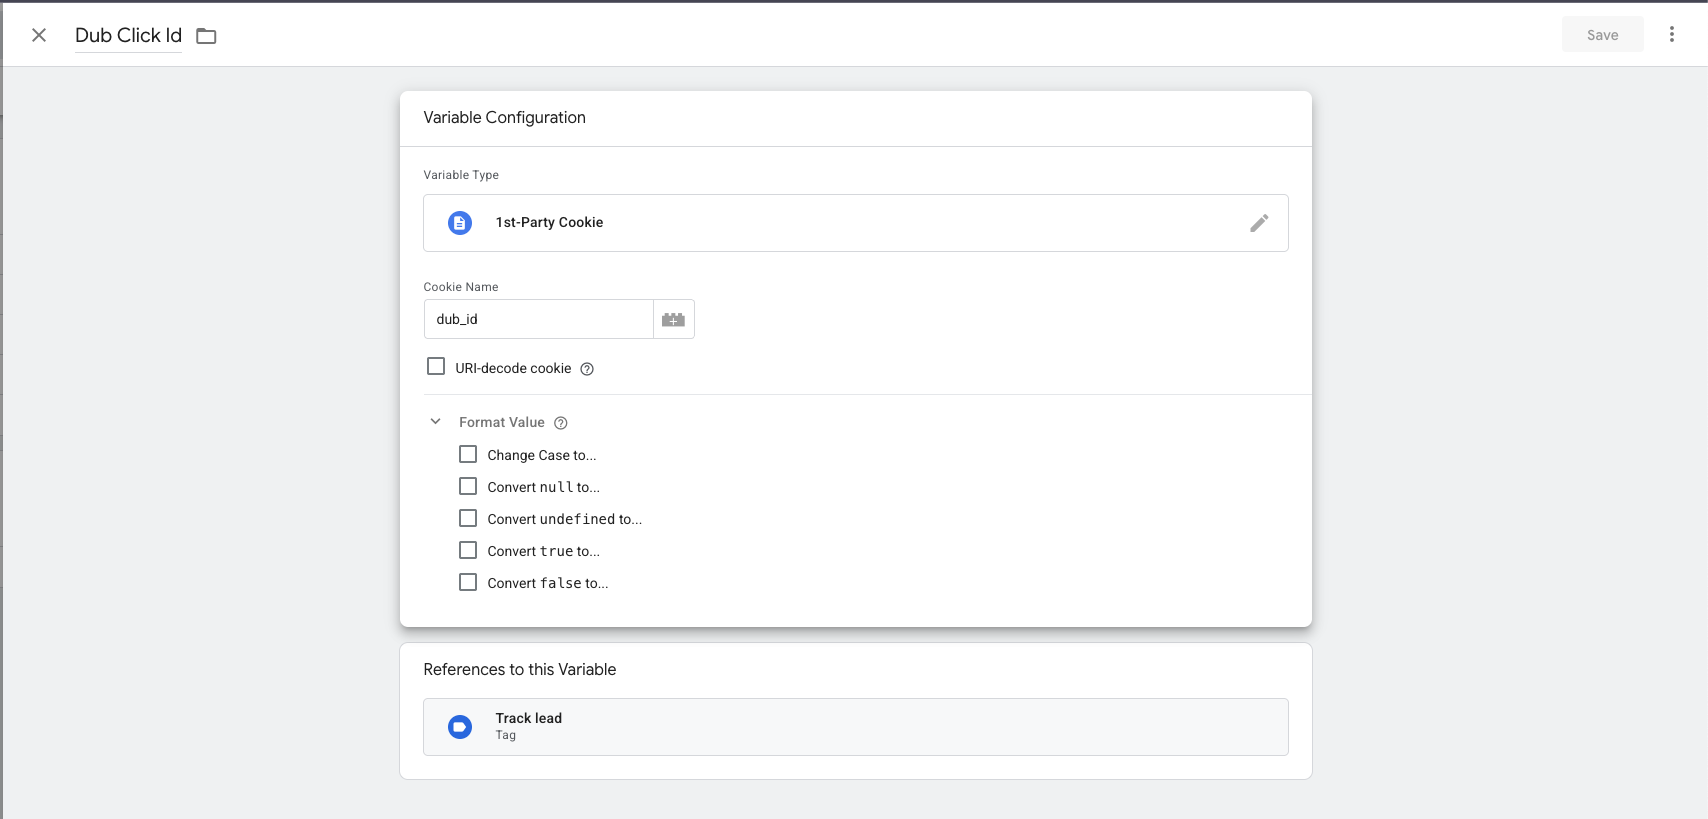
- Variable Type: Select 1st Party Cookie
- Cookie Name: Enter
dub_id - Variable Name: Name it “Dub ID Cookie”
This variable will automatically read the
dub_id cookie value set by the Dub
Analytics script. You can use this variable in your tags to pass the Dub ID
when tracking conversion events.Tracking lead events
There are two ways to track lead events with Google Tag Manager:Option 1: Thank You Page Tracking (Recommended)
This method tracks leads when users land on a thank-you or success page after completing a form. This approach is more reliable as it’s less likely to be blocked by ad blockers and provides better data accuracy. Create a Custom HTML tag with the following code:Important: Make sure to pass along the
email and name query parameters
to the thank-you page so that the lead event can be attributed to the correct
customer.- Trigger Type: Page View
- This trigger fires on: Some Page Views
- Add conditions like:
- Page URL contains
/thank-you - Or Page Path equals
/success - Or whatever URL pattern matches your thank-you pages
- Page URL contains
Option 2: Form Submission Tracking
This method tracks leads immediately when users submit forms on your website. Note that this approach may be less reliable due to ad blockers and timing issues. Create a Custom HTML tag with the following code:Important: You’ll need to customize the DOM selectors
(
getElementById('name'), getElementById('email')) to match your actual
form field IDs or use different methods to capture the form data based on your
website’s structure.- Trigger Type: Form Submission
- This trigger fires on: Some Forms (or All Forms if you want to track all form submissions)
- Add conditions to specify which forms should trigger lead tracking
Tracking sales events
There are two ways to track sales events with Google Tag Manager:Option 1: Order Confirmation Page Tracking (Recommended)
This method tracks sales when users land on an order confirmation or success page after completing a purchase. This approach is more reliable as it’s less likely to be blocked by ad blockers and provides better data accuracy. Create a Custom HTML tag with the following code:- Trigger Type: Page View
- This trigger fires on: Some Page Views
- Add conditions like:
- Page URL contains
/order-confirmation - Or Page Path equals
/checkout/success - Or whatever URL pattern matches your order confirmation pages
- Page URL contains
Option 2: Checkout Form Submission Tracking
This method tracks sales immediately when users complete checkout forms on your website. Note that this approach may be less reliable due to ad blockers and timing issues. Create a Custom HTML tag with the following code:Important: You’ll need to customize the DOM selectors
(
getElementById('customer_id'), getElementById('amount'), etc.) to match
your actual checkout form field IDs or use different methods to capture the
form data based on your website’s structure.- Trigger Type: Form Submission
- This trigger fires on: Some Forms (or All Forms if you want to track all form submissions)
- Add conditions to specify which forms should trigger sales tracking (e.g., checkout forms)
Testing your setup
To test your GTM setup, you can use the Preview mode in Google Tag Manager:- Enable Preview Mode: In your GTM workspace, click the Preview button in the top right corner
- Enter your website URL and click Connect
- Test your chosen tracking method:
- For Option 1 (Order Confirmation): Navigate to your order confirmation page with query parameters (e.g.,
?customer_id=123&amount=1000&invoice_id=inv_456) - For Option 2 (Form Submission): Navigate to a checkout page and complete a test purchase form
- For Option 1 (Order Confirmation): Navigate to your order confirmation page with query parameters (e.g.,
- Check the GTM debugger to see if your tags are firing correctly
Verify conversion tracking
You can also verify that conversion events are being tracked by:- Checking your browser’s developer console for any JavaScript errors
- Using the Network tab to see if requests are being sent to Dub’s analytics endpoint
- Viewing your Dub dashboard to confirm that sale events are appearing in your analytics
Common troubleshooting tips
- Tag not firing: Check that your triggers are configured correctly and that the conditions match your page structure
- Form data not captured (Option 2): Verify that your DOM selectors match your actual checkout form field IDs or names
- Query parameters missing (Option 1): Ensure your checkout process redirects to the confirmation page with the required query parameters
- Amount formatting: Ensure amounts are in cents (e.g., $10.00 = 1000 cents)
- Multiple events: Make sure your tags aren’t firing multiple times by checking trigger conditions
- Duplicate tracking: Verify you’ve only implemented one tracking method (Option 1 OR Option 2, not both)
- Missing publishable key: Ensure you’ve replaced the placeholder with your actual publishable key
View conversion results
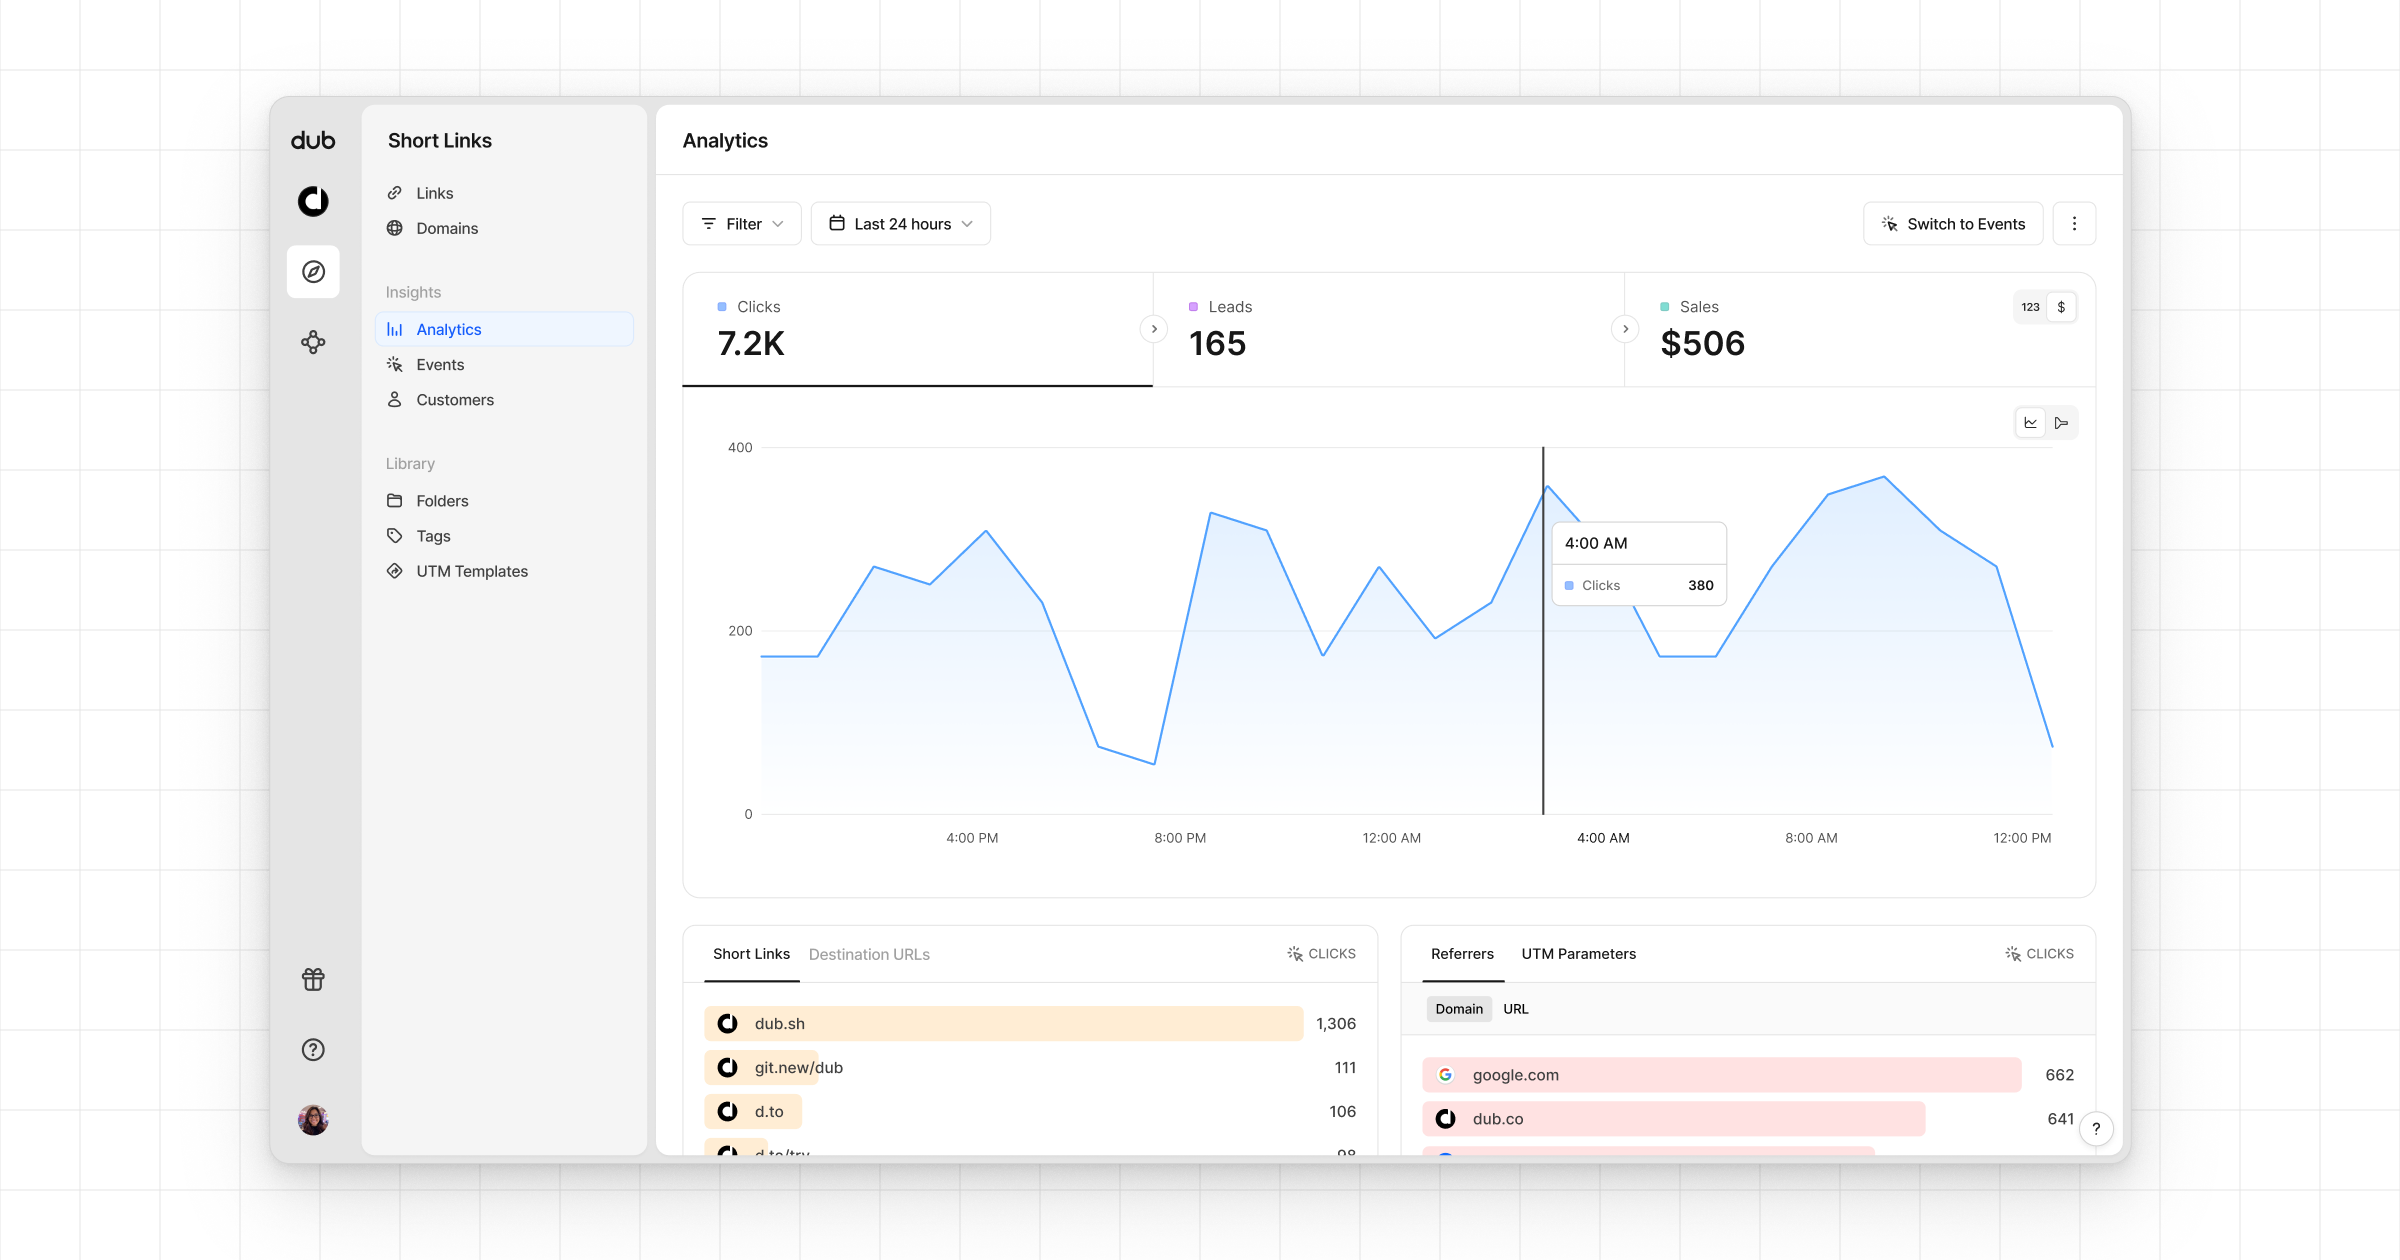
And that’s it – you’re all set! You can now sit back, relax, and watch your conversion revenue grow. We provide 3 different views to help you understand your conversions:- Time-series: A time-series view of the number clicks, leads and sales.
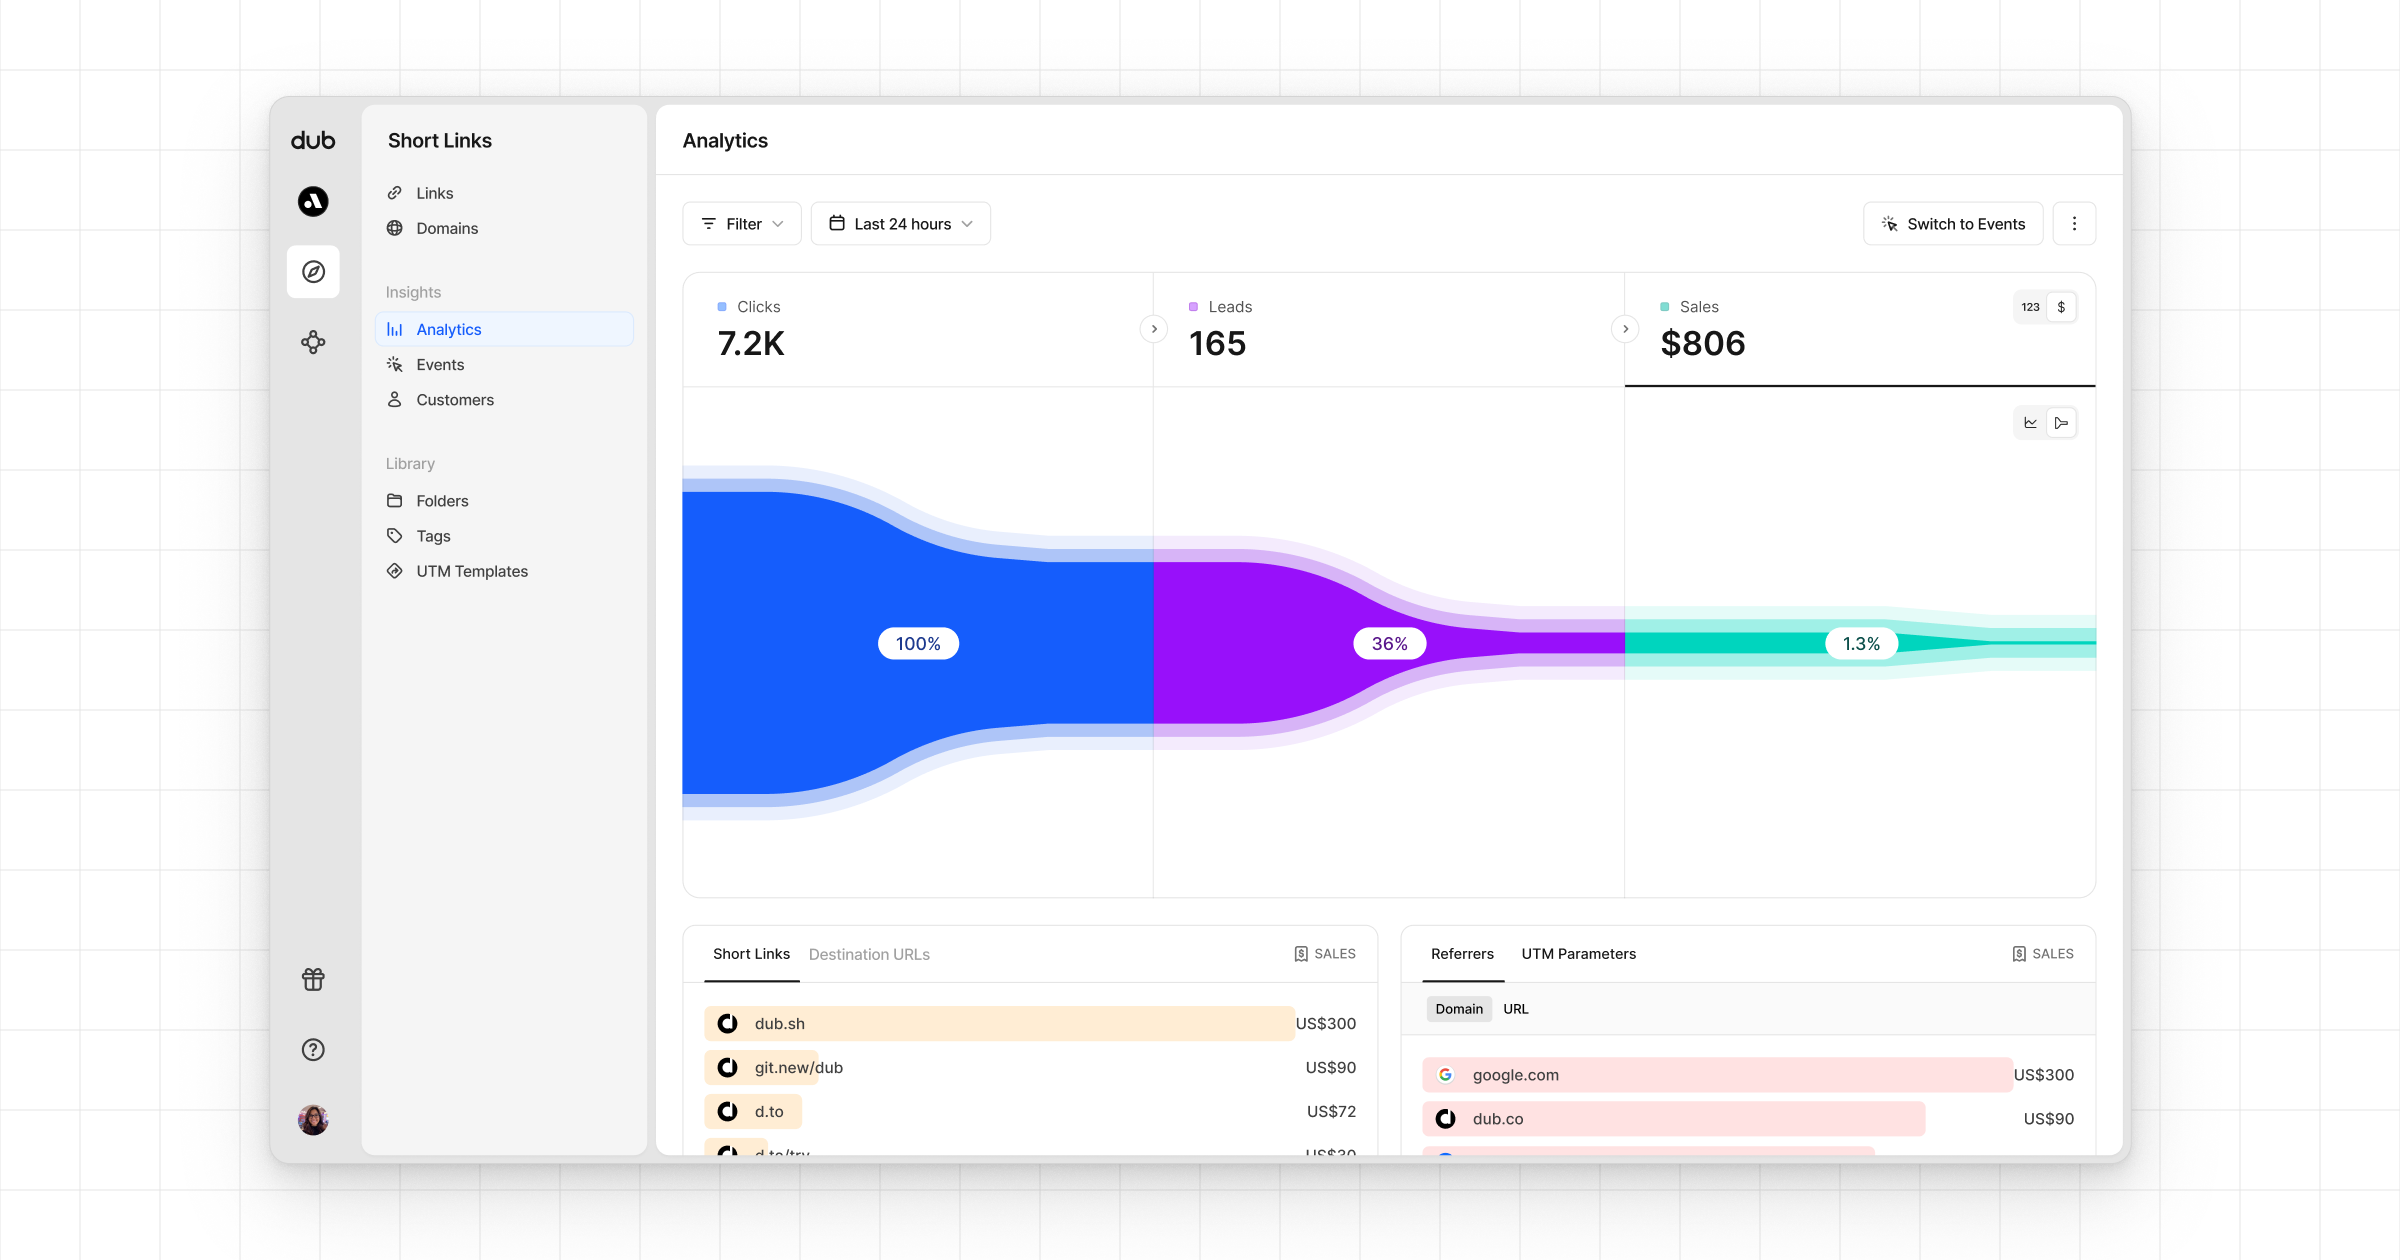
- Funnel chart: A funnel chart view visualizing the conversion & dropoff rates across the different steps in the conversion funnel (clicks → leads → sales).
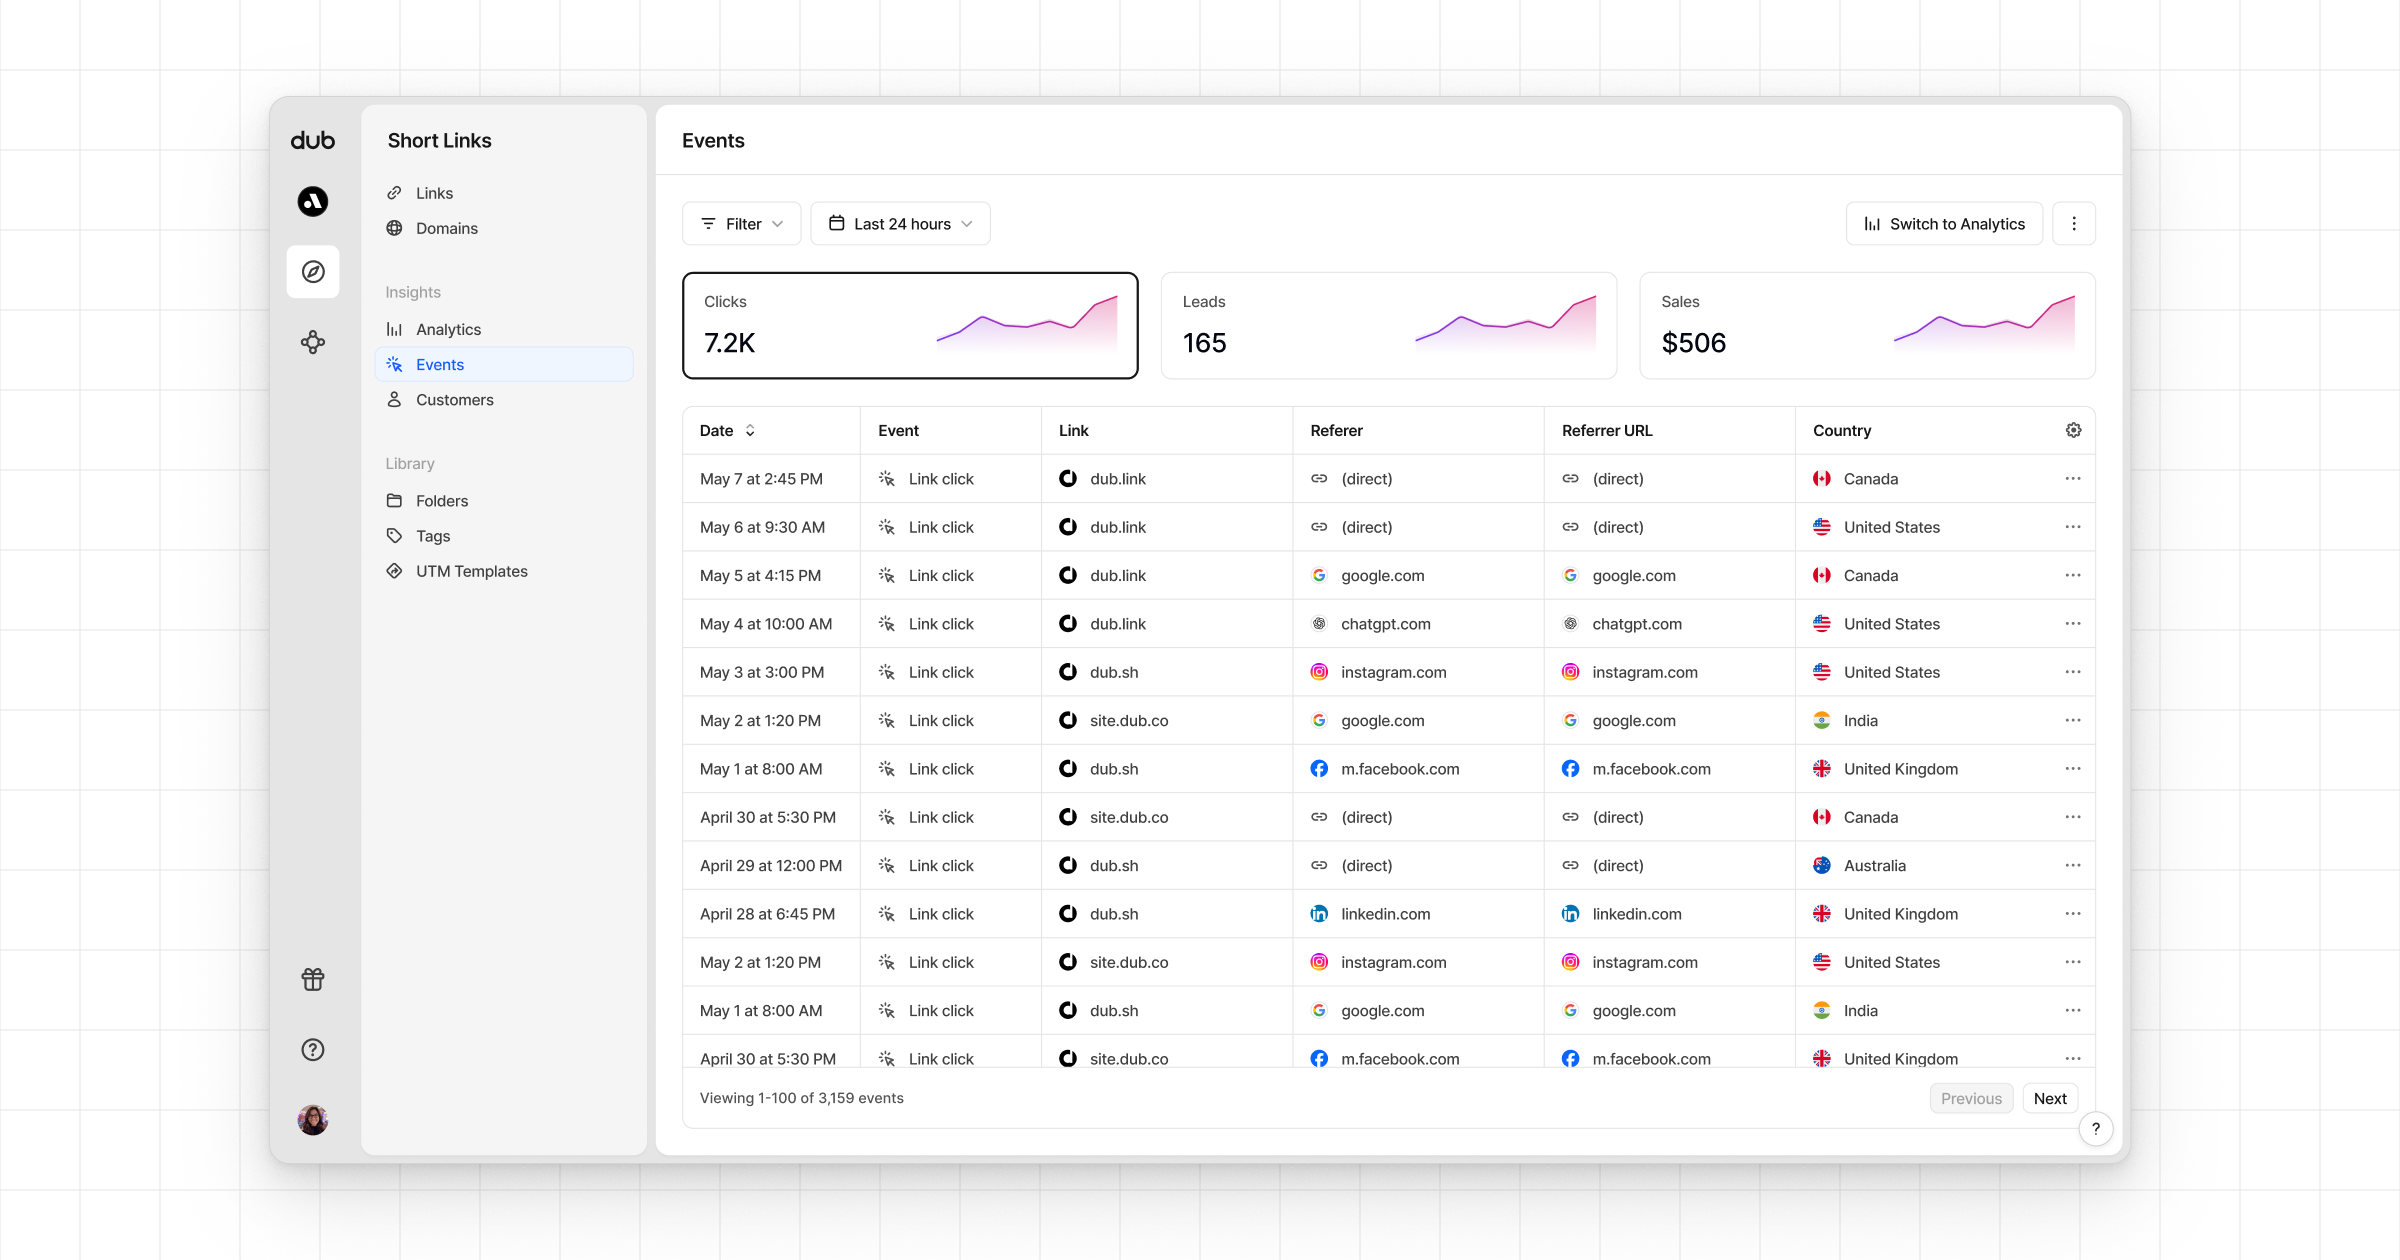
- Real-time events stream: A real-time events stream of every single conversion event that occurs across all your links in your workspace.
Example apps
Dub + GTM Demo App
See the full example on GitHub.