```
## Troubleshooting
### 500 error on `/api/workspaces/[idOrSlug]` route
If you're receiving a 500 error when accessing workspace-related pages, it may be due to missing Stripe API keys. Check your application logs for Stripe-related errors.
For **local development only**, you can add mock Stripe keys to your `apps/web/.env` file:
```bash .env theme={null}
NEXT_PUBLIC_STRIPE_PUBLISHABLE_KEY=123
STRIPE_SECRET_KEY=123
STRIPE_WEBHOOK_SECRET=123
# Stripe App webhook events
STRIPE_APP_WEBHOOK_SECRET=123
```
These mock keys are for local development only and should never be used in production environments.
## Running E2E tests locally
To run end-to-end tests locally, you'll need to configure additional environment variables and generate an API token.
Add the following environment variables to your `apps/web/.env` file:
```bash .env theme={null}
# E2E testing
CI=true
E2E_BASE_URL=http://localhost:8888
E2E_TOKEN=your_token_here
E2E_TOKEN_MEMBER=your_token_here
E2E_TOKEN_OLD=your_token_here
E2E_PUBLISHABLE_KEY=your_token_here
```
1. Start your development server and log in to the application
2. Navigate to [http://localhost:8888/acme/settings/tokens](http://localhost:8888/acme/settings/tokens)
3. Generate a new API token with full access permissions
4. Replace all instances of `your_token_here` in your `.env` file with the generated token
The `CI=true` variable is used because some tests are designed to run in CI environments. Setting this to `true` allows you to run these tests locally for development and debugging purposes.
# Dub MCP Server
Source: https://dub.co/docs/mcp-server
Use the Dub MCP server to manage your partner program with the AI agent of your choice.
## What is an MCP Server?
MCP (Model Context Protocol) is an open standard for connecting AI applications to external tools and data. It gives your AI agent structured access to APIs so it can take actions on your behalf — like approving partner applications or updating commissions — using natural language.
## What can the Dub MCP server do?
The Dub [MCP server](https://mcp.dub.sh/mcp/dub-partners) gives your AI agent native access to the full Dub platform through a single integration. You can manage your partner program, review applications, update commissions, and track attribution using natural language.
* **Partners** — Create or update partners, list all partners, deactivate, or ban partners from your program
* **Partner links** — Create and upsert links for enrolled partners
* **Applications** — List, approve, and reject pending partner applications
* **Analytics** — Retrieve analytics and list events for any partner, [partner groups](/help/article/partner-groups), or their specific links
* **Customers** — List, retrieve, update, and delete customers
* **Tracking** — Track lead, sale, and deep link open events
* **Bounties** — List, approve, and reject bounty submissions
* **Commissions** — List and update commissions (e.g. for refunds or fraud)
* **Payouts** — List payouts for your partner program
As an example, you could use this to triage partner applications, adjust commissions after a refund, or pull attribution analytics for a top partner — all from your AI client.
Looking for the [Dub Links](https://dub.co/links) MCP server? Check out the
[Dub Links MCP server docs](https://mcp.dub.sh/mcp/dub-links).
## Prerequisites
The Dub MCP server is hosted remotely and connects to any [supported MCP client](#mcp-client-integrations) via [`mcp-remote`](https://www.npmjs.com/package/mcp-remote) and `npx`. To use the MCP server, you'll need to:
* [Create a Dub API key](https://app.dub.co/settings/tokens) with access to your partner program
## How to use the MCP Server
Dub's MCP server runs over HTTP at `https://mcp.dub.sh/mcp/dub-partners`. Most clients connect through **`mcp-remote`**, which bridges stdio-based clients to the remote endpoint and forwards your API key in the `Mcp-Dub-Token` header.
Choose your MCP client below to get started. Replace `dub_xxxxxx` with your actual Dub API key.
### MCP client integrations
```bash theme={null}
claude mcp add dub-partners \
--env MCP_DUB_TOKEN=dub_xxxxxx \
-- npx -y mcp-remote@0.1.25 https://mcp.dub.sh/mcp/dub-partners \
--header "Mcp-Dub-Token:\${MCP_DUB_TOKEN}"
```
```bash theme={null}
codex mcp add dub-partners \
--env MCP_DUB_TOKEN=dub_xxxxxx \
-- npx -y mcp-remote@0.1.25 https://mcp.dub.sh/mcp/dub-partners \
--header "Mcp-Dub-Token:\${MCP_DUB_TOKEN}"
```
Open the command palette and choose **Cursor Settings** → **MCP** → **Add new global MCP server**.
```json theme={null}
{
"mcpServers": {
"dub-partners": {
"command": "npx",
"args": [
"-y",
"mcp-remote@0.1.25",
"https://mcp.dub.sh/mcp/dub-partners",
"--header",
"Mcp-Dub-Token:${MCP_DUB_TOKEN}"
],
"env": {
"MCP_DUB_TOKEN": "dub_xxxxxx"
}
}
}
}
```
Open **Claude Desktop** settings → **Developer** tab → **Edit Config** and add the following:
```json theme={null}
{
"mcpServers": {
"dub-partners": {
"command": "npx",
"args": [
"-y",
"mcp-remote@0.1.25",
"https://mcp.dub.sh/mcp/dub-partners",
"--header",
"Mcp-Dub-Token:${MCP_DUB_TOKEN}"
],
"env": {
"MCP_DUB_TOKEN": "dub_xxxxxx"
}
}
}
}
```
To use GitHub Copilot in VS Code, add the following to your `settings.json`:
```json theme={null}
{
"mcp": {
"servers": {
"dub-partners": {
"command": "npx",
"args": [
"-y",
"mcp-remote@0.1.25",
"https://mcp.dub.sh/mcp/dub-partners",
"--header",
"Mcp-Dub-Token:${MCP_DUB_TOKEN}"
],
"env": {
"MCP_DUB_TOKEN": "dub_xxxxxx"
}
}
}
}
}
```
```json theme={null}
{
"mcpServers": {
"dub-partners": {
"command": "npx",
"args": [
"-y",
"mcp-remote@0.1.25",
"https://mcp.dub.sh/mcp/dub-partners",
"--header",
"Mcp-Dub-Token:${MCP_DUB_TOKEN}"
],
"env": {
"MCP_DUB_TOKEN": "dub_xxxxxx"
}
}
}
}
```
Add to your `opencode.json` config:
```json theme={null}
{
"$schema": "https://opencode.ai/config.json",
"mcp": {
"dub-partners": {
"type": "local",
"command": [
"npx",
"-y",
"mcp-remote@0.1.25",
"https://mcp.dub.sh/mcp/dub-partners",
"--header",
"Mcp-Dub-Token:${MCP_DUB_TOKEN}"
],
"enabled": true,
"environment": {
"MCP_DUB_TOKEN": "dub_xxxxxx"
}
}
}
}
```
```json theme={null}
{
"mcpServers": {
"dub-partners": {
"command": "npx",
"args": [
"-y",
"mcp-remote@0.1.25",
"https://mcp.dub.sh/mcp/dub-partners",
"--header",
"Mcp-Dub-Token:${MCP_DUB_TOKEN}"
],
"env": {
"MCP_DUB_TOKEN": "dub_xxxxxx"
}
}
}
}
```
For any MCP client not listed above, use the raw configuration below:
```json theme={null}
{
"command": "npx",
"args": [
"-y",
"mcp-remote@0.1.25",
"https://mcp.dub.sh/mcp/dub-partners",
"--header",
"Mcp-Dub-Token:${MCP_DUB_TOKEN}"
],
"env": {
"MCP_DUB_TOKEN": "dub_xxxxxx"
}
}
```
### Native HTTP
Some MCP clients support connecting directly to a remote HTTP endpoint without `mcp-remote`. In that case, point your client at the Dub MCP URL and pass your API key in the `Mcp-Dub-Token` header.
```bash theme={null}
claude mcp add dub-partners \
--transport http https://mcp.dub.sh/mcp/dub-partners \
--header "Mcp-Dub-Token: dub_xxxxxx"
```
Open the command palette and choose **Cursor Settings** → **MCP** → **Add new global MCP server**.
```json theme={null}
{
"mcpServers": {
"dub-partners": {
"url": "https://mcp.dub.sh/mcp/dub-partners",
"headers": {
"Mcp-Dub-Token": "dub_xxxxxx"
}
}
}
}
```
Use your client's remote MCP configuration with:
* **URL:** `https://mcp.dub.sh/mcp/dub-partners`
* **Header:** `Mcp-Dub-Token: dub_xxxxxx`
### Environment variables
* `MCP_DUB_TOKEN`: Your Dub API key (used by `mcp-remote` and referenced in client configs as `${MCP_DUB_TOKEN}`)
Store your API key in the `env` block or an environment variable rather than
hardcoding it in shared config files when possible.
# Introduction
Source: https://dub.co/docs/partner-api-reference/introduction
Learn how to use Dub's Partner API to programmatically manage your partner account.
Coming soon.
# Embedded referral dashboard
Source: https://dub.co/docs/partners/embedded-referrals
Learn how to create an embedded referral dashboard with Dub for your users to join your partner program without leaving your app.
This feature is only available on [Advanced plans and
above](https://dub.co/pricing/partners).
With [Dub Partners](https://dub.co/partners), you can build an embedded referral dashboard that lives directly inside your application in just a few lines of code.
This way, your users can automatically enroll in your partner program **without needing to leave your app and sign up on a third-party platform**.
In this guide, we'll walk you through the steps to get started with Dub's embedded referral dashboard feature.
Looking to set up non-monetary rewards for your user referral partners? [Read
the guide](/help/article/non-monetary-rewards) on how to set that up.
## Example App
Before we dive in, here's an open-source example app showing Dub's embedded referral dashboard in action: [acme.dub.sh](https://acme.dub.sh)
You can also view the source code for the example app on [GitHub](https://github.com/dubinc/examples/tree/main/embed/referrals):
View the source code for [acme.dub.sh](https://acme.dub.sh) on GitHub.
## Step 1: Generate embed token
First, you need to create a server API route that generates a public token, which will be used by the embedded referral dashboard to fetch real-time conversions and earnings data from the client-side.
![A diagram of the embed token flow]() ### Using server-side SDKs
If you're using our [server-side SDKs](/docs/sdks/overview), you can generate an embed token using the `dub.embedTokens.referrals` method.
```ts TypeScript theme={null}
const { publicToken } = await dub.embedTokens.referrals({
tenantId: user.id, // the user's ID within your application
partner: {
name: user.name, // the user's name
email: user.email, // the user's email
image: user.image, // the user's image/avatar
tenantId: user.id, // the user's ID within your application
groupId: "grp_xxxxxx", // optional: the partner's group ID on Dub (https://d.to/groups)
},
});
```
```python Python theme={null}
from dub import Dub
with Dub(
token="DUB_API_KEY",
) as d_client:
res = d_client.embed_tokens.referrals(request={
"tenant_id": user.id, # the user's ID within your application
"partner": {
"name": user.name, # the user's name
"email": user.email, # the user's email
"image": user.image, # the user's image/avatar
"tenant_id": user.id, # the user's ID within your application
"group_id": "grp_xxxxxx", # optional: the partner's group ID on Dub (https://d.to/groups)
},
})
# Handle response
print(res.public_token)
```
```go Go theme={null}
package main
import(
"context"
dubgo "github.com/dubinc/dub-go"
"github.com/dubinc/dub-go/models/operations"
"log"
)
func main() {
ctx := context.Background()
s := dubgo.New(
dubgo.WithSecurity("DUB_API_KEY"),
)
res, err := s.EmbedTokens.Referrals(ctx, &operations.CreateReferralsEmbedTokenRequestBody{
TenantID: user.ID, // the user's ID within your application
Partner: &operations.Partner{
Name: user.Name, // the user's name
Email: user.Email, // the user's email
Image: user.Image, // the user's image/avatar
TenantID: user.ID, // the user's ID within your application
GroupID: "grp_xxxxxx", // optional: the partner's group ID on Dub (https://d.to/groups)
},
})
if err != nil {
log.Fatal(err)
}
if res != nil {
// Handle response
log.Printf("Public token: %s", res.PublicToken)
}
}
```
```php PHP theme={null}
declare(strict_types=1);
require 'vendor/autoload.php';
use Dub;
use Dub\Models\Operations;
$sdk = Dub\Dub::builder()
->setSecurity('DUB_API_KEY')
->build();
$request = new Operations\CreateReferralsEmbedTokenRequestBody(
tenantId: $user->id, // the user's ID within your application
partner: new Operations\Partner(
name: $user->name, // the user's name
email: $user->email, // the user's email
image: $user->image, // the user's image/avatar
tenantId: $user->id, // the user's ID within your application
groupId: "grp_xxxxxx", // optional: the partner's group ID on Dub (https://d.to/groups)
),
);
$response = $sdk->embedTokens->referrals(
request: $request
);
if ($response->object !== null) {
// Handle response
echo $response->object->publicToken;
}
```
```ruby Ruby theme={null}
require 'dub'
s = ::OpenApiSDK::Dub.new(
security: ::OpenApiSDK::Shared::Security.new(
token: "DUB_API_KEY",
),
)
req = ::OpenApiSDK::Operations::CreateReferralsEmbedTokenRequestBody.new(
tenant_id: user.id, # the user's ID within your application
partner: ::OpenApiSDK::Operations::Partner.new(
name: user.name, # the user's name
email: user.email, # the user's email
image: user.image, # the user's image/avatar
tenant_id: user.id, # the user's ID within your application
group_id: "grp_xxxxxx", # optional: the partner's group ID on Dub (https://d.to/groups)
),
)
res = s.embed_tokens.referrals(req)
if !res.object.nil?
# Handle response
puts res.object.public_token
end
```
### Using REST API
If you're not using our server-side SDKs, you can generate an embed token using our REST API instead (via the [`POST /tokens/embed/referrals`](/docs/api-reference/endpoint/create-referrals-embed-token) endpoint).
```js JavaScript theme={null}
const response = await fetch("https://api.dub.co/tokens/embed/referrals", {
method: "POST",
body: JSON.stringify({
tenantId: user.id, // the user's ID within your application
partner: {
name: user.name, // the user's name
email: user.email, // the user's email
image: user.image, // the user's image/avatar
tenantId: user.id, // the user's ID within your application
groupId: "grp_xxxxxx", // optional: the partner's group ID on Dub (https://d.to/groups)
},
}),
});
const data = await response.json();
const { publicToken } = data;
```
Refer to the [full API reference](/docs/api-reference/endpoint/create-referrals-embed-token) to learn more about the properties you can pass to the `POST /tokens/embed/referrals` endpoint.
When you call this endpoint, it first attempts to find an existing enrollment
using the provided `tenantId`. If no enrollment is found, it resolves the
partner by `email` and creates a new enrollment automatically. This means you
don't need to handle enrollment logic separately – the endpoint guarantees a
valid enrollment and returns a usable embed token every time.
## Step 2: Install the embed
Then, with the `publicToken` from Step 1, you can install and initialize the embedded referral dashboard. There are two ways to do this:
### React component
First, install the [NPM package](https://www.npmjs.com/package/@dub/embed-react):
```bash npm theme={null}
npm install @dub/embed-react
```
```bash yarn theme={null}
yarn add @dub/embed-react
```
```bash pnpm theme={null}
pnpm add @dub/embed-react
```
```bash bun theme={null}
bun add @dub/embed-react
```
Then use the component in your React application:
```tsx theme={null}
import { useState, useEffect } from "react";
import { DubEmbed } from "@dub/embed-react";
export default function App() {
const [publicToken, setPublicToken] = useState("");
useEffect(() => {
const fetchPublicToken = async () => {
// fetching from the server API route you created in Step 1
const response = await fetch("/api/embed-token");
const data = await response.json();
setPublicToken(data.publicToken);
};
fetchPublicToken();
}, []);
if (!publicToken) {
return
### Using server-side SDKs
If you're using our [server-side SDKs](/docs/sdks/overview), you can generate an embed token using the `dub.embedTokens.referrals` method.
```ts TypeScript theme={null}
const { publicToken } = await dub.embedTokens.referrals({
tenantId: user.id, // the user's ID within your application
partner: {
name: user.name, // the user's name
email: user.email, // the user's email
image: user.image, // the user's image/avatar
tenantId: user.id, // the user's ID within your application
groupId: "grp_xxxxxx", // optional: the partner's group ID on Dub (https://d.to/groups)
},
});
```
```python Python theme={null}
from dub import Dub
with Dub(
token="DUB_API_KEY",
) as d_client:
res = d_client.embed_tokens.referrals(request={
"tenant_id": user.id, # the user's ID within your application
"partner": {
"name": user.name, # the user's name
"email": user.email, # the user's email
"image": user.image, # the user's image/avatar
"tenant_id": user.id, # the user's ID within your application
"group_id": "grp_xxxxxx", # optional: the partner's group ID on Dub (https://d.to/groups)
},
})
# Handle response
print(res.public_token)
```
```go Go theme={null}
package main
import(
"context"
dubgo "github.com/dubinc/dub-go"
"github.com/dubinc/dub-go/models/operations"
"log"
)
func main() {
ctx := context.Background()
s := dubgo.New(
dubgo.WithSecurity("DUB_API_KEY"),
)
res, err := s.EmbedTokens.Referrals(ctx, &operations.CreateReferralsEmbedTokenRequestBody{
TenantID: user.ID, // the user's ID within your application
Partner: &operations.Partner{
Name: user.Name, // the user's name
Email: user.Email, // the user's email
Image: user.Image, // the user's image/avatar
TenantID: user.ID, // the user's ID within your application
GroupID: "grp_xxxxxx", // optional: the partner's group ID on Dub (https://d.to/groups)
},
})
if err != nil {
log.Fatal(err)
}
if res != nil {
// Handle response
log.Printf("Public token: %s", res.PublicToken)
}
}
```
```php PHP theme={null}
declare(strict_types=1);
require 'vendor/autoload.php';
use Dub;
use Dub\Models\Operations;
$sdk = Dub\Dub::builder()
->setSecurity('DUB_API_KEY')
->build();
$request = new Operations\CreateReferralsEmbedTokenRequestBody(
tenantId: $user->id, // the user's ID within your application
partner: new Operations\Partner(
name: $user->name, // the user's name
email: $user->email, // the user's email
image: $user->image, // the user's image/avatar
tenantId: $user->id, // the user's ID within your application
groupId: "grp_xxxxxx", // optional: the partner's group ID on Dub (https://d.to/groups)
),
);
$response = $sdk->embedTokens->referrals(
request: $request
);
if ($response->object !== null) {
// Handle response
echo $response->object->publicToken;
}
```
```ruby Ruby theme={null}
require 'dub'
s = ::OpenApiSDK::Dub.new(
security: ::OpenApiSDK::Shared::Security.new(
token: "DUB_API_KEY",
),
)
req = ::OpenApiSDK::Operations::CreateReferralsEmbedTokenRequestBody.new(
tenant_id: user.id, # the user's ID within your application
partner: ::OpenApiSDK::Operations::Partner.new(
name: user.name, # the user's name
email: user.email, # the user's email
image: user.image, # the user's image/avatar
tenant_id: user.id, # the user's ID within your application
group_id: "grp_xxxxxx", # optional: the partner's group ID on Dub (https://d.to/groups)
),
)
res = s.embed_tokens.referrals(req)
if !res.object.nil?
# Handle response
puts res.object.public_token
end
```
### Using REST API
If you're not using our server-side SDKs, you can generate an embed token using our REST API instead (via the [`POST /tokens/embed/referrals`](/docs/api-reference/endpoint/create-referrals-embed-token) endpoint).
```js JavaScript theme={null}
const response = await fetch("https://api.dub.co/tokens/embed/referrals", {
method: "POST",
body: JSON.stringify({
tenantId: user.id, // the user's ID within your application
partner: {
name: user.name, // the user's name
email: user.email, // the user's email
image: user.image, // the user's image/avatar
tenantId: user.id, // the user's ID within your application
groupId: "grp_xxxxxx", // optional: the partner's group ID on Dub (https://d.to/groups)
},
}),
});
const data = await response.json();
const { publicToken } = data;
```
Refer to the [full API reference](/docs/api-reference/endpoint/create-referrals-embed-token) to learn more about the properties you can pass to the `POST /tokens/embed/referrals` endpoint.
When you call this endpoint, it first attempts to find an existing enrollment
using the provided `tenantId`. If no enrollment is found, it resolves the
partner by `email` and creates a new enrollment automatically. This means you
don't need to handle enrollment logic separately – the endpoint guarantees a
valid enrollment and returns a usable embed token every time.
## Step 2: Install the embed
Then, with the `publicToken` from Step 1, you can install and initialize the embedded referral dashboard. There are two ways to do this:
### React component
First, install the [NPM package](https://www.npmjs.com/package/@dub/embed-react):
```bash npm theme={null}
npm install @dub/embed-react
```
```bash yarn theme={null}
yarn add @dub/embed-react
```
```bash pnpm theme={null}
pnpm add @dub/embed-react
```
```bash bun theme={null}
bun add @dub/embed-react
```
Then use the component in your React application:
```tsx theme={null}
import { useState, useEffect } from "react";
import { DubEmbed } from "@dub/embed-react";
export default function App() {
const [publicToken, setPublicToken] = useState("");
useEffect(() => {
const fetchPublicToken = async () => {
// fetching from the server API route you created in Step 1
const response = await fetch("/api/embed-token");
const data = await response.json();
setPublicToken(data.publicToken);
};
fetchPublicToken();
}, []);
if (!publicToken) {
return Loading...
;
}
return ;
}
```
### Iframe embed
Alternatively, if you're not using React (or you're not on React `v18.2.0` or higher), you can add the iframe directly to your HTML:
```tsx theme={null}
import { useState, useEffect } from "react";
export default function App() {
const [publicToken, setPublicToken] = useState("");
useEffect(() => {
const fetchPublicToken = async () => {
// fetching from the server API route you created in Step 1
const response = await fetch("/api/embed-token");
const data = await response.json();
setPublicToken(data.publicToken);
};
fetchPublicToken();
}, []);
if (!publicToken) {
return Loading...
;
}
return (
);
}
```
## Embed options
The embedded referral dashboard supports the following options for styling and behavior:
The type of embed to use. In this case, we're using the `referrals` type.
The theme of the embed.
Available options:
* `backgroundColor`: The background color of the embed.
Depending on the embed type, you can use the following examples to initialize the embed options:
```tsx React component theme={null}
import { DubEmbed } from "@dub/embed-react";
const publicToken = "...";
;
```
```tsx iFrame embed theme={null}
const publicToken = "...";
const iframeUrl = "https://app.dub.co/embed/referrals";
const iframeParams = new URLSearchParams({
token: publicToken,
theme: "light",
themeOptions: JSON.stringify({ backgroundColor: "#F5F5F5" }),
});
;
```
# Event types
Source: https://dub.co/docs/postbacks/event-types
List of supported postback event types and their payloads
Postbacks send real-time notifications when events happen in your Dub partner account. All postback payloads follow this structure:
```json postback-payload.json theme={null}
{
"id": "evt_KleiO4HBwZFbO1vZLWIPZ2AtX",
"event": "lead.created",
"createdAt": "2024-08-26T16:41:52.346Z",
"data": {}
}
```
* **id** – Unique event ID
* **event** – Event type (e.g. `lead.created`)
* **createdAt** – ISO 8601 timestamp when the event was created
* **data** – Event-specific payload
## Postback events
Postbacks only fire for events tied to **your referral links**. Here are the postback events that are available:
| Event Type | Description |
| ----------------------------------------------------------------- | --------------------------------------------------------------------------------------------------------------------- |
| [`lead.created`](/docs/postbacks/events/lead-created) | Occurs when a **new lead is tracked** via your referral link. |
| [`sale.created`](/docs/postbacks/events/sale-created) | Occurs when a **new sale is tracked** via your referral link. |
| [`commission.created`](/docs/postbacks/events/commission-created) | Occurs when a **new commission is generated** for you — from a tracked conversion or created manually by the program. |
# commission.created
Source: https://dub.co/docs/postbacks/events/commission-created
Event triggered when a [new commission is created](/docs/api-reference/commissions/list) for you.
Unique identifier for the commission.
Commission type (e.g. sale).
Sale/order amount in cents.
Commission earnings in cents.
Currency code (e.g. usd).
Commission status (e.g. pending).
Optional description (e.g. for manual commissions).
Quantity (e.g. number of items).
ISO 8601 timestamp when the commission was created.
The referral link the commission is associated with.
Unique identifier for the link.
The short link URL.
Domain of the short link.
Unique key of the short link.
The customer associated with the conversion.
Unique identifier for the customer.
Country code.
ISO 8601 timestamp when the customer was first seen.
ISO 8601 timestamp of the customer's first sale, if any.
ISO 8601 timestamp when the subscription was canceled, if any.
```json Response theme={null}
{
"id": "evt_64dv6vxYVgltzJBKc9ujJ1ghL",
"event": "commission.created",
"createdAt": "2025-07-16T10:48:15.468Z",
"data": {
"id": "cm_1K09DJTBCRT24P6BRD515CK29",
"type": "sale",
"amount": 50000,
"earnings": 10000,
"currency": "usd",
"status": "pending",
"description": null,
"quantity": 1,
"createdAt": "2025-07-16T10:48:14.722Z",
"link": {
"id": "cm0lcuvtz000xcutmqw4a7wi3",
"shortLink": "https://dub.sh/track-test",
"domain": "dub.sh",
"key": "track-test"
},
"customer": {
"id": "cus_1K09DJDEACR47NPYC93RM43WF",
"country": "US",
"createdAt": "2025-07-16T10:48:01.739Z",
"firstSaleAt": "2025-07-18T10:48:01.739Z",
"subscriptionCanceledAt": null
}
}
}
```
# lead.created
Source: https://dub.co/docs/postbacks/events/lead-created
Event triggered when a [new lead is tracked](/docs/api-reference/track/lead) via your referral link.
Name of the tracked event (e.g. Signup).
The click event that led to the lead.
Unique identifier for the click.
ISO 8601 timestamp when the click occurred.
Destination URL of the click.
Country code.
City name.
Region or datacenter identifier.
Continent code.
Device type (e.g. Desktop).
Browser name.
Operating system.
Referrer source.
Referrer URL.
Whether the click came from a QR code.
IP address of the click.
The referral link the lead is associated with.
Unique identifier for the link.
The short link URL.
Domain of the short link.
Unique key of the short link.
The customer that signed up.
Unique identifier for the customer.
Country code.
ISO 8601 timestamp when the customer was first seen.
ISO 8601 timestamp of the customer's first sale, if any.
ISO 8601 timestamp when the subscription was canceled, if any.
```json Response theme={null}
{
"id": "evt_P343bmyae40ALQYr5HT4vRXRd",
"event": "lead.created",
"createdAt": "2025-07-16T10:48:02.000Z",
"data": {
"eventName": "Signup",
"click": {
"id": "GWGrkftJdYlZD2mq",
"timestamp": "2025-02-03T09:35:57.926Z",
"url": "https://github.com/dubinc/dub",
"country": "US",
"city": "San Jose",
"region": "sfo1",
"continent": "NA",
"device": "Desktop",
"browser": "Chrome",
"os": "Mac OS",
"referer": "(direct)",
"refererUrl": "(direct)",
"qr": false,
"ip": "198.51.100.42"
},
"link": {
"id": "cm0lcuvtz000xcutmqw4a7wi3",
"shortLink": "https://dub.sh/track-test",
"domain": "dub.sh",
"key": "track-test"
},
"customer": {
"id": "cus_1K09DJDEACR47NPYC93RM43WF",
"country": "US",
"createdAt": "2025-07-16T10:48:01.739Z",
"firstSaleAt": "2025-07-18T10:48:01.739Z",
"subscriptionCanceledAt": null
}
}
}
```
# sale.created
Source: https://dub.co/docs/postbacks/events/sale-created
Event triggered when a [new sale is tracked](/docs/api-reference/track/sale) via your referral link.
Name of the tracked event (e.g. Subscription).
The click event that led to the sale.
Unique identifier for the click.
ISO 8601 timestamp when the click occurred.
Destination URL of the click.
Country code.
City name.
Region or datacenter identifier.
Continent code.
Device type (e.g. Desktop).
Browser name.
Operating system.
Referrer source.
Referrer URL.
Whether the click came from a QR code.
IP address of the click.
The referral link the sale is associated with.
Unique identifier for the link.
The short link URL.
Domain of the short link.
Unique key of the short link.
The customer that made the purchase.
Unique identifier for the customer.
Country code.
ISO 8601 timestamp when the customer was first seen.
ISO 8601 timestamp of the customer's first sale, if any.
ISO 8601 timestamp when the subscription was canceled, if any.
Details about the recorded sale.
Sale amount in cents.
Currency code (e.g. usd).
```json Response theme={null}
{
"id": "evt_WHjyHhqsfYOrlJOOVJSoHXysD",
"event": "sale.created",
"createdAt": "2025-07-16T10:48:02.000Z",
"data": {
"eventName": "Subscription",
"click": {
"id": "GWGrkftJdYlZD2mq",
"timestamp": "2025-02-03T09:35:57.926Z",
"url": "https://github.com/dubinc/dub",
"country": "US",
"city": "San Jose",
"region": "sfo1",
"continent": "NA",
"device": "Desktop",
"browser": "Chrome",
"os": "Mac OS",
"referer": "(direct)",
"refererUrl": "(direct)",
"qr": false,
"ip": "198.51.100.42"
},
"link": {
"id": "cm0lcuvtz000xcutmqw4a7wi3",
"shortLink": "https://dub.sh/track-test",
"domain": "dub.sh",
"key": "track-test"
},
"customer": {
"id": "cus_1K09DJDEACR47NPYC93RM43WF",
"country": "US",
"createdAt": "2025-07-16T10:48:01.739Z",
"firstSaleAt": "2025-07-18T10:48:01.739Z",
"subscriptionCanceledAt": null
},
"sale": {
"amount": 100,
"currency": "usd"
}
}
}
```
# Introduction
Source: https://dub.co/docs/postbacks/introduction
Use postbacks to get real-time notifications on events happening across your Dub partner account.
Postbacks are currently in **private beta** and are only available for select
partners. [Contact us](https://dub.co/contact/support) to get access.
Postbacks allow you to listen to real-time events happening across your Dub partner account. With postbacks, you can build custom integrations with Dub, such as:
* Syncing leads to your CRM when someone signs up through your referral link
* Updating your internal dashboards when commissions are created
* Building custom attribution tools that react to lead, sale, and commission events in real time
In this guide, we'll show you how to configure postbacks for your partner account and a list of available events you can listen to.
## Creating a postback
To create a postback for your partner account, you'll need to follow these steps:
Navigate to the [**Postbacks** page](https://partners.dub.co/profile/postbacks) in your Dub partner profile.
Click on **Add Postback** to create a new postback.
![Create Postback Modal]() Fill in the required fields in the postback creation form:
1. **Name**: Give your postback a name that helps you identify it.
2. **URL**: Enter the URL of the endpoint where you want to send the postback. We recommend using [webhook.site](https://webhook.site/) to test your postback.
3. **Triggers**: Select the events you want to listen to. You can select multiple events. Refer to the [Event Types](/docs/postbacks/event-types) section to see the list of available events.
Finally, click on **Create postback** to create the postback. After creation, you'll see your signing secret — make sure to copy and store it securely.
## Viewing postback event logs
We also provide you with a postback event logs page where you can view all the postback events that have been sent to your endpoint in real-time.
To view the postback event logs, select the postback from the [**Postbacks** page](https://partners.dub.co/profile/postbacks) and click on the postback to open its details page.
Here, you'll see a list of all the postback events that have been sent to your endpoint:
Fill in the required fields in the postback creation form:
1. **Name**: Give your postback a name that helps you identify it.
2. **URL**: Enter the URL of the endpoint where you want to send the postback. We recommend using [webhook.site](https://webhook.site/) to test your postback.
3. **Triggers**: Select the events you want to listen to. You can select multiple events. Refer to the [Event Types](/docs/postbacks/event-types) section to see the list of available events.
Finally, click on **Create postback** to create the postback. After creation, you'll see your signing secret — make sure to copy and store it securely.
## Viewing postback event logs
We also provide you with a postback event logs page where you can view all the postback events that have been sent to your endpoint in real-time.
To view the postback event logs, select the postback from the [**Postbacks** page](https://partners.dub.co/profile/postbacks) and click on the postback to open its details page.
Here, you'll see a list of all the postback events that have been sent to your endpoint:
![Postback Event Logs]() You can also select a specific event, which will open up a sheet with more details about the event.
## Sending test events
You can send test events to your postback URL to ensure that it's working correctly. To do this:
Navigate to the [**Postbacks** page](https://partners.dub.co/profile/postbacks) and select the postback you want to test.
Click on the postback to open the postback details page.
Select the `⋮` icon on the top right of the page, and click on **Send test event**.
This will open up a modal where you can select the event you want to send.
You can also select a specific event, which will open up a sheet with more details about the event.
## Sending test events
You can send test events to your postback URL to ensure that it's working correctly. To do this:
Navigate to the [**Postbacks** page](https://partners.dub.co/profile/postbacks) and select the postback you want to test.
Click on the postback to open the postback details page.
Select the `⋮` icon on the top right of the page, and click on **Send test event**.
This will open up a modal where you can select the event you want to send.
![Send Test Postback Modal]() Select the event you want to send, and click on **Send test postback**.
Select the event you want to send, and click on **Send test postback**.
![Send Test Postback]() You'll see a success message and receive the postback event in the endpoint you specified.
## Secret rotation
If you need to rotate your postback signing secret (for example, after a suspected compromise), select the `⋮` icon on the postback details page and click on **Rotate secret**. A new secret will be generated.
## Retry Behaviour
If your postback endpoint does not respond with a success status code (2XX), we retry the request to ensure every message will be delivered. You can see all the retry attempts in your postback event logs.
Postbacks are retried until they are successfully delivered – with an exponential backoff to avoid overwhelming your postback endpoint (also known as the "[thundering herd problem](https://en.wikipedia.org/wiki/Thundering_herd_problem)"). The delay is capped at 24 hours from the 5th retry attempt onwards.
| Retry attempt | Delay |
| ------------- | -------- |
| 1st | 12s |
| 2nd | 2m 28s |
| 3rd | 30m 8s |
| 4th | 6h 7m 6s |
| 5th | 24h |
| 6th | 24h |
| ... | ... |
# Verify postback requests
Source: https://dub.co/docs/postbacks/verify-postback-requests
Learn how to verify postback requests to ensure they're coming from Dub.
With signature verification, you can determine if the postback came from Dub, and has not been tampered with in transit.
All postbacks are delivered with a `Dub-Signature` header. Dub generates this header using a secret key that only you and Dub know.
An example header looks like this:
```
Dub-Signature: c9ed6a2abf93f59d761eea69908d8de00f4437b5b6d7cd8b9bf5719cbe61bf46
```
## Finding your postback's signing secret
You can find your postback's signing secret when you create the postback or in the postback details page. Use the **Rotate secret** option if you need to generate a new secret.
Make sure to keep this secret safe by only storing it in a secure environment variable (e.g. `DUB_POSTBACK_SECRET`). Do not commit it to git or add it in any client-side code.
## Verifying a postback request
To verify, you can use the secret key to generate your own signature for each postback. If both signatures match then you can be sure that a received event came from Dub.
The steps required are:
1. Get the raw body of the request.
2. Extract the signature from the `Dub-Signature` header.
3. Calculate the HMAC of the raw body using the `SHA-256` hash function and the secret.
4. Compare the calculated `HMAC` with the one sent in the `Dub-Signature` header. If they match, the postback is verified.
Here's an example of how you can verify a postback request in different languages:
```javascript Next.js theme={null}
export const POST = async (req: Request) => {
const postbackSignature = req.headers.get("Dub-Signature");
if (!postbackSignature) {
return new Response("No signature provided.", { status: 401 });
}
// Copy this from the postback details page
const secret = process.env.DUB_POSTBACK_SECRET;
if (!secret) {
return new Response("No secret provided.", { status: 401 });
}
// Make sure to get the raw body from the request
const rawBody = await req.text();
const computedSignature = crypto
.createHmac("sha256", secret)
.update(rawBody)
.digest("hex");
if (postbackSignature !== computedSignature) {
return new Response("Invalid signature", { status: 400 });
}
// Handle the postback event
// ...
};
```
```python Python theme={null}
import hmac
import hashlib
def postback():
# Get the signature from the header
postback_signature = request.headers.get('Dub-Signature')
if not postback_signature:
abort(401, 'No signature provided.')
# Copy this from the postback details page
secret = os.environ.get('DUB_POSTBACK_SECRET')
if not secret:
abort(401, 'No secret provided.')
# Get the raw body of the request
raw_body = request.data
# Calculate the HMAC
computed_signature = hmac.new(
secret.encode('utf-8'),
raw_body,
hashlib.sha256
).hexdigest()
if postback_signature != computed_signature:
abort(400, 'Invalid signature')
# Handle the postback event
# ...
return 'OK', 200
```
```go Go theme={null}
import (
"crypto/hmac"
"crypto/sha256"
"encoding/hex"
"io/ioutil"
"net/http"
"os"
)
func postbackHandler(w http.ResponseWriter, r *http.Request) {
// Get the signature from the header
postbackSignature := r.Header.Get("Dub-Signature")
if postbackSignature == "" {
http.Error(w, "No signature provided.", http.StatusUnauthorized)
return
}
// Copy this from the postback details page
secret := os.Getenv("DUB_POSTBACK_SECRET")
if secret == "" {
http.Error(w, "No secret provided.", http.StatusUnauthorized)
return
}
// Read the raw body
body, err := ioutil.ReadAll(r.Body)
if err != nil {
http.Error(w, "Error reading request body", http.StatusInternalServerError)
return
}
// Calculate the HMAC
h := hmac.New(sha256.New, []byte(secret))
h.Write(body)
computedSignature := hex.EncodeToString(h.Sum(nil))
if postbackSignature != computedSignature {
http.Error(w, "Invalid signature", http.StatusBadRequest)
return
}
// Handle the postback event
// ...
w.WriteHeader(http.StatusOK)
w.Write([]byte("OK"))
}
```
## Why is signature verification important?
Signature verification is a crucial security measure that protects against request forgery and data tampering. Without verification, malicious actors could send fake postback events to your endpoint, potentially triggering unauthorized actions.
The HMAC-SHA256 signature verification process ensures that only Dub can generate valid postback requests and that payloads haven't been modified in transit. This provides both authentication (confirming the sender is Dub) and integrity (ensuring the message hasn't been tampered with).
# Client-side tracking
Source: https://dub.co/docs/quickstart/client
Learn how to track sales conversion events with Dub on the client-side
This feature is only available on [Business plans and
above](https://dub.co/pricing/partners).
Dub's powerful [attribution platform](/docs/concepts/attribution) lets you understand how well your links are translating to actual users and revenue dollars.
You'll see a success message and receive the postback event in the endpoint you specified.
## Secret rotation
If you need to rotate your postback signing secret (for example, after a suspected compromise), select the `⋮` icon on the postback details page and click on **Rotate secret**. A new secret will be generated.
## Retry Behaviour
If your postback endpoint does not respond with a success status code (2XX), we retry the request to ensure every message will be delivered. You can see all the retry attempts in your postback event logs.
Postbacks are retried until they are successfully delivered – with an exponential backoff to avoid overwhelming your postback endpoint (also known as the "[thundering herd problem](https://en.wikipedia.org/wiki/Thundering_herd_problem)"). The delay is capped at 24 hours from the 5th retry attempt onwards.
| Retry attempt | Delay |
| ------------- | -------- |
| 1st | 12s |
| 2nd | 2m 28s |
| 3rd | 30m 8s |
| 4th | 6h 7m 6s |
| 5th | 24h |
| 6th | 24h |
| ... | ... |
# Verify postback requests
Source: https://dub.co/docs/postbacks/verify-postback-requests
Learn how to verify postback requests to ensure they're coming from Dub.
With signature verification, you can determine if the postback came from Dub, and has not been tampered with in transit.
All postbacks are delivered with a `Dub-Signature` header. Dub generates this header using a secret key that only you and Dub know.
An example header looks like this:
```
Dub-Signature: c9ed6a2abf93f59d761eea69908d8de00f4437b5b6d7cd8b9bf5719cbe61bf46
```
## Finding your postback's signing secret
You can find your postback's signing secret when you create the postback or in the postback details page. Use the **Rotate secret** option if you need to generate a new secret.
Make sure to keep this secret safe by only storing it in a secure environment variable (e.g. `DUB_POSTBACK_SECRET`). Do not commit it to git or add it in any client-side code.
## Verifying a postback request
To verify, you can use the secret key to generate your own signature for each postback. If both signatures match then you can be sure that a received event came from Dub.
The steps required are:
1. Get the raw body of the request.
2. Extract the signature from the `Dub-Signature` header.
3. Calculate the HMAC of the raw body using the `SHA-256` hash function and the secret.
4. Compare the calculated `HMAC` with the one sent in the `Dub-Signature` header. If they match, the postback is verified.
Here's an example of how you can verify a postback request in different languages:
```javascript Next.js theme={null}
export const POST = async (req: Request) => {
const postbackSignature = req.headers.get("Dub-Signature");
if (!postbackSignature) {
return new Response("No signature provided.", { status: 401 });
}
// Copy this from the postback details page
const secret = process.env.DUB_POSTBACK_SECRET;
if (!secret) {
return new Response("No secret provided.", { status: 401 });
}
// Make sure to get the raw body from the request
const rawBody = await req.text();
const computedSignature = crypto
.createHmac("sha256", secret)
.update(rawBody)
.digest("hex");
if (postbackSignature !== computedSignature) {
return new Response("Invalid signature", { status: 400 });
}
// Handle the postback event
// ...
};
```
```python Python theme={null}
import hmac
import hashlib
def postback():
# Get the signature from the header
postback_signature = request.headers.get('Dub-Signature')
if not postback_signature:
abort(401, 'No signature provided.')
# Copy this from the postback details page
secret = os.environ.get('DUB_POSTBACK_SECRET')
if not secret:
abort(401, 'No secret provided.')
# Get the raw body of the request
raw_body = request.data
# Calculate the HMAC
computed_signature = hmac.new(
secret.encode('utf-8'),
raw_body,
hashlib.sha256
).hexdigest()
if postback_signature != computed_signature:
abort(400, 'Invalid signature')
# Handle the postback event
# ...
return 'OK', 200
```
```go Go theme={null}
import (
"crypto/hmac"
"crypto/sha256"
"encoding/hex"
"io/ioutil"
"net/http"
"os"
)
func postbackHandler(w http.ResponseWriter, r *http.Request) {
// Get the signature from the header
postbackSignature := r.Header.Get("Dub-Signature")
if postbackSignature == "" {
http.Error(w, "No signature provided.", http.StatusUnauthorized)
return
}
// Copy this from the postback details page
secret := os.Getenv("DUB_POSTBACK_SECRET")
if secret == "" {
http.Error(w, "No secret provided.", http.StatusUnauthorized)
return
}
// Read the raw body
body, err := ioutil.ReadAll(r.Body)
if err != nil {
http.Error(w, "Error reading request body", http.StatusInternalServerError)
return
}
// Calculate the HMAC
h := hmac.New(sha256.New, []byte(secret))
h.Write(body)
computedSignature := hex.EncodeToString(h.Sum(nil))
if postbackSignature != computedSignature {
http.Error(w, "Invalid signature", http.StatusBadRequest)
return
}
// Handle the postback event
// ...
w.WriteHeader(http.StatusOK)
w.Write([]byte("OK"))
}
```
## Why is signature verification important?
Signature verification is a crucial security measure that protects against request forgery and data tampering. Without verification, malicious actors could send fake postback events to your endpoint, potentially triggering unauthorized actions.
The HMAC-SHA256 signature verification process ensures that only Dub can generate valid postback requests and that payloads haven't been modified in transit. This provides both authentication (confirming the sender is Dub) and integrity (ensuring the message hasn't been tampered with).
# Client-side tracking
Source: https://dub.co/docs/quickstart/client
Learn how to track sales conversion events with Dub on the client-side
This feature is only available on [Business plans and
above](https://dub.co/pricing/partners).
Dub's powerful [attribution platform](/docs/concepts/attribution) lets you understand how well your links are translating to actual users and revenue dollars.
![Conversion analytics]() In this guide, we'll learn how to track conversion events with Dub using client-side tracking.
Client-side conversion tracking comes with the following limitations:
* **Ad blockers** – Users with ad blockers may prevent tracking scripts from loading.
* **JavaScript disabled** – Events won’t be tracked if users have JavaScript disabled.
* **Network issues** – Failed network requests won’t retry automatically.
* **Privacy concerns** – Some users may block client-side tracking for privacy reasons.
For more accurate conversion tracking, consider using [server-side conversion tracking](/docs/quickstart/server).
## Step 1: Enable conversion tracking for your links
First, you'll need to enable conversion tracking for your Dub links to be able to start tracking conversions:
If you're using [Dub Partners](https://dub.co/partners), you can skip this
step since partner links will have conversion tracking enabled by default.
To enable conversion tracking for all future links in a workspace, you can do the following:
To enable conversion tracking for all future links in a workspace, you can do the following:
1. Navigate to your [workspace's Tracking settings page](https://app.dub.co/settings/tracking).
2. Toggle the **Workspace-level Conversion Tracking** switch to enable conversion tracking for the workspace.
In this guide, we'll learn how to track conversion events with Dub using client-side tracking.
Client-side conversion tracking comes with the following limitations:
* **Ad blockers** – Users with ad blockers may prevent tracking scripts from loading.
* **JavaScript disabled** – Events won’t be tracked if users have JavaScript disabled.
* **Network issues** – Failed network requests won’t retry automatically.
* **Privacy concerns** – Some users may block client-side tracking for privacy reasons.
For more accurate conversion tracking, consider using [server-side conversion tracking](/docs/quickstart/server).
## Step 1: Enable conversion tracking for your links
First, you'll need to enable conversion tracking for your Dub links to be able to start tracking conversions:
If you're using [Dub Partners](https://dub.co/partners), you can skip this
step since partner links will have conversion tracking enabled by default.
To enable conversion tracking for all future links in a workspace, you can do the following:
To enable conversion tracking for all future links in a workspace, you can do the following:
1. Navigate to your [workspace's Tracking settings page](https://app.dub.co/settings/tracking).
2. Toggle the **Workspace-level Conversion Tracking** switch to enable conversion tracking for the workspace.
![Enabling conversion tracking for a workspace]() This option will enable conversion tracking in the [Dub Link Builder](/help/article/dub-link-builder) for all future links.
If you don't want to enable conversion tracking for all your links in a workspace, you can also opt to enable it on a link-level.
To enable conversion tracking for a specific link, open the [Dub Link Builder](/help/article/dub-link-builder) for a link and toggle the **Conversion Tracking** switch.
This option will enable conversion tracking in the [Dub Link Builder](/help/article/dub-link-builder) for all future links.
If you don't want to enable conversion tracking for all your links in a workspace, you can also opt to enable it on a link-level.
To enable conversion tracking for a specific link, open the [Dub Link Builder](/help/article/dub-link-builder) for a link and toggle the **Conversion Tracking** switch.
![Enabling conversion tracking for a link]() You can also use the `C` keyboard shortcut when inside the link builder to
quickly enable conversion tracking for a given link.
Alternatively, you can also enable conversion tracking programmatically via the [Dub API](/docs/api-reference/introduction). All you need to do is pass `trackConversion: true` when creating or updating a link:
```javascript Node.js theme={null}
const link = await dub.links.create({
url: "https://dub.co",
trackConversion: true,
});
```
```python Python theme={null}
link = d.links.create(url="https://dub.co", track_conversion=True)
```
```go Go theme={null}
link, err := d.Links.Create(ctx, &dub.CreateLinkRequest{
URL: "https://dub.co",
TrackConversion: true,
})
```
```ruby Ruby theme={null}
s.links.create_many(
::OpenApiSDK::Operations::CreateLinkRequest.new(
url: "https://dub.co",
track_conversion: true,
)
)
```
## Step 2: Install the Dub Analytics script
Then, you'll need to install the Dub Analytics script and set up the necessary configuration for client-side conversion tracking:
Then, you'll need to allowlist your site's domain to allow the client-side conversion events to be ingested by Dub.
To do that, navigate to your [workspace's Tracking settings page](https://app.dub.co/settings/tracking) and add your site's domain to the **Allowed Hostnames** list.
This provides an additional layer of security by ensuring only authorized domains can track conversions using your publishable key.
You can also use the `C` keyboard shortcut when inside the link builder to
quickly enable conversion tracking for a given link.
Alternatively, you can also enable conversion tracking programmatically via the [Dub API](/docs/api-reference/introduction). All you need to do is pass `trackConversion: true` when creating or updating a link:
```javascript Node.js theme={null}
const link = await dub.links.create({
url: "https://dub.co",
trackConversion: true,
});
```
```python Python theme={null}
link = d.links.create(url="https://dub.co", track_conversion=True)
```
```go Go theme={null}
link, err := d.Links.Create(ctx, &dub.CreateLinkRequest{
URL: "https://dub.co",
TrackConversion: true,
})
```
```ruby Ruby theme={null}
s.links.create_many(
::OpenApiSDK::Operations::CreateLinkRequest.new(
url: "https://dub.co",
track_conversion: true,
)
)
```
## Step 2: Install the Dub Analytics script
Then, you'll need to install the Dub Analytics script and set up the necessary configuration for client-side conversion tracking:
Then, you'll need to allowlist your site's domain to allow the client-side conversion events to be ingested by Dub.
To do that, navigate to your [workspace's Tracking settings page](https://app.dub.co/settings/tracking) and add your site's domain to the **Allowed Hostnames** list.
This provides an additional layer of security by ensuring only authorized domains can track conversions using your publishable key.
![Enabling conversion tracking for a workspace]() You can group your hostnames when adding them to the allow list:
* `example.com`: Tracks traffic **only** from `example.com`.
* `*.example.com`: Tracks traffic from **all subdomains** of `example.com`, but **not** from `example.com` itself.
When testing things out locally, you can add `localhost` to the **Allowed
Hostnames** list temporarily. This will allow local events to be ingested by
Dub. Don't forget to remove it once you're ready to go live!
Before you can track conversions on the client-side, you need to generate a [publishable key](/docs/api-reference/authentication#publishable-keys) from your Dub workspace.
To do that, navigate to your [workspace's Tracking settings page](https://app.dub.co/settings/tracking) and generate a new publishable key under the **Publishable Key** section.
You can group your hostnames when adding them to the allow list:
* `example.com`: Tracks traffic **only** from `example.com`.
* `*.example.com`: Tracks traffic from **all subdomains** of `example.com`, but **not** from `example.com` itself.
When testing things out locally, you can add `localhost` to the **Allowed
Hostnames** list temporarily. This will allow local events to be ingested by
Dub. Don't forget to remove it once you're ready to go live!
Before you can track conversions on the client-side, you need to generate a [publishable key](/docs/api-reference/authentication#publishable-keys) from your Dub workspace.
To do that, navigate to your [workspace's Tracking settings page](https://app.dub.co/settings/tracking) and generate a new publishable key under the **Publishable Key** section.
![Enabling conversion tracking for a workspace]() Next, install the Dub Analytics script on your website/web application.
You can install the Dub Analytics script in several different ways:
}
href="/docs/sdks/client-side/installation-guides/framer"
/>
You must configure the **publishable key** you generated in step 1 when
installing the analytics script. Without this key, client-side conversion
tracking will not work.
```html HTML theme={null}
```
```typescript React/Next.js theme={null}
import { Analytics as DubAnalytics } from '@dub/analytics/react';
export default function RootLayout({
children,
}) {
return (
{children}
);
}
```
## Step 3: Track lead events
Looking to track sales without a prior lead event? Check out our [direct sale
tracking guide](/docs/conversions/sales/direct).
Once the analytics script is installed, you can start tracking lead events in your application on the client-side.
### Track leads from URL query parameters (recommended)
If you redirect users to a thank-you page after a successful action, you can track leads by reading query parameters from the URL.
```html HTML theme={null}
Thank You
Next, install the Dub Analytics script on your website/web application.
You can install the Dub Analytics script in several different ways:
}
href="/docs/sdks/client-side/installation-guides/framer"
/>
You must configure the **publishable key** you generated in step 1 when
installing the analytics script. Without this key, client-side conversion
tracking will not work.
```html HTML theme={null}
```
```typescript React/Next.js theme={null}
import { Analytics as DubAnalytics } from '@dub/analytics/react';
export default function RootLayout({
children,
}) {
return (
{children}
);
}
```
## Step 3: Track lead events
Looking to track sales without a prior lead event? Check out our [direct sale
tracking guide](/docs/conversions/sales/direct).
Once the analytics script is installed, you can start tracking lead events in your application on the client-side.
### Track leads from URL query parameters (recommended)
If you redirect users to a thank-you page after a successful action, you can track leads by reading query parameters from the URL.
```html HTML theme={null}
Thank You
Thank you for signing up!
```
```typescript React/Next.js theme={null}
import { useAnalytics } from "@dub/analytics/react";
import { useEffect } from "react";
export function ThankYouPage() {
const { trackLead } = useAnalytics();
useEffect(() => {
// Get query parameters from URL
const params = new URLSearchParams(window.location.search);
const email = params.get("email");
const name = params.get("name");
if (email) {
// Track the lead event
trackLead({
eventName: "Sign Up",
customerExternalId: email, // can also be customer email
customerName: name || undefined,
customerEmail: email,
});
}
}, [trackLead]);
return Thank you for signing up!
;
}
```
### Track leads from form submissions
You can also track leads directly when users submit a form on your website.
```html HTML theme={null}
Sign Up
```
```typescript React/Next.js theme={null}
import { useAnalytics } from "@dub/analytics/react";
import { useState } from "react";
export function SignUpForm() {
const { trackLead } = useAnalytics();
const [name, setName] = useState("");
const [email, setEmail] = useState("");
const handleSubmit = (e: React.FormEvent) => {
e.preventDefault();
// Track the lead event
trackLead({
eventName: "Sign Up",
customerExternalId: email,
customerName: name,
customerEmail: email,
});
};
return (
);
}
```
Here are the properties you can include when sending a lead event:
| Property | Required | Description |
| :------------------- | :------- | :------------------------------------------------------------------------------------------------------------------------------------------------------------------------------------------------------------------------------------------------------------------------------------------------------------------------------------------------------------------------------------- |
| `clickId` | **Yes** | The unique ID of the click that the lead conversion event is attributed to. You can read this value from `dub_id` cookie. If an empty string is provided (i.e. if you're using [tracking a deferred lead event](/docs/conversions/leads/deferred)), Dub will try to find an existing customer with the provided `customerExternalId` and use the `clickId` from the customer if found. |
| `eventName` | **Yes** | The name of the lead event to track. Can also be used as a unique identifier to associate a given lead event for a customer for a subsequent sale event (via the `leadEventName` prop in `/track/sale`). |
| `customerExternalId` | **Yes** | The unique ID of the customer in your system. Will be used to identify and attribute all future events to this customer. |
| `customerName` | No | The name of the customer. If not passed, a random name will be generated (e.g. "Big Red Caribou"). |
| `customerEmail` | No | The email address of the customer. |
| `customerAvatar` | No | The avatar URL of the customer. |
| `mode` | No | The mode to use for tracking the lead event. `async` will not block the request; `wait` will block the request until the lead event is fully recorded in Dub; `deferred` will defer the lead event creation to a subsequent request. |
| `metadata` | No | Additional metadata to be stored with the lead event. Max 10,000 characters. |
**When to track leads**
You should track lead events after successful user actions such as:
* User registration or account creation
* Newsletter subscription
* Contact form submission
* Demo request or trial signup
* Download of gated content
Ensure the event is triggered **only after the backend confirms the action was completed successfully**. This guarantees accurate lead data and prevents false or incomplete entries.
## Step 4: Track sale events
Once the analytics script is installed, you can start tracking sale events in your application on the client-side.
### Track sales from URL query parameters (recommended)
If you redirect users to a confirmation page after a successful purchase, you can track sales by reading query parameters from the URL.
```html HTML theme={null}
Order Confirmation
Thank you for your purchase!
```
```typescript React/Next.js theme={null}
import { useAnalytics } from "@dub/analytics/react";
import { useEffect } from "react";
export function OrderConfirmationPage() {
const { trackSale } = useAnalytics();
useEffect(() => {
// Get query parameters from URL
const params = new URLSearchParams(window.location.search);
const customerId = params.get("customer_id");
const amount = params.get("amount");
const invoiceId = params.get("invoice_id");
if (customerId && amount) {
// Track the sale event
trackSale({
eventName: "Purchase",
customerExternalId: customerId, // can also be customer email
amount: parseInt(amount), // Amount in cents
invoiceId: invoiceId || undefined,
// Additional props for direct sale tracking (without prior lead event):
// clickId: "cm3w...", // Read from dub_id cookie
// customerName: "John Doe",
// customerEmail: "john@example.com",
// customerAvatar: "https://example.com/avatar.jpg",
});
}
}, [trackSale]);
return Thank you for your purchase!
;
}
```
### Track sales from form submissions
You can also track sales directly when users complete a checkout form on your website.
```html HTML theme={null}
Checkout
```
```typescript React/Next.js theme={null}
import { useAnalytics } from "@dub/analytics/react";
import { useState } from "react";
export function CheckoutForm() {
const { trackSale } = useAnalytics();
// …
}
const handleSubmit = (e: React.FormEvent) => {
e.preventDefault();
// Track the sale event
trackSale({
eventName: "Purchase",
customerExternalId: "cus_RBfbD57H", // can also be customer email
amount: 5000, // $50.00
invoiceId: "in_1MtHbELkdIwH",
// For direct sale tracking (without prior lead event):
// clickId: "cm3w...", // Read from dub_id cookie
// customerName: "John Doe",
// customerEmail: "john@example.com",
// customerAvatar: "https://example.com/avatar.jpg",
});
};
return (
);
}
```
Here are the properties you can include when sending a sale event:
| Property | Required | Description |
| :------------------- | :------- | :--------------------------------------------------------------------------------------------------------------------------------------------------------- |
| `customerExternalId` | **Yes** | The unique ID of the customer in your system. Will be used to identify and attribute all future events to this customer. |
| `amount` | **Yes** | The amount of the sale in cents. |
| `paymentProcessor` | No | The payment processor that processed the sale (e.g. [Stripe](/docs/integrations/stripe), [Shopify](/docs/integrations/stripe)). Defaults to "custom". |
| `eventName` | No | The name of the event. Defaults to "Purchase". |
| `invoiceId` | No | The invoice ID of the sale. Can be used as a idempotency key – only one sale event can be recorded for a given invoice ID. |
| `currency` | No | The currency of the sale. Defaults to "usd". |
| `metadata` | No | An object containing additional information about the sale. |
| `clickId` | No | **\[For direct sale tracking]**: The unique ID of the click that the sale conversion event is attributed to. You can read this value from `dub_id` cookie. |
| `customerName` | No | **\[For direct sale tracking]**: The name of the customer. If not passed, a random name will be generated. |
| `customerEmail` | No | **\[For direct sale tracking]**: The email address of the customer. |
| `customerAvatar` | No | **\[For direct sale tracking]**: The avatar URL of the customer. |
**When to track sale**
Track sale events only after a user successfully completes a purchase or payment-related action, such as:
* Completing a checkout or order
* Subscription payment
* Invoice payment
* Any paid trial or demo conversion
Ensure the event is triggered **only after the backend confirms the payment was successful**. This guarantees accurate sale data and prevents false or incomplete entries.
Looking to track refunds? Check out our [refunds tracking
guide](/docs/conversions/sales/refunds).
## Step 5: View your conversions
And that's it – you're all set! You can now sit back, relax, and watch your conversion revenue grow. We provide 3 different views to help you understand your conversions:
* **Time-series**: A [time-series view](https://app.dub.co/dub/analytics?view=timeseries) of the number clicks, leads and sales.
![Time-series line chart]() * **Funnel chart**: A [funnel chart view](http://app.dub.co/analytics?view=funnel) visualizing the conversion & dropoff rates across the different steps in the conversion funnel (clicks → leads → sales).
* **Funnel chart**: A [funnel chart view](http://app.dub.co/analytics?view=funnel) visualizing the conversion & dropoff rates across the different steps in the conversion funnel (clicks → leads → sales).
![Funnel chart view showing the conversion & dropoff rates from clicks → leads → sales]() * **Real-time events stream**: A [real-time events stream](https://app.dub.co/events) of every single conversion event that occurs across all your links in your workspace.
* **Real-time events stream**: A [real-time events stream](https://app.dub.co/events) of every single conversion event that occurs across all your links in your workspace.
![The Events Stream dashboard on Dub]() # Server-side tracking
Source: https://dub.co/docs/quickstart/server
Learn how to track conversion events with Dub using server-side tracking.
This feature is only available on [Business plans and
above](https://dub.co/pricing/partners).
Dub's powerful [attribution platform](/docs/concepts/attribution) lets you understand how well your links are translating to actual users and revenue dollars.
# Server-side tracking
Source: https://dub.co/docs/quickstart/server
Learn how to track conversion events with Dub using server-side tracking.
This feature is only available on [Business plans and
above](https://dub.co/pricing/partners).
Dub's powerful [attribution platform](/docs/concepts/attribution) lets you understand how well your links are translating to actual users and revenue dollars.
![Conversion analytics]() In this guide, we'll learn how to track conversion events with Dub using server-side tracking.
The recommended way to track conversions on Dub is using server-side tracking, which is more reliable than [client-side tracking](/docs/quickstart/client).
## Step 1: Enable conversion tracking for your links
First, you'll need to enable conversion tracking for your Dub links to be able to start tracking conversions:
If you're using [Dub Partners](https://dub.co/partners), you can skip this
step since partner links will have conversion tracking enabled by default.
To enable conversion tracking for all future links in a workspace, you can do the following:
To enable conversion tracking for all future links in a workspace, you can do the following:
1. Navigate to your [workspace's Tracking settings page](https://app.dub.co/settings/tracking).
2. Toggle the **Workspace-level Conversion Tracking** switch to enable conversion tracking for the workspace.
In this guide, we'll learn how to track conversion events with Dub using server-side tracking.
The recommended way to track conversions on Dub is using server-side tracking, which is more reliable than [client-side tracking](/docs/quickstart/client).
## Step 1: Enable conversion tracking for your links
First, you'll need to enable conversion tracking for your Dub links to be able to start tracking conversions:
If you're using [Dub Partners](https://dub.co/partners), you can skip this
step since partner links will have conversion tracking enabled by default.
To enable conversion tracking for all future links in a workspace, you can do the following:
To enable conversion tracking for all future links in a workspace, you can do the following:
1. Navigate to your [workspace's Tracking settings page](https://app.dub.co/settings/tracking).
2. Toggle the **Workspace-level Conversion Tracking** switch to enable conversion tracking for the workspace.
![Enabling conversion tracking for a workspace]() This option will enable conversion tracking in the [Dub Link Builder](/help/article/dub-link-builder) for all future links.
If you don't want to enable conversion tracking for all your links in a workspace, you can also opt to enable it on a link-level.
To enable conversion tracking for a specific link, open the [Dub Link Builder](/help/article/dub-link-builder) for a link and toggle the **Conversion Tracking** switch.
This option will enable conversion tracking in the [Dub Link Builder](/help/article/dub-link-builder) for all future links.
If you don't want to enable conversion tracking for all your links in a workspace, you can also opt to enable it on a link-level.
To enable conversion tracking for a specific link, open the [Dub Link Builder](/help/article/dub-link-builder) for a link and toggle the **Conversion Tracking** switch.
![Enabling conversion tracking for a link]() You can also use the `C` keyboard shortcut when inside the link builder to
quickly enable conversion tracking for a given link.
Alternatively, you can also enable conversion tracking programmatically via the [Dub API](/docs/api-reference/introduction). All you need to do is pass `trackConversion: true` when creating or updating a link:
```javascript Node.js theme={null}
const link = await dub.links.create({
url: "https://dub.co",
trackConversion: true,
});
```
```python Python theme={null}
link = d.links.create(url="https://dub.co", track_conversion=True)
```
```go Go theme={null}
link, err := d.Links.Create(ctx, &dub.CreateLinkRequest{
URL: "https://dub.co",
TrackConversion: true,
})
```
```ruby Ruby theme={null}
s.links.create_many(
::OpenApiSDK::Operations::CreateLinkRequest.new(
url: "https://dub.co",
track_conversion: true,
)
)
```
## Step 2: Install the Dub Analytics script
Next, you'll need to install the [Dub Analytics script](/docs/sdks/client-side/installation-guides/manual).
This script detects the `dub_id` query parameter and storing it as a first-party cookie, which will be used to attribute subsequent conversion events to the original link.
You can also use the `C` keyboard shortcut when inside the link builder to
quickly enable conversion tracking for a given link.
Alternatively, you can also enable conversion tracking programmatically via the [Dub API](/docs/api-reference/introduction). All you need to do is pass `trackConversion: true` when creating or updating a link:
```javascript Node.js theme={null}
const link = await dub.links.create({
url: "https://dub.co",
trackConversion: true,
});
```
```python Python theme={null}
link = d.links.create(url="https://dub.co", track_conversion=True)
```
```go Go theme={null}
link, err := d.Links.Create(ctx, &dub.CreateLinkRequest{
URL: "https://dub.co",
TrackConversion: true,
})
```
```ruby Ruby theme={null}
s.links.create_many(
::OpenApiSDK::Operations::CreateLinkRequest.new(
url: "https://dub.co",
track_conversion: true,
)
)
```
## Step 2: Install the Dub Analytics script
Next, you'll need to install the [Dub Analytics script](/docs/sdks/client-side/installation-guides/manual).
This script detects the `dub_id` query parameter and storing it as a first-party cookie, which will be used to attribute subsequent conversion events to the original link.
![A diagram showing how click events are tracked in the conversion funnel]() You can install the Dub Analytics script in several different ways:
}
href="/docs/sdks/client-side/installation-guides/framer"
/>
You can **verify the installation** with the following tests:
1. Open the browser console and type in `_dubAnalytics` – if the script is installed correctly, you should see the `_dubAnalytics` object in the console.
2. Add the `?dub_id=test` query parameter to your website URL and make sure that the `dub_id` cookie is being set in your browser.
If both of these checks pass, the script is installed correctly. Otherwise, please make sure:
* The analytics script was added to the `` section of the page
* If you're using a content delivery network (CDN), make sure to purge any cached content
## Step 3: Install the Dub server-side SDK
Depending on which framework you're using, you can use our [native SDKs](/docs/sdks/overview) to track conversion events:
TypeScript library for the Dub API
Go library for the Dub API
Python library for the Dub API
Ruby library for the Dub API
PHP library for the Dub API
If you're using a framework that isn't listed, you can use the Dub REST API to track events on the server-side:
* [`POST /track/lead`](/docs/api-reference/track/lead)
* [`POST /track/sale`](/docs/api-reference/track/sale)
## Step 4: Track conversion events
Now comes the fun part – tracking conversion events.
### Tracking lead events
The first event you'll want to track is a `lead` event. This happens when a user performs an action that indicates interest in your product or service. This could be anything from:
* Signing up for an account
* Adding a product to cart
* Joining a mailing list
You can install the Dub Analytics script in several different ways:
}
href="/docs/sdks/client-side/installation-guides/framer"
/>
You can **verify the installation** with the following tests:
1. Open the browser console and type in `_dubAnalytics` – if the script is installed correctly, you should see the `_dubAnalytics` object in the console.
2. Add the `?dub_id=test` query parameter to your website URL and make sure that the `dub_id` cookie is being set in your browser.
If both of these checks pass, the script is installed correctly. Otherwise, please make sure:
* The analytics script was added to the `` section of the page
* If you're using a content delivery network (CDN), make sure to purge any cached content
## Step 3: Install the Dub server-side SDK
Depending on which framework you're using, you can use our [native SDKs](/docs/sdks/overview) to track conversion events:
TypeScript library for the Dub API
Go library for the Dub API
Python library for the Dub API
Ruby library for the Dub API
PHP library for the Dub API
If you're using a framework that isn't listed, you can use the Dub REST API to track events on the server-side:
* [`POST /track/lead`](/docs/api-reference/track/lead)
* [`POST /track/sale`](/docs/api-reference/track/sale)
## Step 4: Track conversion events
Now comes the fun part – tracking conversion events.
### Tracking lead events
The first event you'll want to track is a `lead` event. This happens when a user performs an action that indicates interest in your product or service. This could be anything from:
* Signing up for an account
* Adding a product to cart
* Joining a mailing list
![A diagram showing how lead events are tracked in the conversion funnel]() Our most common lead event is `Sign Up`, which happens when a user signs up for an account. Depending on which authentication framework you're using, here are a few examples of how to send `Sign Up` lead events:
The lead event will serve as the source of truth for the customer's identity and which link they came from. This means that all subsequent actions performed by the customer (e.g. upgrading their plan, purchasing a product) will automatically be attributed to the original link.
### Tracking sale events
The second event you'll want to send is a `sale` event. This happens when a user purchases your product or service. This could be anything from:
* Subscribing to a paid plan
* Usage expansion (upgrading from one plan to another)
* Purchasing a product
Our most common lead event is `Sign Up`, which happens when a user signs up for an account. Depending on which authentication framework you're using, here are a few examples of how to send `Sign Up` lead events:
The lead event will serve as the source of truth for the customer's identity and which link they came from. This means that all subsequent actions performed by the customer (e.g. upgrading their plan, purchasing a product) will automatically be attributed to the original link.
### Tracking sale events
The second event you'll want to send is a `sale` event. This happens when a user purchases your product or service. This could be anything from:
* Subscribing to a paid plan
* Usage expansion (upgrading from one plan to another)
* Purchasing a product
![A diagram showing how sale events are tracked in the conversion funnel]() Depending on which payment processor you're using, we offer native integrations for the following:
Alternatively, you can also send sale events manually using [our SDKs](/docs/sdks/overview) or the [`POST /track/sale` API endpoint](/docs/api-reference/track/sale).
Looking to track sales without a prior lead event? Check out our [direct sale
tracking guide](/docs/conversions/sales/direct).
Looking to track refunds? Check out our [refunds tracking guide](/docs/conversions/sales/refunds).
## Step 5: View your conversions
Once you've enabled conversion tracking for your links, all your tracked conversions will show up on your [Analytics dashboard](https://app.dub.co/analytics). We provide 3 different views to help you understand your conversions:
* **Time-series**: A [time-series view](https://app.dub.co/dub/analytics?view=timeseries) of the number clicks, leads and sales.
Depending on which payment processor you're using, we offer native integrations for the following:
Alternatively, you can also send sale events manually using [our SDKs](/docs/sdks/overview) or the [`POST /track/sale` API endpoint](/docs/api-reference/track/sale).
Looking to track sales without a prior lead event? Check out our [direct sale
tracking guide](/docs/conversions/sales/direct).
Looking to track refunds? Check out our [refunds tracking guide](/docs/conversions/sales/refunds).
## Step 5: View your conversions
Once you've enabled conversion tracking for your links, all your tracked conversions will show up on your [Analytics dashboard](https://app.dub.co/analytics). We provide 3 different views to help you understand your conversions:
* **Time-series**: A [time-series view](https://app.dub.co/dub/analytics?view=timeseries) of the number clicks, leads and sales.
![Time-series line chart]() * **Funnel chart**: A [funnel chart view](http://app.dub.co/analytics?view=funnel) visualizing the conversion & dropoff rates across the different steps in the conversion funnel (clicks → leads → sales).
* **Funnel chart**: A [funnel chart view](http://app.dub.co/analytics?view=funnel) visualizing the conversion & dropoff rates across the different steps in the conversion funnel (clicks → leads → sales).
![Funnel chart view showing the conversion & dropoff rates from clicks → leads → sales]() * **Real-time events stream**: A [real-time events stream](https://app.dub.co/events) of every single conversion event that occurs across all your links in your workspace.
* **Real-time events stream**: A [real-time events stream](https://app.dub.co/events) of every single conversion event that occurs across all your links in your workspace.
![The Events Stream dashboard on Dub]() ## Example Apps
Tracking Stripe sale events with Dub.
Tracking conversion events with Segment and Dub.
Tracking Clerk signup events with Dub.
Tracking Cal.com booking events with Dub.
# React Native
Source: https://dub.co/docs/sdks/client-side-mobile/installation-guides/react-native
How to add the Dub React Native SDK to your React Native project
## Prerequisites
Before you get started, make sure you have the following:
1. Obtain your [publishable key](/docs/api-reference/authentication#publishable-keys) (`DUB_PUBLISHABLE_KEY`) from your [workspace's Tracking settings page](https://app.dub.co/settings/tracking).
2. You would also want to have your [custom domain](https://app.dub.co/settings/domains) (`DUB_DOMAIN`) handy as well.
3. (Optional) If you plan to track conversions, make sure to [enable conversion tracking for your links](/docs/quickstart/server#step-1-enable-conversion-tracking-for-your-links).
## Quickstart
This quick start guide will show you how to get started with Dub React Native SDK in your React Native app.
```sh theme={null}
# With npm
npm install @dub/react-native
# With yarn
yarn add @dub/react-native
# With pnpm
pnpm add @dub/react-native
```
You must call `init` on your `dub` instance with your publishable key and domain prior to being able to use the `dub` instance. We provide two ways to initialize the SDK:
**Option 1**: Use the `DubProvider` to wrap your app
```typescript theme={null}
import { DubProvider } from "@dub/react-native";
export default function App() {
return (
// Your app content...
);
}
```
**Option 2**: Manually initialize the Dub SDK
```typescript theme={null}
import dub from "@dub/react-native";
export default function App() {
useEffect(() => {
dub.init({
publishableKey: "",
domain: "",
});
}, []);
// Return your app...
}
```
Call `trackOpen` on the `dub` instance to track deep link and deferred deep link open events.
The `trackOpen` function should be called once without a `deepLink` parameter on first launch, and then
again with the `deepLink` parameter whenever the app is opened from a deep link.
If your iOS app uses third-party SDKs that handle URLs (e.g., Facebook/Meta SDK), make sure your `AppDelegate`'s `openURL:` handler doesn't short-circuit with `||`. When a third-party SDK returns `YES` first, `RCTLinkingManager` never fires and `trackOpen` won't be called. See the [troubleshooting guide](/docs/concepts/deep-links/quickstart#troubleshooting-deep-links) for details and a fix.
```typescript React Native expandable theme={null}
import { useState, useEffect, useRef } from "react";
import { Linking } from "react-native";
import AsyncStorage from "@react-native-async-storage/async-storage";
import dub from "@dub/react-native";
export default function App() {
useEffect(() => {
dub.init({
publishableKey: "",
domain: "",
});
// Check if this is first launch
const isFirstLaunch = await AsyncStorage.getItem("is_first_launch");
if (isFirstLaunch === null) {
await handleFirstLaunch();
await AsyncStorage.setItem("is_first_launch", "false");
} else {
// Handle initial deep link url (Android only)
const url = await Linking.getInitialURL();
if (url) {
await handleDeepLink(url);
}
}
const linkingListener = Linking.addEventListener("url", (event) => {
handleDeepLink(event.url);
});
return () => {
linkingListener.remove();
};
}, []);
const handleFirstLaunch = async (
deepLinkUrl?: string | null | undefined
): Promise => {
try {
const response = await dub.trackOpen(deepLinkUrl);
const destinationURL = response.link?.url;
// Navigate to the destination URL
} catch (error) {
// Handle error
}
};
// Return your app...
}
```
To track lead events, call `trackLead` on the `dub` instance with your customer's external ID, name, and email.
```typescript React Native theme={null}
import dub from "@dub/react-native";
try {
await dub.trackLead({
eventName: "User Sign Up",
customerExternalId: user.id,
customerName: user.name,
customerEmail: user.email,
});
} catch (error) {
// Handle sale tracking error
}
```
Here are the properties you can include when sending a lead event:
| Property | Required | Description |
| :------------------- | :------- | :------------------------------------------------------------------------------------------------------------------------------------------------------------------------------------------------------------------------------------------------------------------------------------------------------------------------------------------------------------------------------------- |
| `clickId` | **Yes** | The unique ID of the click that the lead conversion event is attributed to. You can read this value from `dub_id` cookie. If an empty string is provided (i.e. if you're using [tracking a deferred lead event](/docs/conversions/leads/deferred)), Dub will try to find an existing customer with the provided `customerExternalId` and use the `clickId` from the customer if found. |
| `eventName` | **Yes** | The name of the lead event to track. Can also be used as a unique identifier to associate a given lead event for a customer for a subsequent sale event (via the `leadEventName` prop in `/track/sale`). |
| `customerExternalId` | **Yes** | The unique ID of the customer in your system. Will be used to identify and attribute all future events to this customer. |
| `customerName` | No | The name of the customer. If not passed, a random name will be generated (e.g. "Big Red Caribou"). |
| `customerEmail` | No | The email address of the customer. |
| `customerAvatar` | No | The avatar URL of the customer. |
| `mode` | No | The mode to use for tracking the lead event. `async` will not block the request; `wait` will block the request until the lead event is fully recorded in Dub; `deferred` will defer the lead event creation to a subsequent request. |
| `metadata` | No | Additional metadata to be stored with the lead event. Max 10,000 characters. |
To track sale events, call `trackSale` on the `dub` instance with your customer's user ID and purchase information.
```typescript React Native theme={null}
import dub from "@dub/react-native";
try {
await dub.trackSale({
customerExternalId: user.id,
amount: product.price.amount,
currency: "usd",
eventName: "Purchase",
});
} catch (error) {
// Handle sale tracking error
}
```
Here are the properties you can include when sending a sale event:
| Property | Required | Description |
| :------------------- | :------- | :--------------------------------------------------------------------------------------------------------------------------------------------------------- |
| `customerExternalId` | **Yes** | The unique ID of the customer in your system. Will be used to identify and attribute all future events to this customer. |
| `amount` | **Yes** | The amount of the sale in cents. |
| `paymentProcessor` | No | The payment processor that processed the sale (e.g. [Stripe](/docs/integrations/stripe), [Shopify](/docs/integrations/stripe)). Defaults to "custom". |
| `eventName` | No | The name of the event. Defaults to "Purchase". |
| `invoiceId` | No | The invoice ID of the sale. Can be used as a idempotency key – only one sale event can be recorded for a given invoice ID. |
| `currency` | No | The currency of the sale. Defaults to "usd". |
| `metadata` | No | An object containing additional information about the sale. |
| `clickId` | No | **\[For direct sale tracking]**: The unique ID of the click that the sale conversion event is attributed to. You can read this value from `dub_id` cookie. |
| `customerName` | No | **\[For direct sale tracking]**: The name of the customer. If not passed, a random name will be generated. |
| `customerEmail` | No | **\[For direct sale tracking]**: The email address of the customer. |
| `customerAvatar` | No | **\[For direct sale tracking]**: The avatar URL of the customer. |
## Examples
Here are some open-source code examples that you can reference:
See the full example on GitHub.
# Swift
Source: https://dub.co/docs/sdks/client-side-mobile/installation-guides/swift
How to add the Dub iOS SDK to your Swift project
## Prerequisites
Before you get started, make sure you have the following:
1. Obtain your [publishable key](/docs/api-reference/authentication#publishable-keys) (`DUB_PUBLISHABLE_KEY`) from your [workspace's Tracking settings page](https://app.dub.co/settings/tracking).
2. You would also want to have your [custom domain](https://app.dub.co/settings/domains) (`DUB_DOMAIN`) handy as well.
3. (Optional) If you plan to track conversions, make sure to [enable conversion tracking for your links](/docs/quickstart/server#step-1-enable-conversion-tracking-for-your-links).
## Quickstart
This quick start guide will show you how to get started with Dub iOS SDK in your Swift project.
Before installing, ensure your environment meets these minimum requirements:
**Build Tools:**
* Xcode 16+
* Swift 4.0+
**Platforms:**
* iOS 16.0+
* macOS 10.13 (Ventura)+
The Dub iOS SDK can be installed using the [Swift Package Manager](https://docs.swift.org/swiftpm/documentation/packagemanagerdocs/).
In Xcode, select **File** > **Add Package Dependencies** and add `https://github.com/dubinc/dub-ios` as the repository URL. Select the latest version of the SDK from the [release page](https://github.com/dubinc/dub-ios/releases).
You must call `Dub.setup` with your publishable key and domain prior to being able to use the `dub` instance.
```swift iOS (SwiftUI) theme={null}
import SwiftUI
import Dub
@main
struct DubApp: App {
// Step 1: Obtain your Dub domain and publishable key
private let dubPublishableKey = ""
private let dubDomain = ""
init() {
// Step 2: Initialize the Dub SDK by calling `setup`
Dub.setup(publishableKey: dubPublishableKey, domain: dubDomain)
}
var body: some Scene {
WindowGroup {
ContentView()
// Step 3: Expose the `dub` instance as a SwiftUI environment value
.environment(\.dub, Dub.shared)
}
}
}
```
```swift iOS (UIKit) theme={null}
import UIKit
import Dub
@main
class AppDelegate: UIResponder, UIApplicationDelegate {
var window: UIWindow?
// Step 1: Obtain your Dub domain and publishable key
private let dubPublishableKey = ""
private let dubDomain = ""
func application(_ application: UIApplication, didFinishLaunchingWithOptions launchOptions: [UIApplication.LaunchOptionsKey: Any]?) -> Bool {
// Step 2: Initialize the Dub SDK by calling `setup`
Dub.setup(publishableKey: dubPublishableKey, domain: dubDomain)
return true
}
}
```
Call `trackOpen` on the `dub` instance to track deep link and deferred deep link open events.
The `trackOpen` function should be called once without a `deepLink` parameter on first launch, and then
again with the `deepLink` parameter whenever the app is opened from a deep link.
**UIKit apps:** If your `AppDelegate` has multiple URL handlers chained with `||` (e.g., Facebook/Meta SDK alongside Dub), the short-circuit evaluation may prevent `handleDeepLink` and `trackOpen` from being called. Make sure all handlers execute independently. See the [troubleshooting guide](/docs/concepts/deep-links/quickstart#troubleshooting-deep-links) for details and a fix.
```swift iOS (SwiftUI) expandable theme={null}
// ContentView.swift
import SwiftUI
import Dub
struct ContentView: View {
@Environment(\.dub) var dub: Dub
@AppStorage("is_first_launch") private var isFirstLaunch = true
var body: some View {
NavigationStack {
VStack {
// Your app content
}
.onOpenURL { url in
trackOpen(deepLink: url)
}
.onAppear {
if isFirstLaunch {
trackOpen()
isFirstLaunch = false
}
}
}
}
private func trackOpen(deepLink: URL? = nil) {
Task {
do {
let response = try await dub.trackOpen(deepLink: deepLink)
// Obtain the destination URL from the response
guard let url = response.link?.url else {
return
}
// Navigate to the destination URL
} catch let error as DubError {
print(error.localizedDescription)
}
}
}
}
```
```swift iOS (UIKit) expandable theme={null}
import UIKit
import Dub
@main
class AppDelegate: UIResponder, UIApplicationDelegate {
var window: UIWindow?
private let dubPublishableKey = ""
private let dubDomain = ""
private var isFirstLaunch: Bool {
get {
UserDefaults.standard.object(forKey: "is_first_launch") as? Bool ?? true
}
set {
UserDefaults.standard.set(newValue, forKey: "is_first_launch")
}
}
func application(_ application: UIApplication, didFinishLaunchingWithOptions launchOptions: [UIApplication.LaunchOptionsKey: Any]?) -> Bool {
Dub.setup(publishableKey: dubPublishableKey, domain: dubDomain)
// Track first launch
if isFirstLaunch {
trackOpen()
isFirstLaunch = false
}
// Override point for customization after application launch.
return true
}
func application(_ app: UIApplication, open url: URL, options: [UIApplication.OpenURLOptionsKey : Any] = [:]) -> Bool {
handleDeepLink(url: url)
return true
}
func handleDeepLink(url: URL) {
trackOpen(deepLink: url)
}
private func trackOpen(deepLink: URL? = nil) {
// Call the tracking endpoint with the full deep link URL
Task {
do {
let response = try await Dub.shared.trackOpen(deepLink: deepLink)
print(response)
// Navigate to final link via link.url
guard let destinationUrl = response.link?.url else {
return
}
// Navigate to the destination URL
} catch let error as DubError {
print(error.localizedDescription)
}
}
}
}
```
To track lead events, call `trackLead` on the `dub` instance with your customer's external ID, name, and email.
```swift iOS (SwiftUI) expandable theme={null}
// ContentView.swift
import SwiftUI
import Dub
struct ContentView: View {
@Environment(\.dub) var dub: Dub
var body: some View {
// ... your app content ...
}
private func trackLead(customerExternalId: String, name: String, email: String) {
Task {
do {
let response = try await dub.trackLead(
eventName: "User Sign Up",
customerExternalId: customerExternalId,
customerName: name,
customerEmail: email
)
print(response)
} catch let error as DubError {
print(error.localizedDescription)
}
}
}
}
```
```swift iOS (UIKit) expandable theme={null}
// ViewController.swift
import UIKit
import Dub
class ViewController: UIViewController {
// View controller lifecycle...
private func trackLead(customerExternalId: String, name: String, email: String) {
Task {
do {
let response = try await Dub.shared.trackLead(
eventName: "User Sign Up",
customerExternalId: customerExternalId,
customerName: name,
customerEmail: email
)
print(response)
} catch let error as DubError {
print(error.localizedDescription)
}
}
}
}
```
Here are the properties you can include when sending a lead event:
| Property | Required | Description |
| :------------------- | :------- | :------------------------------------------------------------------------------------------------------------------------------------------------------------------------------------------------------------------------------------------------------------------------------------------------------------------------------------------------------------------------------------- |
| `clickId` | **Yes** | The unique ID of the click that the lead conversion event is attributed to. You can read this value from `dub_id` cookie. If an empty string is provided (i.e. if you're using [tracking a deferred lead event](/docs/conversions/leads/deferred)), Dub will try to find an existing customer with the provided `customerExternalId` and use the `clickId` from the customer if found. |
| `eventName` | **Yes** | The name of the lead event to track. Can also be used as a unique identifier to associate a given lead event for a customer for a subsequent sale event (via the `leadEventName` prop in `/track/sale`). |
| `customerExternalId` | **Yes** | The unique ID of the customer in your system. Will be used to identify and attribute all future events to this customer. |
| `customerName` | No | The name of the customer. If not passed, a random name will be generated (e.g. "Big Red Caribou"). |
| `customerEmail` | No | The email address of the customer. |
| `customerAvatar` | No | The avatar URL of the customer. |
| `mode` | No | The mode to use for tracking the lead event. `async` will not block the request; `wait` will block the request until the lead event is fully recorded in Dub; `deferred` will defer the lead event creation to a subsequent request. |
| `metadata` | No | Additional metadata to be stored with the lead event. Max 10,000 characters. |
To track sale events, call `trackSale` on the `dub` instance with your customer's user ID and purchase information.
```swift iOS (SwiftUI) expandable theme={null}
// ContentView.swift
import SwiftUI
import Dub
struct ContentView: View {
@Environment(\.dub) var dub: Dub
var body: some View {
// ... your app content ...
}
private func trackSale(
customerExternalId: String,
amount: Int,
currency: String = "usd",
eventName: String? = "Purchase",
paymentProcessor: PaymentProcessor = .custom,
invoiceId: String? = nil,
metadata: Metadata? = nil,
leadEventName: String? = nil,
customerName: String? = nil,
customerEmail: String? = nil,
customerAvatar: String? = nil
) {
Task {
do {
let response = try await dub.trackSale(
customerExternalId: customerExternalId,
amount: amount,
currency: currency,
eventName: eventName,
paymentProcessor: paymentProcessor,
invoiceId: invoiceId,
metadata: metadata,
leadEventName: leadEventName,
customerName: customerName,
customerEmail: customerEmail,
customerAvatar: customerAvatar
)
print(response)
} catch let error as DubError {
print(error.localizedDescription)
}
}
}
}
```
```swift iOS (UIKit) expandable theme={null}
// ViewController.swift
import UIKit
import Dub
class ViewController: UIViewController {
// View controller lifecycle...
private func trackSale(
customerExternalId: String,
amount: Int,
currency: String = "usd",
eventName: String? = "Purchase",
paymentProcessor: PaymentProcessor = .custom,
invoiceId: String? = nil,
metadata: Metadata? = nil,
leadEventName: String? = nil,
customerName: String? = nil,
customerEmail: String? = nil,
customerAvatar: String? = nil
) {
Task {
do {
let response = try await Dub.shared.trackSale(
customerExternalId: customerExternalId,
amount: amount,
currency: currency,
eventName: eventName,
paymentProcessor: paymentProcessor,
invoiceId: invoiceId,
metadata: metadata,
leadEventName: leadEventName,
customerName: customerName,
customerEmail: customerEmail,
customerAvatar: customerAvatar
)
print(response)
} catch let error as DubError {
print(error.localizedDescription)
}
}
}
}
```
Here are the properties you can include when sending a sale event:
| Property | Required | Description |
| :------------------- | :------- | :--------------------------------------------------------------------------------------------------------------------------------------------------------- |
| `customerExternalId` | **Yes** | The unique ID of the customer in your system. Will be used to identify and attribute all future events to this customer. |
| `amount` | **Yes** | The amount of the sale in cents. |
| `paymentProcessor` | No | The payment processor that processed the sale (e.g. [Stripe](/docs/integrations/stripe), [Shopify](/docs/integrations/stripe)). Defaults to "custom". |
| `eventName` | No | The name of the event. Defaults to "Purchase". |
| `invoiceId` | No | The invoice ID of the sale. Can be used as a idempotency key – only one sale event can be recorded for a given invoice ID. |
| `currency` | No | The currency of the sale. Defaults to "usd". |
| `metadata` | No | An object containing additional information about the sale. |
| `clickId` | No | **\[For direct sale tracking]**: The unique ID of the click that the sale conversion event is attributed to. You can read this value from `dub_id` cookie. |
| `customerName` | No | **\[For direct sale tracking]**: The name of the customer. If not passed, a random name will be generated. |
| `customerEmail` | No | **\[For direct sale tracking]**: The email address of the customer. |
| `customerAvatar` | No | **\[For direct sale tracking]**: The avatar URL of the customer. |
## Examples
Here are some open-source code examples that you can reference:
See the full example on GitHub.
See the full example on GitHub.
# Introduction
Source: https://dub.co/docs/sdks/client-side-mobile/introduction
Learn more about the the Dub client-side mobile SDKs.
Dub offers first-party, open-source, mobile SDKs to help you track [deep links](/docs/concepts/deep-links/quickstart), [deferred deep links](/docs/concepts/deep-links/deferred-deep-linking), and [deep link attribution](/docs/concepts/deep-links/attribution) in your mobile applications.
Currently, we support the following mobile SDKs:
* [Dub iOS SDK (beta)](https://github.com/dubinc/dub-ios)
* [Dub React Native SDK (beta)](https://github.com/dubinc/dub-react-native)
Android support is coming soon. If you'd like early access, please [contact
us](https://dub.co/contact/support).
## Installation guides
Dub currently supports the following client-side mobile SDKs:
Add the Dub iOS SDK to your app (Swift)
Add the Dub React Native SDK to your app (React Native)
## Open-source examples
Here are some open-source code examples that you can reference:
See the full example on GitHub.
See the full example on GitHub.
See the full example on GitHub.
# Client-side click tracking
Source: https://dub.co/docs/sdks/client-side/features/click-tracking
Track clicks on the client-side using query parameters
With the [Dub Analytics script](/docs/sdks/client-side/introduction), you can track clicks on the client-side using query parameters (e.g. `?via=john`, `?ref=jane`).
A few use cases include:
* You're using [Dub Partners](/help/article/dub-partners) with [dual-sided incentives](/help/article/dual-sided-incentives) and want to display a banner that says: *"John referred you to Acme and gave you 25% off"*
* You are migrating from an existing affiliate management platform (e.g. [Rewardful](/help/article/migrating-from-rewardful)) that uses query parameters to track conversions.
* You are running an ad on a platform like Google/Reddit that requires you to use your main site domain for the URL (no short links allowed) – so instead of using a short link, you can use a query parameter to track clicks.
* You have dynamically generated referral pages (e.g. [Tesla](https://www.tesla.com/referral/peeroke520149)) and want to track clicks [using a `trackClick()` function](#manually-tracking-clicks-with-the-trackclick-function) inside your application code.
## Quickstart
Here's how you can enable client-side click-tracking with the Dub Analytics script:
First, you'll need to [add a custom short link domain](/help/article/how-to-add-custom-domain) to your Dub workspace. You can use a domain you already own, or leverage our [free .link domain offer](/help/article/free-dot-link-domain) to register a custom domain like `yourcompany.link` for free.
This is the domain that you'll use for your short links on Dub.
Then, you'll need to allowlist your site's domain to allow the client-side click events to be ingested by Dub. To do that, navigate to your [workspace's Tracking settings page](https://app.dub.co/settings/tracking) and add your site's domain to the **Allowed Hostnames** list.
## Example Apps
Tracking Stripe sale events with Dub.
Tracking conversion events with Segment and Dub.
Tracking Clerk signup events with Dub.
Tracking Cal.com booking events with Dub.
# React Native
Source: https://dub.co/docs/sdks/client-side-mobile/installation-guides/react-native
How to add the Dub React Native SDK to your React Native project
## Prerequisites
Before you get started, make sure you have the following:
1. Obtain your [publishable key](/docs/api-reference/authentication#publishable-keys) (`DUB_PUBLISHABLE_KEY`) from your [workspace's Tracking settings page](https://app.dub.co/settings/tracking).
2. You would also want to have your [custom domain](https://app.dub.co/settings/domains) (`DUB_DOMAIN`) handy as well.
3. (Optional) If you plan to track conversions, make sure to [enable conversion tracking for your links](/docs/quickstart/server#step-1-enable-conversion-tracking-for-your-links).
## Quickstart
This quick start guide will show you how to get started with Dub React Native SDK in your React Native app.
```sh theme={null}
# With npm
npm install @dub/react-native
# With yarn
yarn add @dub/react-native
# With pnpm
pnpm add @dub/react-native
```
You must call `init` on your `dub` instance with your publishable key and domain prior to being able to use the `dub` instance. We provide two ways to initialize the SDK:
**Option 1**: Use the `DubProvider` to wrap your app
```typescript theme={null}
import { DubProvider } from "@dub/react-native";
export default function App() {
return (
// Your app content...
);
}
```
**Option 2**: Manually initialize the Dub SDK
```typescript theme={null}
import dub from "@dub/react-native";
export default function App() {
useEffect(() => {
dub.init({
publishableKey: "",
domain: "",
});
}, []);
// Return your app...
}
```
Call `trackOpen` on the `dub` instance to track deep link and deferred deep link open events.
The `trackOpen` function should be called once without a `deepLink` parameter on first launch, and then
again with the `deepLink` parameter whenever the app is opened from a deep link.
If your iOS app uses third-party SDKs that handle URLs (e.g., Facebook/Meta SDK), make sure your `AppDelegate`'s `openURL:` handler doesn't short-circuit with `||`. When a third-party SDK returns `YES` first, `RCTLinkingManager` never fires and `trackOpen` won't be called. See the [troubleshooting guide](/docs/concepts/deep-links/quickstart#troubleshooting-deep-links) for details and a fix.
```typescript React Native expandable theme={null}
import { useState, useEffect, useRef } from "react";
import { Linking } from "react-native";
import AsyncStorage from "@react-native-async-storage/async-storage";
import dub from "@dub/react-native";
export default function App() {
useEffect(() => {
dub.init({
publishableKey: "",
domain: "",
});
// Check if this is first launch
const isFirstLaunch = await AsyncStorage.getItem("is_first_launch");
if (isFirstLaunch === null) {
await handleFirstLaunch();
await AsyncStorage.setItem("is_first_launch", "false");
} else {
// Handle initial deep link url (Android only)
const url = await Linking.getInitialURL();
if (url) {
await handleDeepLink(url);
}
}
const linkingListener = Linking.addEventListener("url", (event) => {
handleDeepLink(event.url);
});
return () => {
linkingListener.remove();
};
}, []);
const handleFirstLaunch = async (
deepLinkUrl?: string | null | undefined
): Promise => {
try {
const response = await dub.trackOpen(deepLinkUrl);
const destinationURL = response.link?.url;
// Navigate to the destination URL
} catch (error) {
// Handle error
}
};
// Return your app...
}
```
To track lead events, call `trackLead` on the `dub` instance with your customer's external ID, name, and email.
```typescript React Native theme={null}
import dub from "@dub/react-native";
try {
await dub.trackLead({
eventName: "User Sign Up",
customerExternalId: user.id,
customerName: user.name,
customerEmail: user.email,
});
} catch (error) {
// Handle sale tracking error
}
```
Here are the properties you can include when sending a lead event:
| Property | Required | Description |
| :------------------- | :------- | :------------------------------------------------------------------------------------------------------------------------------------------------------------------------------------------------------------------------------------------------------------------------------------------------------------------------------------------------------------------------------------- |
| `clickId` | **Yes** | The unique ID of the click that the lead conversion event is attributed to. You can read this value from `dub_id` cookie. If an empty string is provided (i.e. if you're using [tracking a deferred lead event](/docs/conversions/leads/deferred)), Dub will try to find an existing customer with the provided `customerExternalId` and use the `clickId` from the customer if found. |
| `eventName` | **Yes** | The name of the lead event to track. Can also be used as a unique identifier to associate a given lead event for a customer for a subsequent sale event (via the `leadEventName` prop in `/track/sale`). |
| `customerExternalId` | **Yes** | The unique ID of the customer in your system. Will be used to identify and attribute all future events to this customer. |
| `customerName` | No | The name of the customer. If not passed, a random name will be generated (e.g. "Big Red Caribou"). |
| `customerEmail` | No | The email address of the customer. |
| `customerAvatar` | No | The avatar URL of the customer. |
| `mode` | No | The mode to use for tracking the lead event. `async` will not block the request; `wait` will block the request until the lead event is fully recorded in Dub; `deferred` will defer the lead event creation to a subsequent request. |
| `metadata` | No | Additional metadata to be stored with the lead event. Max 10,000 characters. |
To track sale events, call `trackSale` on the `dub` instance with your customer's user ID and purchase information.
```typescript React Native theme={null}
import dub from "@dub/react-native";
try {
await dub.trackSale({
customerExternalId: user.id,
amount: product.price.amount,
currency: "usd",
eventName: "Purchase",
});
} catch (error) {
// Handle sale tracking error
}
```
Here are the properties you can include when sending a sale event:
| Property | Required | Description |
| :------------------- | :------- | :--------------------------------------------------------------------------------------------------------------------------------------------------------- |
| `customerExternalId` | **Yes** | The unique ID of the customer in your system. Will be used to identify and attribute all future events to this customer. |
| `amount` | **Yes** | The amount of the sale in cents. |
| `paymentProcessor` | No | The payment processor that processed the sale (e.g. [Stripe](/docs/integrations/stripe), [Shopify](/docs/integrations/stripe)). Defaults to "custom". |
| `eventName` | No | The name of the event. Defaults to "Purchase". |
| `invoiceId` | No | The invoice ID of the sale. Can be used as a idempotency key – only one sale event can be recorded for a given invoice ID. |
| `currency` | No | The currency of the sale. Defaults to "usd". |
| `metadata` | No | An object containing additional information about the sale. |
| `clickId` | No | **\[For direct sale tracking]**: The unique ID of the click that the sale conversion event is attributed to. You can read this value from `dub_id` cookie. |
| `customerName` | No | **\[For direct sale tracking]**: The name of the customer. If not passed, a random name will be generated. |
| `customerEmail` | No | **\[For direct sale tracking]**: The email address of the customer. |
| `customerAvatar` | No | **\[For direct sale tracking]**: The avatar URL of the customer. |
## Examples
Here are some open-source code examples that you can reference:
See the full example on GitHub.
# Swift
Source: https://dub.co/docs/sdks/client-side-mobile/installation-guides/swift
How to add the Dub iOS SDK to your Swift project
## Prerequisites
Before you get started, make sure you have the following:
1. Obtain your [publishable key](/docs/api-reference/authentication#publishable-keys) (`DUB_PUBLISHABLE_KEY`) from your [workspace's Tracking settings page](https://app.dub.co/settings/tracking).
2. You would also want to have your [custom domain](https://app.dub.co/settings/domains) (`DUB_DOMAIN`) handy as well.
3. (Optional) If you plan to track conversions, make sure to [enable conversion tracking for your links](/docs/quickstart/server#step-1-enable-conversion-tracking-for-your-links).
## Quickstart
This quick start guide will show you how to get started with Dub iOS SDK in your Swift project.
Before installing, ensure your environment meets these minimum requirements:
**Build Tools:**
* Xcode 16+
* Swift 4.0+
**Platforms:**
* iOS 16.0+
* macOS 10.13 (Ventura)+
The Dub iOS SDK can be installed using the [Swift Package Manager](https://docs.swift.org/swiftpm/documentation/packagemanagerdocs/).
In Xcode, select **File** > **Add Package Dependencies** and add `https://github.com/dubinc/dub-ios` as the repository URL. Select the latest version of the SDK from the [release page](https://github.com/dubinc/dub-ios/releases).
You must call `Dub.setup` with your publishable key and domain prior to being able to use the `dub` instance.
```swift iOS (SwiftUI) theme={null}
import SwiftUI
import Dub
@main
struct DubApp: App {
// Step 1: Obtain your Dub domain and publishable key
private let dubPublishableKey = ""
private let dubDomain = ""
init() {
// Step 2: Initialize the Dub SDK by calling `setup`
Dub.setup(publishableKey: dubPublishableKey, domain: dubDomain)
}
var body: some Scene {
WindowGroup {
ContentView()
// Step 3: Expose the `dub` instance as a SwiftUI environment value
.environment(\.dub, Dub.shared)
}
}
}
```
```swift iOS (UIKit) theme={null}
import UIKit
import Dub
@main
class AppDelegate: UIResponder, UIApplicationDelegate {
var window: UIWindow?
// Step 1: Obtain your Dub domain and publishable key
private let dubPublishableKey = ""
private let dubDomain = ""
func application(_ application: UIApplication, didFinishLaunchingWithOptions launchOptions: [UIApplication.LaunchOptionsKey: Any]?) -> Bool {
// Step 2: Initialize the Dub SDK by calling `setup`
Dub.setup(publishableKey: dubPublishableKey, domain: dubDomain)
return true
}
}
```
Call `trackOpen` on the `dub` instance to track deep link and deferred deep link open events.
The `trackOpen` function should be called once without a `deepLink` parameter on first launch, and then
again with the `deepLink` parameter whenever the app is opened from a deep link.
**UIKit apps:** If your `AppDelegate` has multiple URL handlers chained with `||` (e.g., Facebook/Meta SDK alongside Dub), the short-circuit evaluation may prevent `handleDeepLink` and `trackOpen` from being called. Make sure all handlers execute independently. See the [troubleshooting guide](/docs/concepts/deep-links/quickstart#troubleshooting-deep-links) for details and a fix.
```swift iOS (SwiftUI) expandable theme={null}
// ContentView.swift
import SwiftUI
import Dub
struct ContentView: View {
@Environment(\.dub) var dub: Dub
@AppStorage("is_first_launch") private var isFirstLaunch = true
var body: some View {
NavigationStack {
VStack {
// Your app content
}
.onOpenURL { url in
trackOpen(deepLink: url)
}
.onAppear {
if isFirstLaunch {
trackOpen()
isFirstLaunch = false
}
}
}
}
private func trackOpen(deepLink: URL? = nil) {
Task {
do {
let response = try await dub.trackOpen(deepLink: deepLink)
// Obtain the destination URL from the response
guard let url = response.link?.url else {
return
}
// Navigate to the destination URL
} catch let error as DubError {
print(error.localizedDescription)
}
}
}
}
```
```swift iOS (UIKit) expandable theme={null}
import UIKit
import Dub
@main
class AppDelegate: UIResponder, UIApplicationDelegate {
var window: UIWindow?
private let dubPublishableKey = ""
private let dubDomain = ""
private var isFirstLaunch: Bool {
get {
UserDefaults.standard.object(forKey: "is_first_launch") as? Bool ?? true
}
set {
UserDefaults.standard.set(newValue, forKey: "is_first_launch")
}
}
func application(_ application: UIApplication, didFinishLaunchingWithOptions launchOptions: [UIApplication.LaunchOptionsKey: Any]?) -> Bool {
Dub.setup(publishableKey: dubPublishableKey, domain: dubDomain)
// Track first launch
if isFirstLaunch {
trackOpen()
isFirstLaunch = false
}
// Override point for customization after application launch.
return true
}
func application(_ app: UIApplication, open url: URL, options: [UIApplication.OpenURLOptionsKey : Any] = [:]) -> Bool {
handleDeepLink(url: url)
return true
}
func handleDeepLink(url: URL) {
trackOpen(deepLink: url)
}
private func trackOpen(deepLink: URL? = nil) {
// Call the tracking endpoint with the full deep link URL
Task {
do {
let response = try await Dub.shared.trackOpen(deepLink: deepLink)
print(response)
// Navigate to final link via link.url
guard let destinationUrl = response.link?.url else {
return
}
// Navigate to the destination URL
} catch let error as DubError {
print(error.localizedDescription)
}
}
}
}
```
To track lead events, call `trackLead` on the `dub` instance with your customer's external ID, name, and email.
```swift iOS (SwiftUI) expandable theme={null}
// ContentView.swift
import SwiftUI
import Dub
struct ContentView: View {
@Environment(\.dub) var dub: Dub
var body: some View {
// ... your app content ...
}
private func trackLead(customerExternalId: String, name: String, email: String) {
Task {
do {
let response = try await dub.trackLead(
eventName: "User Sign Up",
customerExternalId: customerExternalId,
customerName: name,
customerEmail: email
)
print(response)
} catch let error as DubError {
print(error.localizedDescription)
}
}
}
}
```
```swift iOS (UIKit) expandable theme={null}
// ViewController.swift
import UIKit
import Dub
class ViewController: UIViewController {
// View controller lifecycle...
private func trackLead(customerExternalId: String, name: String, email: String) {
Task {
do {
let response = try await Dub.shared.trackLead(
eventName: "User Sign Up",
customerExternalId: customerExternalId,
customerName: name,
customerEmail: email
)
print(response)
} catch let error as DubError {
print(error.localizedDescription)
}
}
}
}
```
Here are the properties you can include when sending a lead event:
| Property | Required | Description |
| :------------------- | :------- | :------------------------------------------------------------------------------------------------------------------------------------------------------------------------------------------------------------------------------------------------------------------------------------------------------------------------------------------------------------------------------------- |
| `clickId` | **Yes** | The unique ID of the click that the lead conversion event is attributed to. You can read this value from `dub_id` cookie. If an empty string is provided (i.e. if you're using [tracking a deferred lead event](/docs/conversions/leads/deferred)), Dub will try to find an existing customer with the provided `customerExternalId` and use the `clickId` from the customer if found. |
| `eventName` | **Yes** | The name of the lead event to track. Can also be used as a unique identifier to associate a given lead event for a customer for a subsequent sale event (via the `leadEventName` prop in `/track/sale`). |
| `customerExternalId` | **Yes** | The unique ID of the customer in your system. Will be used to identify and attribute all future events to this customer. |
| `customerName` | No | The name of the customer. If not passed, a random name will be generated (e.g. "Big Red Caribou"). |
| `customerEmail` | No | The email address of the customer. |
| `customerAvatar` | No | The avatar URL of the customer. |
| `mode` | No | The mode to use for tracking the lead event. `async` will not block the request; `wait` will block the request until the lead event is fully recorded in Dub; `deferred` will defer the lead event creation to a subsequent request. |
| `metadata` | No | Additional metadata to be stored with the lead event. Max 10,000 characters. |
To track sale events, call `trackSale` on the `dub` instance with your customer's user ID and purchase information.
```swift iOS (SwiftUI) expandable theme={null}
// ContentView.swift
import SwiftUI
import Dub
struct ContentView: View {
@Environment(\.dub) var dub: Dub
var body: some View {
// ... your app content ...
}
private func trackSale(
customerExternalId: String,
amount: Int,
currency: String = "usd",
eventName: String? = "Purchase",
paymentProcessor: PaymentProcessor = .custom,
invoiceId: String? = nil,
metadata: Metadata? = nil,
leadEventName: String? = nil,
customerName: String? = nil,
customerEmail: String? = nil,
customerAvatar: String? = nil
) {
Task {
do {
let response = try await dub.trackSale(
customerExternalId: customerExternalId,
amount: amount,
currency: currency,
eventName: eventName,
paymentProcessor: paymentProcessor,
invoiceId: invoiceId,
metadata: metadata,
leadEventName: leadEventName,
customerName: customerName,
customerEmail: customerEmail,
customerAvatar: customerAvatar
)
print(response)
} catch let error as DubError {
print(error.localizedDescription)
}
}
}
}
```
```swift iOS (UIKit) expandable theme={null}
// ViewController.swift
import UIKit
import Dub
class ViewController: UIViewController {
// View controller lifecycle...
private func trackSale(
customerExternalId: String,
amount: Int,
currency: String = "usd",
eventName: String? = "Purchase",
paymentProcessor: PaymentProcessor = .custom,
invoiceId: String? = nil,
metadata: Metadata? = nil,
leadEventName: String? = nil,
customerName: String? = nil,
customerEmail: String? = nil,
customerAvatar: String? = nil
) {
Task {
do {
let response = try await Dub.shared.trackSale(
customerExternalId: customerExternalId,
amount: amount,
currency: currency,
eventName: eventName,
paymentProcessor: paymentProcessor,
invoiceId: invoiceId,
metadata: metadata,
leadEventName: leadEventName,
customerName: customerName,
customerEmail: customerEmail,
customerAvatar: customerAvatar
)
print(response)
} catch let error as DubError {
print(error.localizedDescription)
}
}
}
}
```
Here are the properties you can include when sending a sale event:
| Property | Required | Description |
| :------------------- | :------- | :--------------------------------------------------------------------------------------------------------------------------------------------------------- |
| `customerExternalId` | **Yes** | The unique ID of the customer in your system. Will be used to identify and attribute all future events to this customer. |
| `amount` | **Yes** | The amount of the sale in cents. |
| `paymentProcessor` | No | The payment processor that processed the sale (e.g. [Stripe](/docs/integrations/stripe), [Shopify](/docs/integrations/stripe)). Defaults to "custom". |
| `eventName` | No | The name of the event. Defaults to "Purchase". |
| `invoiceId` | No | The invoice ID of the sale. Can be used as a idempotency key – only one sale event can be recorded for a given invoice ID. |
| `currency` | No | The currency of the sale. Defaults to "usd". |
| `metadata` | No | An object containing additional information about the sale. |
| `clickId` | No | **\[For direct sale tracking]**: The unique ID of the click that the sale conversion event is attributed to. You can read this value from `dub_id` cookie. |
| `customerName` | No | **\[For direct sale tracking]**: The name of the customer. If not passed, a random name will be generated. |
| `customerEmail` | No | **\[For direct sale tracking]**: The email address of the customer. |
| `customerAvatar` | No | **\[For direct sale tracking]**: The avatar URL of the customer. |
## Examples
Here are some open-source code examples that you can reference:
See the full example on GitHub.
See the full example on GitHub.
# Introduction
Source: https://dub.co/docs/sdks/client-side-mobile/introduction
Learn more about the the Dub client-side mobile SDKs.
Dub offers first-party, open-source, mobile SDKs to help you track [deep links](/docs/concepts/deep-links/quickstart), [deferred deep links](/docs/concepts/deep-links/deferred-deep-linking), and [deep link attribution](/docs/concepts/deep-links/attribution) in your mobile applications.
Currently, we support the following mobile SDKs:
* [Dub iOS SDK (beta)](https://github.com/dubinc/dub-ios)
* [Dub React Native SDK (beta)](https://github.com/dubinc/dub-react-native)
Android support is coming soon. If you'd like early access, please [contact
us](https://dub.co/contact/support).
## Installation guides
Dub currently supports the following client-side mobile SDKs:
Add the Dub iOS SDK to your app (Swift)
Add the Dub React Native SDK to your app (React Native)
## Open-source examples
Here are some open-source code examples that you can reference:
See the full example on GitHub.
See the full example on GitHub.
See the full example on GitHub.
# Client-side click tracking
Source: https://dub.co/docs/sdks/client-side/features/click-tracking
Track clicks on the client-side using query parameters
With the [Dub Analytics script](/docs/sdks/client-side/introduction), you can track clicks on the client-side using query parameters (e.g. `?via=john`, `?ref=jane`).
A few use cases include:
* You're using [Dub Partners](/help/article/dub-partners) with [dual-sided incentives](/help/article/dual-sided-incentives) and want to display a banner that says: *"John referred you to Acme and gave you 25% off"*
* You are migrating from an existing affiliate management platform (e.g. [Rewardful](/help/article/migrating-from-rewardful)) that uses query parameters to track conversions.
* You are running an ad on a platform like Google/Reddit that requires you to use your main site domain for the URL (no short links allowed) – so instead of using a short link, you can use a query parameter to track clicks.
* You have dynamically generated referral pages (e.g. [Tesla](https://www.tesla.com/referral/peeroke520149)) and want to track clicks [using a `trackClick()` function](#manually-tracking-clicks-with-the-trackclick-function) inside your application code.
## Quickstart
Here's how you can enable client-side click-tracking with the Dub Analytics script:
First, you'll need to [add a custom short link domain](/help/article/how-to-add-custom-domain) to your Dub workspace. You can use a domain you already own, or leverage our [free .link domain offer](/help/article/free-dot-link-domain) to register a custom domain like `yourcompany.link` for free.
This is the domain that you'll use for your short links on Dub.
Then, you'll need to allowlist your site's domain to allow the client-side click events to be ingested by Dub. To do that, navigate to your [workspace's Tracking settings page](https://app.dub.co/settings/tracking) and add your site's domain to the **Allowed Hostnames** list.
![Enabling conversion tracking for a workspace]() You can group your hostnames when adding them to the allow list:
* `example.com`: Tracks traffic **only** from `example.com`.
* `*.example.com`: Tracks traffic from **all subdomains** of `example.com`, but **not** from `example.com` itself.
When testing things out locally, you can add `localhost` to the **Allowed
Hostnames** list temporarily. This will allow local events to be ingested by
Dub. Don't forget to remove it once you're ready to go live!
Next, install the Dub [client-side SDK](/docs/sdks/client-side/introduction) and initialize it with the domain you added in the previous step.
```javascript HTML theme={null}
// include this script tag in your HTML Head tag
```
```typescript React/Next.js theme={null}
// install the package (e.g. npm install @dub/analytics)
import { Analytics as DubAnalytics } from "@dub/analytics/react";
export default function App() {
return (
{/* Your app code here */}
);
}
```
Here's the full list of parameters you can pass to the script:
The base URL for the Dub API. This is useful for [setting up reverse
proxies](/docs/sdks/client-side/features/reverse-proxy-support) to avoid
adblockers.
The attribution model to use for the analytics event. The following
attribution models are available:
* `first-click`: The first click model
gives all the credit to the first touchpoint in the customer journey.
* `last-click`: The last click model gives all the credit to the last
touchpoint in the customer journey.
Specifies the value for the `Domain` Set-Cookie attribute. This is useful
for cross-domain tracking. Example: `.example.com`
Specifies the `Date` object to be the value for the `Expires` Set-Cookie
attribute. Example: `new Date('2024-12-31')`
Specifies the number (in days) to be the value for the `Expires`
Set-Cookie attribute. Example: `90`
Specifies the value for the `Path` Set-Cookie attribute. By default, the
path is considered the "default path". Example: `/`
Configure the domains that Dub will track. The following properties are available:
The Dub custom domain for [referral program client-side click tracking](http://d.to/clicks/refer)
(previously `shortDomain`).
Example: `refer.dub.co`
The Dub short domain for tracking site visits.
Example: `site.dub.co`
An array of domains for cross-domain tracking. When configured, the existing
`dub_id` cookie will be automatically appended to all outbound links
targeting these domains to enable cross-domain tracking across different
applications.
Example: `["dub.sh", "git.new"]`
An array of query parameters to listen to for client-side click-tracking (e.g.
`?via=abc123`).
Custom properties to pass to the script tag. Refer to
[MDN](https://developer.mozilla.org/en-US/docs/Web/API/HTMLScriptElement) for
all available options.
To avoid ad-blockers from blocking your click-tracking requests, we recommend setting up a reverse proxy.
Refer to the [Reverse-proxy support](/docs/sdks/client-side/features/reverse-proxy-support) guide to learn how to set one up.
To verify that your click-tracking is working, run your website locally and append the URL with the unique key of your short link
For example, if your short link is `https://go.example.com/abc123`, you'll need to append `?via=abc123` to the URL.
Once you've done that, check if the following is true:
1. There is a successful `/track/click` request in your browser's **Network** tab (and no errors in the **Console** tab).
2. The `dub_id` cookie is being set upon a successful `/track/click` request.
3. The click tracked correctly in the [**Events**](https://app.dub.co/events) tab of your Dub workspace.
## Automatically fetching partner and discount data
If you're using [Dub Partners](https://dub.co/partners) with [dual-sided incentives](/help/article/dual-sided-incentives), the script will automatically fetch the partner and discount data for you when someone lands on your site via a valid referral link.
This data will be stored as a JSON-stringified object in the `dub_partner_data` cookie in the following format:
```json theme={null}
{
"clickId": "xxx", // unique ID of the click event
"partner": {
"id": "pn_xxx", // unique ID of the partner on Dub
"name": "John Doe", // name of the partner
"image": "https://example.com/john.png", // avatar of the partner
"groupId": "grp_xxx", // unique ID of the group the partner belongs to
"tenantId": "user_xxx" // partner's unique ID in your database
},
"discount": {
"id": "disc_xxx", // unique ID of the discount on Dub
"amount": 25, // discount amount (either a percentage or a fixed amount)
"type": "percentage", // type of the discount (either "percentage" or "fixed")
"maxDuration": 3, // maximum duration of the discount in months
"couponId": "XZuejd0Q", // Stripe coupon code
"couponTestId": "2NMXz81x" // Stripe test coupon ID
}
}
```
You can access partner and discount data in your application code using the `useAnalytics()` hook. If you’re working in a non-React environment, you can use the `DubAnalytics` object directly.
Here is a quick example of how you can display a discount banner using the `useAnalytics()` hook:
```javascript HTML theme={null}
// Display a banner that says: _"John referred you to Acme and gave you 25% off"_
dubAnalytics("ready", function () {
if (DubAnalytics.partner && DubAnalytics.discount) {
const banner = document.createElement("div");
banner.innerHTML = `
You can group your hostnames when adding them to the allow list:
* `example.com`: Tracks traffic **only** from `example.com`.
* `*.example.com`: Tracks traffic from **all subdomains** of `example.com`, but **not** from `example.com` itself.
When testing things out locally, you can add `localhost` to the **Allowed
Hostnames** list temporarily. This will allow local events to be ingested by
Dub. Don't forget to remove it once you're ready to go live!
Next, install the Dub [client-side SDK](/docs/sdks/client-side/introduction) and initialize it with the domain you added in the previous step.
```javascript HTML theme={null}
// include this script tag in your HTML Head tag
```
```typescript React/Next.js theme={null}
// install the package (e.g. npm install @dub/analytics)
import { Analytics as DubAnalytics } from "@dub/analytics/react";
export default function App() {
return (
{/* Your app code here */}
);
}
```
Here's the full list of parameters you can pass to the script:
The base URL for the Dub API. This is useful for [setting up reverse
proxies](/docs/sdks/client-side/features/reverse-proxy-support) to avoid
adblockers.
The attribution model to use for the analytics event. The following
attribution models are available:
* `first-click`: The first click model
gives all the credit to the first touchpoint in the customer journey.
* `last-click`: The last click model gives all the credit to the last
touchpoint in the customer journey.
Specifies the value for the `Domain` Set-Cookie attribute. This is useful
for cross-domain tracking. Example: `.example.com`
Specifies the `Date` object to be the value for the `Expires` Set-Cookie
attribute. Example: `new Date('2024-12-31')`
Specifies the number (in days) to be the value for the `Expires`
Set-Cookie attribute. Example: `90`
Specifies the value for the `Path` Set-Cookie attribute. By default, the
path is considered the "default path". Example: `/`
Configure the domains that Dub will track. The following properties are available:
The Dub custom domain for [referral program client-side click tracking](http://d.to/clicks/refer)
(previously `shortDomain`).
Example: `refer.dub.co`
The Dub short domain for tracking site visits.
Example: `site.dub.co`
An array of domains for cross-domain tracking. When configured, the existing
`dub_id` cookie will be automatically appended to all outbound links
targeting these domains to enable cross-domain tracking across different
applications.
Example: `["dub.sh", "git.new"]`
An array of query parameters to listen to for client-side click-tracking (e.g.
`?via=abc123`).
Custom properties to pass to the script tag. Refer to
[MDN](https://developer.mozilla.org/en-US/docs/Web/API/HTMLScriptElement) for
all available options.
To avoid ad-blockers from blocking your click-tracking requests, we recommend setting up a reverse proxy.
Refer to the [Reverse-proxy support](/docs/sdks/client-side/features/reverse-proxy-support) guide to learn how to set one up.
To verify that your click-tracking is working, run your website locally and append the URL with the unique key of your short link
For example, if your short link is `https://go.example.com/abc123`, you'll need to append `?via=abc123` to the URL.
Once you've done that, check if the following is true:
1. There is a successful `/track/click` request in your browser's **Network** tab (and no errors in the **Console** tab).
2. The `dub_id` cookie is being set upon a successful `/track/click` request.
3. The click tracked correctly in the [**Events**](https://app.dub.co/events) tab of your Dub workspace.
## Automatically fetching partner and discount data
If you're using [Dub Partners](https://dub.co/partners) with [dual-sided incentives](/help/article/dual-sided-incentives), the script will automatically fetch the partner and discount data for you when someone lands on your site via a valid referral link.
This data will be stored as a JSON-stringified object in the `dub_partner_data` cookie in the following format:
```json theme={null}
{
"clickId": "xxx", // unique ID of the click event
"partner": {
"id": "pn_xxx", // unique ID of the partner on Dub
"name": "John Doe", // name of the partner
"image": "https://example.com/john.png", // avatar of the partner
"groupId": "grp_xxx", // unique ID of the group the partner belongs to
"tenantId": "user_xxx" // partner's unique ID in your database
},
"discount": {
"id": "disc_xxx", // unique ID of the discount on Dub
"amount": 25, // discount amount (either a percentage or a fixed amount)
"type": "percentage", // type of the discount (either "percentage" or "fixed")
"maxDuration": 3, // maximum duration of the discount in months
"couponId": "XZuejd0Q", // Stripe coupon code
"couponTestId": "2NMXz81x" // Stripe test coupon ID
}
}
```
You can access partner and discount data in your application code using the `useAnalytics()` hook. If you’re working in a non-React environment, you can use the `DubAnalytics` object directly.
Here is a quick example of how you can display a discount banner using the `useAnalytics()` hook:
```javascript HTML theme={null}
// Display a banner that says: _"John referred you to Acme and gave you 25% off"_
dubAnalytics("ready", function () {
if (DubAnalytics.partner && DubAnalytics.discount) {
const banner = document.createElement("div");
banner.innerHTML = `

${DubAnalytics.partner.name} referred you to Acme and gave you ${DubAnalytics.discount.amount} ${DubAnalytics.discount.type} off
`;
document.body.appendChild(banner);
}
});
```
```typescript React/Next.js theme={null}
// Display a banner that says: _"John referred you to Acme and gave you 25% off"_
import { useAnalytics } from "@dub/analytics/react";
function DiscountBanner() {
const { partner, discount } = useAnalytics();
if (!partner || !discount) {
return null;
}
return (

{partner.name} referred you to Acme and gave you {discount.amount}{" "}
{discount.type} off
);
}
```
Here's an example of how the discount banner will look like:
![A screenshot of the Dub partner data example]() ## Manually tracking clicks with the `trackClick()` function
This is helpful for tracking clicks on:
* Dynamically generated referral pages (e.g. [Tesla](https://www.tesla.com/referral/peeroke520149))
* Dynamic user-generated content/webpages:
* Dub's public analytics dashboards (e.g. [app.dub.co/share/:slug](https://app.dub.co/share/dash_6NSA6vNm017MZwfzt8SubNSZ))
* v0 template pages (e.g. [v0.app/templates/:slug](https://v0.app/templates/evasion-e-commerce-template-annqMtFCROP))
* Tella's video pages (e.g. [tella.tv/video/:slug](https://www.tella.tv/video/cluvcfcfi00tw0fjrgizr4pw2))
The `trackClick()` function allows you to manually trigger click events from your application code. This is useful when you want to track clicks that happen programmatically.
The `trackClick()` function accepts an object with the following parameters:
The domain of the short link (e.g. `getacme.link`)
The short link slug (e.g. `john`)
Here's how you can use the `trackClick()` function in your application:
```javascript HTML theme={null}
document.addEventListener("DOMContentLoaded", function () {
// Extract the key from the URL path (e.g., /share/dash_6NSA6vNm017MZwfzt8SubNSZ -> dash_6NSA6vNm017MZwfzt8SubNSZ)
const pathSegments = window.location.pathname.split("/");
const key = pathSegments[2]; // e.g. dash_6NSA6vNm017MZwfzt8SubNSZ
if (key) {
dubAnalytics.trackClick({
domain: "getacme.link",
key,
});
}
});
// This will track clicks for URLs like app.dub.co/share/dash_6NSA6vNm017MZwfzt8SubNSZ
```
```typescript React/Next.js theme={null}
import { useAnalytics } from "@dub/analytics/react";
import { useRouter } from "next/router";
function BookingPage() {
const router = useRouter();
const { trackClick } = useAnalytics();
// Extract the key from the URL path (e.g., /john -> john)
const { slug: key } = router.query;
useEffect(() => {
if (key) {
trackClick({
domain: "getacme.link",
key,
});
}
}, [key, trackClick]);
return <>;
}
```
## Differences from server-side click-tracking
Server-side click-tracking is enabled by default for all Dub links and come with the following attributes:
| Attribute | Type | Description |
| :----------- | :------ | :----------------------------------------------------------------------------------------------- |
| `timestamp` | string | The timestamp of the click event |
| `id` | string | The unique ID of the click event |
| `url` | string | The destination URL that the link resolved to – this can vary if geo/device-targeting is enabled |
| `continent` | string | The continent of the user who clicked the link |
| `country` | string | The country of the user who clicked the link |
| `city` | string | The city of the user who clicked the link |
| `device` | string | The device of the user who clicked the link |
| `browser` | string | The browser of the user who clicked the link |
| `os` | string | The operating system of the user who clicked the link |
| `referer` | string | The referrer of the user who clicked the link |
| `refererUrl` | string | The full referrer URL of the user who clicked the link |
| `qr` | boolean | Whether the click event was triggered by a QR code scan |
| `ip` | string | The IP address of the user who clicked the link (non-EU users only) |
These events happen on the server-side and cannot be blocked by browser extensions or ad-blockers, which improves the accuracy of your analytics data.
# Client-side conversion tracking
Source: https://dub.co/docs/sdks/client-side/features/conversion-tracking
Learn how to use the Dub Analytics script to track conversion events on the client-side
Dub Analytics is a client-side script for [tracking conversion events](/docs/concepts/attribution) with Dub.
By default, the script handles the detection of the `dub_id` query parameter and storing it as a first-party cookie:
## Manually tracking clicks with the `trackClick()` function
This is helpful for tracking clicks on:
* Dynamically generated referral pages (e.g. [Tesla](https://www.tesla.com/referral/peeroke520149))
* Dynamic user-generated content/webpages:
* Dub's public analytics dashboards (e.g. [app.dub.co/share/:slug](https://app.dub.co/share/dash_6NSA6vNm017MZwfzt8SubNSZ))
* v0 template pages (e.g. [v0.app/templates/:slug](https://v0.app/templates/evasion-e-commerce-template-annqMtFCROP))
* Tella's video pages (e.g. [tella.tv/video/:slug](https://www.tella.tv/video/cluvcfcfi00tw0fjrgizr4pw2))
The `trackClick()` function allows you to manually trigger click events from your application code. This is useful when you want to track clicks that happen programmatically.
The `trackClick()` function accepts an object with the following parameters:
The domain of the short link (e.g. `getacme.link`)
The short link slug (e.g. `john`)
Here's how you can use the `trackClick()` function in your application:
```javascript HTML theme={null}
document.addEventListener("DOMContentLoaded", function () {
// Extract the key from the URL path (e.g., /share/dash_6NSA6vNm017MZwfzt8SubNSZ -> dash_6NSA6vNm017MZwfzt8SubNSZ)
const pathSegments = window.location.pathname.split("/");
const key = pathSegments[2]; // e.g. dash_6NSA6vNm017MZwfzt8SubNSZ
if (key) {
dubAnalytics.trackClick({
domain: "getacme.link",
key,
});
}
});
// This will track clicks for URLs like app.dub.co/share/dash_6NSA6vNm017MZwfzt8SubNSZ
```
```typescript React/Next.js theme={null}
import { useAnalytics } from "@dub/analytics/react";
import { useRouter } from "next/router";
function BookingPage() {
const router = useRouter();
const { trackClick } = useAnalytics();
// Extract the key from the URL path (e.g., /john -> john)
const { slug: key } = router.query;
useEffect(() => {
if (key) {
trackClick({
domain: "getacme.link",
key,
});
}
}, [key, trackClick]);
return <>;
}
```
## Differences from server-side click-tracking
Server-side click-tracking is enabled by default for all Dub links and come with the following attributes:
| Attribute | Type | Description |
| :----------- | :------ | :----------------------------------------------------------------------------------------------- |
| `timestamp` | string | The timestamp of the click event |
| `id` | string | The unique ID of the click event |
| `url` | string | The destination URL that the link resolved to – this can vary if geo/device-targeting is enabled |
| `continent` | string | The continent of the user who clicked the link |
| `country` | string | The country of the user who clicked the link |
| `city` | string | The city of the user who clicked the link |
| `device` | string | The device of the user who clicked the link |
| `browser` | string | The browser of the user who clicked the link |
| `os` | string | The operating system of the user who clicked the link |
| `referer` | string | The referrer of the user who clicked the link |
| `refererUrl` | string | The full referrer URL of the user who clicked the link |
| `qr` | boolean | Whether the click event was triggered by a QR code scan |
| `ip` | string | The IP address of the user who clicked the link (non-EU users only) |
These events happen on the server-side and cannot be blocked by browser extensions or ad-blockers, which improves the accuracy of your analytics data.
# Client-side conversion tracking
Source: https://dub.co/docs/sdks/client-side/features/conversion-tracking
Learn how to use the Dub Analytics script to track conversion events on the client-side
Dub Analytics is a client-side script for [tracking conversion events](/docs/concepts/attribution) with Dub.
By default, the script handles the detection of the `dub_id` query parameter and storing it as a first-party cookie:
![A diagram showing how click events are tracked in the conversion funnel]() Then, when a conversion event occurs (e.g. a user signs up for an account), you can check for the `dub_id` cookie and attribute the conversion to the original click by [tracking a lead event](/docs/quickstart/server#tracking-lead-events).
Then, when a conversion event occurs (e.g. a user signs up for an account), you can check for the `dub_id` cookie and attribute the conversion to the original click by [tracking a lead event](/docs/quickstart/server#tracking-lead-events).
![A diagram showing how lead events are tracked in the conversion funnel]() Finally, when the user completes a purchase (e.g. subscribing to a plan, purchasing a product, etc.), you can [track a sale event](/docs/quickstart/server#tracking-sale-events). Under the hood, Dub will automatically attribute the sale to the original link click.
Finally, when the user completes a purchase (e.g. subscribing to a plan, purchasing a product, etc.), you can [track a sale event](/docs/quickstart/server#tracking-sale-events). Under the hood, Dub will automatically attribute the sale to the original link click.
![A diagram showing how sale events are tracked in the conversion funnel]() ## Quickstart
First, you'll need to enable conversion tracking for your Dub links to be able to start tracking conversions:
If you're using [Dub Partners](https://dub.co/partners), you can skip this
step since partner links will have conversion tracking enabled by default.
To enable conversion tracking for all future links in a workspace, you can do the following:
To enable conversion tracking for all future links in a workspace, you can do the following:
1. Navigate to your [workspace's Tracking settings page](https://app.dub.co/settings/tracking).
2. Toggle the **Workspace-level Conversion Tracking** switch to enable conversion tracking for the workspace.
## Quickstart
First, you'll need to enable conversion tracking for your Dub links to be able to start tracking conversions:
If you're using [Dub Partners](https://dub.co/partners), you can skip this
step since partner links will have conversion tracking enabled by default.
To enable conversion tracking for all future links in a workspace, you can do the following:
To enable conversion tracking for all future links in a workspace, you can do the following:
1. Navigate to your [workspace's Tracking settings page](https://app.dub.co/settings/tracking).
2. Toggle the **Workspace-level Conversion Tracking** switch to enable conversion tracking for the workspace.
![Enabling conversion tracking for a workspace]() This option will enable conversion tracking in the [Dub Link Builder](/help/article/dub-link-builder) for all future links.
If you don't want to enable conversion tracking for all your links in a workspace, you can also opt to enable it on a link-level.
To enable conversion tracking for a specific link, open the [Dub Link Builder](/help/article/dub-link-builder) for a link and toggle the **Conversion Tracking** switch.
This option will enable conversion tracking in the [Dub Link Builder](/help/article/dub-link-builder) for all future links.
If you don't want to enable conversion tracking for all your links in a workspace, you can also opt to enable it on a link-level.
To enable conversion tracking for a specific link, open the [Dub Link Builder](/help/article/dub-link-builder) for a link and toggle the **Conversion Tracking** switch.
![Enabling conversion tracking for a link]() You can also use the `C` keyboard shortcut when inside the link builder to
quickly enable conversion tracking for a given link.
Alternatively, you can also enable conversion tracking programmatically via the [Dub API](/docs/api-reference/introduction). All you need to do is pass `trackConversion: true` when creating or updating a link:
```javascript Node.js theme={null}
const link = await dub.links.create({
url: "https://dub.co",
trackConversion: true,
});
```
```python Python theme={null}
link = d.links.create(url="https://dub.co", track_conversion=True)
```
```go Go theme={null}
link, err := d.Links.Create(ctx, &dub.CreateLinkRequest{
URL: "https://dub.co",
TrackConversion: true,
})
```
```ruby Ruby theme={null}
s.links.create_many(
::OpenApiSDK::Operations::CreateLinkRequest.new(
url: "https://dub.co",
track_conversion: true,
)
)
```
***
Then, you'll need to install the Dub Analytics script and set up the necessary configuration for client-side conversion tracking:
Then, you'll need to allowlist your site's domain to allow the client-side conversion events to be ingested by Dub.
To do that, navigate to your [workspace's Tracking settings page](https://app.dub.co/settings/tracking) and add your site's domain to the **Allowed Hostnames** list.
This provides an additional layer of security by ensuring only authorized domains can track conversions using your publishable key.
You can also use the `C` keyboard shortcut when inside the link builder to
quickly enable conversion tracking for a given link.
Alternatively, you can also enable conversion tracking programmatically via the [Dub API](/docs/api-reference/introduction). All you need to do is pass `trackConversion: true` when creating or updating a link:
```javascript Node.js theme={null}
const link = await dub.links.create({
url: "https://dub.co",
trackConversion: true,
});
```
```python Python theme={null}
link = d.links.create(url="https://dub.co", track_conversion=True)
```
```go Go theme={null}
link, err := d.Links.Create(ctx, &dub.CreateLinkRequest{
URL: "https://dub.co",
TrackConversion: true,
})
```
```ruby Ruby theme={null}
s.links.create_many(
::OpenApiSDK::Operations::CreateLinkRequest.new(
url: "https://dub.co",
track_conversion: true,
)
)
```
***
Then, you'll need to install the Dub Analytics script and set up the necessary configuration for client-side conversion tracking:
Then, you'll need to allowlist your site's domain to allow the client-side conversion events to be ingested by Dub.
To do that, navigate to your [workspace's Tracking settings page](https://app.dub.co/settings/tracking) and add your site's domain to the **Allowed Hostnames** list.
This provides an additional layer of security by ensuring only authorized domains can track conversions using your publishable key.
![Enabling conversion tracking for a workspace]() You can group your hostnames when adding them to the allow list:
* `example.com`: Tracks traffic **only** from `example.com`.
* `*.example.com`: Tracks traffic from **all subdomains** of `example.com`, but **not** from `example.com` itself.
When testing things out locally, you can add `localhost` to the **Allowed
Hostnames** list temporarily. This will allow local events to be ingested by
Dub. Don't forget to remove it once you're ready to go live!
Before you can track conversions on the client-side, you need to generate a [publishable key](/docs/api-reference/authentication#publishable-keys) from your Dub workspace.
To do that, navigate to your [workspace's Tracking settings page](https://app.dub.co/settings/tracking) and generate a new publishable key under the **Publishable Key** section.
You can group your hostnames when adding them to the allow list:
* `example.com`: Tracks traffic **only** from `example.com`.
* `*.example.com`: Tracks traffic from **all subdomains** of `example.com`, but **not** from `example.com` itself.
When testing things out locally, you can add `localhost` to the **Allowed
Hostnames** list temporarily. This will allow local events to be ingested by
Dub. Don't forget to remove it once you're ready to go live!
Before you can track conversions on the client-side, you need to generate a [publishable key](/docs/api-reference/authentication#publishable-keys) from your Dub workspace.
To do that, navigate to your [workspace's Tracking settings page](https://app.dub.co/settings/tracking) and generate a new publishable key under the **Publishable Key** section.
![Enabling conversion tracking for a workspace]() Next, install the Dub Analytics script on your website/web application.
You can install the Dub Analytics script in several different ways:
}
href="/docs/sdks/client-side/installation-guides/framer"
/>
You must configure the **publishable key** you generated in step 1 when
installing the analytics script. Without this key, client-side conversion
tracking will not work.
```html HTML theme={null}
```
```typescript React/Next.js theme={null}
import { Analytics as DubAnalytics } from '@dub/analytics/react';
export default function RootLayout({
children,
}) {
return (
{children}
);
}
```
## Client-side lead tracking
Once the analytics script is installed, you can start tracking lead events in your application on the client-side.
### Track leads from URL query parameters (recommended)
If you redirect users to a thank-you page after a successful action, you can track leads by reading query parameters from the URL.
```html HTML theme={null}
Thank You
Next, install the Dub Analytics script on your website/web application.
You can install the Dub Analytics script in several different ways:
}
href="/docs/sdks/client-side/installation-guides/framer"
/>
You must configure the **publishable key** you generated in step 1 when
installing the analytics script. Without this key, client-side conversion
tracking will not work.
```html HTML theme={null}
```
```typescript React/Next.js theme={null}
import { Analytics as DubAnalytics } from '@dub/analytics/react';
export default function RootLayout({
children,
}) {
return (
{children}
);
}
```
## Client-side lead tracking
Once the analytics script is installed, you can start tracking lead events in your application on the client-side.
### Track leads from URL query parameters (recommended)
If you redirect users to a thank-you page after a successful action, you can track leads by reading query parameters from the URL.
```html HTML theme={null}
Thank You
Thank you for signing up!
```
```typescript React/Next.js theme={null}
import { useAnalytics } from "@dub/analytics/react";
import { useEffect } from "react";
export function ThankYouPage() {
const { trackLead } = useAnalytics();
useEffect(() => {
// Get query parameters from URL
const params = new URLSearchParams(window.location.search);
const email = params.get("email");
const name = params.get("name");
if (email) {
// Track the lead event
trackLead({
eventName: "Sign Up",
customerExternalId: email, // can also be customer email
customerName: name || undefined,
customerEmail: email,
});
}
}, [trackLead]);
return Thank you for signing up!
;
}
```
### Track leads from form submissions
You can also track leads directly when users submit a form on your website.
```html HTML theme={null}
Sign Up
```
```typescript React/Next.js theme={null}
import { useAnalytics } from "@dub/analytics/react";
import { useState } from "react";
export function SignUpForm() {
const { trackLead } = useAnalytics();
const [name, setName] = useState("");
const [email, setEmail] = useState("");
const handleSubmit = (e: React.FormEvent) => {
e.preventDefault();
// Track the lead event
trackLead({
eventName: "Sign Up",
customerExternalId: email,
customerName: name,
customerEmail: email,
});
};
return (
);
}
```
Here are the properties you can include when sending a lead event:
| Property | Required | Description |
| :------------------- | :------- | :------------------------------------------------------------------------------------------------------------------------------------------------------------------------------------------------------------------------------------------------------------------------------------------------------------------------------------------------------------------------------------- |
| `clickId` | **Yes** | The unique ID of the click that the lead conversion event is attributed to. You can read this value from `dub_id` cookie. If an empty string is provided (i.e. if you're using [tracking a deferred lead event](/docs/conversions/leads/deferred)), Dub will try to find an existing customer with the provided `customerExternalId` and use the `clickId` from the customer if found. |
| `eventName` | **Yes** | The name of the lead event to track. Can also be used as a unique identifier to associate a given lead event for a customer for a subsequent sale event (via the `leadEventName` prop in `/track/sale`). |
| `customerExternalId` | **Yes** | The unique ID of the customer in your system. Will be used to identify and attribute all future events to this customer. |
| `customerName` | No | The name of the customer. If not passed, a random name will be generated (e.g. "Big Red Caribou"). |
| `customerEmail` | No | The email address of the customer. |
| `customerAvatar` | No | The avatar URL of the customer. |
| `mode` | No | The mode to use for tracking the lead event. `async` will not block the request; `wait` will block the request until the lead event is fully recorded in Dub; `deferred` will defer the lead event creation to a subsequent request. |
| `metadata` | No | Additional metadata to be stored with the lead event. Max 10,000 characters. |
**When to track leads**
You should track lead events after successful user actions such as:
* User registration or account creation
* Newsletter subscription
* Contact form submission
* Demo request or trial signup
* Download of gated content
Ensure the event is triggered **only after the backend confirms the action was completed successfully**. This guarantees accurate lead data and prevents false or incomplete entries.
## Client-side sale tracking
Once the analytics script is installed, you can start tracking sale events in your application on the client-side.
### Track sales from URL query parameters (recommended)
If you redirect users to a confirmation page after a successful purchase, you can track sales by reading query parameters from the URL.
```html HTML theme={null}
Order Confirmation
Thank you for your purchase!
```
```typescript React/Next.js theme={null}
import { useAnalytics } from "@dub/analytics/react";
import { useEffect } from "react";
export function OrderConfirmationPage() {
const { trackSale } = useAnalytics();
useEffect(() => {
// Get query parameters from URL
const params = new URLSearchParams(window.location.search);
const customerId = params.get("customer_id");
const amount = params.get("amount");
const invoiceId = params.get("invoice_id");
if (customerId && amount) {
// Track the sale event
trackSale({
eventName: "Purchase",
customerExternalId: customerId, // can also be customer email
amount: parseInt(amount), // Amount in cents
invoiceId: invoiceId || undefined,
// Additional props for direct sale tracking (without prior lead event):
// clickId: "cm3w...", // Read from dub_id cookie
// customerName: "John Doe",
// customerEmail: "john@example.com",
// customerAvatar: "https://example.com/avatar.jpg",
});
}
}, [trackSale]);
return Thank you for your purchase!
;
}
```
### Track sales from form submissions
You can also track sales directly when users complete a checkout form on your website.
```html HTML theme={null}
Checkout
```
```typescript React/Next.js theme={null}
import { useAnalytics } from "@dub/analytics/react";
import { useState } from "react";
export function CheckoutForm() {
const { trackSale } = useAnalytics();
// …
}
const handleSubmit = (e: React.FormEvent) => {
e.preventDefault();
// Track the sale event
trackSale({
eventName: "Purchase",
customerExternalId: "cus_RBfbD57H", // can also be customer email
amount: 5000, // $50.00
invoiceId: "in_1MtHbELkdIwH",
// For direct sale tracking (without prior lead event):
// clickId: "cm3w...", // Read from dub_id cookie
// customerName: "John Doe",
// customerEmail: "john@example.com",
// customerAvatar: "https://example.com/avatar.jpg",
});
};
return (
);
}
```
Here are the properties you can include when sending a sale event:
| Property | Required | Description |
| :------------------- | :------- | :--------------------------------------------------------------------------------------------------------------------------------------------------------- |
| `customerExternalId` | **Yes** | The unique ID of the customer in your system. Will be used to identify and attribute all future events to this customer. |
| `amount` | **Yes** | The amount of the sale in cents. |
| `paymentProcessor` | No | The payment processor that processed the sale (e.g. [Stripe](/docs/integrations/stripe), [Shopify](/docs/integrations/stripe)). Defaults to "custom". |
| `eventName` | No | The name of the event. Defaults to "Purchase". |
| `invoiceId` | No | The invoice ID of the sale. Can be used as a idempotency key – only one sale event can be recorded for a given invoice ID. |
| `currency` | No | The currency of the sale. Defaults to "usd". |
| `metadata` | No | An object containing additional information about the sale. |
| `clickId` | No | **\[For direct sale tracking]**: The unique ID of the click that the sale conversion event is attributed to. You can read this value from `dub_id` cookie. |
| `customerName` | No | **\[For direct sale tracking]**: The name of the customer. If not passed, a random name will be generated. |
| `customerEmail` | No | **\[For direct sale tracking]**: The email address of the customer. |
| `customerAvatar` | No | **\[For direct sale tracking]**: The avatar URL of the customer. |
**When to track sale**
Track sale events only after a user successfully completes a purchase or payment-related action, such as:
* Completing a checkout or order
* Subscription payment
* Invoice payment
* Any paid trial or demo conversion
Ensure the event is triggered **only after the backend confirms the payment was successful**. This guarantees accurate sale data and prevents false or incomplete entries.
# Cross-domain tracking
Source: https://dub.co/docs/sdks/client-side/features/cross-domain-tracking
Track conversions across domains
By default, the script already sets the `dub_id` cookie on a **cross-domain level**.
This means that if you have the script installed on your marketing site (e.g. **example.com**), the cookie will also be accessible when your user signs up for your app (e.g. **app.example.com**).
However, if you are installing the script on a subdomain (e.g. **app.example.com**), you will need to set the following option to make sure the cookie is accessible on the apex domain as well (e.g. **example.com**):
```html HTML theme={null}
```
```typescript React/Next.js theme={null}
```
The script also supports conversion tracking across *entirely different domains*.
This means that if you have the script installed on a separate domain (e.g. **example.sh**), you can use the `outboundDomains` prop to ensure that the `dub_id` cookie value is automatically appended to all outbound links targeting your main domain (e.g. **example.com**).
```html HTML theme={null}
```
```typescript React/Next.js theme={null}
// install this script on both domains
```
For outbound-domains support, you'll need to use the
[`script.outbound-domains.js`](/docs/sdks/client-side/variants#outbound-domains-variant-script-outbound-domains-js)
variant of the script. Learn more about [how script variants
work](/docs/sdks/client-side/variants).
# Reverse-proxy support
Source: https://dub.co/docs/sdks/client-side/features/reverse-proxy-support
Track clicks on the client-side using a reverse proxy
## Tracking clicks via a reverse proxy
To avoid ad-blockers from blocking your click-tracking requests, we recommend setting up a reverse proxy.
Depending on which backend framework you're using, there are a few different ways to do this:
```javascript Next.js theme={null}
// next.config.js
module.exports = {
async rewrites() {
return [
{
source: "/_proxy/dub/track/:path",
destination: "https://api.dub.co/track/:path",
},
];
},
};
```
```json Vercel theme={null}
// vercel.json
{
"rewrites": [
{
"source": "/_proxy/dub/track/:path",
"destination": "https://api.dub.co/track/:path"
}
]
}
```
Once you've set up your reverse proxy, don't forget to update the `apiHost` parameter in the `` component to point to your proxy URL.
```javascript HTML theme={null}
// include this script tag in your HTML Head tag
```
```typescript React/Next.js theme={null}
import { Analytics as DubAnalytics } from "@dub/analytics/react";
export default function App() {
return (
{/* Your app code here */}
);
}
```
## Loading the script via a reverse proxy
To avoid ad-blockers from blocking the Dub Analytics script, it is recommended to use a reverse proxy.
Depending on which backend framework you're using, there are a few different ways to do this:
```javascript Next.js theme={null}
// next.config.js
module.exports = {
async rewrites() {
return [
{
source: "/_proxy/dub/script.js",
destination: "https://www.dubcdn.com/analytics/script.js",
},
];
},
};
```
```json Vercel theme={null}
// vercel.json
{
"rewrites": [
{
"source": "/_proxy/dub/script.js",
"destination": "https://www.dubcdn.com/analytics/script.js"
}
]
}
```
Once you've set up your reverse proxy, don't forget to update the `scriptProps.src` parameter in the `` component to point to your proxy URL.
```javascript HTML theme={null}
// include this script tag in your HTML Head tag
```
```typescript React/Next.js theme={null}
import { Analytics as DubAnalytics } from "@dub/analytics/react";
export default function App() {
return (
{/* Your app code here */}
);
}
```
# Framer
Source: https://dub.co/docs/sdks/client-side/installation-guides/framer
How to add the Dub Analytics script to your Framer site
With Dub Analytics, you can track lead and sale conversions on your Framer site, enabling you to measure the effectiveness of your marketing campaigns.
You can add the Dub Analytics script to your Framer website same way you would add Google Analytics script or any other JavaScript code.
Follow these steps to add the script to your site:
* Go to your Framer project and open the **Project Settings** menu.
* Open the **General** tab and scroll down to the **Custom Code** section.
* Paste the Dub analytics script in the **Start of head tag** section.
* Click on the **Save** button to save the changes.
```html theme={null}
```
If you're using [Dub Partners](https://dub.co/partners) for affiliate management, you will also need to set up the `data-domains` property to enable [client-side click-tracking](/docs/sdks/client-side/features/click-tracking).
```html theme={null}
```
Read the [client-side click-tracking guide](/docs/sdks/client-side/features/click-tracking) for more information.
You can **verify the installation** with the following tests:
1. Open the browser console and type in `_dubAnalytics` – if the script is installed correctly, you should see the `_dubAnalytics` object in the console.
2. Add the `?dub_id=test` query parameter to your website URL and make sure that the `dub_id` cookie is being set in your browser.
If both of these checks pass, the script is installed correctly. Otherwise, please make sure:
* The analytics script was added to the `` section of the page
* If you're using a content delivery network (CDN), make sure to purge any cached content
## Concepts
You can pass the following props to the Dub Analytics script to customize its behavior:
The base URL for the Dub API. This is useful for [setting up reverse
proxies](/docs/sdks/client-side/features/reverse-proxy-support) to avoid
adblockers.
The attribution model to use for the analytics event. The following
attribution models are available:
* `first-click`: The first click model
gives all the credit to the first touchpoint in the customer journey.
* `last-click`: The last click model gives all the credit to the last
touchpoint in the customer journey.
Custom properties to pass to the cookie. Refer to
[MDN's Set-Cookie documentation](https://developer.mozilla.org/en-US/docs/Web/HTTP/Headers/Set-Cookie) for
all available options.
Specifies the value for the `Domain` Set-Cookie attribute. This is useful
for cross-domain tracking. Example: `.example.com`
Specifies the `Date` object to be the value for the `Expires` Set-Cookie
attribute. Example: `new Date('2024-12-31')`
Specifies the number (in days) to be the value for the `Expires`
Set-Cookie attribute.
For example, to set the cookie window to 60 days (instead of the default 90 days), you can add the following to your script:
```html theme={null}
```
Specifies the value for the `Path` Set-Cookie attribute. By default, the
path is considered the "default path". Example: `/`
Configure the domains that Dub will track. The following properties are available:
The Dub custom domain for [referral program client-side click tracking](http://d.to/clicks/refer) (previously `data-short-domain`).
Example: `refer.dub.co`
The Dub short domain for tracking site visits.
Example: `site.dub.co`
An array of domains for cross-domain tracking. When configured, the existing `dub_id` cookie
will be automatically appended to all outbound links targeting these domains to enable
cross-domain tracking across different applications.
Example: `"dub.sh, git.new"`
An array of query parameters to listen to for client-side click-tracking (e.g.
`?via=abc123`).
# Google Tag Manager
Source: https://dub.co/docs/sdks/client-side/installation-guides/google-tag-manager
How to add the Dub Analytics script to your site using Google Tag Manager
This guide will walk you through the process of integrating Dub Analytics with Google Tag Manager (GTM).
First, navigate to your Google Tag Manager account and create a new tag:
* Click on **Tags** in the left sidebar
* Click the **New** button
* Select **Custom HTML** as the tag type
![Select Custom HTML tag]() In the Custom HTML section, you'll need to add the Dub Analytics script. Copy and paste the following code into the **HTML** field:
```js theme={null}
```
In the Custom HTML section, you'll need to add the Dub Analytics script. Copy and paste the following code into the **HTML** field:
```js theme={null}
```
![Add dub analytics script]() If you're using [Dub Partners](https://dub.co/partners) for affiliate management, you will also need to set up the `data-domains` property to enable [client-side click-tracking](/docs/sdks/client-side/features/click-tracking).
```js theme={null}
```
To ensure the analytics script loads on all pages:
* Click on the **Triggering** section
* Select **All Pages** as the trigger type
* This will make the tag fire on every page load
* Name your tag **Dub Analytics**
* Click **Save** to store your changes
* Click **Submit** to create a new version
* Finally, click **Publish** to activate the tag on your website
You can **verify the installation** with the following tests:
1. Open the browser console and type in `_dubAnalytics` – if the script is installed correctly, you should see the `_dubAnalytics` object in the console.
2. Add the `?dub_id=test` query parameter to your website URL and make sure that the `dub_id` cookie is being set in your browser.
If both of these checks pass, the script is installed correctly. Otherwise, please make sure:
* The analytics script was added to the `` section of the page
* If you're using a content delivery network (CDN), make sure to purge any cached content
## Concepts
You can pass the following props to the Dub Analytics script to customize its behavior:
The base URL for the Dub API. This is useful for [setting up reverse
proxies](/docs/sdks/client-side/features/reverse-proxy-support) to avoid
adblockers.
The attribution model to use for the analytics event. The following
attribution models are available:
* `first-click`: The first click model
gives all the credit to the first touchpoint in the customer journey.
* `last-click`: The last click model gives all the credit to the last
touchpoint in the customer journey.
Custom properties to pass to the cookie. Refer to
[MDN's Set-Cookie documentation](https://developer.mozilla.org/en-US/docs/Web/HTTP/Headers/Set-Cookie) for
all available options.
Specifies the value for the `Domain` Set-Cookie attribute. This is useful
for cross-domain tracking. Example: `.example.com`
Specifies the `Date` object to be the value for the `Expires` Set-Cookie
attribute. Example: `new Date('2024-12-31')`
Specifies the number (in days) to be the value for the `Expires`
Set-Cookie attribute.
For example, to set the cookie window to 60 days (instead of the default 90 days), you can add the following to your script:
```html theme={null}
```
Specifies the value for the `Path` Set-Cookie attribute. By default, the
path is considered the "default path". Example: `/`
Configure the domains that Dub will track. The following properties are available:
The Dub custom domain for [referral program client-side click tracking](http://d.to/clicks/refer) (previously `data-short-domain`).
Example: `refer.dub.co`
The Dub short domain for tracking site visits.
Example: `site.dub.co`
An array of domains for cross-domain tracking. When configured, the existing `dub_id` cookie
will be automatically appended to all outbound links targeting these domains to enable
cross-domain tracking across different applications.
Example: `"dub.sh, git.new"`
An array of query parameters to listen to for client-side click-tracking (e.g.
`?via=abc123`).
# Manual Installation
Source: https://dub.co/docs/sdks/client-side/installation-guides/manual
How to add the Dub Analytics script to your website
With Dub Analytics, you can track lead and sale conversions on your website, enabling you to measure the effectiveness of your marketing campaigns.
You can add the Dub Analytics script to your website same way you would add Google Analytics script or any other JavaScript code – by adding the Dub Analytics script in the `` section of your HTML file.
```html theme={null}
```
If you're using [Dub Partners](https://dub.co/partners) for affiliate management, you will also need to set up the `data-domains` property to enable [client-side click-tracking](/docs/sdks/client-side/features/click-tracking).
```html theme={null}
```
Read the [client-side click-tracking guide](/docs/sdks/client-side/features/click-tracking) for more information.
You can **verify the installation** with the following tests:
1. Open the browser console and type in `_dubAnalytics` – if the script is installed correctly, you should see the `_dubAnalytics` object in the console.
2. Add the `?dub_id=test` query parameter to your website URL and make sure that the `dub_id` cookie is being set in your browser.
If both of these checks pass, the script is installed correctly. Otherwise, please make sure:
* The analytics script was added to the `` section of the page
* If you're using a content delivery network (CDN), make sure to purge any cached content
## Concepts
You can pass the following props to the Dub Analytics script to customize its behavior:
The base URL for the Dub API. This is useful for [setting up reverse
proxies](/docs/sdks/client-side/features/reverse-proxy-support) to avoid
adblockers.
The attribution model to use for the analytics event. The following
attribution models are available:
* `first-click`: The first click model
gives all the credit to the first touchpoint in the customer journey.
* `last-click`: The last click model gives all the credit to the last
touchpoint in the customer journey.
Custom properties to pass to the cookie. Refer to
[MDN's Set-Cookie documentation](https://developer.mozilla.org/en-US/docs/Web/HTTP/Headers/Set-Cookie) for
all available options.
Specifies the value for the `Domain` Set-Cookie attribute. This is useful
for cross-domain tracking. Example: `.example.com`
Specifies the `Date` object to be the value for the `Expires` Set-Cookie
attribute. Example: `new Date('2024-12-31')`
Specifies the number (in days) to be the value for the `Expires`
Set-Cookie attribute.
For example, to set the cookie window to 60 days (instead of the default 90 days), you can add the following to your script:
```html theme={null}
```
Specifies the value for the `Path` Set-Cookie attribute. By default, the
path is considered the "default path". Example: `/`
Configure the domains that Dub will track. The following properties are available:
The Dub custom domain for [referral program client-side click tracking](http://d.to/clicks/refer) (previously `data-short-domain`).
Example: `refer.dub.co`
The Dub short domain for tracking site visits.
Example: `site.dub.co`
An array of domains for cross-domain tracking. When configured, the existing `dub_id` cookie
will be automatically appended to all outbound links targeting these domains to enable
cross-domain tracking across different applications.
Example: `"dub.sh, git.new"`
An array of query parameters to listen to for client-side click-tracking (e.g.
`?via=abc123`).
# React
Source: https://dub.co/docs/sdks/client-side/installation-guides/react
How to add the Dub Analytics script to your React website
With Dub Analytics, you can track lead and sale conversions on your website, enabling you to measure the effectiveness of your marketing campaigns.
## Quickstart
This quick start guide will show you how to get started with Dub Analytics on your website.
Using the package manager of your choice, add the `@dub/analytics` to your project.
```bash npm theme={null}
npm install @dub/analytics
```
```bash pnpm theme={null}
pnpm add @dub/analytics
```
```bash yarn theme={null}
yarn add @dub/analytics
```
```bash bun theme={null}
bun add @dub/analytics
```
If you are using a React framework, you can use the `` component to track conversions on your website.
E.g. if you're using Next.js, you can add the `` component to your root layout component or any other pages where you want to track conversions.
```jsx app/layout.tsx theme={null}
import { Analytics as DubAnalytics } from '@dub/analytics/react';
export default function RootLayout({
children,
}: Readonly<{
children: React.ReactNode;
}>) {
return (
{children}
);
}
```
If you're using [Dub Partners](https://dub.co/partners) for affiliate management, you will also need to set up the `domainsConfig.refer` property to enable [client-side click-tracking](/docs/sdks/client-side/features/click-tracking).
```jsx app/layout.tsx theme={null}
import { Analytics as DubAnalytics } from '@dub/analytics/react';
export default function RootLayout({
children,
}: Readonly<{
children: React.ReactNode;
}>) {
return (
{children}
);
}
```
Read the [client-side click-tracking guide](/docs/sdks/client-side/features/click-tracking) for more information.
You can **verify the installation** with the following tests:
1. Open the browser console and type in `_dubAnalytics` – if the script is installed correctly, you should see the `_dubAnalytics` object in the console.
2. Add the `?dub_id=test` query parameter to your website URL and make sure that the `dub_id` cookie is being set in your browser.
If both of these checks pass, the script is installed correctly. Otherwise, please make sure:
* The analytics script was added to the `` section of the page
* If you're using a content delivery network (CDN), make sure to purge any cached content
## Concepts
You can pass the following props to the `` component to customize its behavior:
The base URL for the Dub API. This is useful for [setting up reverse
proxies](/docs/sdks/client-side/features/reverse-proxy-support) to avoid
adblockers.
The attribution model to use for the analytics event. The following
attribution models are available:
* `first-click`: The first click model
gives all the credit to the first touchpoint in the customer journey.
* `last-click`: The last click model gives all the credit to the last
touchpoint in the customer journey.
Specifies the value for the `Domain` Set-Cookie attribute. This is useful
for cross-domain tracking. Example: `.example.com`
Specifies the `Date` object to be the value for the `Expires` Set-Cookie
attribute. Example: `new Date('2024-12-31')`
Specifies the number (in days) to be the value for the `Expires`
Set-Cookie attribute. Example: `90`
Specifies the value for the `Path` Set-Cookie attribute. By default, the
path is considered the "default path". Example: `/`
Configure the domains that Dub will track. The following properties are available:
The Dub custom domain for [referral program client-side click tracking](http://d.to/clicks/refer)
(previously `shortDomain`).
Example: `refer.dub.co`
The Dub short domain for tracking site visits.
Example: `site.dub.co`
An array of domains for cross-domain tracking. When configured, the existing
`dub_id` cookie will be automatically appended to all outbound links
targeting these domains to enable cross-domain tracking across different
applications.
Example: `["dub.sh", "git.new"]`
An array of query parameters to listen to for client-side click-tracking (e.g.
`?via=abc123`).
Custom properties to pass to the script tag. Refer to
[MDN](https://developer.mozilla.org/en-US/docs/Web/API/HTMLScriptElement) for
all available options.
# Shopify
Source: https://dub.co/docs/sdks/client-side/installation-guides/shopify
How to add the Dub Analytics script to your Shopify store
With Dub Analytics, you can track lead and sale conversions on your Shopify store, enabling you to measure the effectiveness of your marketing campaigns.
You can add the Dub Analytics script to your Shopify store simply by installing the [Dub Shopify App](https://d.to/shopify/app) from the App Store.
If you're using [Dub Partners](https://dub.co/partners) for affiliate management, you will also need to set up the `data-domains` property to enable [client-side click-tracking](/docs/sdks/client-side/features/click-tracking).
```js theme={null}
```
To ensure the analytics script loads on all pages:
* Click on the **Triggering** section
* Select **All Pages** as the trigger type
* This will make the tag fire on every page load
* Name your tag **Dub Analytics**
* Click **Save** to store your changes
* Click **Submit** to create a new version
* Finally, click **Publish** to activate the tag on your website
You can **verify the installation** with the following tests:
1. Open the browser console and type in `_dubAnalytics` – if the script is installed correctly, you should see the `_dubAnalytics` object in the console.
2. Add the `?dub_id=test` query parameter to your website URL and make sure that the `dub_id` cookie is being set in your browser.
If both of these checks pass, the script is installed correctly. Otherwise, please make sure:
* The analytics script was added to the `` section of the page
* If you're using a content delivery network (CDN), make sure to purge any cached content
## Concepts
You can pass the following props to the Dub Analytics script to customize its behavior:
The base URL for the Dub API. This is useful for [setting up reverse
proxies](/docs/sdks/client-side/features/reverse-proxy-support) to avoid
adblockers.
The attribution model to use for the analytics event. The following
attribution models are available:
* `first-click`: The first click model
gives all the credit to the first touchpoint in the customer journey.
* `last-click`: The last click model gives all the credit to the last
touchpoint in the customer journey.
Custom properties to pass to the cookie. Refer to
[MDN's Set-Cookie documentation](https://developer.mozilla.org/en-US/docs/Web/HTTP/Headers/Set-Cookie) for
all available options.
Specifies the value for the `Domain` Set-Cookie attribute. This is useful
for cross-domain tracking. Example: `.example.com`
Specifies the `Date` object to be the value for the `Expires` Set-Cookie
attribute. Example: `new Date('2024-12-31')`
Specifies the number (in days) to be the value for the `Expires`
Set-Cookie attribute.
For example, to set the cookie window to 60 days (instead of the default 90 days), you can add the following to your script:
```html theme={null}
```
Specifies the value for the `Path` Set-Cookie attribute. By default, the
path is considered the "default path". Example: `/`
Configure the domains that Dub will track. The following properties are available:
The Dub custom domain for [referral program client-side click tracking](http://d.to/clicks/refer) (previously `data-short-domain`).
Example: `refer.dub.co`
The Dub short domain for tracking site visits.
Example: `site.dub.co`
An array of domains for cross-domain tracking. When configured, the existing `dub_id` cookie
will be automatically appended to all outbound links targeting these domains to enable
cross-domain tracking across different applications.
Example: `"dub.sh, git.new"`
An array of query parameters to listen to for client-side click-tracking (e.g.
`?via=abc123`).
# Manual Installation
Source: https://dub.co/docs/sdks/client-side/installation-guides/manual
How to add the Dub Analytics script to your website
With Dub Analytics, you can track lead and sale conversions on your website, enabling you to measure the effectiveness of your marketing campaigns.
You can add the Dub Analytics script to your website same way you would add Google Analytics script or any other JavaScript code – by adding the Dub Analytics script in the `` section of your HTML file.
```html theme={null}
```
If you're using [Dub Partners](https://dub.co/partners) for affiliate management, you will also need to set up the `data-domains` property to enable [client-side click-tracking](/docs/sdks/client-side/features/click-tracking).
```html theme={null}
```
Read the [client-side click-tracking guide](/docs/sdks/client-side/features/click-tracking) for more information.
You can **verify the installation** with the following tests:
1. Open the browser console and type in `_dubAnalytics` – if the script is installed correctly, you should see the `_dubAnalytics` object in the console.
2. Add the `?dub_id=test` query parameter to your website URL and make sure that the `dub_id` cookie is being set in your browser.
If both of these checks pass, the script is installed correctly. Otherwise, please make sure:
* The analytics script was added to the `` section of the page
* If you're using a content delivery network (CDN), make sure to purge any cached content
## Concepts
You can pass the following props to the Dub Analytics script to customize its behavior:
The base URL for the Dub API. This is useful for [setting up reverse
proxies](/docs/sdks/client-side/features/reverse-proxy-support) to avoid
adblockers.
The attribution model to use for the analytics event. The following
attribution models are available:
* `first-click`: The first click model
gives all the credit to the first touchpoint in the customer journey.
* `last-click`: The last click model gives all the credit to the last
touchpoint in the customer journey.
Custom properties to pass to the cookie. Refer to
[MDN's Set-Cookie documentation](https://developer.mozilla.org/en-US/docs/Web/HTTP/Headers/Set-Cookie) for
all available options.
Specifies the value for the `Domain` Set-Cookie attribute. This is useful
for cross-domain tracking. Example: `.example.com`
Specifies the `Date` object to be the value for the `Expires` Set-Cookie
attribute. Example: `new Date('2024-12-31')`
Specifies the number (in days) to be the value for the `Expires`
Set-Cookie attribute.
For example, to set the cookie window to 60 days (instead of the default 90 days), you can add the following to your script:
```html theme={null}
```
Specifies the value for the `Path` Set-Cookie attribute. By default, the
path is considered the "default path". Example: `/`
Configure the domains that Dub will track. The following properties are available:
The Dub custom domain for [referral program client-side click tracking](http://d.to/clicks/refer) (previously `data-short-domain`).
Example: `refer.dub.co`
The Dub short domain for tracking site visits.
Example: `site.dub.co`
An array of domains for cross-domain tracking. When configured, the existing `dub_id` cookie
will be automatically appended to all outbound links targeting these domains to enable
cross-domain tracking across different applications.
Example: `"dub.sh, git.new"`
An array of query parameters to listen to for client-side click-tracking (e.g.
`?via=abc123`).
# React
Source: https://dub.co/docs/sdks/client-side/installation-guides/react
How to add the Dub Analytics script to your React website
With Dub Analytics, you can track lead and sale conversions on your website, enabling you to measure the effectiveness of your marketing campaigns.
## Quickstart
This quick start guide will show you how to get started with Dub Analytics on your website.
Using the package manager of your choice, add the `@dub/analytics` to your project.
```bash npm theme={null}
npm install @dub/analytics
```
```bash pnpm theme={null}
pnpm add @dub/analytics
```
```bash yarn theme={null}
yarn add @dub/analytics
```
```bash bun theme={null}
bun add @dub/analytics
```
If you are using a React framework, you can use the `` component to track conversions on your website.
E.g. if you're using Next.js, you can add the `` component to your root layout component or any other pages where you want to track conversions.
```jsx app/layout.tsx theme={null}
import { Analytics as DubAnalytics } from '@dub/analytics/react';
export default function RootLayout({
children,
}: Readonly<{
children: React.ReactNode;
}>) {
return (
{children}
);
}
```
If you're using [Dub Partners](https://dub.co/partners) for affiliate management, you will also need to set up the `domainsConfig.refer` property to enable [client-side click-tracking](/docs/sdks/client-side/features/click-tracking).
```jsx app/layout.tsx theme={null}
import { Analytics as DubAnalytics } from '@dub/analytics/react';
export default function RootLayout({
children,
}: Readonly<{
children: React.ReactNode;
}>) {
return (
{children}
);
}
```
Read the [client-side click-tracking guide](/docs/sdks/client-side/features/click-tracking) for more information.
You can **verify the installation** with the following tests:
1. Open the browser console and type in `_dubAnalytics` – if the script is installed correctly, you should see the `_dubAnalytics` object in the console.
2. Add the `?dub_id=test` query parameter to your website URL and make sure that the `dub_id` cookie is being set in your browser.
If both of these checks pass, the script is installed correctly. Otherwise, please make sure:
* The analytics script was added to the `` section of the page
* If you're using a content delivery network (CDN), make sure to purge any cached content
## Concepts
You can pass the following props to the `` component to customize its behavior:
The base URL for the Dub API. This is useful for [setting up reverse
proxies](/docs/sdks/client-side/features/reverse-proxy-support) to avoid
adblockers.
The attribution model to use for the analytics event. The following
attribution models are available:
* `first-click`: The first click model
gives all the credit to the first touchpoint in the customer journey.
* `last-click`: The last click model gives all the credit to the last
touchpoint in the customer journey.
Specifies the value for the `Domain` Set-Cookie attribute. This is useful
for cross-domain tracking. Example: `.example.com`
Specifies the `Date` object to be the value for the `Expires` Set-Cookie
attribute. Example: `new Date('2024-12-31')`
Specifies the number (in days) to be the value for the `Expires`
Set-Cookie attribute. Example: `90`
Specifies the value for the `Path` Set-Cookie attribute. By default, the
path is considered the "default path". Example: `/`
Configure the domains that Dub will track. The following properties are available:
The Dub custom domain for [referral program client-side click tracking](http://d.to/clicks/refer)
(previously `shortDomain`).
Example: `refer.dub.co`
The Dub short domain for tracking site visits.
Example: `site.dub.co`
An array of domains for cross-domain tracking. When configured, the existing
`dub_id` cookie will be automatically appended to all outbound links
targeting these domains to enable cross-domain tracking across different
applications.
Example: `["dub.sh", "git.new"]`
An array of query parameters to listen to for client-side click-tracking (e.g.
`?via=abc123`).
Custom properties to pass to the script tag. Refer to
[MDN](https://developer.mozilla.org/en-US/docs/Web/API/HTMLScriptElement) for
all available options.
# Shopify
Source: https://dub.co/docs/sdks/client-side/installation-guides/shopify
How to add the Dub Analytics script to your Shopify store
With Dub Analytics, you can track lead and sale conversions on your Shopify store, enabling you to measure the effectiveness of your marketing campaigns.
You can add the Dub Analytics script to your Shopify store simply by installing the [Dub Shopify App](https://d.to/shopify/app) from the App Store.
![The connection status in the Dub app]() Then, make sure to activate the Dub Analytics script by following these steps:
1. Navigate to your Shopify admin panel.
2. Go to **Online Store** > **Themes**.
3. Click on **Customize** for your current theme.
4. In the theme editor, select the **App embeds** tab.
5. Locate the **Analytics Script** for the Dub app and toggle it to activate.
Then, make sure to activate the Dub Analytics script by following these steps:
1. Navigate to your Shopify admin panel.
2. Go to **Online Store** > **Themes**.
3. Click on **Customize** for your current theme.
4. In the theme editor, select the **App embeds** tab.
5. Locate the **Analytics Script** for the Dub app and toggle it to activate.
![Enable the Dub Analytics script in your Shopify theme]() You can **verify the installation** with the following tests:
1. Open the browser console and type in `_dubAnalytics` – if the script is installed correctly, you should see the `_dubAnalytics` object in the console.
2. Add the `?dub_id=test` query parameter to your website URL and make sure that the `dub_id` cookie is being set in your browser.
If both of these checks pass, the script is installed correctly. Otherwise, please make sure:
* The analytics script was added to the `` section of the page
* If you're using a content delivery network (CDN), make sure to purge any cached content
## Installation video
Here's a video showing how to install and activate the Dub Analytics script in your Shopify store:
# Webflow
Source: https://dub.co/docs/sdks/client-side/installation-guides/webflow
How to add the Dub Analytics script to your Webflow site
With Dub Analytics, you can track lead and sale conversions on your Webflow site, enabling you to measure the effectiveness of your marketing campaigns.
You can add the Dub Analytics script to your Webflow website same way you would add Google Analytics script or any other JavaScript code.
Follow these steps to add the script to your site:
* On your project's page, click on the **Webflow logo** in the left-hand side menu and choose **Project Settings**.
* Choose **[Custom Code](https://university.webflow.com/lesson/custom-code-in-the-head-and-body-tags?topics=site-settings)** from the menu and paste the Dub analytics script in the **Head Code** section.
* Click on the **Save Changes** button and then **Publish** your changes.
```html theme={null}
```
If you're using [Dub Partners](https://dub.co/partners) for affiliate management, you will also need to set up the `data-domains` property to enable [client-side click-tracking](/docs/sdks/client-side/features/click-tracking).
```html theme={null}
```
Read the [client-side click-tracking guide](/docs/sdks/client-side/features/click-tracking) for more information.
You can **verify the installation** with the following tests:
1. Open the browser console and type in `_dubAnalytics` – if the script is installed correctly, you should see the `_dubAnalytics` object in the console.
2. Add the `?dub_id=test` query parameter to your website URL and make sure that the `dub_id` cookie is being set in your browser.
If both of these checks pass, the script is installed correctly. Otherwise, please make sure:
* The analytics script was added to the `` section of the page
* If you're using a content delivery network (CDN), make sure to purge any cached content
## Concepts
You can pass the following props to the Dub Analytics script to customize its behavior:
The base URL for the Dub API. This is useful for [setting up reverse
proxies](/docs/sdks/client-side/features/reverse-proxy-support) to avoid
adblockers.
The attribution model to use for the analytics event. The following
attribution models are available:
* `first-click`: The first click model
gives all the credit to the first touchpoint in the customer journey.
* `last-click`: The last click model gives all the credit to the last
touchpoint in the customer journey.
Custom properties to pass to the cookie. Refer to
[MDN's Set-Cookie documentation](https://developer.mozilla.org/en-US/docs/Web/HTTP/Headers/Set-Cookie) for
all available options.
Specifies the value for the `Domain` Set-Cookie attribute. This is useful
for cross-domain tracking. Example: `.example.com`
Specifies the `Date` object to be the value for the `Expires` Set-Cookie
attribute. Example: `new Date('2024-12-31')`
Specifies the number (in days) to be the value for the `Expires`
Set-Cookie attribute.
For example, to set the cookie window to 60 days (instead of the default 90 days), you can add the following to your script:
```html theme={null}
```
Specifies the value for the `Path` Set-Cookie attribute. By default, the
path is considered the "default path". Example: `/`
Configure the domains that Dub will track. The following properties are available:
The Dub custom domain for [referral program client-side click tracking](http://d.to/clicks/refer) (previously `data-short-domain`).
Example: `refer.dub.co`
The Dub short domain for tracking site visits.
Example: `site.dub.co`
An array of domains for cross-domain tracking. When configured, the existing `dub_id` cookie
will be automatically appended to all outbound links targeting these domains to enable
cross-domain tracking across different applications.
Example: `"dub.sh, git.new"`
An array of query parameters to listen to for client-side click-tracking (e.g.
`?via=abc123`).
# WordPress
Source: https://dub.co/docs/sdks/client-side/installation-guides/wordpress
How to add the Dub Analytics script to your WordPress site
With Dub Analytics, you can track lead and sale conversions on your WordPress site, enabling you to measure the effectiveness of your marketing campaigns.
You can add the Dub Analytics script to your WordPress website same way you would add Google Analytics script or any other JavaScript code.
Follow these steps to add the script to your site:
* On your WordPress dashboard, navigate to the **Theme Editor** section under the **Appearance** menu.
* Open the **Theme Header (header.php)** file on the right column.
* Paste the Dub analytics script in the header area.
* Click on the **Update File** button to save the changes.
```html theme={null}
```
If you're using [Dub Partners](https://dub.co/partners) for affiliate management, you will also need to set up the `data-domains` property to enable [client-side click-tracking](/docs/sdks/client-side/features/click-tracking).
```html theme={null}
```
Read the [client-side click-tracking guide](/docs/sdks/client-side/features/click-tracking) for more information.
You can **verify the installation** with the following tests:
1. Open the browser console and type in `_dubAnalytics` – if the script is installed correctly, you should see the `_dubAnalytics` object in the console.
2. Add the `?dub_id=test` query parameter to your website URL and make sure that the `dub_id` cookie is being set in your browser.
If both of these checks pass, the script is installed correctly. Otherwise, please make sure:
* The analytics script was added to the `` section of the page
* If you're using a content delivery network (CDN), make sure to purge any cached content
## Concepts
You can pass the following props to the Dub Analytics script to customize its behavior:
The base URL for the Dub API. This is useful for [setting up reverse
proxies](/docs/sdks/client-side/features/reverse-proxy-support) to avoid
adblockers.
The attribution model to use for the analytics event. The following
attribution models are available:
* `first-click`: The first click model
gives all the credit to the first touchpoint in the customer journey.
* `last-click`: The last click model gives all the credit to the last
touchpoint in the customer journey.
Custom properties to pass to the cookie. Refer to
[MDN's Set-Cookie documentation](https://developer.mozilla.org/en-US/docs/Web/HTTP/Headers/Set-Cookie) for
all available options.
Specifies the value for the `Domain` Set-Cookie attribute. This is useful
for cross-domain tracking. Example: `.example.com`
Specifies the `Date` object to be the value for the `Expires` Set-Cookie
attribute. Example: `new Date('2024-12-31')`
Specifies the number (in days) to be the value for the `Expires`
Set-Cookie attribute.
For example, to set the cookie window to 60 days (instead of the default 90 days), you can add the following to your script:
```html theme={null}
```
Specifies the value for the `Path` Set-Cookie attribute. By default, the
path is considered the "default path". Example: `/`
Configure the domains that Dub will track. The following properties are available:
The Dub custom domain for [referral program client-side click tracking](http://d.to/clicks/refer) (previously `data-short-domain`).
Example: `refer.dub.co`
The Dub short domain for tracking site visits.
Example: `site.dub.co`
An array of domains for cross-domain tracking. When configured, the existing `dub_id` cookie
will be automatically appended to all outbound links targeting these domains to enable
cross-domain tracking across different applications.
Example: `"dub.sh, git.new"`
An array of query parameters to listen to for client-side click-tracking (e.g.
`?via=abc123`).
# Introduction
Source: https://dub.co/docs/sdks/client-side/introduction
Learn more about the Dub Analytics script and how to install it.
Dub Analytics (`@dub/analytics`) is a lightweight (\~1kb), [open-source](https://github.com/dubinc/analytics) client-side script for [tracking conversion events](/help/article/dub-conversions) with Dub.
The script handles the detection of the `dub_id` query parameter and storing it as a first-party cookie, which will be used to attribute subsequent conversion events to the original link.
You can **verify the installation** with the following tests:
1. Open the browser console and type in `_dubAnalytics` – if the script is installed correctly, you should see the `_dubAnalytics` object in the console.
2. Add the `?dub_id=test` query parameter to your website URL and make sure that the `dub_id` cookie is being set in your browser.
If both of these checks pass, the script is installed correctly. Otherwise, please make sure:
* The analytics script was added to the `` section of the page
* If you're using a content delivery network (CDN), make sure to purge any cached content
## Installation video
Here's a video showing how to install and activate the Dub Analytics script in your Shopify store:
# Webflow
Source: https://dub.co/docs/sdks/client-side/installation-guides/webflow
How to add the Dub Analytics script to your Webflow site
With Dub Analytics, you can track lead and sale conversions on your Webflow site, enabling you to measure the effectiveness of your marketing campaigns.
You can add the Dub Analytics script to your Webflow website same way you would add Google Analytics script or any other JavaScript code.
Follow these steps to add the script to your site:
* On your project's page, click on the **Webflow logo** in the left-hand side menu and choose **Project Settings**.
* Choose **[Custom Code](https://university.webflow.com/lesson/custom-code-in-the-head-and-body-tags?topics=site-settings)** from the menu and paste the Dub analytics script in the **Head Code** section.
* Click on the **Save Changes** button and then **Publish** your changes.
```html theme={null}
```
If you're using [Dub Partners](https://dub.co/partners) for affiliate management, you will also need to set up the `data-domains` property to enable [client-side click-tracking](/docs/sdks/client-side/features/click-tracking).
```html theme={null}
```
Read the [client-side click-tracking guide](/docs/sdks/client-side/features/click-tracking) for more information.
You can **verify the installation** with the following tests:
1. Open the browser console and type in `_dubAnalytics` – if the script is installed correctly, you should see the `_dubAnalytics` object in the console.
2. Add the `?dub_id=test` query parameter to your website URL and make sure that the `dub_id` cookie is being set in your browser.
If both of these checks pass, the script is installed correctly. Otherwise, please make sure:
* The analytics script was added to the `` section of the page
* If you're using a content delivery network (CDN), make sure to purge any cached content
## Concepts
You can pass the following props to the Dub Analytics script to customize its behavior:
The base URL for the Dub API. This is useful for [setting up reverse
proxies](/docs/sdks/client-side/features/reverse-proxy-support) to avoid
adblockers.
The attribution model to use for the analytics event. The following
attribution models are available:
* `first-click`: The first click model
gives all the credit to the first touchpoint in the customer journey.
* `last-click`: The last click model gives all the credit to the last
touchpoint in the customer journey.
Custom properties to pass to the cookie. Refer to
[MDN's Set-Cookie documentation](https://developer.mozilla.org/en-US/docs/Web/HTTP/Headers/Set-Cookie) for
all available options.
Specifies the value for the `Domain` Set-Cookie attribute. This is useful
for cross-domain tracking. Example: `.example.com`
Specifies the `Date` object to be the value for the `Expires` Set-Cookie
attribute. Example: `new Date('2024-12-31')`
Specifies the number (in days) to be the value for the `Expires`
Set-Cookie attribute.
For example, to set the cookie window to 60 days (instead of the default 90 days), you can add the following to your script:
```html theme={null}
```
Specifies the value for the `Path` Set-Cookie attribute. By default, the
path is considered the "default path". Example: `/`
Configure the domains that Dub will track. The following properties are available:
The Dub custom domain for [referral program client-side click tracking](http://d.to/clicks/refer) (previously `data-short-domain`).
Example: `refer.dub.co`
The Dub short domain for tracking site visits.
Example: `site.dub.co`
An array of domains for cross-domain tracking. When configured, the existing `dub_id` cookie
will be automatically appended to all outbound links targeting these domains to enable
cross-domain tracking across different applications.
Example: `"dub.sh, git.new"`
An array of query parameters to listen to for client-side click-tracking (e.g.
`?via=abc123`).
# WordPress
Source: https://dub.co/docs/sdks/client-side/installation-guides/wordpress
How to add the Dub Analytics script to your WordPress site
With Dub Analytics, you can track lead and sale conversions on your WordPress site, enabling you to measure the effectiveness of your marketing campaigns.
You can add the Dub Analytics script to your WordPress website same way you would add Google Analytics script or any other JavaScript code.
Follow these steps to add the script to your site:
* On your WordPress dashboard, navigate to the **Theme Editor** section under the **Appearance** menu.
* Open the **Theme Header (header.php)** file on the right column.
* Paste the Dub analytics script in the header area.
* Click on the **Update File** button to save the changes.
```html theme={null}
```
If you're using [Dub Partners](https://dub.co/partners) for affiliate management, you will also need to set up the `data-domains` property to enable [client-side click-tracking](/docs/sdks/client-side/features/click-tracking).
```html theme={null}
```
Read the [client-side click-tracking guide](/docs/sdks/client-side/features/click-tracking) for more information.
You can **verify the installation** with the following tests:
1. Open the browser console and type in `_dubAnalytics` – if the script is installed correctly, you should see the `_dubAnalytics` object in the console.
2. Add the `?dub_id=test` query parameter to your website URL and make sure that the `dub_id` cookie is being set in your browser.
If both of these checks pass, the script is installed correctly. Otherwise, please make sure:
* The analytics script was added to the `` section of the page
* If you're using a content delivery network (CDN), make sure to purge any cached content
## Concepts
You can pass the following props to the Dub Analytics script to customize its behavior:
The base URL for the Dub API. This is useful for [setting up reverse
proxies](/docs/sdks/client-side/features/reverse-proxy-support) to avoid
adblockers.
The attribution model to use for the analytics event. The following
attribution models are available:
* `first-click`: The first click model
gives all the credit to the first touchpoint in the customer journey.
* `last-click`: The last click model gives all the credit to the last
touchpoint in the customer journey.
Custom properties to pass to the cookie. Refer to
[MDN's Set-Cookie documentation](https://developer.mozilla.org/en-US/docs/Web/HTTP/Headers/Set-Cookie) for
all available options.
Specifies the value for the `Domain` Set-Cookie attribute. This is useful
for cross-domain tracking. Example: `.example.com`
Specifies the `Date` object to be the value for the `Expires` Set-Cookie
attribute. Example: `new Date('2024-12-31')`
Specifies the number (in days) to be the value for the `Expires`
Set-Cookie attribute.
For example, to set the cookie window to 60 days (instead of the default 90 days), you can add the following to your script:
```html theme={null}
```
Specifies the value for the `Path` Set-Cookie attribute. By default, the
path is considered the "default path". Example: `/`
Configure the domains that Dub will track. The following properties are available:
The Dub custom domain for [referral program client-side click tracking](http://d.to/clicks/refer) (previously `data-short-domain`).
Example: `refer.dub.co`
The Dub short domain for tracking site visits.
Example: `site.dub.co`
An array of domains for cross-domain tracking. When configured, the existing `dub_id` cookie
will be automatically appended to all outbound links targeting these domains to enable
cross-domain tracking across different applications.
Example: `"dub.sh, git.new"`
An array of query parameters to listen to for client-side click-tracking (e.g.
`?via=abc123`).
# Introduction
Source: https://dub.co/docs/sdks/client-side/introduction
Learn more about the Dub Analytics script and how to install it.
Dub Analytics (`@dub/analytics`) is a lightweight (\~1kb), [open-source](https://github.com/dubinc/analytics) client-side script for [tracking conversion events](/help/article/dub-conversions) with Dub.
The script handles the detection of the `dub_id` query parameter and storing it as a first-party cookie, which will be used to attribute subsequent conversion events to the original link.
![A diagram showing how click events are tracked in the conversion funnel]() If you're using Dub Partners, this script also lets you [track clicks on the client-side](/docs/sdks/client-side/features/click-tracking) using query parameters (e.g. `?via=john`). This gives you the flexibility to track clicks directly on your website or app, without needing to rely on link redirects.
## Installation guides
You can install the Dub Analytics script in several different ways:
}
href="/docs/sdks/client-side/installation-guides/framer"
/>
## Features
The Dub Analytics script comes with the following features:
* [Conversion-tracking](/docs/sdks/client-side/features/conversion-tracking)
* [Client-side click-tracking](/docs/sdks/client-side/features/click-tracking)
* [Cross-domain tracking](/docs/sdks/client-side/features/cross-domain-tracking)
* [Reverse-proxy support](/docs/sdks/client-side/features/reverse-proxy-support)
## Properties
You can pass the following props to the Dub Analytics script to customize its behavior:
The base URL for the Dub API. This is useful for [setting up reverse
proxies](/docs/sdks/client-side/features/reverse-proxy-support) to avoid
adblockers.
The attribution model to use for the analytics event. The following
attribution models are available:
* `first-click`: The first click model
gives all the credit to the first touchpoint in the customer journey.
* `last-click`: The last click model gives all the credit to the last
touchpoint in the customer journey.
Custom properties to pass to the cookie. Refer to
[MDN's Set-Cookie documentation](https://developer.mozilla.org/en-US/docs/Web/HTTP/Headers/Set-Cookie) for
all available options.
Specifies the value for the `Domain` Set-Cookie attribute. This is useful
for cross-domain tracking. Example: `.example.com`
Specifies the `Date` object to be the value for the `Expires` Set-Cookie
attribute. Example: `new Date('2024-12-31')`
Specifies the number (in days) to be the value for the `Expires`
Set-Cookie attribute.
For example, to set the cookie window to 60 days (instead of the default 90 days), you can add the following to your script:
```html theme={null}
```
Specifies the value for the `Path` Set-Cookie attribute. By default, the
path is considered the "default path". Example: `/`
Configure the domains that Dub will track. The following properties are available:
The Dub custom domain for [referral program client-side click tracking](http://d.to/clicks/refer) (previously `data-short-domain`).
Example: `refer.dub.co`
The Dub short domain for tracking site visits.
Example: `site.dub.co`
An array of domains for cross-domain tracking. When configured, the existing `dub_id` cookie
will be automatically appended to all outbound links targeting these domains to enable
cross-domain tracking across different applications.
Example: `"dub.sh, git.new"`
An array of query parameters to listen to for client-side click-tracking (e.g.
`?via=abc123`).
## Open-source examples
Here are some open-source code examples that you can reference:
See the full example on GitHub.
See the full example on GitHub.
# Script Variants
Source: https://dub.co/docs/sdks/client-side/variants
Learn more about the different variants of the Dub Analytics script.
Inspired by [Plausible](https://plausible.io/), our script is split into multiple variants to help you optimize your script for different use cases.
This allows us to keep the base variant of the script as lightweight as possible (\~1kb) while still allowing you to use the script in more complex use cases.
## Syntax
The base script is available on [`script.js`](https://www.dubcdn.com/analytics/script.js), and all variants are available on `script.[variant].js`.
For instance, the `outbound-domains` variant is available on [`script.outbound-domains.js`](https://www.dubcdn.com/analytics/script.outbound-domains.js).
You can also mix and match variants. For example, you can use the `site-visit` and `outbound-domains` variants together with this script: [`script.site-visit.outbound-domains.js`](https://www.dubcdn.com/analytics/script.site-visit.outbound-domains.js).
## List of variants
Here's a list of all the variants available:
* [Base Variant](#base-variant-script-js)
* [Site Visit Variant](#site-visit-variant-script-site-visit-js)
* [Outbound Domains Variant](#outbound-domains-variant-script-outbound-domains-js)
* [Combined Variant](#combined-variant)
### Base Variant (`script.js`)
The base variant of the script is the most lightweight variant of the script. It supports the following features:
* Detecting the `dub_id` query parameter and storing it as a first-party cookie.
* Tracking [client-side click events for referral programs](/docs/sdks/client-side/features/click-tracking).
* Setting [custom cookie window](/docs/sdks/client-side/introduction#custom-cookie-window) and [attribution models](/docs/sdks/client-side/introduction#param-data-attribution-model)
Here's how you can use the base variant:
```html HTML theme={null}
```
```typescript React/Next.js theme={null}
```
### Site Visit Variant (`script.site-visit.js`)
Dub Analytics site visit feature is still in beta.
The site visit variant of the script is a variant of the script that supports tracking site visits.
On top of the features supported by the base variant, it also supports tracking the first entry page of a user, which is useful for measuring SEO and Google Ads performance.
Here's how you can use the site visit variant:
```html HTML theme={null}
```
```typescript React/Next.js theme={null}
// the DubAnalytics component automatically detects the `domainsConfig.site` prop
// and applies the site-visit script variant for you
```
### Outbound Domains Variant (`script.outbound-domains.js`)
The outbound domains variant of the script is a variant of the script that supports [cross-domain tracking](/docs/sdks/client-side/introduction#cross-domain-tracking) across different applications.
On top of the features supported by the base variant, it also supports appending the `dub_id` cookie to all outbound links targeting the domains you configure.
Here's how you can use the outbound domains variant:
```html HTML theme={null}
```
```typescript React/Next.js theme={null}
// the DubAnalytics component automatically detects the `domainsConfig.outbound` prop
// and applies the outbound-domains script variant for you
```
### Combined Variant
You can also mix and match variants. For example, you can use the `site-visit` and `outbound-domains` variants together with this script: [`script.site-visit.outbound-domains.js`](https://www.dubcdn.com/analytics/script.site-visit.outbound-domains.js).
Here's how you can use the combined variant:
```html HTML theme={null}
```
```typescript React/Next.js theme={null}
// the DubAnalytics component automatically detects the `domainsConfig` prop
// and applies the combined script variant for you
```
## `DubAnalytics` React Component
If you're using a React application, we recommend using the `DubAnalytics` component to automatically apply the correct script variant for you.
For example, if you want to use the `outbound-domains` variant, you can do the following:
```typescript React/Next.js theme={null}
```
The `DubAnalytics` component will automatically detect the `domainsConfig` prop and apply the correct script variant for you.
# Go SDK
Source: https://dub.co/docs/sdks/go
Learn how to integrate Dub with Go.
## Installation
```bash theme={null}
go get github.com/dubinc/dub-go
```
## Basic Usage
Here's how you can use the Dub Go SDK to create a link and retrieve click analytics in timeseries format for it:
```go theme={null}
package main
import (
"context"
"fmt"
"log"
"os"
dub "github.com/dubinc/dub-go"
)
func main() {
// Initialize the Dub SDK with your API key
d := dub.New(
dub.WithSecurity(os.Getenv("DUB_API_KEY")), // optional, defaults to DUB_API_KEY
)
// Create a new link
request := &operations.CreateLinkRequestBody{
URL: "https://google.com",
}
ctx := context.Background()
res, err := d.Links.Create(ctx, request)
if err != nil {
log.Fatal(err)
}
if res.LinkSchema != nil {
fmt.Println(res.LinkSchema.ShortLink) // e.g. https://dub.sh/abc123
}
// Get analytics for the link
analyticsRequest := operations.RetrieveAnalyticsRequest{
LinkId: res.LinkSchema.ID,
GroupBy: "timeseries",
Interval: "30d",
}
analyticsRes, err := d.Analytics.Retrieve(ctx, analyticsRequest)
if err != nil {
log.Fatal(err)
}
if analyticsRes.OneOf != nil {
fmt.Println(analyticsRes.OneOf) // e.g. [{ start: "2024-01-01", clicks: 100 }]
}
}
```
For more usage examples:
1. [Organizing links by external ID, tenant ID, tags, etc](/docs/concepts/links/organization)
2. [Bulk link operations (create, update, delete)](/docs/concepts/links/bulk-operations)
3. [Retrieving link analytics](/docs/concepts/analytics)
You can also check out the [Go SDK quickstart](/docs/sdks/quickstart/go) for a basic example.
## Additional Resources
Download and install the Dub Go SDK on GitHub
View the complete SDK reference documentation
Quickstart examples with the Go SDK
# Overview
Source: https://dub.co/docs/sdks/overview
Open-source client libraries for the Dub API
## MCP Server
Use the Dub MCP server to manage your partner program with the AI agent of
your choice.
## Server-side SDKs
Dub offers server-side SDKs for many popular programming languages:
TypeScript library for the Dub API
Go library for the Dub API
Python library for the Dub API
Ruby library for the Dub API
PHP library for the Dub API
## Client-side SDKs
Dub Analytics SDK
## Client-side mobile SDKs
Dub iOS SDK
Dub React Native SDK
## Embedded Dashboards
Embed the Dub Referrals dashboard in your application
## CLI
Shorten and manage your links directly from your terminal
# PHP SDK
Source: https://dub.co/docs/sdks/php
Learn how to integrate Dub with PHP.
## Installation
```bash theme={null}
composer require dub/dub-php
```
## Basic Usage
Here's how you can use the Dub PHP SDK to create a link and retrieve click analytics in timeseries format for it:
```php theme={null}
setSecurity(getenv('DUB_API_KEY')) // optional, defaults to DUB_API_KEY
->build();
// Create a new link
$request = new Operations\CreateLinkRequestBody(
url: 'https://google.com',
);
try {
$response = $dub->links->create($request);
if ($response->linkSchema !== null) {
echo $response->linkSchema->shortLink; // e.g. https://dub.sh/abc123
}
// Get analytics for the link
$analyticsRequest = new Operations\RetrieveAnalyticsRequest();
$analyticsRequest->linkId = $response->linkSchema->id;
$analyticsRequest->interval = Operations\Interval::ThirtyD;
$analyticsRequest->groupBy = Operations\GroupBy::Timeseries;
$analyticsResponse = $dub->analytics->retrieve($analyticsRequest);
if ($analyticsResponse->oneOf !== null) {
print_r($analyticsResponse->oneOf); // e.g. [{ start: "2024-01-01", clicks: 100 }]
}
} catch (Throwable $e) {
// handle exception
}
```
For more usage examples:
1. [Organizing links by external ID, tenant ID, tags, etc](/docs/concepts/links/organization)
2. [Bulk link operations (create, update, delete)](/docs/concepts/links/bulk-operations)
3. [Retrieving link analytics](/docs/concepts/analytics)
## Frameworks
You can use the Dub PHP SDK with any PHP framework:
1. [Usage with Laravel](/docs/sdks/quickstart/laravel)
If you're using a different PHP framework, you can refer to the [PHP SDK quickstart](/docs/sdks/quickstart/php) for a basic example.
## Additional Resources
Download and install the Dub PHP SDK on Packagist
View the complete SDK reference documentation
Quickstart examples with the PHP SDK
View the complete source code for the Dub PHP SDK
# Python SDK
Source: https://dub.co/docs/sdks/python
Learn how to integrate Dub with Python.
## Installation
```bash theme={null}
pip install dub
```
## Basic Usage
Here's how you can use the Dub Python SDK to create a link and retrieve click analytics in timeseries format for it:
```python theme={null}
import os
import dub
from dub.models import operations
# Initialize the Dub SDK with your API key
d = dub.Dub(
token=os.environ['DUB_API_KEY'], # optional, defaults to DUB_API_KEY
)
# Create a new link
res = d.links.create(request={
"url": "https://google.com",
})
print(res.short_link) # e.g. https://dub.sh/abc123
# Get analytics for the link
analytics = d.analytics.retrieve(request={
"link_id": res.id,
"interval": "30d",
"group_by": "timeseries",
})
print(analytics) # e.g. [{ "start": "2024-01-01", "clicks": 100 }]
```
For more usage examples:
1. [Organizing links by external ID, tenant ID, tags, etc](/docs/concepts/links/organization)
2. [Bulk link operations (create, update, delete)](/docs/concepts/links/bulk-operations)
3. [Retrieving link analytics](/docs/concepts/analytics)
## Frameworks
You can use the Dub Python SDK with any Python framework:
1. [Usage with Flask](/docs/sdks/quickstart/flask)
2. [Usage with Django](/docs/sdks/quickstart/django)
If you're using a different Python framework, you can refer to the [Python SDK quickstart](/docs/sdks/quickstart/python) for a basic example.
## Additional Resources
Download and install the Dub Python SDK on PyPI
View the complete SDK reference documentation
Quickstart examples with the Python SDK
View the complete source code for the Dub Python SDK
# Ruby SDK
Source: https://dub.co/docs/sdks/ruby
Learn how to integrate Dub with Ruby.
## Installation
```bash theme={null}
gem install dub
```
## Basic Usage
Here's how you can use the Dub Ruby SDK to create a link and retrieve click analytics in timeseries format for it:
```ruby theme={null}
require 'dub'
# Initialize the Dub SDK with your API key
dub = ::OpenApiSDK::Dub.new
dub.config_security(
::OpenApiSDK::Shared::Security.new(
token: ENV['DUB_API_KEY'], # optional, defaults to DUB_API_KEY
)
)
# Create a new link
req = ::OpenApiSDK::Operations::CreateLinkRequest.new(
request_body: ::OpenApiSDK::Operations::CreateLinkRequestBody.new(
url: "https://google.com"
)
)
res = dub.links.create(req)
puts res.raw_response.body # e.g. { "shortLink": "https://dub.sh/abc123" }
# Get analytics for the link
analytics_req = ::OpenApiSDK::Operations::RetrieveAnalyticsRequest.new(
link_id: res.raw_response.body["id"],
interval: ::OpenApiSDK::Operations::Interval::THIRTYD,
group_by: ::OpenApiSDK::Operations::GroupBy::TIMESERIES
)
analytics_res = dub.analytics.retrieve(analytics_req)
puts analytics_res.raw_response.body # e.g. [{ "start": "2024-01-01", "clicks": 100 }]
```
For more usage examples:
1. [Organizing links by external ID, tenant ID, tags, etc](/docs/concepts/links/organization)
2. [Bulk link operations (create, update, delete)](/docs/concepts/links/bulk-operations)
3. [Retrieving link analytics](/docs/concepts/analytics)
## Frameworks
You can use the Dub Ruby SDK with any Ruby framework:
1. [Usage with Rails](/docs/sdks/quickstart/rails)
2. [Usage with Sinatra](/docs/sdks/quickstart/sinatra)
If you're using a different Ruby framework, you can refer to the [Ruby SDK quickstart](/docs/sdks/quickstart/ruby) for a basic example.
## Additional Resources
Download and install the Dub Ruby SDK on RubyGems
View the complete SDK reference documentation
Quickstart examples with the Ruby SDK
View the complete source code for the Dub Ruby SDK
# TypeScript SDK
Source: https://dub.co/docs/sdks/typescript
Learn how to integrate Dub with TypeScript.
## Installation
```bash npm theme={null}
npm install dub
```
```bash pnpm theme={null}
pnpm add dub
```
```bash yarn theme={null}
yarn add dub zod # zod is a peer dependency
```
## Basic Usage
Here's how you can use the Dub TypeScript SDK to create a link and retrieve click analytics in timeseries format for it:
```typescript theme={null}
import { Dub } from "dub";
// Initialize the Dub SDK with your API key
const dub = new Dub({
token: process.env.DUB_API_KEY, // optional, defaults to DUB_API_KEY
});
// Create a new link
const link = await dub.links.create({
url: "https://google.com",
});
console.log(link.shortLink); // e.g. https://dub.sh/abc123
// Get analytics for the link
const analytics = await dub.analytics.retrieve({
link_id: link.id,
groupBy: "timeseries",
interval: "30d",
});
console.log(analytics); // e.g. [{ start: "2024-01-01", clicks: 100 }]
```
For more usage examples:
1. [Organizing links by external ID, tenant ID, tags, etc](/docs/concepts/links/organization)
2. [Bulk link operations (create, update, delete)](/docs/concepts/links/bulk-operations)
3. [Retrieving link analytics](/docs/concepts/analytics)
## Frameworks
You can use the Dub TypeScript SDK with any JavaScript framework:
1. [Usage with Next.js](/docs/sdks/quickstart/nextjs)
2. [Usage with Remix](/docs/sdks/quickstart/remix)
3. [Usage with Nuxt](/docs/sdks/quickstart/nuxt)
4. [Usage with Express](/docs/sdks/quickstart/express)
If you're using a different JavaScript framework, you can refer to the [TypeScript SDK quickstart](/docs/sdks/quickstart/typescript) for a basic example.
## Additional Resources
Download and install the Dub TypeScript SDK on NPM
View the complete SDK reference documentation
Quickstart examples with the TypeScript SDK
View the complete source code for the Dub TypeScript SDK
# Self-hosting Dub
Source: https://dub.co/docs/self-hosting
An end-to-end guide on how to self-host Dub – the open-source link attribution platform.
If you're using Dub Partners, this script also lets you [track clicks on the client-side](/docs/sdks/client-side/features/click-tracking) using query parameters (e.g. `?via=john`). This gives you the flexibility to track clicks directly on your website or app, without needing to rely on link redirects.
## Installation guides
You can install the Dub Analytics script in several different ways:
}
href="/docs/sdks/client-side/installation-guides/framer"
/>
## Features
The Dub Analytics script comes with the following features:
* [Conversion-tracking](/docs/sdks/client-side/features/conversion-tracking)
* [Client-side click-tracking](/docs/sdks/client-side/features/click-tracking)
* [Cross-domain tracking](/docs/sdks/client-side/features/cross-domain-tracking)
* [Reverse-proxy support](/docs/sdks/client-side/features/reverse-proxy-support)
## Properties
You can pass the following props to the Dub Analytics script to customize its behavior:
The base URL for the Dub API. This is useful for [setting up reverse
proxies](/docs/sdks/client-side/features/reverse-proxy-support) to avoid
adblockers.
The attribution model to use for the analytics event. The following
attribution models are available:
* `first-click`: The first click model
gives all the credit to the first touchpoint in the customer journey.
* `last-click`: The last click model gives all the credit to the last
touchpoint in the customer journey.
Custom properties to pass to the cookie. Refer to
[MDN's Set-Cookie documentation](https://developer.mozilla.org/en-US/docs/Web/HTTP/Headers/Set-Cookie) for
all available options.
Specifies the value for the `Domain` Set-Cookie attribute. This is useful
for cross-domain tracking. Example: `.example.com`
Specifies the `Date` object to be the value for the `Expires` Set-Cookie
attribute. Example: `new Date('2024-12-31')`
Specifies the number (in days) to be the value for the `Expires`
Set-Cookie attribute.
For example, to set the cookie window to 60 days (instead of the default 90 days), you can add the following to your script:
```html theme={null}
```
Specifies the value for the `Path` Set-Cookie attribute. By default, the
path is considered the "default path". Example: `/`
Configure the domains that Dub will track. The following properties are available:
The Dub custom domain for [referral program client-side click tracking](http://d.to/clicks/refer) (previously `data-short-domain`).
Example: `refer.dub.co`
The Dub short domain for tracking site visits.
Example: `site.dub.co`
An array of domains for cross-domain tracking. When configured, the existing `dub_id` cookie
will be automatically appended to all outbound links targeting these domains to enable
cross-domain tracking across different applications.
Example: `"dub.sh, git.new"`
An array of query parameters to listen to for client-side click-tracking (e.g.
`?via=abc123`).
## Open-source examples
Here are some open-source code examples that you can reference:
See the full example on GitHub.
See the full example on GitHub.
# Script Variants
Source: https://dub.co/docs/sdks/client-side/variants
Learn more about the different variants of the Dub Analytics script.
Inspired by [Plausible](https://plausible.io/), our script is split into multiple variants to help you optimize your script for different use cases.
This allows us to keep the base variant of the script as lightweight as possible (\~1kb) while still allowing you to use the script in more complex use cases.
## Syntax
The base script is available on [`script.js`](https://www.dubcdn.com/analytics/script.js), and all variants are available on `script.[variant].js`.
For instance, the `outbound-domains` variant is available on [`script.outbound-domains.js`](https://www.dubcdn.com/analytics/script.outbound-domains.js).
You can also mix and match variants. For example, you can use the `site-visit` and `outbound-domains` variants together with this script: [`script.site-visit.outbound-domains.js`](https://www.dubcdn.com/analytics/script.site-visit.outbound-domains.js).
## List of variants
Here's a list of all the variants available:
* [Base Variant](#base-variant-script-js)
* [Site Visit Variant](#site-visit-variant-script-site-visit-js)
* [Outbound Domains Variant](#outbound-domains-variant-script-outbound-domains-js)
* [Combined Variant](#combined-variant)
### Base Variant (`script.js`)
The base variant of the script is the most lightweight variant of the script. It supports the following features:
* Detecting the `dub_id` query parameter and storing it as a first-party cookie.
* Tracking [client-side click events for referral programs](/docs/sdks/client-side/features/click-tracking).
* Setting [custom cookie window](/docs/sdks/client-side/introduction#custom-cookie-window) and [attribution models](/docs/sdks/client-side/introduction#param-data-attribution-model)
Here's how you can use the base variant:
```html HTML theme={null}
```
```typescript React/Next.js theme={null}
```
### Site Visit Variant (`script.site-visit.js`)
Dub Analytics site visit feature is still in beta.
The site visit variant of the script is a variant of the script that supports tracking site visits.
On top of the features supported by the base variant, it also supports tracking the first entry page of a user, which is useful for measuring SEO and Google Ads performance.
Here's how you can use the site visit variant:
```html HTML theme={null}
```
```typescript React/Next.js theme={null}
// the DubAnalytics component automatically detects the `domainsConfig.site` prop
// and applies the site-visit script variant for you
```
### Outbound Domains Variant (`script.outbound-domains.js`)
The outbound domains variant of the script is a variant of the script that supports [cross-domain tracking](/docs/sdks/client-side/introduction#cross-domain-tracking) across different applications.
On top of the features supported by the base variant, it also supports appending the `dub_id` cookie to all outbound links targeting the domains you configure.
Here's how you can use the outbound domains variant:
```html HTML theme={null}
```
```typescript React/Next.js theme={null}
// the DubAnalytics component automatically detects the `domainsConfig.outbound` prop
// and applies the outbound-domains script variant for you
```
### Combined Variant
You can also mix and match variants. For example, you can use the `site-visit` and `outbound-domains` variants together with this script: [`script.site-visit.outbound-domains.js`](https://www.dubcdn.com/analytics/script.site-visit.outbound-domains.js).
Here's how you can use the combined variant:
```html HTML theme={null}
```
```typescript React/Next.js theme={null}
// the DubAnalytics component automatically detects the `domainsConfig` prop
// and applies the combined script variant for you
```
## `DubAnalytics` React Component
If you're using a React application, we recommend using the `DubAnalytics` component to automatically apply the correct script variant for you.
For example, if you want to use the `outbound-domains` variant, you can do the following:
```typescript React/Next.js theme={null}
```
The `DubAnalytics` component will automatically detect the `domainsConfig` prop and apply the correct script variant for you.
# Go SDK
Source: https://dub.co/docs/sdks/go
Learn how to integrate Dub with Go.
## Installation
```bash theme={null}
go get github.com/dubinc/dub-go
```
## Basic Usage
Here's how you can use the Dub Go SDK to create a link and retrieve click analytics in timeseries format for it:
```go theme={null}
package main
import (
"context"
"fmt"
"log"
"os"
dub "github.com/dubinc/dub-go"
)
func main() {
// Initialize the Dub SDK with your API key
d := dub.New(
dub.WithSecurity(os.Getenv("DUB_API_KEY")), // optional, defaults to DUB_API_KEY
)
// Create a new link
request := &operations.CreateLinkRequestBody{
URL: "https://google.com",
}
ctx := context.Background()
res, err := d.Links.Create(ctx, request)
if err != nil {
log.Fatal(err)
}
if res.LinkSchema != nil {
fmt.Println(res.LinkSchema.ShortLink) // e.g. https://dub.sh/abc123
}
// Get analytics for the link
analyticsRequest := operations.RetrieveAnalyticsRequest{
LinkId: res.LinkSchema.ID,
GroupBy: "timeseries",
Interval: "30d",
}
analyticsRes, err := d.Analytics.Retrieve(ctx, analyticsRequest)
if err != nil {
log.Fatal(err)
}
if analyticsRes.OneOf != nil {
fmt.Println(analyticsRes.OneOf) // e.g. [{ start: "2024-01-01", clicks: 100 }]
}
}
```
For more usage examples:
1. [Organizing links by external ID, tenant ID, tags, etc](/docs/concepts/links/organization)
2. [Bulk link operations (create, update, delete)](/docs/concepts/links/bulk-operations)
3. [Retrieving link analytics](/docs/concepts/analytics)
You can also check out the [Go SDK quickstart](/docs/sdks/quickstart/go) for a basic example.
## Additional Resources
Download and install the Dub Go SDK on GitHub
View the complete SDK reference documentation
Quickstart examples with the Go SDK
# Overview
Source: https://dub.co/docs/sdks/overview
Open-source client libraries for the Dub API
## MCP Server
Use the Dub MCP server to manage your partner program with the AI agent of
your choice.
## Server-side SDKs
Dub offers server-side SDKs for many popular programming languages:
TypeScript library for the Dub API
Go library for the Dub API
Python library for the Dub API
Ruby library for the Dub API
PHP library for the Dub API
## Client-side SDKs
Dub Analytics SDK
## Client-side mobile SDKs
Dub iOS SDK
Dub React Native SDK
## Embedded Dashboards
Embed the Dub Referrals dashboard in your application
## CLI
Shorten and manage your links directly from your terminal
# PHP SDK
Source: https://dub.co/docs/sdks/php
Learn how to integrate Dub with PHP.
## Installation
```bash theme={null}
composer require dub/dub-php
```
## Basic Usage
Here's how you can use the Dub PHP SDK to create a link and retrieve click analytics in timeseries format for it:
```php theme={null}
setSecurity(getenv('DUB_API_KEY')) // optional, defaults to DUB_API_KEY
->build();
// Create a new link
$request = new Operations\CreateLinkRequestBody(
url: 'https://google.com',
);
try {
$response = $dub->links->create($request);
if ($response->linkSchema !== null) {
echo $response->linkSchema->shortLink; // e.g. https://dub.sh/abc123
}
// Get analytics for the link
$analyticsRequest = new Operations\RetrieveAnalyticsRequest();
$analyticsRequest->linkId = $response->linkSchema->id;
$analyticsRequest->interval = Operations\Interval::ThirtyD;
$analyticsRequest->groupBy = Operations\GroupBy::Timeseries;
$analyticsResponse = $dub->analytics->retrieve($analyticsRequest);
if ($analyticsResponse->oneOf !== null) {
print_r($analyticsResponse->oneOf); // e.g. [{ start: "2024-01-01", clicks: 100 }]
}
} catch (Throwable $e) {
// handle exception
}
```
For more usage examples:
1. [Organizing links by external ID, tenant ID, tags, etc](/docs/concepts/links/organization)
2. [Bulk link operations (create, update, delete)](/docs/concepts/links/bulk-operations)
3. [Retrieving link analytics](/docs/concepts/analytics)
## Frameworks
You can use the Dub PHP SDK with any PHP framework:
1. [Usage with Laravel](/docs/sdks/quickstart/laravel)
If you're using a different PHP framework, you can refer to the [PHP SDK quickstart](/docs/sdks/quickstart/php) for a basic example.
## Additional Resources
Download and install the Dub PHP SDK on Packagist
View the complete SDK reference documentation
Quickstart examples with the PHP SDK
View the complete source code for the Dub PHP SDK
# Python SDK
Source: https://dub.co/docs/sdks/python
Learn how to integrate Dub with Python.
## Installation
```bash theme={null}
pip install dub
```
## Basic Usage
Here's how you can use the Dub Python SDK to create a link and retrieve click analytics in timeseries format for it:
```python theme={null}
import os
import dub
from dub.models import operations
# Initialize the Dub SDK with your API key
d = dub.Dub(
token=os.environ['DUB_API_KEY'], # optional, defaults to DUB_API_KEY
)
# Create a new link
res = d.links.create(request={
"url": "https://google.com",
})
print(res.short_link) # e.g. https://dub.sh/abc123
# Get analytics for the link
analytics = d.analytics.retrieve(request={
"link_id": res.id,
"interval": "30d",
"group_by": "timeseries",
})
print(analytics) # e.g. [{ "start": "2024-01-01", "clicks": 100 }]
```
For more usage examples:
1. [Organizing links by external ID, tenant ID, tags, etc](/docs/concepts/links/organization)
2. [Bulk link operations (create, update, delete)](/docs/concepts/links/bulk-operations)
3. [Retrieving link analytics](/docs/concepts/analytics)
## Frameworks
You can use the Dub Python SDK with any Python framework:
1. [Usage with Flask](/docs/sdks/quickstart/flask)
2. [Usage with Django](/docs/sdks/quickstart/django)
If you're using a different Python framework, you can refer to the [Python SDK quickstart](/docs/sdks/quickstart/python) for a basic example.
## Additional Resources
Download and install the Dub Python SDK on PyPI
View the complete SDK reference documentation
Quickstart examples with the Python SDK
View the complete source code for the Dub Python SDK
# Ruby SDK
Source: https://dub.co/docs/sdks/ruby
Learn how to integrate Dub with Ruby.
## Installation
```bash theme={null}
gem install dub
```
## Basic Usage
Here's how you can use the Dub Ruby SDK to create a link and retrieve click analytics in timeseries format for it:
```ruby theme={null}
require 'dub'
# Initialize the Dub SDK with your API key
dub = ::OpenApiSDK::Dub.new
dub.config_security(
::OpenApiSDK::Shared::Security.new(
token: ENV['DUB_API_KEY'], # optional, defaults to DUB_API_KEY
)
)
# Create a new link
req = ::OpenApiSDK::Operations::CreateLinkRequest.new(
request_body: ::OpenApiSDK::Operations::CreateLinkRequestBody.new(
url: "https://google.com"
)
)
res = dub.links.create(req)
puts res.raw_response.body # e.g. { "shortLink": "https://dub.sh/abc123" }
# Get analytics for the link
analytics_req = ::OpenApiSDK::Operations::RetrieveAnalyticsRequest.new(
link_id: res.raw_response.body["id"],
interval: ::OpenApiSDK::Operations::Interval::THIRTYD,
group_by: ::OpenApiSDK::Operations::GroupBy::TIMESERIES
)
analytics_res = dub.analytics.retrieve(analytics_req)
puts analytics_res.raw_response.body # e.g. [{ "start": "2024-01-01", "clicks": 100 }]
```
For more usage examples:
1. [Organizing links by external ID, tenant ID, tags, etc](/docs/concepts/links/organization)
2. [Bulk link operations (create, update, delete)](/docs/concepts/links/bulk-operations)
3. [Retrieving link analytics](/docs/concepts/analytics)
## Frameworks
You can use the Dub Ruby SDK with any Ruby framework:
1. [Usage with Rails](/docs/sdks/quickstart/rails)
2. [Usage with Sinatra](/docs/sdks/quickstart/sinatra)
If you're using a different Ruby framework, you can refer to the [Ruby SDK quickstart](/docs/sdks/quickstart/ruby) for a basic example.
## Additional Resources
Download and install the Dub Ruby SDK on RubyGems
View the complete SDK reference documentation
Quickstart examples with the Ruby SDK
View the complete source code for the Dub Ruby SDK
# TypeScript SDK
Source: https://dub.co/docs/sdks/typescript
Learn how to integrate Dub with TypeScript.
## Installation
```bash npm theme={null}
npm install dub
```
```bash pnpm theme={null}
pnpm add dub
```
```bash yarn theme={null}
yarn add dub zod # zod is a peer dependency
```
## Basic Usage
Here's how you can use the Dub TypeScript SDK to create a link and retrieve click analytics in timeseries format for it:
```typescript theme={null}
import { Dub } from "dub";
// Initialize the Dub SDK with your API key
const dub = new Dub({
token: process.env.DUB_API_KEY, // optional, defaults to DUB_API_KEY
});
// Create a new link
const link = await dub.links.create({
url: "https://google.com",
});
console.log(link.shortLink); // e.g. https://dub.sh/abc123
// Get analytics for the link
const analytics = await dub.analytics.retrieve({
link_id: link.id,
groupBy: "timeseries",
interval: "30d",
});
console.log(analytics); // e.g. [{ start: "2024-01-01", clicks: 100 }]
```
For more usage examples:
1. [Organizing links by external ID, tenant ID, tags, etc](/docs/concepts/links/organization)
2. [Bulk link operations (create, update, delete)](/docs/concepts/links/bulk-operations)
3. [Retrieving link analytics](/docs/concepts/analytics)
## Frameworks
You can use the Dub TypeScript SDK with any JavaScript framework:
1. [Usage with Next.js](/docs/sdks/quickstart/nextjs)
2. [Usage with Remix](/docs/sdks/quickstart/remix)
3. [Usage with Nuxt](/docs/sdks/quickstart/nuxt)
4. [Usage with Express](/docs/sdks/quickstart/express)
If you're using a different JavaScript framework, you can refer to the [TypeScript SDK quickstart](/docs/sdks/quickstart/typescript) for a basic example.
## Additional Resources
Download and install the Dub TypeScript SDK on NPM
View the complete SDK reference documentation
Quickstart examples with the TypeScript SDK
View the complete source code for the Dub TypeScript SDK
# Self-hosting Dub
Source: https://dub.co/docs/self-hosting
An end-to-end guide on how to self-host Dub – the open-source link attribution platform.
![Dub Logo on a gradient background]() You can self-host Dub on your own servers and cloud infrastructure for greater control over your data and design. This guide will walk you through the entire process of setting up Dub on your own servers.
## Prerequisites
Before you begin, make sure you have the following:
* A [GitHub](https://github.com/) account
* A [Tinybird](https://www.tinybird.co/) account
* An [Upstash](https://upstash.com/) account
* A [PlanetScale](https://planetscale.com/) account
* A [Vercel](https://vercel.com/) account
* Either a [Cloudflare](https://www.cloudflare.com/) or [AWS](https://aws.com) account
You'll also need a custom domain that you will be using for your Dub instance, with an optional custom short domain for your links.
In this guide, we'll use `acme.com` as a placeholder for your custom domain, and `ac.me` as a placeholder for your custom short domain.
## Step 1: Local setup
First, you'll need to clone the Dub repo and install the dependencies.
First, clone the [Dub repo](https://d.to/github) into a public GitHub repository. If you are planning to distribute the code or allow users to interact with the code remotely (e.g., as part of a hosted application), make sure to provide source access (including modifications) as required by the [AGPLv3 license](https://d.to/license).
```bash Terminal theme={null}
git clone https://github.com/dubinc/dub.git
```
Run the following command to install the dependencies:
```bash Terminal theme={null}
pnpm i
```
Delete the `apps/web/vercel.json` file since cron jobs are not required for the self-hosted version:
```bash Terminal theme={null}
rm apps/web/vercel.json
```
Convert the `.env.example` file to `.env`. You can start filling in the first few environment variables:
```bash Terminal theme={null}
# The domain that your app will be hosted on
NEXT_PUBLIC_APP_DOMAIN=acme.com
# The short domain that your app will be using (could be the same as the above)
NEXT_PUBLIC_APP_SHORT_DOMAIN=ac.me
# The ID of the Vercel team that your app will be deployed to: https://vercel.com/docs/accounts/create-a-team#find-your-team-id
TEAM_ID_VERCEL=
# The unique access token for your Vercel account: https://vercel.com/guides/how-do-i-use-a-vercel-api-access-token
AUTH_BEARER_TOKEN=
```
You will fill in the remaining environment variables in the following steps.
## Step 2: Set up Tinybird Clickhouse database
Next, you'll need to set up the [Tinybird](https://tinybird.co) Clickhouse database. This will be used to store time-series click events data.
In your [Tinybird](https://tinybird.co/) account, create a new Workspace.
Copy your `admin` [Auth Token](https://www.tinybird.co/docs/concepts/auth-tokens.html). Paste this token as the `TINYBIRD_API_KEY` environment variable in your `.env` file.
In your newly-cloned Dub repo, navigate to the `packages/tinybird` directory.
Install the Tinybird CLI with `pip install tinybird-cli` (requires Python >= 3.8).
Run `tb login` and paste your `admin` Auth Token.
Run `tb deploy` to publish the datasource and endpoints in the `packages/tinybird` directory. You should see the following output (truncated for brevity):
```bash Terminal theme={null}
$ tb deploy
** Processing ./datasources/click_events.datasource
** Processing ./endpoints/clicks.pipe
...
** Building dependencies
** Running 'click_events'
** 'click_events' created
** Running 'device'
** => Test endpoint at https://api.us-east.tinybird.co/v0/pipes/device.json
** Token device_endpoint_read_8888 not found, creating one
** => Test endpoint with:
** $ curl https://api.us-east.tinybird.co/v0/pipes/device.json?token=p.ey...NWeaoTLM
** 'device' created
...
```
You will then need to update your [Tinybird API base URL](https://www.tinybird.co/docs/api-reference/api-reference.html#regions-and-endpoints) to match the region of your database.
From the previous step, take note of the **Test endpoint** URL. It should look something like this:
```bash Terminal theme={null}
Test endpoint at https://api.us-east.tinybird.co/v0/pipes/device.json
```
Copy the base URL and paste it as the `TINYBIRD_API_URL` environment variable in your `.env` file.
```bash Terminal theme={null}
TINYBIRD_API_URL=https://api.us-east.tinybird.co
```
## Step 3: Set up Upstash Redis database
Next, you'll need to set up the [Upstash](https://upstash.com) Redis database. This will be used to cache link metadata and serve link redirects.
In your [Upstash account](https://console.upstash.com/), create a new database.
For better performance & read times, we recommend setting up a global database with several read regions.
You can self-host Dub on your own servers and cloud infrastructure for greater control over your data and design. This guide will walk you through the entire process of setting up Dub on your own servers.
## Prerequisites
Before you begin, make sure you have the following:
* A [GitHub](https://github.com/) account
* A [Tinybird](https://www.tinybird.co/) account
* An [Upstash](https://upstash.com/) account
* A [PlanetScale](https://planetscale.com/) account
* A [Vercel](https://vercel.com/) account
* Either a [Cloudflare](https://www.cloudflare.com/) or [AWS](https://aws.com) account
You'll also need a custom domain that you will be using for your Dub instance, with an optional custom short domain for your links.
In this guide, we'll use `acme.com` as a placeholder for your custom domain, and `ac.me` as a placeholder for your custom short domain.
## Step 1: Local setup
First, you'll need to clone the Dub repo and install the dependencies.
First, clone the [Dub repo](https://d.to/github) into a public GitHub repository. If you are planning to distribute the code or allow users to interact with the code remotely (e.g., as part of a hosted application), make sure to provide source access (including modifications) as required by the [AGPLv3 license](https://d.to/license).
```bash Terminal theme={null}
git clone https://github.com/dubinc/dub.git
```
Run the following command to install the dependencies:
```bash Terminal theme={null}
pnpm i
```
Delete the `apps/web/vercel.json` file since cron jobs are not required for the self-hosted version:
```bash Terminal theme={null}
rm apps/web/vercel.json
```
Convert the `.env.example` file to `.env`. You can start filling in the first few environment variables:
```bash Terminal theme={null}
# The domain that your app will be hosted on
NEXT_PUBLIC_APP_DOMAIN=acme.com
# The short domain that your app will be using (could be the same as the above)
NEXT_PUBLIC_APP_SHORT_DOMAIN=ac.me
# The ID of the Vercel team that your app will be deployed to: https://vercel.com/docs/accounts/create-a-team#find-your-team-id
TEAM_ID_VERCEL=
# The unique access token for your Vercel account: https://vercel.com/guides/how-do-i-use-a-vercel-api-access-token
AUTH_BEARER_TOKEN=
```
You will fill in the remaining environment variables in the following steps.
## Step 2: Set up Tinybird Clickhouse database
Next, you'll need to set up the [Tinybird](https://tinybird.co) Clickhouse database. This will be used to store time-series click events data.
In your [Tinybird](https://tinybird.co/) account, create a new Workspace.
Copy your `admin` [Auth Token](https://www.tinybird.co/docs/concepts/auth-tokens.html). Paste this token as the `TINYBIRD_API_KEY` environment variable in your `.env` file.
In your newly-cloned Dub repo, navigate to the `packages/tinybird` directory.
Install the Tinybird CLI with `pip install tinybird-cli` (requires Python >= 3.8).
Run `tb login` and paste your `admin` Auth Token.
Run `tb deploy` to publish the datasource and endpoints in the `packages/tinybird` directory. You should see the following output (truncated for brevity):
```bash Terminal theme={null}
$ tb deploy
** Processing ./datasources/click_events.datasource
** Processing ./endpoints/clicks.pipe
...
** Building dependencies
** Running 'click_events'
** 'click_events' created
** Running 'device'
** => Test endpoint at https://api.us-east.tinybird.co/v0/pipes/device.json
** Token device_endpoint_read_8888 not found, creating one
** => Test endpoint with:
** $ curl https://api.us-east.tinybird.co/v0/pipes/device.json?token=p.ey...NWeaoTLM
** 'device' created
...
```
You will then need to update your [Tinybird API base URL](https://www.tinybird.co/docs/api-reference/api-reference.html#regions-and-endpoints) to match the region of your database.
From the previous step, take note of the **Test endpoint** URL. It should look something like this:
```bash Terminal theme={null}
Test endpoint at https://api.us-east.tinybird.co/v0/pipes/device.json
```
Copy the base URL and paste it as the `TINYBIRD_API_URL` environment variable in your `.env` file.
```bash Terminal theme={null}
TINYBIRD_API_URL=https://api.us-east.tinybird.co
```
## Step 3: Set up Upstash Redis database
Next, you'll need to set up the [Upstash](https://upstash.com) Redis database. This will be used to cache link metadata and serve link redirects.
In your [Upstash account](https://console.upstash.com/), create a new database.
For better performance & read times, we recommend setting up a global database with several read regions.
![Upstash Redis database]() Once your database is created, copy the `UPSTASH_REDIS_REST_URL` and `UPSTASH_REDIS_REST_TOKEN` from the **REST API** section into your `.env` file.
Once your database is created, copy the `UPSTASH_REDIS_REST_URL` and `UPSTASH_REDIS_REST_TOKEN` from the **REST API** section into your `.env` file.
![Upstash Redis tokens]() Navigate to the [QStash tab](https://console.upstash.com/qstash) and copy the `QSTASH_TOKEN`, `QSTASH_CURRENT_SIGNING_KEY`, and `QSTASH_NEXT_SIGNING_KEY` from the **Request Builder** section into your `.env` file.
Navigate to the [QStash tab](https://console.upstash.com/qstash) and copy the `QSTASH_TOKEN`, `QSTASH_CURRENT_SIGNING_KEY`, and `QSTASH_NEXT_SIGNING_KEY` from the **Request Builder** section into your `.env` file.
![Upstash QStash tokens]() ## Step 4: Set up PlanetScale MySQL database
Next, you'll need to set up a [PlanetScale](https://planetscale.com/)-compatible MySQL database. This will be used to store user data and link metadata.
PlanetScale recently [removed their free
tier](https://planetscale.com/blog/planetscale-forever), so you'll need to pay
for this option. A cheaper alternative is to use a [MySQL database on
Railway](https://railway.app/template/mysql) (\$5/month).
For [local development](/docs/local-development), we recommend using a [local MySQL database
with PlanetScale simulator](/docs/local-development#option-1-local-mysql-database-with-planetscale-simulator-recommended) (100% free).
In your [PlanetScale account](https://app.planetscale.com/), create a new database.
Once your database is created, you'll be prompted to select your language or Framework. Select **Prisma**.
## Step 4: Set up PlanetScale MySQL database
Next, you'll need to set up a [PlanetScale](https://planetscale.com/)-compatible MySQL database. This will be used to store user data and link metadata.
PlanetScale recently [removed their free
tier](https://planetscale.com/blog/planetscale-forever), so you'll need to pay
for this option. A cheaper alternative is to use a [MySQL database on
Railway](https://railway.app/template/mysql) (\$5/month).
For [local development](/docs/local-development), we recommend using a [local MySQL database
with PlanetScale simulator](/docs/local-development#option-1-local-mysql-database-with-planetscale-simulator-recommended) (100% free).
In your [PlanetScale account](https://app.planetscale.com/), create a new database.
Once your database is created, you'll be prompted to select your language or Framework. Select **Prisma**.
![PlanetScale choose framework]() Then, you'll have to create a new password for your database. Once the password is created, scroll down to the **Add credentials to .env** section and copy the `DATABASE_URL` into your `.env` file.
Then, you'll have to create a new password for your database. Once the password is created, scroll down to the **Add credentials to .env** section and copy the `DATABASE_URL` into your `.env` file.
![PlanetScale add credentials]() In your Dub codebase, navigate to `apps/web/prisma/schema.prisma` and replace all the columns in the `DefaultDomains` model to the normalized version of your custom short domain (removing the `.` character).
For example, if your custom short domain is `ac.me`, your `DefaultDomains` model should look like this:
```prisma apps/web/prisma/schema.prisma theme={null}
model DefaultDomains {
id String @id @default(cuid())
acme Boolean @default(true)
projectId String @unique
project Project @relation(fields: [projectId], references: [id], onDelete: Cascade)
}
```
In the terminal, navigate to the `apps/web` directory and run the following command to generate the Prisma client:
```bash Terminal theme={null}
pnpm run prisma:generate
```
Then, create the database tables with the following command:
```bash Terminal theme={null}
pnpm run prisma:push
```
## Step 5: Set up GitHub OAuth
Next, [create a new GitHub App](https://github.com/settings/applications/new). This will allow you to sign in to Dub with your GitHub account.
Don't forget to set the following Callback URLs:
* `https://app.acme.com/api/auth/callback/github`
* `http://localhost:8888/api/auth/callback/github` for local development.
Optional: Set the "Email addresses" account permission to **read-only** in
order to access private email addresses on GitHub.
Once your GitHub App is created, copy the `Client ID` and `Client Secret` into your `.env` file as the `GITHUB_CLIENT_ID` and `GITHUB_CLIENT_SECRET` environment variables.
## Step 6: Set up Cloudflare R2
Dub stores user-generated assets in either S3 or S3-compatible services like [Cloudflare R2](https://cloudflare.com/r2). These include:
* Project logos
* User avatars
* [Custom Social Media Cards](/help/article/custom-link-previews) images
We recommend using [Cloudflare R2](https://cloudflare.com/r2) for self-hosting Dub, as it's a more cost-effective solution compared to AWS S3. Here's how you can set it up:
You'll need to subscribe to the R2 service if you haven't already.
In your [Cloudflare account](https://dash.cloudflare.com/), create a new R2 bucket. We recommend giving your bucket a descriptive name (e.g. `dubassets`) and leaving the remaining settings as is.
In your Dub codebase, navigate to `apps/web/prisma/schema.prisma` and replace all the columns in the `DefaultDomains` model to the normalized version of your custom short domain (removing the `.` character).
For example, if your custom short domain is `ac.me`, your `DefaultDomains` model should look like this:
```prisma apps/web/prisma/schema.prisma theme={null}
model DefaultDomains {
id String @id @default(cuid())
acme Boolean @default(true)
projectId String @unique
project Project @relation(fields: [projectId], references: [id], onDelete: Cascade)
}
```
In the terminal, navigate to the `apps/web` directory and run the following command to generate the Prisma client:
```bash Terminal theme={null}
pnpm run prisma:generate
```
Then, create the database tables with the following command:
```bash Terminal theme={null}
pnpm run prisma:push
```
## Step 5: Set up GitHub OAuth
Next, [create a new GitHub App](https://github.com/settings/applications/new). This will allow you to sign in to Dub with your GitHub account.
Don't forget to set the following Callback URLs:
* `https://app.acme.com/api/auth/callback/github`
* `http://localhost:8888/api/auth/callback/github` for local development.
Optional: Set the "Email addresses" account permission to **read-only** in
order to access private email addresses on GitHub.
Once your GitHub App is created, copy the `Client ID` and `Client Secret` into your `.env` file as the `GITHUB_CLIENT_ID` and `GITHUB_CLIENT_SECRET` environment variables.
## Step 6: Set up Cloudflare R2
Dub stores user-generated assets in either S3 or S3-compatible services like [Cloudflare R2](https://cloudflare.com/r2). These include:
* Project logos
* User avatars
* [Custom Social Media Cards](/help/article/custom-link-previews) images
We recommend using [Cloudflare R2](https://cloudflare.com/r2) for self-hosting Dub, as it's a more cost-effective solution compared to AWS S3. Here's how you can set it up:
You'll need to subscribe to the R2 service if you haven't already.
In your [Cloudflare account](https://dash.cloudflare.com/), create a new R2 bucket. We recommend giving your bucket a descriptive name (e.g. `dubassets`) and leaving the remaining settings as is.
![Cloudflare R2 bucket]() In your bucket settings, copy the **S3 API** value – you'll need it in Step 3.
From the R2 main page, click **Manage R2 API Tokens** on the right-hand column.
In your bucket settings, copy the **S3 API** value – you'll need it in Step 3.
From the R2 main page, click **Manage R2 API Tokens** on the right-hand column.
![Cloudflare manage API tokens]() Then, click **Create API Token**.
Then, click **Create API Token**.
![Cloudflare R2 API token]() Make sure to name your API token something relevant to the service that will be using the token.
Give it "Object Read & Write" permissions, and we recommend only applying ito to a single bucket.
You can leave the remaining settings (TTL, Client IP Address Filtering) as is, and click **Create API Token**.
After you create you token, copy the `Access Key ID` and `Secret Access Key` values – you'll need them in the next step.
Once you have your credentials, set them in your `.env` file:
```TypeScript .env theme={null}
STORAGE_ACCESS_KEY_ID= // this is the Access Key ID value from Step 2
STORAGE_SECRET_ACCESS_KEY= // this is the Secret Access Key value from Step 2
STORAGE_ENDPOINT= // this is the S3 API value from Step 1
```
In order for your images to be publically accessible in R2 you need to setup a domain. You can either use your own domain or an R2.dev subdomain.
To use your own domain, you'll need to create a CNAME record in your DNS settings that points to your R2 bucket.
In you plan to use an R2.dev subdomain, make sure you "Allow Access".
Then set the `STORAGE_BASE_URL` in your `.env` file to the domain you chose.
```bash theme={null}
STORAGE_BASE_URL={URL your assets as available at} # https://static.example.com
```
Make sure to name your API token something relevant to the service that will be using the token.
Give it "Object Read & Write" permissions, and we recommend only applying ito to a single bucket.
You can leave the remaining settings (TTL, Client IP Address Filtering) as is, and click **Create API Token**.
After you create you token, copy the `Access Key ID` and `Secret Access Key` values – you'll need them in the next step.
Once you have your credentials, set them in your `.env` file:
```TypeScript .env theme={null}
STORAGE_ACCESS_KEY_ID= // this is the Access Key ID value from Step 2
STORAGE_SECRET_ACCESS_KEY= // this is the Secret Access Key value from Step 2
STORAGE_ENDPOINT= // this is the S3 API value from Step 1
```
In order for your images to be publically accessible in R2 you need to setup a domain. You can either use your own domain or an R2.dev subdomain.
To use your own domain, you'll need to create a CNAME record in your DNS settings that points to your R2 bucket.
In you plan to use an R2.dev subdomain, make sure you "Allow Access".
Then set the `STORAGE_BASE_URL` in your `.env` file to the domain you chose.
```bash theme={null}
STORAGE_BASE_URL={URL your assets as available at} # https://static.example.com
```
![Cloudflare R2 domain]() ## Step 7: Set up Resend (optional)
Note that if you want to use magic link sign-in, this is a required step.
Next, you'll need to set up Resend for transactional emails (e.g. magic link emails):
1. Sign up for Resend and [create your API key here](https://resend.com/api-keys).
2. Copy the API key into your `.env` file as the `RESEND_API_KEY` environment variable.
3. You'll then need to set up and verify your domain by [following this guide here](https://resend.com/docs/dashboard/domains/introduction).
## Step 8: Set up Unsplash (optional)
Dub uses Unsplash's API for the [Custom Social Media Cards](/help/article/custom-link-previews) feature. You'll need to set up an Unsplash application to get an access key.
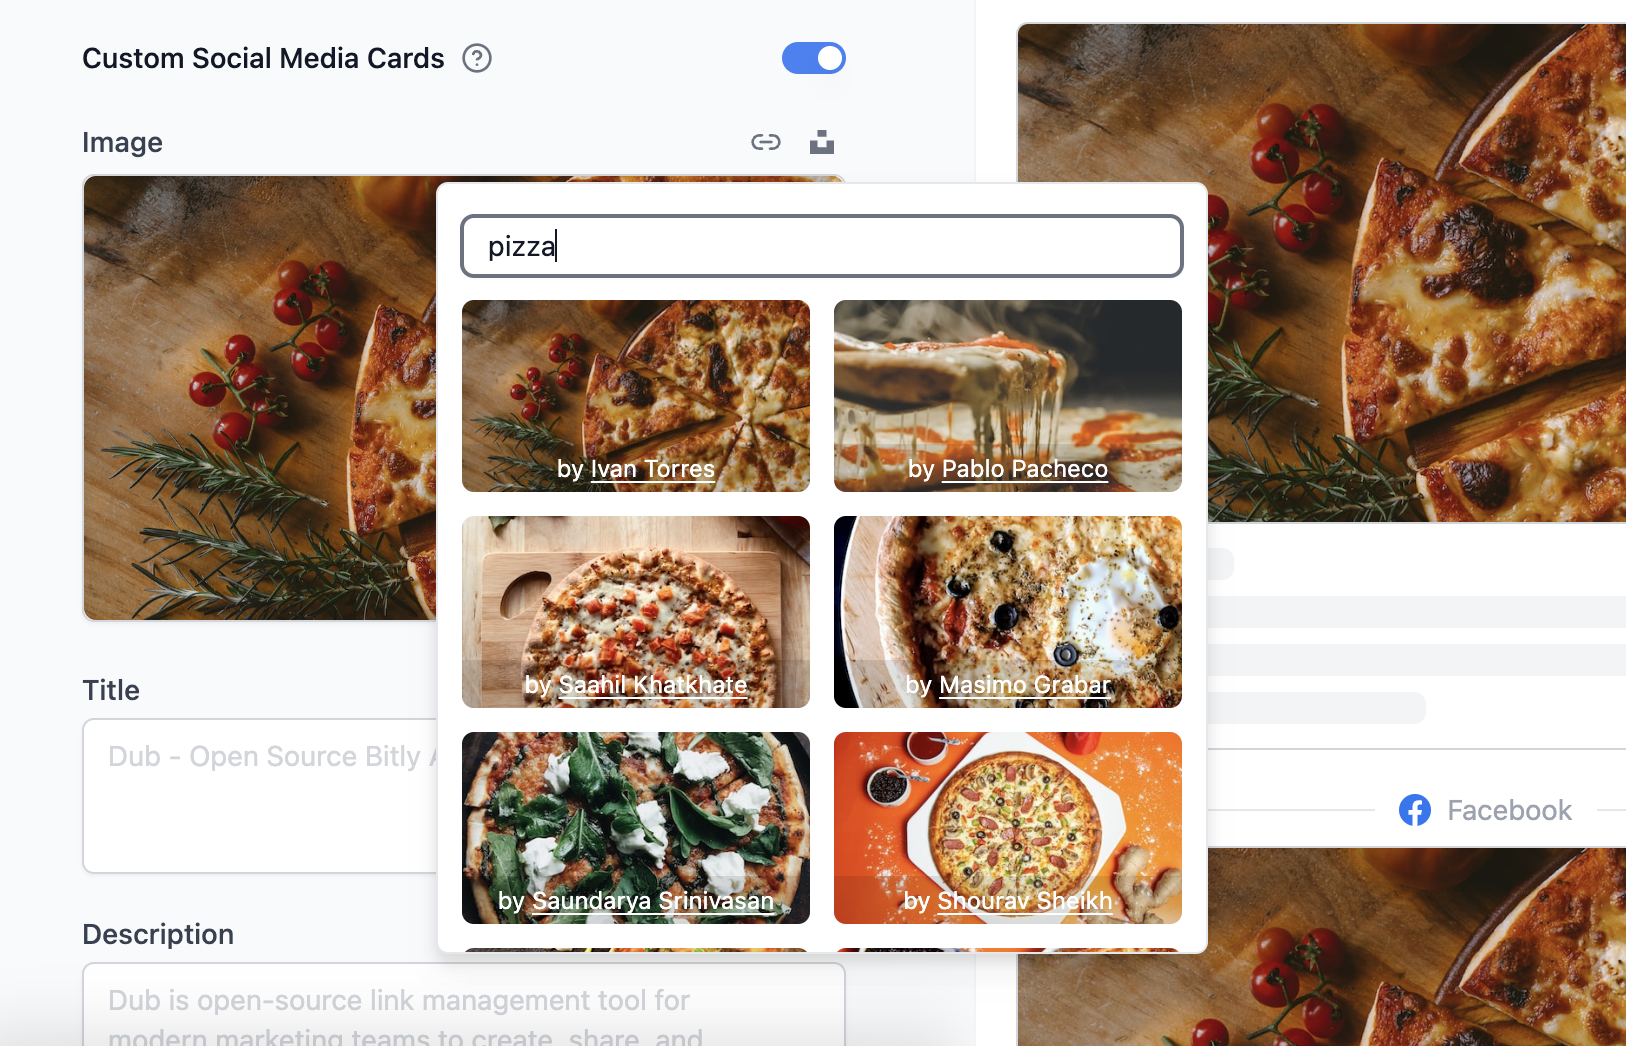
Check out Unsplash's [official documentation](https://unsplash.com/documentation#creating-a-developer-account) to learn how you can set up the `UNSPLASH_ACCESS_KEY` env var.
## Step 9: Deploy to Vercel
Once you've set up all of the above services, you can now deploy your app to Vercel.
If you haven't already, push up your cloned repository to GitHub by running the following commands:
```bash Terminal theme={null}
git add .
git commit -m "Initial commit"
git push origin main
```
In your [Vercel account](https://vercel.com/), create a new project. Then, select your GitHub repository and click **Import**.
Make sure that your **Framework Preset** is set to **Next.js** and the **Root Directory** is set to `apps/web`.
## Step 7: Set up Resend (optional)
Note that if you want to use magic link sign-in, this is a required step.
Next, you'll need to set up Resend for transactional emails (e.g. magic link emails):
1. Sign up for Resend and [create your API key here](https://resend.com/api-keys).
2. Copy the API key into your `.env` file as the `RESEND_API_KEY` environment variable.
3. You'll then need to set up and verify your domain by [following this guide here](https://resend.com/docs/dashboard/domains/introduction).
## Step 8: Set up Unsplash (optional)
Dub uses Unsplash's API for the [Custom Social Media Cards](/help/article/custom-link-previews) feature. You'll need to set up an Unsplash application to get an access key.

Check out Unsplash's [official documentation](https://unsplash.com/documentation#creating-a-developer-account) to learn how you can set up the `UNSPLASH_ACCESS_KEY` env var.
## Step 9: Deploy to Vercel
Once you've set up all of the above services, you can now deploy your app to Vercel.
If you haven't already, push up your cloned repository to GitHub by running the following commands:
```bash Terminal theme={null}
git add .
git commit -m "Initial commit"
git push origin main
```
In your [Vercel account](https://vercel.com/), create a new project. Then, select your GitHub repository and click **Import**.
Make sure that your **Framework Preset** is set to **Next.js** and the **Root Directory** is set to `apps/web`.
![Vercel Framework Preset and Root Directory]() In the **Environment Variables** section, add all of the environment variables from your `.env` file by copying all of them and pasting it into the first input field. A few notes:
* Remove the `PROJECT_ID_VERCEL` environment variable for now since we will only get the project ID after deploying the project.
* Replace the `NEXTAUTH_URL` environment variable with the app domain that you will be using (e.g. `https://app.acme.com`).
Click on **Deploy** to deploy your project.
If you get a `No Output Directory called "public" was found after the build
completed` error, make sure that your [Vercel deployment
settings](https://vercel.com/docs/deployments/configure-a-build) to make sure that they match the following:
In the **Environment Variables** section, add all of the environment variables from your `.env` file by copying all of them and pasting it into the first input field. A few notes:
* Remove the `PROJECT_ID_VERCEL` environment variable for now since we will only get the project ID after deploying the project.
* Replace the `NEXTAUTH_URL` environment variable with the app domain that you will be using (e.g. `https://app.acme.com`).
Click on **Deploy** to deploy your project.
If you get a `No Output Directory called "public" was found after the build
completed` error, make sure that your [Vercel deployment
settings](https://vercel.com/docs/deployments/configure-a-build) to make sure that they match the following:
![Vercel Deploy settings]() Once the project deploys, retrieve your [Vercel project ID](https://vercel.com/docs/projects/overview#project-id) and add it as the `PROJECT_ID_VERCEL` environment variable – both in your `.env` file and in your newly created Vercel project's settings (under **Settings > Environment Variables**)
Add both the `NEXT_PUBLIC_APP_DOMAIN` and `NEXT_PUBLIC_APP_SHORT_DOMAIN` as domains in your Vercel project's settings (under **Settings** > **Domains**). You can follow this guide to learn [how to set up a custom domain on Vercel](https://vercel.com/docs/projects/domains/add-a-domain).
Go back to the **Deployments** page and redeploy your project.
Once the deployment is complete, you should be able to visit your app domain (e.g. `https://app.acme.com`) and see the following login page:
Once the project deploys, retrieve your [Vercel project ID](https://vercel.com/docs/projects/overview#project-id) and add it as the `PROJECT_ID_VERCEL` environment variable – both in your `.env` file and in your newly created Vercel project's settings (under **Settings > Environment Variables**)
Add both the `NEXT_PUBLIC_APP_DOMAIN` and `NEXT_PUBLIC_APP_SHORT_DOMAIN` as domains in your Vercel project's settings (under **Settings** > **Domains**). You can follow this guide to learn [how to set up a custom domain on Vercel](https://vercel.com/docs/projects/domains/add-a-domain).
Go back to the **Deployments** page and redeploy your project.
Once the deployment is complete, you should be able to visit your app domain (e.g. `https://app.acme.com`) and see the following login page:
![Whitelabeled Login]() ## Caveats
This guide is meant to be a starting point for self-hosting Dub. It currently depends on the following services to work:
* [Tinybird](https://www.tinybird.co/) for the analytics database
* [Upstash](https://upstash.com/) for the Redis database
* [PlanetScale](https://planetscale.com/) for the MySQL database
* [Vercel](https://vercel.com/) for hosting & [Edge Middleware](https://vercel.com/docs/functions/edge-middleware)
In the future, we plan to make it easier to self-host Dub by making these dependencies optional by swapping them out for native databases (e.g. mysql, redis, clickhouse, [GeoLite2](https://github.com/GitSquared/node-geolite2-redist) etc.)
Also, Docker is currently not supported, but we have a few [open](https://github.com/dubinc/dub/issues/25) [issues](https://github.com/dubinc/dub/issues/378) and [PRs](https://github.com/dubinc/dub/pull/391) for it.
# Event types
Source: https://dub.co/docs/webhooks/event-types
List of supported webhook event types and their payloads
Webhooks send real-time notifications when events happen in your Dub workspace. All webhook payloads follow this structure:
```json webhook-payload.json theme={null}
{
"id": "evt_KleiO4HBwZFbO1vZLWIPZ2AtX",
"event": "link.created",
"createdAt": "2024-08-26T16:41:52.346Z",
"data": {}
}
```
* **id** – Unique event ID
* **event** – Event type (e.g. `link.created`)
* **createdAt** – ISO 8601 timestamp when the event was created
* **data** – Event-specific payload
## Dub Partners
[Dub Partners](https://dub.co/partners) lets you run a partner program with referral links, commissions, and payouts. Here are the webhook events that are available for Dub Partners:
| Event Type | Description |
| -------------------------------------------------------------------------------------- | --------------------------------------------------------------------------------------------------------------- |
| [`partner.enrolled`](/docs/webhooks/events/partner-enrolled) | Occurs when a **new partner is enrolled** in your partner program. |
| [`partner.application_submitted`](/docs/webhooks/events/partner-application-submitted) | Occurs when a **partner submits an application** to join your partner program. |
| [`lead.created`](/docs/webhooks/events/lead-created) | Occurs when a **new lead is tracked**. |
| [`sale.created`](/docs/webhooks/events/sale-created) | Occurs when a **new sale is tracked**. |
| [`commission.created`](/docs/webhooks/events/commission-created) | Occurs when a **new commission is generated** — from a tracked conversion or created manually in the dashboard. |
## Dub Links
[Dub Links](https://dub.co/links) is your short link and analytics platform for creating, managing, and tracking links. Here are the webhook events that are available for Dub Links:
| Event Type | Description |
| ---------------------------------------------------- | -------------------------------------------------------------------------------------------------------- |
| [`link.created`](/docs/webhooks/events/link-created) | Occurs when a **new link is created** in your workspace. |
| [`link.updated`](/docs/webhooks/events/link-updated) | Occurs when a **link is updated** in your workspace. |
| [`link.deleted`](/docs/webhooks/events/link-deleted) | Occurs when a **link is deleted** in your workspace. |
| [`link.clicked`](/docs/webhooks/events/link-clicked) | Occurs when a **user clicks a link** (scoped to specific links; you choose which links to subscribe to). |
# commission.created
Source: https://dub.co/docs/webhooks/events/commission-created
Event triggered when a [new commission is created](/docs/api-reference/commissions/list).
When enabled, this webhook is triggered when a commission is created either
from a tracked conversion or manually in the dashboard.
Use the `userId` field to distinguish between manual commissions from automatic ones.
Unique identifier for the commission.
Commission type (e.g.
## Caveats
This guide is meant to be a starting point for self-hosting Dub. It currently depends on the following services to work:
* [Tinybird](https://www.tinybird.co/) for the analytics database
* [Upstash](https://upstash.com/) for the Redis database
* [PlanetScale](https://planetscale.com/) for the MySQL database
* [Vercel](https://vercel.com/) for hosting & [Edge Middleware](https://vercel.com/docs/functions/edge-middleware)
In the future, we plan to make it easier to self-host Dub by making these dependencies optional by swapping them out for native databases (e.g. mysql, redis, clickhouse, [GeoLite2](https://github.com/GitSquared/node-geolite2-redist) etc.)
Also, Docker is currently not supported, but we have a few [open](https://github.com/dubinc/dub/issues/25) [issues](https://github.com/dubinc/dub/issues/378) and [PRs](https://github.com/dubinc/dub/pull/391) for it.
# Event types
Source: https://dub.co/docs/webhooks/event-types
List of supported webhook event types and their payloads
Webhooks send real-time notifications when events happen in your Dub workspace. All webhook payloads follow this structure:
```json webhook-payload.json theme={null}
{
"id": "evt_KleiO4HBwZFbO1vZLWIPZ2AtX",
"event": "link.created",
"createdAt": "2024-08-26T16:41:52.346Z",
"data": {}
}
```
* **id** – Unique event ID
* **event** – Event type (e.g. `link.created`)
* **createdAt** – ISO 8601 timestamp when the event was created
* **data** – Event-specific payload
## Dub Partners
[Dub Partners](https://dub.co/partners) lets you run a partner program with referral links, commissions, and payouts. Here are the webhook events that are available for Dub Partners:
| Event Type | Description |
| -------------------------------------------------------------------------------------- | --------------------------------------------------------------------------------------------------------------- |
| [`partner.enrolled`](/docs/webhooks/events/partner-enrolled) | Occurs when a **new partner is enrolled** in your partner program. |
| [`partner.application_submitted`](/docs/webhooks/events/partner-application-submitted) | Occurs when a **partner submits an application** to join your partner program. |
| [`lead.created`](/docs/webhooks/events/lead-created) | Occurs when a **new lead is tracked**. |
| [`sale.created`](/docs/webhooks/events/sale-created) | Occurs when a **new sale is tracked**. |
| [`commission.created`](/docs/webhooks/events/commission-created) | Occurs when a **new commission is generated** — from a tracked conversion or created manually in the dashboard. |
## Dub Links
[Dub Links](https://dub.co/links) is your short link and analytics platform for creating, managing, and tracking links. Here are the webhook events that are available for Dub Links:
| Event Type | Description |
| ---------------------------------------------------- | -------------------------------------------------------------------------------------------------------- |
| [`link.created`](/docs/webhooks/events/link-created) | Occurs when a **new link is created** in your workspace. |
| [`link.updated`](/docs/webhooks/events/link-updated) | Occurs when a **link is updated** in your workspace. |
| [`link.deleted`](/docs/webhooks/events/link-deleted) | Occurs when a **link is deleted** in your workspace. |
| [`link.clicked`](/docs/webhooks/events/link-clicked) | Occurs when a **user clicks a link** (scoped to specific links; you choose which links to subscribe to). |
# commission.created
Source: https://dub.co/docs/webhooks/events/commission-created
Event triggered when a [new commission is created](/docs/api-reference/commissions/list).
When enabled, this webhook is triggered when a commission is created either
from a tracked conversion or manually in the dashboard.
Use the `userId` field to distinguish between manual commissions from automatic ones.
Unique identifier for the commission.
Commission type (e.g. sale).
Sale/order amount in cents.
Commission earnings in cents.
Currency code (e.g. usd).
Commission status (e.g. pending).
Related invoice ID, if any.
Optional description (e.g. for manual commissions).
Quantity (e.g. number of items).
ID of the user who created the commission. Set for manual commissions; null for automatic.
ISO 8601 timestamp when the commission was created.
ISO 8601 timestamp when the commission was last updated.
The partner that earned the commission (id, name, email, image, country, groupId, totalClicks, totalLeads, totalSales, totalSaleAmount, totalCommissions).
The customer associated with the conversion.
Unique identifier for the customer.
Your external customer ID, if provided when tracking.
Customer name.
Customer email address.
URL to the customer's avatar.
Country code.
Number of sales from this customer.
Total sale amount in cents.
ISO 8601 timestamp when the customer was first seen.
```json Response theme={null}
{
"id": "evt_64dv6vxYVgltzJBKc9ujJ1ghL",
"event": "commission.created",
"createdAt": "2025-07-16T10:48:15.468Z",
"data": {
"id": "cm_1K09DJTBCRT24P6BRD515CK29",
"type": "sale",
"amount": 50000,
"earnings": 10000,
"currency": "usd",
"status": "pending",
"invoiceId": null,
"description": null,
"quantity": 1,
"userId": "cludszk1h0000wmd2e0ea2b0p",
"createdAt": "2025-07-16T10:48:14.722Z",
"updatedAt": "2025-07-16T10:48:14.960Z",
"partner": {
"id": "pn_1K06X6FX2GRB31NCM2VVCGJ72",
"name": "Matthew Hayden",
"email": "matthew@example.com",
"image": null,
"payoutsEnabledAt": null,
"country": "US",
"groupId": "grp_1K6K3HD0QE7XTX5HSVR77AK5B",
"totalClicks": 50,
"totalLeads": 15,
"totalConversions": 10,
"totalSales": 10,
"totalSaleAmount": 100000,
"totalCommissions": 50000
},
"customer": {
"id": "cus_1K09DJDEACR47NPYC93RM43WF",
"externalId": "TaMD05AnuyqeI",
"name": "David",
"email": "david@example.com",
"avatar": null,
"country": "US",
"sales": 1,
"saleAmount": 50000,
"createdAt": "2025-07-16T10:48:01.739Z"
}
}
}
```
# lead.created
Source: https://dub.co/docs/webhooks/events/lead-created
Event triggered when a [new lead is tracked](/docs/api-reference/track/lead).
Name of the tracked event (e.g. Sign up).
The customer that signed up.
Unique identifier for the customer.
Customer name.
Customer email address.
URL to the customer's avatar image.
The click event that led to the lead (id, url, ip, continent, country, city, device, browser, os, ua, bot, qr, referer).
The referral link the lead is associated with (full link object).
Partner details. Only present when the link is a partner referral link (id, name, email, image, country, groupId, totalClicks, totalLeads, totalSales, totalSaleAmount, totalCommissions, etc.).
Optional metadata associated with the lead event.
```json Response theme={null}
{
"id": "evt_P343bmyae40ALQYr5HT4vRXRd",
"event": "lead.created",
"createdAt": "2024-08-30T09:53:50.343Z",
"data": {
"eventName": "Sign up",
"customer": {
"id": "oU5P0SqI8fpwx5bxw1",
"name": "John",
"email": "john@example.com",
"avatar": "https://example.com/john.jpeg"
},
"click": {
"id": "d0UtZqE0BZuBPrJS",
"url": "https://github.com/dubinc/dub",
"ip": "63.141.57.109",
"continent": "NA",
"country": "US",
"city": "San Francisco",
"device": "Desktop",
"browser": "Chrome",
"os": "Mac OS",
"ua": "Mozilla/5.0 (Macintosh; Intel Mac OS X 10_15_7) AppleWebKit/537.36 (KHTML, like Gecko) Chrome/127.0.0.0 Safari/537.36",
"bot": false,
"qr": false,
"referer": "(direct)"
},
"link": {
"id": "cm0faqkyn0001txvfwjfeq7gl",
"domain": "dub.sh",
"key": "79ys3WA",
"externalId": null,
"url": "https://github.com/dubinc/dub",
"trackConversion": true,
"archived": false,
"expiresAt": null,
"expiredUrl": null,
"password": null,
"proxy": false,
"title": null,
"description": null,
"image": null,
"video": null,
"rewrite": false,
"doIndex": false,
"ios": null,
"android": null,
"geo": null,
"publicStats": false,
"comments": null,
"shortLink": "https://dub.sh/79ys3WA",
"qrCode": "https://api.dub.co/qr?url=https://dub.sh/79ys3WA?qr=1",
"utm_source": null,
"utm_medium": null,
"utm_campaign": null,
"utm_term": null,
"utm_content": null,
"userId": "cm022rkcw0000ikt14mscg9sg",
"workspaceId": "ws_cm022sis60003ikt1syy7kfhl",
"clicks": 10,
"lastClicked": "2024-08-30T07:45:09.000Z",
"leads": 5,
"sales": 0,
"saleAmount": 0,
"createdAt": "2024-08-29T13:03:59.098Z",
"updatedAt": "2024-08-30T09:53:49.505Z",
"testCompletedAt": null,
"testStartedAt": null
},
"partner": {
"id": "pn_1JRB6678XHGBZE95R5PH5QVGS",
"name": "John Smith",
"email": "john@partner.com",
"image": "https://example.com/avatar.jpg",
"payoutsEnabledAt": null,
"country": "US",
"groupId": "grp_1K6K3HD0QE7XTX5HSVR77AK5B",
"totalClicks": 150,
"totalLeads": 25,
"totalConversions": 15,
"totalSales": 10,
"totalSaleAmount": 50000,
"totalCommissions": 5000
},
"metadata": null
}
}
```
# link.clicked
Source: https://dub.co/docs/webhooks/events/link-clicked
Event triggered when an end user clicks on a short link.
Due to the high volume nature of these events, these events are scoped to a
specific link. This means that you need to specify the link when creating a webhook for this event.
You can also include multiple links in the same `link.clicked` webhook – either via the dashboard or using the [`webhookIds` prop in the Links API](/docs/api-reference/links/create#body-webhook-ids-one-of-0).
Details about the click event.
Unique identifier for the click.
ISO 8601 timestamp when the click occurred.
The destination URL that was visited.
IP address of the visitor.
Continent code (e.g. NA).
Country code (e.g. US).
City name.
Device type (e.g. Desktop, Mobile).
Browser name (e.g. Chrome).
Operating system (e.g. Mac OS).
Whether the request was identified as a bot.
Whether the click came from a QR code scan.
Referrer URL or (direct).
The link resource that was clicked (full link object including stats such as clicks, shortLink, url, etc.).
```json Response theme={null}
{
"id": "evt_b9ywgxWqai2glUpCQjclB17kM",
"event": "link.clicked",
"createdAt": "2024-08-30T10:16:13.149Z",
"data": {
"click": {
"id": "d0UtZqE0BZuBPrJS",
"timestamp": "2024-08-30T10:16:12.124Z",
"url": "https://github.com/dubinc/dub",
"ip": "63.141.57.109",
"continent": "NA",
"country": "US",
"city": "San Francisco",
"device": "Desktop",
"browser": "Chrome",
"os": "Mac OS",
"ua": "Mozilla/5.0 (Macintosh; Intel Mac OS X 10_15_7) AppleWebKit/537.36 (KHTML, like Gecko) Chrome/127.0.0.0 Safari/537.36",
"bot": false,
"qr": false,
"referer": "(direct)"
},
"link": {
"id": "cm0faqkyn0001txvfwjfeq7gl",
"domain": "dub.sh",
"key": "79ys3WA",
"externalId": null,
"url": "https://github.com/dubinc/dub",
"trackConversion": true,
"archived": false,
"expiresAt": null,
"expiredUrl": null,
"password": null,
"proxy": false,
"title": null,
"description": null,
"image": null,
"video": null,
"rewrite": false,
"doIndex": false,
"ios": null,
"android": null,
"geo": null,
"publicStats": false,
"comments": null,
"shortLink": "https://dub.sh/79ys3WA",
"qrCode": "https://api.dub.co/qr?url=https://dub.sh/79ys3WA?qr=1",
"utm_source": null,
"utm_medium": null,
"utm_campaign": null,
"utm_term": null,
"utm_content": null,
"userId": "cm022rkcw0000ikt14mscg9sg",
"workspaceId": "ws_cm022sis60003ikt1syy7kfhl",
"clicks": 11,
"lastClicked": "2024-08-30T07:45:09.000Z",
"leads": 6,
"sales": 10,
"saleAmount": 200000,
"createdAt": "2024-08-29T13:03:59.098Z",
"updatedAt": "2024-08-30T10:16:12.126Z",
"testCompletedAt": null,
"testStartedAt": null
}
}
}
```
# link.created
Source: https://dub.co/docs/webhooks/events/link-created
Event triggered when a [new link is created](/docs/api-reference/links/create).
Unique identifier for the link.
The short link domain (e.g. dub.sh).
The short link path/slug.
The destination URL.
Full short link URL.
URL to the QR code image for this link.
ID of the user who created the link.
ID of the workspace the link belongs to.
Total click count for the link.
Total lead count (when conversion tracking is enabled).
Total sale count (when conversion tracking is enabled).
Total sale amount in cents.
ISO 8601 timestamp when the link was created.
ISO 8601 timestamp when the link was last updated.
```json Response theme={null}
{
"id": "evt_KleiO4HBwZFbO1vZLWIPZ2AtX",
"event": "link.created",
"createdAt": "2024-08-26T16:41:52.346Z",
"data": {
"id": "cm0b87844000dismqhkviju54",
"domain": "dub.sh",
"key": "sOvvXDT",
"externalId": null,
"url": "https://github.com/stack-auth/stack",
"trackConversion": false,
"archived": false,
"expiresAt": null,
"expiredUrl": null,
"password": null,
"proxy": false,
"title": null,
"description": null,
"image": null,
"video": null,
"rewrite": false,
"doIndex": false,
"ios": null,
"android": null,
"geo": null,
"publicStats": false,
"tagId": null,
"tags": [],
"comments": null,
"shortLink": "https://dub.sh/sOvvXDT",
"qrCode": "https://api.dub.co/qr?url=https://dub.sh/sOvvXDT?qr=1",
"utm_source": null,
"utm_medium": null,
"utm_campaign": null,
"utm_term": null,
"utm_content": null,
"userId": "cm022rkcw0000ikt14mscg9sg",
"workspaceId": "ws_cm022sis60003ikt1syy7kfhl",
"clicks": 0,
"lastClicked": null,
"leads": 0,
"sales": 0,
"saleAmount": 0,
"createdAt": "2024-08-26T16:41:52.084Z",
"updatedAt": "2024-08-26T16:41:52.084Z",
"testCompletedAt": null,
"testStartedAt": null,
"projectId": "cm022sis60003ikt1syy7kfhl"
}
}
```
# link.deleted
Source: https://dub.co/docs/webhooks/events/link-deleted
Event triggered when a [link is deleted](/docs/api-reference/links/delete).
Unique identifier for the link.
The short link domain (e.g. dub.sh).
The short link path/slug.
The destination URL.
Full short link URL.
ID of the user who owned the link.
ID of the workspace the link belonged to.
```json Response theme={null}
{
"id": "evt_KleiO4HBwZFbO1vZLWIPZ2AtX",
"event": "link.deleted",
"createdAt": "2024-08-26T16:41:52.346Z",
"data": {
"id": "cm0b87844000dismqhkviju54",
"domain": "dub.sh",
"key": "sOvvXDT",
"externalId": null,
"url": "https://github.com/stack-auth/stack",
"trackConversion": false,
"archived": false,
"expiresAt": null,
"expiredUrl": null,
"password": null,
"proxy": false,
"title": null,
"description": null,
"image": null,
"video": null,
"rewrite": false,
"doIndex": false,
"ios": null,
"android": null,
"geo": null,
"publicStats": false,
"tagId": null,
"tags": [],
"comments": null,
"shortLink": "https://dub.sh/sOvvXDT",
"qrCode": "https://api.dub.co/qr?url=https://dub.sh/sOvvXDT?qr=1",
"utm_source": null,
"utm_medium": null,
"utm_campaign": null,
"utm_term": null,
"utm_content": null,
"userId": "cm022rkcw0000ikt14mscg9sg",
"workspaceId": "ws_cm022sis60003ikt1syy7kfhl",
"clicks": 0,
"lastClicked": null,
"leads": 0,
"sales": 0,
"saleAmount": 0,
"createdAt": "2024-08-26T16:41:52.084Z",
"updatedAt": "2024-08-26T16:41:52.084Z",
"testCompletedAt": null,
"testStartedAt": null,
"projectId": "cm022sis60003ikt1syy7kfhl"
}
}
```
# link.updated
Source: https://dub.co/docs/webhooks/events/link-updated
Event triggered when a [link is updated](/docs/api-reference/links/update).
Unique identifier for the link.
The short link domain (e.g. dub.sh).
The short link path/slug.
The destination URL.
Full short link URL.
URL to the QR code image for this link.
ID of the user who owns the link.
ID of the workspace the link belongs to.
Total click count for the link.
ISO 8601 timestamp when the link was created.
ISO 8601 timestamp when the link was last updated.
```json Response theme={null}
{
"id": "event_KleiO4HBwZFbO1vZLWIPZ2AtX",
"event": "link.updated",
"createdAt": "2024-08-26T16:41:52.346Z",
"data": {
"id": "cm0b87844000dismqhkviju54",
"domain": "dub.sh",
"key": "sOvvXDT",
"externalId": null,
"url": "https://github.com/stack-auth/stack",
"trackConversion": false,
"archived": false,
"expiresAt": null,
"expiredUrl": null,
"password": null,
"proxy": false,
"title": null,
"description": null,
"image": null,
"video": null,
"rewrite": false,
"doIndex": false,
"ios": null,
"android": null,
"geo": null,
"publicStats": false,
"tagId": null,
"tags": [],
"comments": null,
"shortLink": "https://dub.sh/sOvvXDT",
"qrCode": "https://api.dub.co/qr?url=https://dub.sh/sOvvXDT?qr=1",
"utm_source": null,
"utm_medium": null,
"utm_campaign": null,
"utm_term": null,
"utm_content": null,
"userId": "cm022rkcw0000ikt14mscg9sg",
"workspaceId": "ws_cm022sis60003ikt1syy7kfhl",
"clicks": 0,
"lastClicked": null,
"leads": 0,
"sales": 0,
"saleAmount": 0,
"createdAt": "2024-08-26T16:41:52.084Z",
"updatedAt": "2024-08-26T16:41:52.084Z",
"testCompletedAt": null,
"testStartedAt": null,
"projectId": "cm022sis60003ikt1syy7kfhl"
}
}
```
# partner.application_submitted
Source: https://dub.co/docs/webhooks/events/partner-application-submitted
Event triggered when a partner submits an application to join your partner program.
The application ID.
ISO 8601 timestamp when the application was submitted.
The partner who submitted the application.
Unique identifier for the partner.
Partner name.
Partner email address.
Company name, if provided.
URL to the partner's profile image.
Partner bio or description.
Country code (e.g. US).
ID of the partner group they applied to.
Application status (e.g. pending).
Partner website URL.
YouTube profile URL.
Twitter/X profile URL.
LinkedIn profile URL.
Instagram profile URL.
TikTok profile URL.
Array of form fields submitted by the partner.
The form field label.
The value submitted for this field.
```json Response theme={null}
{
"id": "evt_KleiO4HBwZFbO1vZLWIPZ2AtX",
"event": "partner.application_submitted",
"createdAt": "2025-11-06T11:25:59.264Z",
"data": {
"id": "pga_1K9CEN4JWYACNHS4DR3PWNR2F",
"createdAt": "2025-11-06T11:25:59.264Z",
"partner": {
"id": "pn_1K9BZE1K285BSTX4W6MPKXJFZ",
"name": "Matthew Hayden",
"email": "matthew@example.com",
"companyName": null,
"image": null,
"description": "I'm a content creator who works with brands to grow their business.",
"country": "US",
"groupId": "grp_1K9BZE1K2RWYAWB2K1YN5TY7F",
"status": "pending",
"website": null,
"youtube": null,
"twitter": null,
"linkedin": null,
"instagram": null,
"tiktok": null
},
"applicationFormData": [
{
"label": "Website",
"value": "https://example.com/"
},
{
"label": "How do you plan to promote Acme?",
"value": "I'll promote Acme by sharing it on my social platforms and writing a blog post."
},
{
"label": "Any additional questions or comments?",
"value": null
}
]
}
}
```
# partner.enrolled
Source: https://dub.co/docs/webhooks/events/partner-enrolled
Event triggered when a [new partner is enrolled](/docs/api-reference/partners/create) in your partner program.
Unique identifier for the partner.
Partner name.
Partner email address.
URL to the partner's profile image.
Partner bio or description.
Country code (e.g. US).
ISO 8601 timestamp when payouts were enabled for this partner.
ISO 8601 timestamp when the partner was enrolled.
Partner status (e.g. approved).
ID of the partner program.
Total clicks across the partner's links.
Total leads attributed to the partner.
Total sales attributed to the partner.
Total sale amount in cents.
Total earnings in cents.
Partner website URL.
Array of the partner's referral links.
Link ID.
Short link domain.
Short link path/slug.
Full short link URL.
Destination URL.
Click count for this link.
Lead count for this link.
Sale count for this link.
Sale amount in cents for this link.
```json Response theme={null}
{
"id": "evt_ovabfqva8oqZzmLPN1JnwIfdt",
"event": "partner.enrolled",
"createdAt": "2025-04-08T17:11:56.492Z",
"data": {
"id": "pn_1JRB6678XHGBZE95R5PH5QVGS",
"name": "Asleep Pink Mammal",
"email": "chosen.blush.barracuda@dub-internal-test.com",
"image": "https://api.dub.co/og/avatar?seed=Asleep Pink Mammal",
"description": null,
"country": "US",
"payoutsEnabledAt": null,
"paypalEmail": null,
"stripeConnectId": null,
"createdAt": "2025-04-08T17:11:56.446Z",
"status": "approved",
"programId": "prog_CYCu7IMAapjkRpTnr8F1azjN",
"tenantId": null,
"clicks": 0,
"leads": 0,
"sales": 0,
"saleAmount": 0,
"earnings": 0,
"applicationId": null,
"website": "https://example.com",
"youtube": null,
"twitter": null,
"linkedin": null,
"instagram": null,
"tiktok": null,
"links": [
{
"id": "link_1JRB6677YXQB49RC1HKH7TPJE",
"domain": "getacme.link",
"key": "uvYO5pMIpctKdUVJlL3jIL4o",
"shortLink": "https://getacme.link/uvYO5pMIpctKdUVJlL3jIL4o",
"url": "https://acme.com",
"clicks": 0,
"leads": 0,
"sales": 0,
"saleAmount": 0
}
]
}
}
```
# sale.created
Source: https://dub.co/docs/webhooks/events/sale-created
Event triggered when a [new sale is tracked](/docs/api-reference/track/sale).
Name of the tracked event (e.g. Purchased).
The customer that made the purchase (id, name, email, avatar).
The click event that led to the sale (id, url, ip, continent, country, city, device, browser, os, ua, bot, qr, referer).
The referral link the sale is associated with (full link object).
Partner details. Only present when the link is a partner referral link.
Details about the recorded sale.
Sale amount in cents.
Currency code (e.g. usd).
Payment processor used (e.g. stripe).
External invoice ID, if any.
Optional metadata associated with the sale event.
```json Response theme={null}
{
"id": "evt_WHjyHhqsfYOrlJOOVJSoHXysD",
"event": "sale.created",
"createdAt": "2024-08-30T09:57:51.245Z",
"data": {
"eventName": "Purchased",
"customer": {
"id": "cm0gjdvr20001dkbha2n9gt2b",
"name": "John",
"email": "john@example.com",
"avatar": "https://example.com/john.jpeg"
},
"click": {
"id": "d0UtZqE0BZuBPrJS",
"url": "https://github.com/dubinc/dub",
"ip": "63.141.57.109",
"continent": "NA",
"country": "US",
"city": "San Francisco",
"device": "Desktop",
"browser": "Chrome",
"os": "Mac OS",
"ua": "Mozilla/5.0 (Macintosh; Intel Mac OS X 10_15_7) AppleWebKit/537.36 (KHTML, like Gecko) Chrome/127.0.0.0 Safari/537.36",
"bot": false,
"qr": false,
"referer": "(direct)"
},
"link": {
"id": "cm0faqkyn0001txvfwjfeq7gl",
"domain": "dub.sh",
"key": "79ys3WA",
"externalId": null,
"url": "https://github.com/dubinc/dub",
"trackConversion": true,
"archived": false,
"expiresAt": null,
"expiredUrl": null,
"password": null,
"proxy": false,
"title": null,
"description": null,
"image": null,
"video": null,
"rewrite": false,
"doIndex": false,
"ios": null,
"android": null,
"geo": null,
"publicStats": false,
"comments": null,
"shortLink": "https://dub.sh/79ys3WA",
"qrCode": "https://api.dub.co/qr?url=https://dub.sh/79ys3WA?qr=1",
"utm_source": null,
"utm_medium": null,
"utm_campaign": null,
"utm_term": null,
"utm_content": null,
"userId": "cm022rkcw0000ikt14mscg9sg",
"workspaceId": "ws_cm022sis60003ikt1syy7kfhl",
"clicks": 10,
"lastClicked": "2024-08-30T07:45:09.000Z",
"leads": 5,
"sales": 1,
"saleAmount": 20000,
"createdAt": "2024-08-29T13:03:59.098Z",
"updatedAt": "2024-08-30T09:57:50.891Z",
"testCompletedAt": null,
"testStartedAt": null
},
"partner": {
"id": "pn_1JRB6678XHGBZE95R5PH5QVGS",
"name": "Sarah Johnson",
"email": "sarah@partner.com",
"image": "https://example.com/sarah-avatar.jpg",
"payoutsEnabledAt": null,
"country": "US",
"groupId": "grp_1K6K3HD0QE7XTX5HSVR77AK5B",
"totalClicks": 200,
"totalLeads": 30,
"totalConversions": 20,
"totalSales": 15,
"totalSaleAmount": 75000,
"totalCommissions": 7500
},
"sale": {
"amount": 4500,
"currency": "usd",
"paymentProcessor": "stripe",
"invoiceId": null
},
"metadata": null
}
}
```
# Introduction
Source: https://dub.co/docs/webhooks/introduction
Use webhooks to get real-time notifications on events happening across your Dub workspace.
Webhooks allows you to listen to real-time events happening across your Dub workspace. With webhooks, you can build custom integrations with Dub, such as:
* Triggering a Zap on [Zapier](https://dub.co/integrations/zapier) when a new link is created in Dub
* Sending click events in real-time to [Segment](https://dub.co/integrations/segment) for further processing
* Get a [Slack](https://dub.co/integrations/slack) notification when someone clicks on your pitch deck link
* Building gamified referral programs – e.g. increment usage credits for the referrer when a [new signup](/docs/conversions/leads) happens
The following endpoints do not trigger webhook events: [Bulk create
links](/docs/api-reference/links/bulk-create), [Bulk update
links](/docs/api-reference/links/bulk-update), [Bulk delete
links](/docs/api-reference/links/bulk-delete).
In this guide, we'll show you how to configure webhooks for your Dub workspace and a list of available events you can listen to.
## Creating a webhook
To create a webhook for your Dub workspace, you'll need to follow these steps:
Navigate to the [**Webhooks** settings page](https://app.dub.co/webhooks) in your Dub workspace.
![Create Webhook]() Click on **Create Webhook** to create a new webhook.
Click on **Create Webhook** to create a new webhook.
![Create Webhook Form]() Fill in the required fields in the webhook creation form:
1. **Name**: Give your webhook a name that helps you identify it.
2. **URL**: Enter the URL of the endpoint where you want to send the webhook. We recommend using [webhook.site](https://webhook.site/) to test your webhook.
3. **Signing secret**: This is an auto-generated secret key that you can use to verify the authenticity of the webhook in your application. Learn more about [verifying webhook requests](/docs/webhooks/verify-webhook-requests).
4. **Events**: Select the events you want to listen to. You can select multiple events. Refer to the [Event Types](/docs/webhooks/event-types) section to see the list of available events.
Finally, click on **Create webhook** to create the webhook.
## Viewing webhook event logs
We also provide you with a webhook event logs page where you can view all the webhook events that have been sent to your webhook endpoint in real-time.
To view the webhook event logs, select the webhook from the [**Webhooks** settings page](https://app.dub.co/webhooks) and click on the **Webhook Logs** tab.
Here, you'll see a list of all the webhook events that have been sent to your webhook endpoint:
Fill in the required fields in the webhook creation form:
1. **Name**: Give your webhook a name that helps you identify it.
2. **URL**: Enter the URL of the endpoint where you want to send the webhook. We recommend using [webhook.site](https://webhook.site/) to test your webhook.
3. **Signing secret**: This is an auto-generated secret key that you can use to verify the authenticity of the webhook in your application. Learn more about [verifying webhook requests](/docs/webhooks/verify-webhook-requests).
4. **Events**: Select the events you want to listen to. You can select multiple events. Refer to the [Event Types](/docs/webhooks/event-types) section to see the list of available events.
Finally, click on **Create webhook** to create the webhook.
## Viewing webhook event logs
We also provide you with a webhook event logs page where you can view all the webhook events that have been sent to your webhook endpoint in real-time.
To view the webhook event logs, select the webhook from the [**Webhooks** settings page](https://app.dub.co/webhooks) and click on the **Webhook Logs** tab.
Here, you'll see a list of all the webhook events that have been sent to your webhook endpoint:
![Webhook Event Logs]() You can also select on a specific event, which will open up a sheet with more details about the event:
You can also select on a specific event, which will open up a sheet with more details about the event:
![Webhook Event Logs Details]() ## Sending test events
You can send test events to your webhook URL to ensure that it's working correctly. To do this:
Navigate to the [**Webhooks** settings page](https://app.dub.co/webhooks) and select the webhook you want to test.
Click on the **Update Details** tab to open the webhook details page.
Select the `⋮` icon on the top right of the page, and click on **Send test event**.
## Sending test events
You can send test events to your webhook URL to ensure that it's working correctly. To do this:
Navigate to the [**Webhooks** settings page](https://app.dub.co/webhooks) and select the webhook you want to test.
Click on the **Update Details** tab to open the webhook details page.
Select the `⋮` icon on the top right of the page, and click on **Send test event**.
![Send Test Event]() This will open up a modal where you can select the event you want to send.
This will open up a modal where you can select the event you want to send.
![Send Test Event Modal]() Select the event you want to send, and click on **Send test webhook**.
Select the event you want to send, and click on **Send test webhook**.
![Send Test Webhook]() You'll see a success message and receive the webhook event in the webhook endpoint you specified.
## Retry Behaviour
If your webhook endpoint does not respond with a success status code (2XX), we retry the request to ensure every message will be delivered. You can see all the retry attempts in your webhook event logs.
Webhooks are retried until they are successfully delivered – with an exponential backoff to avoid overwhelming your webhook endpoint (also known as the "[thundering herd problem](https://en.wikipedia.org/wiki/Thundering_herd_problem)"). The delay is capped at 24 hours from the 5th retry attempt onwards.
| Retry attempt | Delay |
| ------------- | -------- |
| 1st | 12s |
| 2nd | 2m 28s |
| 3rd | 30m 8s |
| 4th | 6h 7m 6s |
| 5th | 24h |
| 6th | 24h |
| ... | ... |
### Temporary Disablement
If a webhook endpoint consistently fails, it will be automatically disabled after a series of failed attempts.
Notifications will be sent to the Workspace owners at the following intervals:
* After 5, 10, and 15 consecutive failed attempts.
* On the 20th consecutive failed attempt, the **webhook will be disabled**.
This mechanism ensures that non-responsive endpoints do not continue to receive retry attempts indefinitely, maintaining system efficiency and preventing unnecessary load on both the sender and receiver.
You can re-enable a disabled webhook by clicking on the **Enable webhook** button in the webhook details page.
# Verify webhook requests
Source: https://dub.co/docs/webhooks/verify-webhook-requests
Learn how to verify webhook requests to ensure they're coming from Dub.
With signature verification, you can determine if the webhook came from Dub, and has not been tampered with in transit.
All webhooks are delivered with a `Dub-Signature` header. Dub generates this header using a secret key that only you and Dub know.
An example header looks like this:
```
Dub-Signature: c9ed6a2abf93f59d761eea69908d8de00f4437b5b6d7cd8b9bf5719cbe61bf46
```
## Finding your webhook's signing secret
You can find your webhook's signing secret in the **Update Details** tab:
You'll see a success message and receive the webhook event in the webhook endpoint you specified.
## Retry Behaviour
If your webhook endpoint does not respond with a success status code (2XX), we retry the request to ensure every message will be delivered. You can see all the retry attempts in your webhook event logs.
Webhooks are retried until they are successfully delivered – with an exponential backoff to avoid overwhelming your webhook endpoint (also known as the "[thundering herd problem](https://en.wikipedia.org/wiki/Thundering_herd_problem)"). The delay is capped at 24 hours from the 5th retry attempt onwards.
| Retry attempt | Delay |
| ------------- | -------- |
| 1st | 12s |
| 2nd | 2m 28s |
| 3rd | 30m 8s |
| 4th | 6h 7m 6s |
| 5th | 24h |
| 6th | 24h |
| ... | ... |
### Temporary Disablement
If a webhook endpoint consistently fails, it will be automatically disabled after a series of failed attempts.
Notifications will be sent to the Workspace owners at the following intervals:
* After 5, 10, and 15 consecutive failed attempts.
* On the 20th consecutive failed attempt, the **webhook will be disabled**.
This mechanism ensures that non-responsive endpoints do not continue to receive retry attempts indefinitely, maintaining system efficiency and preventing unnecessary load on both the sender and receiver.
You can re-enable a disabled webhook by clicking on the **Enable webhook** button in the webhook details page.
# Verify webhook requests
Source: https://dub.co/docs/webhooks/verify-webhook-requests
Learn how to verify webhook requests to ensure they're coming from Dub.
With signature verification, you can determine if the webhook came from Dub, and has not been tampered with in transit.
All webhooks are delivered with a `Dub-Signature` header. Dub generates this header using a secret key that only you and Dub know.
An example header looks like this:
```
Dub-Signature: c9ed6a2abf93f59d761eea69908d8de00f4437b5b6d7cd8b9bf5719cbe61bf46
```
## Finding your webhook's signing secret
You can find your webhook's signing secret in the **Update Details** tab:
![Webhook signing secret]() Make sure to keep this secret safe by only storing it in a secure environment variable (e.g. `DUB_WEBHOOK_SECRET`). Do not commit it to git or add it in any client-side code.
## Verifying a webhook request
To verify, you can use the secret key to generate your own signature for each webhook. If both signatures match then you can be sure that a received event came from Dub.
The steps required are:
1. Get the raw body of the request.
2. Extract the signature from the `Dub-Signature` header.
3. Calculate the HMAC of the raw body using the `SHA-256` hash function and the secret.
4. Compare the calculated `HMAC` with the one sent in the `Dub-Signature` header. If they match, the webhook is verified.
Here's an example of how you can verify a webhook request in different languages:
```javascript Next.js theme={null}
export const POST = async (req: Request) => {
const webhookSignature = req.headers.get("Dub-Signature");
if (!webhookSignature) {
return new Response("No signature provided.", { status: 401 });
}
// Copy this from the webhook details page
const secret = process.env.DUB_WEBHOOK_SECRET;
if (!secret) {
return new Response("No secret provided.", { status: 401 });
}
// Make sure to get the raw body from the request
const rawBody = await req.text();
const computedSignature = crypto
.createHmac("sha256", secret)
.update(rawBody)
.digest("hex");
if (webhookSignature !== computedSignature) {
return new Response("Invalid signature", { status: 400 });
}
// Handle the webhook event
// ...
};
```
```python Python theme={null}
import hmac
import hashlib
def webhook():
# Get the signature from the header
webhook_signature = request.headers.get('Dub-Signature')
if not webhook_signature:
abort(401, 'No signature provided.')
# Copy this from the webhook details page
secret = os.environ.get('DUB_WEBHOOK_SECRET')
if not secret:
abort(401, 'No secret provided.')
# Get the raw body of the request
raw_body = request.data
# Calculate the HMAC
computed_signature = hmac.new(
secret.encode('utf-8'),
raw_body,
hashlib.sha256
).hexdigest()
if webhook_signature != computed_signature:
abort(400, 'Invalid signature')
# Handle the webhook event
# ...
return 'OK', 200
```
```go Go theme={null}
import (
"crypto/hmac"
"crypto/sha256"
"encoding/hex"
"io/ioutil"
"net/http"
"os"
)
func webhookHandler(w http.ResponseWriter, r *http.Request) {
// Get the signature from the header
webhookSignature := r.Header.Get("Dub-Signature")
if webhookSignature == "" {
http.Error(w, "No signature provided.", http.StatusUnauthorized)
return
}
// Copy this from the webhook details page
secret := os.Getenv("DUB_WEBHOOK_SECRET")
if secret == "" {
http.Error(w, "No secret provided.", http.StatusUnauthorized)
return
}
// Read the raw body
body, err := ioutil.ReadAll(r.Body)
if err != nil {
http.Error(w, "Error reading request body", http.StatusInternalServerError)
return
}
// Calculate the HMAC
h := hmac.New(sha256.New, []byte(secret))
h.Write(body)
computedSignature := hex.EncodeToString(h.Sum(nil))
if webhookSignature != computedSignature {
http.Error(w, "Invalid signature", http.StatusBadRequest)
return
}
// Handle the webhook event
// ...
w.WriteHeader(http.StatusOK)
w.Write([]byte("OK"))
}
```
## Why is signature verification important?
Signature verification is a crucial security measure that protects against request forgery and data tampering. Without verification, malicious actors could send fake webhook events to your endpoint, potentially triggering unauthorized actions.
The HMAC-SHA256 signature verification process ensures that only Dub can generate valid webhook requests and that payloads haven't been modified in transit. This provides both authentication (confirming the sender is Dub) and integrity (ensuring the message hasn't been tampered with).
# Dub Help Center
Source: https://dub.co/help
Find answers to all your Dub-related questions.
## Categories
Run affiliate/referral/influencer programs, with 1-click global payouts
Join programs, manage your profile, get paid for referrals
Create links, track analytics, manage custom domains
Manage your workspace, invite teammates, configure SAML/SSO
## Popular Articles
# How to run A/B tests with Dub Links?
Source: https://dub.co/help/article/ab-testing
Run A/B tests to compare different short-link variations and identify what drives the highest conversions.
A/B testing is only available on Business plans and higher. [View all pricing
plans](https://dub.co/pricing).
## What is A/B testing?
A/B testing is a method of comparing two or more variations of a destination URL to see which performs better. It works by randomly redirecting users who click the same short link to different target URLs, then measuring which version gets better results based on metrics.
If you combine A/B testing with [device targeting](/help/article/device-targeting) or [geo targeting](/help/article/geo-targeting) on the same link, the targeting rules are evaluated in this order:
1. **Device targeting** (iOS/Android) – checked first
2. **Geo targeting** – checked next
3. **A/B testing** – applied last
A/B testing only applies to traffic that isn't already redirected by a device or geo targeting rule.
## Where to find A/B testing?
When the link builder is open, you'll find the **A/B test** button in the bottom action row. Click to open the dialogue.
Make sure to keep this secret safe by only storing it in a secure environment variable (e.g. `DUB_WEBHOOK_SECRET`). Do not commit it to git or add it in any client-side code.
## Verifying a webhook request
To verify, you can use the secret key to generate your own signature for each webhook. If both signatures match then you can be sure that a received event came from Dub.
The steps required are:
1. Get the raw body of the request.
2. Extract the signature from the `Dub-Signature` header.
3. Calculate the HMAC of the raw body using the `SHA-256` hash function and the secret.
4. Compare the calculated `HMAC` with the one sent in the `Dub-Signature` header. If they match, the webhook is verified.
Here's an example of how you can verify a webhook request in different languages:
```javascript Next.js theme={null}
export const POST = async (req: Request) => {
const webhookSignature = req.headers.get("Dub-Signature");
if (!webhookSignature) {
return new Response("No signature provided.", { status: 401 });
}
// Copy this from the webhook details page
const secret = process.env.DUB_WEBHOOK_SECRET;
if (!secret) {
return new Response("No secret provided.", { status: 401 });
}
// Make sure to get the raw body from the request
const rawBody = await req.text();
const computedSignature = crypto
.createHmac("sha256", secret)
.update(rawBody)
.digest("hex");
if (webhookSignature !== computedSignature) {
return new Response("Invalid signature", { status: 400 });
}
// Handle the webhook event
// ...
};
```
```python Python theme={null}
import hmac
import hashlib
def webhook():
# Get the signature from the header
webhook_signature = request.headers.get('Dub-Signature')
if not webhook_signature:
abort(401, 'No signature provided.')
# Copy this from the webhook details page
secret = os.environ.get('DUB_WEBHOOK_SECRET')
if not secret:
abort(401, 'No secret provided.')
# Get the raw body of the request
raw_body = request.data
# Calculate the HMAC
computed_signature = hmac.new(
secret.encode('utf-8'),
raw_body,
hashlib.sha256
).hexdigest()
if webhook_signature != computed_signature:
abort(400, 'Invalid signature')
# Handle the webhook event
# ...
return 'OK', 200
```
```go Go theme={null}
import (
"crypto/hmac"
"crypto/sha256"
"encoding/hex"
"io/ioutil"
"net/http"
"os"
)
func webhookHandler(w http.ResponseWriter, r *http.Request) {
// Get the signature from the header
webhookSignature := r.Header.Get("Dub-Signature")
if webhookSignature == "" {
http.Error(w, "No signature provided.", http.StatusUnauthorized)
return
}
// Copy this from the webhook details page
secret := os.Getenv("DUB_WEBHOOK_SECRET")
if secret == "" {
http.Error(w, "No secret provided.", http.StatusUnauthorized)
return
}
// Read the raw body
body, err := ioutil.ReadAll(r.Body)
if err != nil {
http.Error(w, "Error reading request body", http.StatusInternalServerError)
return
}
// Calculate the HMAC
h := hmac.New(sha256.New, []byte(secret))
h.Write(body)
computedSignature := hex.EncodeToString(h.Sum(nil))
if webhookSignature != computedSignature {
http.Error(w, "Invalid signature", http.StatusBadRequest)
return
}
// Handle the webhook event
// ...
w.WriteHeader(http.StatusOK)
w.Write([]byte("OK"))
}
```
## Why is signature verification important?
Signature verification is a crucial security measure that protects against request forgery and data tampering. Without verification, malicious actors could send fake webhook events to your endpoint, potentially triggering unauthorized actions.
The HMAC-SHA256 signature verification process ensures that only Dub can generate valid webhook requests and that payloads haven't been modified in transit. This provides both authentication (confirming the sender is Dub) and integrity (ensuring the message hasn't been tampered with).
# Dub Help Center
Source: https://dub.co/help
Find answers to all your Dub-related questions.
## Categories
Run affiliate/referral/influencer programs, with 1-click global payouts
Join programs, manage your profile, get paid for referrals
Create links, track analytics, manage custom domains
Manage your workspace, invite teammates, configure SAML/SSO
## Popular Articles
# How to run A/B tests with Dub Links?
Source: https://dub.co/help/article/ab-testing
Run A/B tests to compare different short-link variations and identify what drives the highest conversions.
A/B testing is only available on Business plans and higher. [View all pricing
plans](https://dub.co/pricing).
## What is A/B testing?
A/B testing is a method of comparing two or more variations of a destination URL to see which performs better. It works by randomly redirecting users who click the same short link to different target URLs, then measuring which version gets better results based on metrics.
If you combine A/B testing with [device targeting](/help/article/device-targeting) or [geo targeting](/help/article/geo-targeting) on the same link, the targeting rules are evaluated in this order:
1. **Device targeting** (iOS/Android) – checked first
2. **Geo targeting** – checked next
3. **A/B testing** – applied last
A/B testing only applies to traffic that isn't already redirected by a device or geo targeting rule.
## Where to find A/B testing?
When the link builder is open, you'll find the **A/B test** button in the bottom action row. Click to open the dialogue.
![A/B test location]() ## A/B testing builder
With the builder open, you are able to add additional destination URLs, set the traffic percentage, and set the completion date. A minimum of 2 URLs is required to create the test.
## A/B testing builder
With the builder open, you are able to add additional destination URLs, set the traffic percentage, and set the completion date. A minimum of 2 URLs is required to create the test.
![A/B test builder]() ### Testing URLs
You can enter a maximum of 4 additional testing URLs that you'd like to send your traffic to.
### Testing URLs
You can enter a maximum of 4 additional testing URLs that you'd like to send your traffic to.
![Testing URLs]() If you need to remove any URLs you've added, click the **`X`** icon to the right of each input to remove it.
### Traffic split
By default, the traffic is split evenly between each of the URLs, but this can be changed depending on your preference.
If you need to remove any URLs you've added, click the **`X`** icon to the right of each input to remove it.
### Traffic split
By default, the traffic is split evenly between each of the URLs, but this can be changed depending on your preference.
![Traffic split]() Click and drag the dividers between each group to adjust the traffic to each
destination URL. The minimum percentage you can set traffic to is 10%. ###
Completion Date By default, A/B tests will be set to run for 2 weeks, as that is
enough time to collect performance data to make a decision
Click and drag the dividers between each group to adjust the traffic to each
destination URL. The minimum percentage you can set traffic to is 10%. ###
Completion Date By default, A/B tests will be set to run for 2 weeks, as that is
enough time to collect performance data to make a decision
![Completion date]() You can run a test for a shorter period, but that's not recommended because in
most cases, you won't collect enough data to make a decision. The longest you
can run a test for is 6 weeks.
## Active A/B tests
While an A/B test is active, a `flask` icon is shown on each link. You can see this while viewing all your links.
You can run a test for a shorter period, but that's not recommended because in
most cases, you won't collect enough data to make a decision. The longest you
can run a test for is 6 weeks.
## Active A/B tests
While an A/B test is active, a `flask` icon is shown on each link. You can see this while viewing all your links.
![Links view]() You can click this icon to expand the current link view to show all the
destination URLs you've entered for testing. This will show you the traffic
percentage you've set and the click, lead, and sale performance.
You can click this icon to expand the current link view to show all the
destination URLs you've entered for testing. This will show you the traffic
percentage you've set and the click, lead, and sale performance.
![Links view expanded]() ## Completing A/B tests
There are two ways A/B tests can be completed. They can either be manually ended early or the scheduled completion date passes.
By default, your A/B test will complete when the scheduled date passes. Here's how the new destination URL is selected:
1. Select the link with the highest amount of conversions
2. If conversions are tied, select the link with the highest conversion rate (conversions ÷ clicks)
3. If still tied, select the link with the highest clicks
`OR - If no conversions are recorded or tracked`
1. Select the link with the highest number of leads
2. If leads are tied, select the link with the highest lead rate (leads ÷ clicks)
3. If still tied, select the link with the highest clicks
To end your test before the scheduled date, open your A/B settings and click **End A/B test** in the bottom left of the modal.
## Completing A/B tests
There are two ways A/B tests can be completed. They can either be manually ended early or the scheduled completion date passes.
By default, your A/B test will complete when the scheduled date passes. Here's how the new destination URL is selected:
1. Select the link with the highest amount of conversions
2. If conversions are tied, select the link with the highest conversion rate (conversions ÷ clicks)
3. If still tied, select the link with the highest clicks
`OR - If no conversions are recorded or tracked`
1. Select the link with the highest number of leads
2. If leads are tied, select the link with the highest lead rate (leads ÷ clicks)
3. If still tied, select the link with the highest clicks
To end your test before the scheduled date, open your A/B settings and click **End A/B test** in the bottom left of the modal.
![End test early]() From here, you'll select the new destination URL for your short link.
From here, you'll select the new destination URL for your short link.
![Select the destination URL]() After clicking **End test**, make sure to save your link changes in the next
screen to confirm the changes.
# Application analytics
Source: https://dub.co/help/article/application-analytics
Use application analytics to understand where partner applications come from and how applicants move from visit to approval.
This feature is only available on [Business plans and
above](https://dub.co/pricing/partners).
Application analytics helps you understand how people discover your partner program and where applicants drop off before becoming approved partners.
Use it to compare application sources, measure conversion through each step of the application funnel, and see which channels are bringing in applicants who are most likely to be approved.
## Where to find application analytics?
When viewing your Partner Program navigation, click on the **Analytics** page in the **Insights** group.
In the analytics chart, select **Applications** from the top data selector.
After clicking **End test**, make sure to save your link changes in the next
screen to confirm the changes.
# Application analytics
Source: https://dub.co/help/article/application-analytics
Use application analytics to understand where partner applications come from and how applicants move from visit to approval.
This feature is only available on [Business plans and
above](https://dub.co/pricing/partners).
Application analytics helps you understand how people discover your partner program and where applicants drop off before becoming approved partners.
Use it to compare application sources, measure conversion through each step of the application funnel, and see which channels are bringing in applicants who are most likely to be approved.
## Where to find application analytics?
When viewing your Partner Program navigation, click on the **Analytics** page in the **Insights** group.
In the analytics chart, select **Applications** from the top data selector.
![Application analytics dashboard]() ## Application analytics views
The application analytics dashboard uses filtering and date range controls like the [program analytics](/help/article/program-analytics), but focuses the chart on application acquisition and approval flow.
### 1. Application chart
The application chart shows application activity across the selected date range. You can use it to identify spikes, dips, and trends in how potential partners move through the application process.
| Step | Description |
| ----------- | ------------------------------------------------ |
| Visits | People who visited your program application page |
| Starts | Visitors who started the application form |
| Submissions | Applicants who submitted the application form |
| Approvals | Submitted applications that were approved |
## Application analytics views
The application analytics dashboard uses filtering and date range controls like the [program analytics](/help/article/program-analytics), but focuses the chart on application acquisition and approval flow.
### 1. Application chart
The application chart shows application activity across the selected date range. You can use it to identify spikes, dips, and trends in how potential partners move through the application process.
| Step | Description |
| ----------- | ------------------------------------------------ |
| Visits | People who visited your program application page |
| Starts | Visitors who started the application form |
| Submissions | Applicants who submitted the application form |
| Approvals | Submitted applications that were approved |
![Application analytics time-series chart]() **Chart toggle**
You can change the chart type displayed by clicking the `time-chart | application funnel` toggle in the top right of the chart area.
**Chart toggle**
You can change the chart type displayed by clicking the `time-chart | application funnel` toggle in the top right of the chart area.
![Application analytics chart toggle]() When the chart type is switched to **application funnel**, you can view the percentage of visitors that complete each stage of the application process.
**Application funnel**
The application funnel shows how potential partners progress through each step of the application process. Each step shows the total count for the selected date range and the conversion rate from the first visit.
When the chart type is switched to **application funnel**, you can view the percentage of visitors that complete each stage of the application process.
**Application funnel**
The application funnel shows how potential partners progress through each step of the application process. Each step shows the total count for the selected date range and the conversion rate from the first visit.
![Application analytics funnel chart]() This helps you understand whether applicants are dropping off before starting, before submitting, or during review.
### 2. Aggregated data for different facets (top views)
These are more commonly known as the "Top Views" in Dub Analytics. These views show your top application **Sources** and **Countries**, and allow you to explore your program data further.
Use **Application source** to identify which sources are driving application interest, such as the Dub Program Marketplace, direct applications, referrers, and other websites that send traffic to your program.
Use **Application country** to compare application demand across countries, understand where your program is attracting partners, and decide whether your application settings or partner groups should be tailored by region.
This helps you understand whether applicants are dropping off before starting, before submitting, or during review.
### 2. Aggregated data for different facets (top views)
These are more commonly known as the "Top Views" in Dub Analytics. These views show your top application **Sources** and **Countries**, and allow you to explore your program data further.
Use **Application source** to identify which sources are driving application interest, such as the Dub Program Marketplace, direct applications, referrers, and other websites that send traffic to your program.
Use **Application country** to compare application demand across countries, understand where your program is attracting partners, and decide whether your application settings or partner groups should be tailored by region.
![Aggregated application analytics data]() ## Reviewing applications
To review the applicants behind your application analytics, click **View Applications** in the top right of the analytics page.
## Reviewing applications
To review the applicants behind your application analytics, click **View Applications** in the top right of the analytics page.
![View applications button]() You can also go directly to the [Applications page](/help/article/program-applications) to approve, reject, or review pending applications.
## Filtering application analytics
You can click the **Filter** button in the top left to narrow application analytics by partner, application source, and country.
You can also go directly to the [Applications page](/help/article/program-applications) to approve, reject, or review pending applications.
## Filtering application analytics
You can click the **Filter** button in the top left to narrow application analytics by partner, application source, and country.
![Filtering application analytics]() | Filter | Description |
| ------- | -------------------------------------------------- |
| Partner | Select a specific program partner |
| Source | Select a specific application source |
| Country | Select a specific country where applications start |
The date picker controls the reporting period for the application funnel and source tables.
# Archiving domains on Dub
Source: https://dub.co/help/article/archiving-domains
Learn more about how you can archive domains on Dub to better manage your domains.
You can archive your custom domains on Dub to better manage your domains.
When you archive a domain:
* The domain will not show up in the [link builder](/help/article/dub-link-builder)
* The domain will also be hidden from the **Active** domain list
* Their links will continue to work and will still show up on the links dashboard
| Filter | Description |
| ------- | -------------------------------------------------- |
| Partner | Select a specific program partner |
| Source | Select a specific application source |
| Country | Select a specific country where applications start |
The date picker controls the reporting period for the application funnel and source tables.
# Archiving domains on Dub
Source: https://dub.co/help/article/archiving-domains
Learn more about how you can archive domains on Dub to better manage your domains.
You can archive your custom domains on Dub to better manage your domains.
When you archive a domain:
* The domain will not show up in the [link builder](/help/article/dub-link-builder)
* The domain will also be hidden from the **Active** domain list
* Their links will continue to work and will still show up on the links dashboard
![Archived domains will only show up under the 'Archived' tab under your workspace domains]() To archive a domain, you can follow the steps below:
1. Go to your workspace settings and click on the **Domains** tab.
2. Click on the `⋮` button next to the domain you want to archive, and select **Archive**.
3. In the modal that appears, select **Confirm archive** to archive the domain.
The domain will now be archived and will no longer show up in the active domain list.
# Configuring SAML SSO with Azure AD
Source: https://dub.co/help/article/azure-saml
For Dub Enterprise users, you can securely manage your team's access to Dub using Azure AD SAML SSO.
This feature is only available on [Dub Enterprise](https://dub.co/enterprise).
For Dub Enterprise users, you can securely manage your team's access to Dub using [Azure AD SAML SSO](https://learn.microsoft.com/en-us/azure/active-directory/architecture/auth-saml).
## Step 1: Create or Select SAML Application
In your [Azure Admin console](https://portal.azure.com/), select **Azure Active Directory** (or search for it in the search bar).
To archive a domain, you can follow the steps below:
1. Go to your workspace settings and click on the **Domains** tab.
2. Click on the `⋮` button next to the domain you want to archive, and select **Archive**.
3. In the modal that appears, select **Confirm archive** to archive the domain.
The domain will now be archived and will no longer show up in the active domain list.
# Configuring SAML SSO with Azure AD
Source: https://dub.co/help/article/azure-saml
For Dub Enterprise users, you can securely manage your team's access to Dub using Azure AD SAML SSO.
This feature is only available on [Dub Enterprise](https://dub.co/enterprise).
For Dub Enterprise users, you can securely manage your team's access to Dub using [Azure AD SAML SSO](https://learn.microsoft.com/en-us/azure/active-directory/architecture/auth-saml).
## Step 1: Create or Select SAML Application
In your [Azure Admin console](https://portal.azure.com/), select **Azure Active Directory** (or search for it in the search bar).
![Azure Active Directory option on the Azure Dashboard]() Then, click on **Enterprise applications** from the left sidebar.
Then, click on **Enterprise applications** from the left sidebar.
![Enterprise applications option on the Azure Dashboard]() If you already have an existing Azure AD SAML application, select it from the list and move on to [Step 2](#step-2-configure-saml-applicaation).
If not, click on **New application** at the top.
If you already have an existing Azure AD SAML application, select it from the list and move on to [Step 2](#step-2-configure-saml-applicaation).
If not, click on **New application** at the top.
![Create new application button on the Azure Dashboard]() In the next screen, click on **Create your own application**. Give your application a **Name** (e.g. "Dub") and click **Create**.
In the next screen, click on **Create your own application**. Give your application a **Name** (e.g. "Dub") and click **Create**.
![Create your own application option on the Azure Dashboard]() ## Step 2: Configure SAML Application
Under the **Manage** section in the left sidebar, select **Single sign-on**. Then, click on **SAML**.
## Step 2: Configure SAML Application
Under the **Manage** section in the left sidebar, select **Single sign-on**. Then, click on **SAML**.
![SAML option on the Azure Dashboard]() Under the **Basic SAML Configuration** section, click on **Edit**.
Under the **Basic SAML Configuration** section, click on **Edit**.
![Edit button on the SAML Settings page on the Azure Dashboard]() This will open up a sheet overlay. Under **Basic SAML Configuration**, enter the following values:
```text title="Identifier (Entity ID)" theme={null}
https://saml.dub.co
```
```text title="Reply URL (Assertion Consumer Service URL)" theme={null}
https://api.dub.co/auth/saml/callback
```
This will open up a sheet overlay. Under **Basic SAML Configuration**, enter the following values:
```text title="Identifier (Entity ID)" theme={null}
https://saml.dub.co
```
```text title="Reply URL (Assertion Consumer Service URL)" theme={null}
https://api.dub.co/auth/saml/callback
```
![Basic SAML Configuration section on the Azure Dashboard]() Click **Save** in the menu bar to save your changes.
Click **Save** in the menu bar to save your changes.
![Basic SAML Configuration section on the Azure Dashboard]() ## Step 3: Attribute Mapping
Click **Edit** on the **Attributes & Claims** section.
## Step 3: Attribute Mapping
Click **Edit** on the **Attributes & Claims** section.
![Attributes & Claims section on the Azure Dashboard]() Under **Additional claims**, make sure the following entries are present:
| Name | Value |
| ---------------------------------------------------------------------------------------------------------------------------------------- | ---------------------- |
| [http://schemas.xmlsoap.org/ws/2005/05/identity/claims/emailaddress](http://schemas.xmlsoap.org/ws/2005/05/identity/claims/emailaddress) | user.mail |
| [http://schemas.xmlsoap.org/ws/2005/05/identity/claims/givenname](http://schemas.xmlsoap.org/ws/2005/05/identity/claims/givenname) | user.givenname |
| [http://schemas.xmlsoap.org/ws/2005/05/identity/claims/name](http://schemas.xmlsoap.org/ws/2005/05/identity/claims/name) | user.userprincipalname |
| [http://schemas.xmlsoap.org/ws/2005/05/identity/claims/surname](http://schemas.xmlsoap.org/ws/2005/05/identity/claims/surname) | user.surname |
Under **Additional claims**, make sure the following entries are present:
| Name | Value |
| ---------------------------------------------------------------------------------------------------------------------------------------- | ---------------------- |
| [http://schemas.xmlsoap.org/ws/2005/05/identity/claims/emailaddress](http://schemas.xmlsoap.org/ws/2005/05/identity/claims/emailaddress) | user.mail |
| [http://schemas.xmlsoap.org/ws/2005/05/identity/claims/givenname](http://schemas.xmlsoap.org/ws/2005/05/identity/claims/givenname) | user.givenname |
| [http://schemas.xmlsoap.org/ws/2005/05/identity/claims/name](http://schemas.xmlsoap.org/ws/2005/05/identity/claims/name) | user.userprincipalname |
| [http://schemas.xmlsoap.org/ws/2005/05/identity/claims/surname](http://schemas.xmlsoap.org/ws/2005/05/identity/claims/surname) | user.surname |
![Additional claims section on the Azure Dashboard]() Once that's done, click on the `X` button in the top right corner to go back to the main settings page (or click the back button in your browser).
## Step 4: Copy the Metadata URL
Scroll down to the 3rd section on the page, **SAML Certificates**. Copy the **App Federation Metadata Url** value and return to the Dub dashboard.
Once that's done, click on the `X` button in the top right corner to go back to the main settings page (or click the back button in your browser).
## Step 4: Copy the Metadata URL
Scroll down to the 3rd section on the page, **SAML Certificates**. Copy the **App Federation Metadata Url** value and return to the Dub dashboard.
![Metadata URL on the Azure Dashboard]() ## Step 5: Configure SAML SSO on Dub
In your workspace settings, click on **Security** in the **Workspace** group.
## Step 5: Configure SAML SSO on Dub
In your workspace settings, click on **Security** in the **Workspace** group.
![Directory Sync section on the Dub Dashboard]() Under the **SAML Single Sign-On** section, click on **Configure**. This will open up the SAML SSO modal:
1. Select **Azure AD** as the SAML provider.
2. Enter the **App Federation Metadata Url** value that you copied from Step 4.
3. Click **Save changes**.
Under the **SAML Single Sign-On** section, click on **Configure**. This will open up the SAML SSO modal:
1. Select **Azure AD** as the SAML provider.
2. Enter the **App Federation Metadata Url** value that you copied from Step 4.
3. Click **Save changes**.
![SAML SSO Modal]() ## Step 6: Assign Users
We highly recommend configuring [SCIM Directory
Sync](/help/article/azure-scim) before assigning users & groups to your
workspace. This will ensure that your users are automatically added to your
workspace when they sign in for the first time, as well as automatically
removed when they are deactivated in Azure.
Once you've configured SAML SSO, you can start assigning users & groups to your workspace.
From your application, click the **Users and groups** from the left navigation menu and click **Add user/group**.
## Step 6: Assign Users
We highly recommend configuring [SCIM Directory
Sync](/help/article/azure-scim) before assigning users & groups to your
workspace. This will ensure that your users are automatically added to your
workspace when they sign in for the first time, as well as automatically
removed when they are deactivated in Azure.
Once you've configured SAML SSO, you can start assigning users & groups to your workspace.
From your application, click the **Users and groups** from the left navigation menu and click **Add user/group**.
![Adding users in Azure AD]() Click on **None Selected** under **Users**.
From the right side of the screen, select the users you want to assign to the app and click the **Select** button. Thenm click **Assign** to those users to your app.
Click on **None Selected** under **Users**.
From the right side of the screen, select the users you want to assign to the app and click the **Select** button. Thenm click **Assign** to those users to your app.
![Assigning users in Azure AD]() Your assigned users should now receive an invitation email to join your Dub workspace.
Your assigned users should now receive an invitation email to join your Dub workspace.
![SAML invite email]() Azure AD SCIM provisioning can take [anywhere between 20-40 minutes to
sync](https://learn.microsoft.com/en-us/azure/databricks/administration-guide/users-groups/scim/aad#provisioning-tips).
This means that it may take up to 40 minutes for your users to receive the
invitation email and be able to join your Dub workspace.
They will also be able to sign in to Dub using Azure AD SSO.
# Configuring SCIM Directory Sync with Azure AD
Source: https://dub.co/help/article/azure-scim
For Dub Enterprise users, you can automatically provision and deprovision users from Azure AD to Dub using SCIM Directory Sync.
This feature is only available on [Dub Enterprise](https://dub.co/enterprise).
For Dub Enterprise users, you can automatically provision and deprovision users from your Azure Active Directory (AD) to Dub using [SCIM Directory Sync](https://learn.microsoft.com/en-us/azure/active-directory/architecture/sync-scim).
## Step 1: Configure Directory Sync on Dub
In your workspace dashboard on Dub, click on the **Settings** tab in the menu bar at the top. Then, click on the **Security** tab in the sidebar.
Azure AD SCIM provisioning can take [anywhere between 20-40 minutes to
sync](https://learn.microsoft.com/en-us/azure/databricks/administration-guide/users-groups/scim/aad#provisioning-tips).
This means that it may take up to 40 minutes for your users to receive the
invitation email and be able to join your Dub workspace.
They will also be able to sign in to Dub using Azure AD SSO.
# Configuring SCIM Directory Sync with Azure AD
Source: https://dub.co/help/article/azure-scim
For Dub Enterprise users, you can automatically provision and deprovision users from Azure AD to Dub using SCIM Directory Sync.
This feature is only available on [Dub Enterprise](https://dub.co/enterprise).
For Dub Enterprise users, you can automatically provision and deprovision users from your Azure Active Directory (AD) to Dub using [SCIM Directory Sync](https://learn.microsoft.com/en-us/azure/active-directory/architecture/sync-scim).
## Step 1: Configure Directory Sync on Dub
In your workspace dashboard on Dub, click on the **Settings** tab in the menu bar at the top. Then, click on the **Security** tab in the sidebar.
![Directory Sync section on the Dub Dashboard]() Under the **Directory Sync** section, click on **Configure**. This will open up the Directory Sync modal:
1. Select **Azure AD** as the Directory Provider.
2. Click **Save changes**.
Under the **Directory Sync** section, click on **Configure**. This will open up the Directory Sync modal:
1. Select **Azure AD** as the Directory Provider.
2. Click **Save changes**.
![SCIM Modal]() This will generate a Directory Sync connection for your Dub workspace, and return 2 values, which will be needed in Step 2:
1. **Tenant URL**
2. **Secret Token**
This will generate a Directory Sync connection for your Dub workspace, and return 2 values, which will be needed in Step 2:
1. **Tenant URL**
2. **Secret Token**
![SCIM Modal]() ## Step 2: Add Provisioning to SAML Application
Click on the **Provisioning** tab of your existing Dub Okta SAML application that you want to enable SCIM provisioning for.
## Step 2: Add Provisioning to SAML Application
Click on the **Provisioning** tab of your existing Dub Okta SAML application that you want to enable SCIM provisioning for.
![Provisioning tab of Okta SAML application]() In the Provisioning tab, click on **Get started**.
In the Provisioning tab, click on **Get started**.
![Get started with provisioning]() Select **Automatic** from the **Provisioning Mode** dropdown. Under the **Admin Credentials** section, enter the values that you obtained from Step 1:
1. **Tenant URL**
2. **Secret Token**
Select **Automatic** from the **Provisioning Mode** dropdown. Under the **Admin Credentials** section, enter the values that you obtained from Step 1:
1. **Tenant URL**
2. **Secret Token**
![Provisioning tab of Azure SAML application]() Click on **Test Connection** to test the connection to see if the credentials are correct, then click **Save** to save the credentials.
Expand the **Mappings** section and ensure group and user attribute mappings are enabled for your app. The default mapping should work.
Click on **Test Connection** to test the connection to see if the credentials are correct, then click **Save** to save the credentials.
Expand the **Mappings** section and ensure group and user attribute mappings are enabled for your app. The default mapping should work.
![Mappings section of Azure SAML application]() Expand the **Settings** section and make the following changes:
* Select **Sync only assigned users and groups** from the **Scope** dropdown.
* Confirm the **Provisioning Status** is set to **On**.
Click **Save** to save the changes.
Expand the **Settings** section and make the following changes:
* Select **Sync only assigned users and groups** from the **Scope** dropdown.
* Confirm the **Provisioning Status** is set to **On**.
Click **Save** to save the changes.
![Settings section of Azure SAML application]() Congratulations! You've successfully configured SCIM provisioning for your Dub workspace.
## Step 3: Assign Users
Once you've configured Directory sync, you can assign users to Dub directly within Azure AD.
From your application, click the **Users and groups** from the left navigation menu and click **Add user/group**.
Congratulations! You've successfully configured SCIM provisioning for your Dub workspace.
## Step 3: Assign Users
Once you've configured Directory sync, you can assign users to Dub directly within Azure AD.
From your application, click the **Users and groups** from the left navigation menu and click **Add user/group**.
![Adding users in Azure AD]() Click on **None Selected** under **Users**.
From the right side of the screen, select the users you want to assign to the app and click the **Select** button. Thenm click **Assign** to those users to your app.
Click on **None Selected** under **Users**.
From the right side of the screen, select the users you want to assign to the app and click the **Select** button. Thenm click **Assign** to those users to your app.
![Assigning users in Azure AD]() Your assigned users should now receive an invitation email to join your Dub workspace.
Your assigned users should now receive an invitation email to join your Dub workspace.
![SAML invite email]() Azure AD SCIM provisioning can take [anywhere between 20-40 minutes to
sync](https://learn.microsoft.com/en-us/azure/databricks/administration-guide/users-groups/scim/aad#provisioning-tips).
This means that it may take up to 40 minutes for your users to receive the
invitation email and be able to join your Dub workspace.
They will also be able to sign in to Dub using Azure AD SSO
# How to manage your links in bulk
Source: https://dub.co/help/article/bulk-link-actions
Learn how to speed up your link management workflow with bulk link actions.
At Dub, we understand that "time is money".
Imagine you've created a dozen links for a marketing campaign, but you realized that you forgot to assign them to a tag when creating them.
Instead of [manually tagging them in the link builder](/help/article/how-to-use-tags), what if you could *tag all of them at once*?
With bulk link actions, you can do exactly that.
## Bulk selecting links
To select a link, hover over the logo of the link and click on it. A check mark will show up in lieu of the link logo, and a selection toolbar will appear at the bottom of your screen:
Azure AD SCIM provisioning can take [anywhere between 20-40 minutes to
sync](https://learn.microsoft.com/en-us/azure/databricks/administration-guide/users-groups/scim/aad#provisioning-tips).
This means that it may take up to 40 minutes for your users to receive the
invitation email and be able to join your Dub workspace.
They will also be able to sign in to Dub using Azure AD SSO
# How to manage your links in bulk
Source: https://dub.co/help/article/bulk-link-actions
Learn how to speed up your link management workflow with bulk link actions.
At Dub, we understand that "time is money".
Imagine you've created a dozen links for a marketing campaign, but you realized that you forgot to assign them to a tag when creating them.
Instead of [manually tagging them in the link builder](/help/article/how-to-use-tags), what if you could *tag all of them at once*?
With bulk link actions, you can do exactly that.
## Bulk selecting links
To select a link, hover over the logo of the link and click on it. A check mark will show up in lieu of the link logo, and a selection toolbar will appear at the bottom of your screen:
![]() You can also select multiple links at once with `SHIFT` + `CLICK`:
## Updating links in bulk
Then, once you've selected your links, you can use the toolbar to [perform bulk actions](#supported-bulk-link-actions) on the selected links:
You can also select multiple links at once with `SHIFT` + `CLICK`:
## Updating links in bulk
Then, once you've selected your links, you can use the toolbar to [perform bulk actions](#supported-bulk-link-actions) on the selected links:
![]() Hitting `ESC` deselect all currently selected links.
## Supported bulk link actions
Here's a list of all supported bulk link actions, along with their respective keyboard shortcuts:
| Action | Shortcut |
| ------------------------------------------------------------------------------------------ | -------- |
| [Tagging](/help/article/how-to-use-tags) multiple links | `T` |
| Moving multiple links to the same folder | `M` |
| Enabling/disabling [conversion tracking](/help/article/dub-conversions) for multiple links | `C` |
| Archiving multiple links | `A` |
| Deleting multiple links | `X` |
Are there any other bulk link actions you'd like to see? [Let us know](https://dub.co/contact/support)!
## Programmatically managing links in bulk
You can also manage links in bulk using the [Dub API](/docs/api-reference/introduction).
Here are a few things you can do with the API:
* [Create links in bulk](/docs/api-reference/endpoint/bulk-create-links)
* [Update links in bulk](/docs/api-reference/endpoint/bulk-update-links)
* [Delete links in bulk](/docs/api-reference/endpoint/bulk-delete-links)
# How to choose a custom domain for your short links
Source: https://dub.co/help/article/choosing-a-custom-domain
Learn how to choose the right custom domain for your short links on Dub.
Custom domains are a great way to [improve the click-through rates of your short links](https://dub.co/blog/custom-domains). They are especially useful if you want to use a domain that is relevant to your audience and content.
On Dub, you can add custom domains for free. The number of domains that you can add depends on your plan:
* **Free plan**: 3 domains
* [**Pro plan**](https://dub.co/pricing): 10 domains
* [**Business plan**](https://dub.co/pricing): 40 domains
* **Enterprise plan**: Unlimited domains
## Which custom domain should I choose for my short link?
When choosing a custom domain for your short links, consider the following factors:
1. **Brand**: Choose a domain that best reflects your brand – ideally containing your brand name in it. For example, if your company domain is `jupiter.com`, you can use a domain like `jupiter.link` or `go.jupiter.com`.
2. **Length**: Shorter domains are easier to remember and type. To achieve this, some companies might opt for acronyms or abbreviations. For example, one of our customers [Tinybird](https://dub.co/customers/tinybird) uses `tbrd.co` for their short domain.
The only exception here is you're going for a `.link` TLD, or a `go.`
subdomain, which are both slightly longer than your original domain.
Here are some examples of custom domains that you can use for your short links – based on what we've seen [our customers](https://dub.co/customers) use:
| Option | Format | Real-world examples | Usage on Dub |
| -------------- | --------------- | ---------------------------------------------------------------------------------------------------------------------------------- | ------------ |
| Subdomains | `go.domain.com` | **Clerk** → `go.clerk.com`
Hitting `ESC` deselect all currently selected links.
## Supported bulk link actions
Here's a list of all supported bulk link actions, along with their respective keyboard shortcuts:
| Action | Shortcut |
| ------------------------------------------------------------------------------------------ | -------- |
| [Tagging](/help/article/how-to-use-tags) multiple links | `T` |
| Moving multiple links to the same folder | `M` |
| Enabling/disabling [conversion tracking](/help/article/dub-conversions) for multiple links | `C` |
| Archiving multiple links | `A` |
| Deleting multiple links | `X` |
Are there any other bulk link actions you'd like to see? [Let us know](https://dub.co/contact/support)!
## Programmatically managing links in bulk
You can also manage links in bulk using the [Dub API](/docs/api-reference/introduction).
Here are a few things you can do with the API:
* [Create links in bulk](/docs/api-reference/endpoint/bulk-create-links)
* [Update links in bulk](/docs/api-reference/endpoint/bulk-update-links)
* [Delete links in bulk](/docs/api-reference/endpoint/bulk-delete-links)
# How to choose a custom domain for your short links
Source: https://dub.co/help/article/choosing-a-custom-domain
Learn how to choose the right custom domain for your short links on Dub.
Custom domains are a great way to [improve the click-through rates of your short links](https://dub.co/blog/custom-domains). They are especially useful if you want to use a domain that is relevant to your audience and content.
On Dub, you can add custom domains for free. The number of domains that you can add depends on your plan:
* **Free plan**: 3 domains
* [**Pro plan**](https://dub.co/pricing): 10 domains
* [**Business plan**](https://dub.co/pricing): 40 domains
* **Enterprise plan**: Unlimited domains
## Which custom domain should I choose for my short link?
When choosing a custom domain for your short links, consider the following factors:
1. **Brand**: Choose a domain that best reflects your brand – ideally containing your brand name in it. For example, if your company domain is `jupiter.com`, you can use a domain like `jupiter.link` or `go.jupiter.com`.
2. **Length**: Shorter domains are easier to remember and type. To achieve this, some companies might opt for acronyms or abbreviations. For example, one of our customers [Tinybird](https://dub.co/customers/tinybird) uses `tbrd.co` for their short domain.
The only exception here is you're going for a `.link` TLD, or a `go.`
subdomain, which are both slightly longer than your original domain.
Here are some examples of custom domains that you can use for your short links – based on what we've seen [our customers](https://dub.co/customers) use:
| Option | Format | Real-world examples | Usage on Dub |
| -------------- | --------------- | ---------------------------------------------------------------------------------------------------------------------------------- | ------------ |
| Subdomains | `go.domain.com` | **Clerk** → `go.clerk.com`
**Nuxt** → `go.nuxt.com`
**Cal.com** → `go.cal.com`
**Causal** → `go.causal.app` | 32.1% |
| Different TLDs | `domain.link` | **Framer** → `framer.link`
**Supabase** → `supabase.link`
**Vercel** → `vercel.fyi`
**Replicate** → `replicate.fyi` | 6.6% |
| Domain hacks | `doma.in` | **Basedash** → `baseda.sh`
**Inngest** → `innge.st`
**Lugg** → `lu.gg`
**Crowdin** → `crowd.in` | 1.9% |
### Option 1: Use a subdomain
This is the easiest option to get started with – especially since you don't need to buy a new domain. Plus, using a subdomain is also better for ownership verification since users can be certain that the domain is owned by your entity (as opposed to a separate domain like `company.tld`).
For instance, if you're using `domain.com` for your main website, you can [use a subdomain](/help/article/how-to-add-custom-domain#step-2b-adding-a-subdomain) like `go.domain.com` for your short links.
Some real-world examples of this are:
* **Clerk** → `go.clerk.com`
* **Nuxt** → `go.nuxt.com`
* **Cal.com** → `go.cal.com`
* **Causal** → `go.causal.app`
At the time of writing, 1,293 out of 4,024 verified domains on Dub use a
subdomain for their short links – a 31% usage rate.
### Option 2: Use a different TLD
Alternatively, you can use a different top-level domain (TLD) like `.link` or `.fyi` for your short links. With this option, you get to use a similar length domain – if not shorter – for your short links, with the trade-off being that you'll need to scoop out a few extra dollars for the additional domain.
For example, if you're using `domain.com` for your main website, you can use a TLD like `domain.link` for your short links.
Some real-world examples of this are:
* **Framer** → `framer.link`
* **Supabase** → `supabase.link`
* **Vercel** → `vercel.fyi`
* **Replicate** → `replicate.fyi`
At the time of writing, 266 out of 4,024 verified domains on Dub use a
different TLD for their short links – a 6.6% usage rate.
If you're on a [Pro plan](https://dub.co/pricing) or higher, you can also claim a [complimentary .link custom domain](/help/article/free-dot-link-domain) and use it as your short link domain.
![Free .link domain]() ### Option 3: Use a domain hack
Last but not least, you can get creative with your short link domain by using a domain hack. This is a technique where you split your company name into two parts and use the first part as the domain and the second part as the top-level domain (TLD).
For example, if you're using `domain.com` for your main website, you can use a domain hack like `doma.in` for your short links.
Some real-world examples of this are:
* **Basedash** → `baseda.sh`
* **Inngest** → `innge.st`
* **Lugg** → `lu.gg`
* **Crowdin** → `crowd.in`
At the time of writing, 78 out of 4,024 verified domains on Dub use a domain
hack for their short links – a 1.9% usage rate.
# Commission analytics
Source: https://dub.co/help/article/commission-analytics
Use commission analytics to understand how much your partners are earning over time and which commissions are driving your program payouts.
This feature is only available on [Business plans and
above](https://dub.co/pricing/partners).
Commission analytics helps you analyze your partner program's commission earnings over time. It is useful when you want to understand payout trends, compare commission activity across a date range, or see which partners and referral activity are driving earnings.
## Where to find commission analytics?
When viewing your Partner Program navigation, click on the **Analytics** page in the **Insights** group.
In the analytics chart, select **Commissions** from the top data selector.
### Option 3: Use a domain hack
Last but not least, you can get creative with your short link domain by using a domain hack. This is a technique where you split your company name into two parts and use the first part as the domain and the second part as the top-level domain (TLD).
For example, if you're using `domain.com` for your main website, you can use a domain hack like `doma.in` for your short links.
Some real-world examples of this are:
* **Basedash** → `baseda.sh`
* **Inngest** → `innge.st`
* **Lugg** → `lu.gg`
* **Crowdin** → `crowd.in`
At the time of writing, 78 out of 4,024 verified domains on Dub use a domain
hack for their short links – a 1.9% usage rate.
# Commission analytics
Source: https://dub.co/help/article/commission-analytics
Use commission analytics to understand how much your partners are earning over time and which commissions are driving your program payouts.
This feature is only available on [Business plans and
above](https://dub.co/pricing/partners).
Commission analytics helps you analyze your partner program's commission earnings over time. It is useful when you want to understand payout trends, compare commission activity across a date range, or see which partners and referral activity are driving earnings.
## Where to find commission analytics?
When viewing your Partner Program navigation, click on the **Analytics** page in the **Insights** group.
In the analytics chart, select **Commissions** from the top data selector.
![Program analytics location]() ## Commission analytics views
The commission analytics dashboard uses filtering and date range controls like the [program analytics](/help/article/program-analytics), but focuses the chart on commission earnings.
### 1. Commission chart
The commission chart shows commission earnings across the selected date range. You can use it to identify spikes, dips, and trends in partner payouts.
## Commission analytics views
The commission analytics dashboard uses filtering and date range controls like the [program analytics](/help/article/program-analytics), but focuses the chart on commission earnings.
### 1. Commission chart
The commission chart shows commission earnings across the selected date range. You can use it to identify spikes, dips, and trends in partner payouts.
![Time-series chart]() **Data toggle**
You can change the data displayed by clicking the `$ | 123` toggle in the top right of the data type section.
**Data toggle**
You can change the data displayed by clicking the `$ | 123` toggle in the top right of the data type section.
![Time-series chart]() By default, `$` is selected to show commission value. Switching to `123` changes the chart to show the number of commissions instead.
### 2. Partner commission data
Below the chart, you can review partner-level commission performance for the selected period. This helps you identify which partners are generating the most commission activity.
By default, `$` is selected to show commission value. Switching to `123` changes the chart to show the number of commissions instead.
### 2. Partner commission data
Below the chart, you can review partner-level commission performance for the selected period. This helps you identify which partners are generating the most commission activity.
![Partner data table]() To inspect individual commission records, go to the [Commissions page](/help/article/partner-commissions).
### 3. Aggregated data for different facets (top views)
These are more commonly known as the "Top Views" in Dub Analytics. These views show your top **Partner Groups** and commission **Types**, and allow you to explore your program data further.
To inspect individual commission records, go to the [Commissions page](/help/article/partner-commissions).
### 3. Aggregated data for different facets (top views)
These are more commonly known as the "Top Views" in Dub Analytics. These views show your top **Partner Groups** and commission **Types**, and allow you to explore your program data further.
![Aggregated data for different facets]() ## Filtering commission analytics
You can click the **Filter** button in the top left to narrow commission analytics by partner, group, and commission type.
The date picker controls the reporting period for the commission chart and partner data.
## Filtering commission analytics
You can click the **Filter** button in the top left to narrow commission analytics by partner, group, and commission type.
The date picker controls the reporting period for the commission chart and partner data.
![Program analytics location]() | Filter | Description |
| --------------- | --------------------------------------------------------------- |
| Partner | Select a specific program partner |
| Partner Group | Select a specific [partner group](/help/article/partner-groups) |
| Partner Tag | Select a specific [partner tag](/help/article/partner-tags) |
| Commission type | Select a specific commission type (eg: click, lead, sale) |
# How commissions and payouts work on Dub
Source: https://dub.co/help/article/commissions-payouts
Learn about the different commission and payout statuses on Dub and when you can expect to be paid by the programs you work with.
As an affiliate partner on Dub, you can participate in various affiliate programs and receive commission payouts directly into your bank account.
In this article, we'll explore how commissions and payouts work on Dub, their various statuses, and when you can expect to be paid by the programs you work with.
## Commission statuses
When you receive a commission on Dub, it goes through the following statuses:
* `Pending`: This is the initial status for a commission. Depending on your program's [holding period](#what-does-holding-period-mean), commissions can stay in "pending" status anywhere from less than a day to 90 days.
* `Processed`: When a commission has been added to a payout (after any applicable [holding period](#what-does-holding-period-mean)), its status will change from "pending" to "processed".
* `Paid`: When the payout containing the commission has been paid by the program, the commission will be updated to "paid" status.
Occasionally, commissions can also be updated to the following statuses:
* `Refunded`: If the sale for the commission was refunded. This is usually automatically detected via our [Stripe integration](https://dub.co/integrations/stripe), or manually by the program.
* `Fraud`: If a sale was marked as fraudulent by your program.
* `Canceled`: If a sale was marked as canceled/voided by your program (e.g. in cases of self-referrals where commissions are not eligible for payout).
* `Duplicate`: If a sale was marked as duplicate by your program.
In these cases, we recommend reaching out to your program's support email with any questions/appeals that you might have.
## Payout statuses
Payouts on Dub go through the following statuses:
* `Pending`: When you start earning commissions from a program, they'll be accrued under a payout entry. If the program has a [minimum payout amount](#what-does-minimum-payout-amount-mean) set, your payout amount will need to reach the threshold to become eligible for payment.
* `Processing`: When a program initiates a payout to you, the payout will be updated to a "processing" state until the payment settles on Dub. This process can take up to 5 business days.
* `Processed`: Once the program's payout has settled on Dub, the payout will be updated to a "processed" state. If the payout amount is above your [minimum withdrawal balance](/help/article/receiving-payouts#what-is-the-minimum-withdrawal-amount-and-how-does-it-work), the funds will be automatically paid out to your connected bank account.
* `Sent`: When your payout is on its way to your connected bank account, it will be updated to a "sent" state. Depending on your bank location, this can take anywhere from 1 to 14 business days (you will see the estimated arrival date in the notification email from Dub).
* `Completed`: When the payout is completed and the funds are deposited into your bank account.
If you haven't already, [set up your bank account to receive payouts on Dub](/help/article/receiving-payouts).
| Filter | Description |
| --------------- | --------------------------------------------------------------- |
| Partner | Select a specific program partner |
| Partner Group | Select a specific [partner group](/help/article/partner-groups) |
| Partner Tag | Select a specific [partner tag](/help/article/partner-tags) |
| Commission type | Select a specific commission type (eg: click, lead, sale) |
# How commissions and payouts work on Dub
Source: https://dub.co/help/article/commissions-payouts
Learn about the different commission and payout statuses on Dub and when you can expect to be paid by the programs you work with.
As an affiliate partner on Dub, you can participate in various affiliate programs and receive commission payouts directly into your bank account.
In this article, we'll explore how commissions and payouts work on Dub, their various statuses, and when you can expect to be paid by the programs you work with.
## Commission statuses
When you receive a commission on Dub, it goes through the following statuses:
* `Pending`: This is the initial status for a commission. Depending on your program's [holding period](#what-does-holding-period-mean), commissions can stay in "pending" status anywhere from less than a day to 90 days.
* `Processed`: When a commission has been added to a payout (after any applicable [holding period](#what-does-holding-period-mean)), its status will change from "pending" to "processed".
* `Paid`: When the payout containing the commission has been paid by the program, the commission will be updated to "paid" status.
Occasionally, commissions can also be updated to the following statuses:
* `Refunded`: If the sale for the commission was refunded. This is usually automatically detected via our [Stripe integration](https://dub.co/integrations/stripe), or manually by the program.
* `Fraud`: If a sale was marked as fraudulent by your program.
* `Canceled`: If a sale was marked as canceled/voided by your program (e.g. in cases of self-referrals where commissions are not eligible for payout).
* `Duplicate`: If a sale was marked as duplicate by your program.
In these cases, we recommend reaching out to your program's support email with any questions/appeals that you might have.
## Payout statuses
Payouts on Dub go through the following statuses:
* `Pending`: When you start earning commissions from a program, they'll be accrued under a payout entry. If the program has a [minimum payout amount](#what-does-minimum-payout-amount-mean) set, your payout amount will need to reach the threshold to become eligible for payment.
* `Processing`: When a program initiates a payout to you, the payout will be updated to a "processing" state until the payment settles on Dub. This process can take up to 5 business days.
* `Processed`: Once the program's payout has settled on Dub, the payout will be updated to a "processed" state. If the payout amount is above your [minimum withdrawal balance](/help/article/receiving-payouts#what-is-the-minimum-withdrawal-amount-and-how-does-it-work), the funds will be automatically paid out to your connected bank account.
* `Sent`: When your payout is on its way to your connected bank account, it will be updated to a "sent" state. Depending on your bank location, this can take anywhere from 1 to 14 business days (you will see the estimated arrival date in the notification email from Dub).
* `Completed`: When the payout is completed and the funds are deposited into your bank account.
If you haven't already, [set up your bank account to receive payouts on Dub](/help/article/receiving-payouts).
![Payout statuses]() ## Frequently asked questions
### What does "holding period" mean?
Programs can set certain **holding periods** for earned commissions, during which your commissions will be kept in `pending` status and won't be eligible for payout:
* 0 days
* 14 days
* 30 days (most common)
* 60 days
* 90 days
This is usually done for security / fraud prevention purposes, as well as to account for potential refunds/chargebacks from referred customers.
### What does "minimum payout amount" mean?
Programs can also set a **minimum payout amount** (e.g. \$100), where commissions will be accrued and only eligible for payout after it surpasses the minimum threshold.
The default payout amount on Dub is \$0.
### When will I get paid?
This depends on your program's payment schedule, which is usually at the beginning or the end of the month. We recommend reaching out to your program's support team to confirm the exact payment date.
# Communicating with your programs
Source: https://dub.co/help/article/communicating-with-programs
Learn about using the messaging center to stay connected with your programs, view conversations, and send messages.
On Dub, you can use the built-in Messaging Center to communicate directly with the programs you're enrolled in.
This is helpful for discussing any questions about your rewards structure, [commissions](/help/article/commissions-payouts), and [partner payouts](/help/article/receiving-payouts).
## Where can I find my messages?
In your main navigation, click the **Messages** icon to see your inbox and compose new messages.
## Frequently asked questions
### What does "holding period" mean?
Programs can set certain **holding periods** for earned commissions, during which your commissions will be kept in `pending` status and won't be eligible for payout:
* 0 days
* 14 days
* 30 days (most common)
* 60 days
* 90 days
This is usually done for security / fraud prevention purposes, as well as to account for potential refunds/chargebacks from referred customers.
### What does "minimum payout amount" mean?
Programs can also set a **minimum payout amount** (e.g. \$100), where commissions will be accrued and only eligible for payout after it surpasses the minimum threshold.
The default payout amount on Dub is \$0.
### When will I get paid?
This depends on your program's payment schedule, which is usually at the beginning or the end of the month. We recommend reaching out to your program's support team to confirm the exact payment date.
# Communicating with your programs
Source: https://dub.co/help/article/communicating-with-programs
Learn about using the messaging center to stay connected with your programs, view conversations, and send messages.
On Dub, you can use the built-in Messaging Center to communicate directly with the programs you're enrolled in.
This is helpful for discussing any questions about your rewards structure, [commissions](/help/article/commissions-payouts), and [partner payouts](/help/article/receiving-payouts).
## Where can I find my messages?
In your main navigation, click the **Messages** icon to see your inbox and compose new messages.
![Messages location]() ## Messages overview
The messaging center has three panels:
## Messages overview
The messaging center has three panels:
![Message panels]() | Panel | Content |
| ------------ | ----------------------------------------------- |
| Inbox | All your conversations in one place. |
| Conversation | The full thread with your selected program. |
| Details | Key info and performance stats for the program. |
### Inbox panel
Your Inbox lists every conversation with the programs you're enrolled in. Select one to pick up where you left off, or click the **Pencil** button in the top right to compose something new.
| Panel | Content |
| ------------ | ----------------------------------------------- |
| Inbox | All your conversations in one place. |
| Conversation | The full thread with your selected program. |
| Details | Key info and performance stats for the program. |
### Inbox panel
Your Inbox lists every conversation with the programs you're enrolled in. Select one to pick up where you left off, or click the **Pencil** button in the top right to compose something new.
![Inbox panel]() Each conversation row shows:
* **Unread indicator** – shows if you’ve read the message
* **Program** – program's name and program image
* **Last activity** – most recent message from you or the program
* **Excerpt** – short preview of the latest message
Each conversation row shows:
* **Unread indicator** – shows if you’ve read the message
* **Program** – program's name and program image
* **Last activity** – most recent message from you or the program
* **Excerpt** – short preview of the latest message
![Inbox pieces]() ### Conversation panel
In the Conversation panel, you’ll see the full thread with your partner. Workspace members can reply too, with their profile images shown beside each message.
### Conversation panel
In the Conversation panel, you’ll see the full thread with your partner. Workspace members can reply too, with their profile images shown beside each message.
![Conversation panel]() **Message status**
Each message sent has a check mark next to the send time:
* **Single check mark** – delivered
* **Double check marks** – delivered and read (either in email or in the app)
### Details panel
The details panel is collapsible and shows the program's information, your performance stats, referral link, and eligible rewards/bounties.
**Message status**
Each message sent has a check mark next to the send time:
* **Single check mark** – delivered
* **Double check marks** – delivered and read (either in email or in the app)
### Details panel
The details panel is collapsible and shows the program's information, your performance stats, referral link, and eligible rewards/bounties.
![Details panel]() ## Messaging programs
You can message any program you are enrolled in as long as they have enabled the Messaging Center. If messaging is not enabled, the program’s support email address will appear instead:
## Messaging programs
You can message any program you are enrolled in as long as they have enabled the Messaging Center. If messaging is not enabled, the program’s support email address will appear instead:
![Details panel]() # How to set custom link previews for your Dub links?
Source: https://dub.co/help/article/custom-link-previews
Learn how to customize how your links show up on social media to improve click-through rates.
This feature is only available on [Pro plans and
above](https://dub.co/pricing).
Dub is the only link management platform that lets you customize the social media cards for your links, so you can have full control over how your links look when shared on social media and improve click-through rates.
## Why set custom link previews?
When running marketing campaigns, it's important to have a consistent brand voice across your links. However, that isn't always the case, especially when collaborating with external partners.
For example, your company was recently featured on TechCrunch, but the default link preview is a generic Unsplash image that doesn't accurately reflect your brand.
With Dub, you can set a custom-designed social media card for your link, which **greatly improves the click-through rate and performance of your short link**.
## How to set a custom link preview?
To leverage this feature, toggle the "Custom Link Previews" switch in the [link builder](/help/article/dub-link-builder). This will reveal the following fields:
1. **Image**: The image that will be used for the social media card. You can upload an image from your computer or drag and drop an image into the field (recommended size: 1200 x 630 pixels, max 1.5MB).
2. **Title**: The title that will be used for the social media card (max 120 characters).
3. **Description**: The description that will be used for the social media card (max 240 characters).
# How to set custom link previews for your Dub links?
Source: https://dub.co/help/article/custom-link-previews
Learn how to customize how your links show up on social media to improve click-through rates.
This feature is only available on [Pro plans and
above](https://dub.co/pricing).
Dub is the only link management platform that lets you customize the social media cards for your links, so you can have full control over how your links look when shared on social media and improve click-through rates.
## Why set custom link previews?
When running marketing campaigns, it's important to have a consistent brand voice across your links. However, that isn't always the case, especially when collaborating with external partners.
For example, your company was recently featured on TechCrunch, but the default link preview is a generic Unsplash image that doesn't accurately reflect your brand.
With Dub, you can set a custom-designed social media card for your link, which **greatly improves the click-through rate and performance of your short link**.
## How to set a custom link preview?
To leverage this feature, toggle the "Custom Link Previews" switch in the [link builder](/help/article/dub-link-builder). This will reveal the following fields:
1. **Image**: The image that will be used for the social media card. You can upload an image from your computer or drag and drop an image into the field (recommended size: 1200 x 630 pixels, max 1.5MB).
2. **Title**: The title that will be used for the social media card (max 120 characters).
3. **Description**: The description that will be used for the social media card (max 240 characters).
![Create custom link previews for your links]() You can also quickly access the **Link Preview** feature by using the keyboard shortcut `L` while in the link builder.
## Generating custom link previews using AI
You can also generate custom link previews for your links using AI simply by clicking on the `✨` button:
Behind the scenes, [Dub AI](https://dub.co/blog/introducing-dub-ai) leverages the latest Large Language Models (LLMs) to analyze the content of the link and generate a title and description that is SEO-friendly and increases the click-through rate.
## How do custom link previews look like?
When you share a Dub link that has a custom social media card, they will show up with the title, description, and image that you set on all social media platforms.
For example, this is a link that Taimur from Causal [shared on Twitter](https://x.com/taimurabdaal/status/1762516755153387886) when they launched their YC data dashboard project:
You can also quickly access the **Link Preview** feature by using the keyboard shortcut `L` while in the link builder.
## Generating custom link previews using AI
You can also generate custom link previews for your links using AI simply by clicking on the `✨` button:
Behind the scenes, [Dub AI](https://dub.co/blog/introducing-dub-ai) leverages the latest Large Language Models (LLMs) to analyze the content of the link and generate a title and description that is SEO-friendly and increases the click-through rate.
## How do custom link previews look like?
When you share a Dub link that has a custom social media card, they will show up with the title, description, and image that you set on all social media platforms.
For example, this is a link that Taimur from Causal [shared on Twitter](https://x.com/taimurabdaal/status/1762516755153387886) when they launched their YC data dashboard project:
![Causal's YC dashboard tweet]() By leveraging Dub's custom link previews feature, they were able to set a custom title and preview image for their link, [go.causal.app/ycombinator](https://go.causal.app/ycombinator).
This resulted in a more engaging and informative tweet that effectively communicated the value of their product to a wider audience.
## Bonus: Add a custom video preview
Dub also supports the `og:video` [OpenGraph](https://ogp.me/) tag, which allows you to set a custom video preview for your links.
To set a custom video preview, you can pass a link to your video via the `video` attribute when [creating a link](/docs/api-reference/links/create) using our API:
```typescript title="create-link.ts" theme={null}
import { Dub } from "dub";
const dub = new Dub();
await dub.links.create({
url: "https://example.com",
proxy: true, // proxy has to enabled for custom link previews to work
image: "https://example.com/image.png", // it's recommended to pass a fallback image for platforms that don't support og:video
video: "https://example.com/video.mp4", // [!code highlight]
});
```
We currently do not support uploading custom video previews directly via the
dashboard, but please [let us know](https://dub.co/contact/support) if that's
something that you'd like to see.
Here's a demo of how custom video previews works – let's embed a link ([https://dub.link/og-video](https://dub.link/og-video)) that has custom video preview enabled in Notion:
As you can see, the link unfurled into a video preview when embedded in Notion, but if you clicked on the link, it would redirect you to the destination URL.
## Why are my custom link previews not working?
If your custom link previews are not working, it's usually due to a caching issue, where the social media platform cached the old version of your link.
You can use the following tools to bust the cache:
* **X**: [cards-dev.x.com/validator](https://cards-dev.x.com/validator)
* **LinkedIn**: [linkedin.com/post-inspector](https://www.linkedin.com/post-inspector)
* **Facebook**: [developers.facebook.com/tools/debug](https://developers.facebook.com/tools/debug)
If you're still having issues, please [let us know](https://dub.co/contact/support) and we'll be happy to help you out.
# Custom QR codes
Source: https://dub.co/help/article/custom-qr-codes
Learn how custom QR codes work on Dub.
With Dub you customize your short link QR codes, giving you many options to make it your own. This can be done during link creation or editing your link later.
By leveraging Dub's custom link previews feature, they were able to set a custom title and preview image for their link, [go.causal.app/ycombinator](https://go.causal.app/ycombinator).
This resulted in a more engaging and informative tweet that effectively communicated the value of their product to a wider audience.
## Bonus: Add a custom video preview
Dub also supports the `og:video` [OpenGraph](https://ogp.me/) tag, which allows you to set a custom video preview for your links.
To set a custom video preview, you can pass a link to your video via the `video` attribute when [creating a link](/docs/api-reference/links/create) using our API:
```typescript title="create-link.ts" theme={null}
import { Dub } from "dub";
const dub = new Dub();
await dub.links.create({
url: "https://example.com",
proxy: true, // proxy has to enabled for custom link previews to work
image: "https://example.com/image.png", // it's recommended to pass a fallback image for platforms that don't support og:video
video: "https://example.com/video.mp4", // [!code highlight]
});
```
We currently do not support uploading custom video previews directly via the
dashboard, but please [let us know](https://dub.co/contact/support) if that's
something that you'd like to see.
Here's a demo of how custom video previews works – let's embed a link ([https://dub.link/og-video](https://dub.link/og-video)) that has custom video preview enabled in Notion:
As you can see, the link unfurled into a video preview when embedded in Notion, but if you clicked on the link, it would redirect you to the destination URL.
## Why are my custom link previews not working?
If your custom link previews are not working, it's usually due to a caching issue, where the social media platform cached the old version of your link.
You can use the following tools to bust the cache:
* **X**: [cards-dev.x.com/validator](https://cards-dev.x.com/validator)
* **LinkedIn**: [linkedin.com/post-inspector](https://www.linkedin.com/post-inspector)
* **Facebook**: [developers.facebook.com/tools/debug](https://developers.facebook.com/tools/debug)
If you're still having issues, please [let us know](https://dub.co/contact/support) and we'll be happy to help you out.
# Custom QR codes
Source: https://dub.co/help/article/custom-qr-codes
Learn how custom QR codes work on Dub.
With Dub you customize your short link QR codes, giving you many options to make it your own. This can be done during link creation or editing your link later.
![Default QR Code editor]() ## Logo controls
This feature is only available on [Pro plans and
above](https://dub.co/pricing).
With a paid plan, Dub gives you the ability to hide or show your logo on the QR code. For free users, the Dub logo will be shown by default and cannot be removed.
## Logo controls
This feature is only available on [Pro plans and
above](https://dub.co/pricing).
With a paid plan, Dub gives you the ability to hide or show your logo on the QR code. For free users, the Dub logo will be shown by default and cannot be removed.
![QR Code logo controls]() If you'd like to remove the Dub logo/upload your own, please consider [upgrading to a Pro plan](https://dub.co/pricing#how-to-upgrade-to-pro) to support us. Thank you!
### Setting a custom QR code logo
There are two ways to set a custom QR code logo:
* [For your entire workspace](#set-a-custom-qr-code-logo-for-your-entire-workspace) – applies to all short links under your workspace
* [For a specific domain](#set-a-custom-qr-code-logo-for-a-specific-domain) – applies to all short links under this domain
If a custom QR code logo is set for both your workspace and a domain, the
custom QR code logo for the domain will take precedence.
#### Option 1: Set a custom QR code logo for your entire workspace
To set a custom QR code logo for your entire workspace, you'll need to set your workspace's logo first by following the steps below:
1. Go to your [workspace settings page](https://app.dub.co/settings) by clicking on the **Settings** tab in the sidebar.
2. Scroll down to the **Workspace Logo** section and upload your company's logo. We recommend using a square image for the best results.
If you'd like to remove the Dub logo/upload your own, please consider [upgrading to a Pro plan](https://dub.co/pricing#how-to-upgrade-to-pro) to support us. Thank you!
### Setting a custom QR code logo
There are two ways to set a custom QR code logo:
* [For your entire workspace](#set-a-custom-qr-code-logo-for-your-entire-workspace) – applies to all short links under your workspace
* [For a specific domain](#set-a-custom-qr-code-logo-for-a-specific-domain) – applies to all short links under this domain
If a custom QR code logo is set for both your workspace and a domain, the
custom QR code logo for the domain will take precedence.
#### Option 1: Set a custom QR code logo for your entire workspace
To set a custom QR code logo for your entire workspace, you'll need to set your workspace's logo first by following the steps below:
1. Go to your [workspace settings page](https://app.dub.co/settings) by clicking on the **Settings** tab in the sidebar.
2. Scroll down to the **Workspace Logo** section and upload your company's logo. We recommend using a square image for the best results.
![Workspace Logo section]() Once you've set your workspace's logo, your QR code will automatically update to use your workspace's logo.
#### Option 2: Set a custom QR code logo for a specific domain
If you manage multiple brands/products on Dub, you can set custom QR code logos for each of them for better brand recognition.
Once you've set your workspace's logo, your QR code will automatically update to use your workspace's logo.
#### Option 2: Set a custom QR code logo for a specific domain
If you manage multiple brands/products on Dub, you can set custom QR code logos for each of them for better brand recognition.
![Set custom QR code logos for your domains]() To set a custom QR code logo for a specific domain, you'll need to follow the steps below:
1. Go to your [workspace Domains settings tab](https://app.dub.co/domains).
2. Click on the `⋮` button next to the domain you want to set a custom not found URL for.
3. Select **Edit Domain** to edit the domain settings.
4. Toggle the **Custom QR code logo** switch to enable it.
5. Upload your custom QR code logo. We recommend using a square image for the best results.
6. Click on the **Save changes** button to save the changes.
To set a custom QR code logo for a specific domain, you'll need to follow the steps below:
1. Go to your [workspace Domains settings tab](https://app.dub.co/domains).
2. Click on the `⋮` button next to the domain you want to set a custom not found URL for.
3. Select **Edit Domain** to edit the domain settings.
4. Toggle the **Custom QR code logo** switch to enable it.
5. Upload your custom QR code logo. We recommend using a square image for the best results.
6. Click on the **Save changes** button to save the changes.
![Setting a custom QR code logo for a custom domain]() ## QR code styling
Dub gives you the ability to customize the style of your QR code. You can customize the dot style, marker center, marker border, and colors of your QR code.
### Dot style
To change the dot style of your QR code, click on one of the three options below the QR code preview. You can choose between square, circles, and joined dot styles. The default dot style is square.
## QR code styling
Dub gives you the ability to customize the style of your QR code. You can customize the dot style, marker center, marker border, and colors of your QR code.
### Dot style
To change the dot style of your QR code, click on one of the three options below the QR code preview. You can choose between square, circles, and joined dot styles. The default dot style is square.
![QR code dot style options]() ### Marker center
To change the marker center style of your QR code, click on one of the two options below the QR code preview. You can choose between square, or circle center styles. The default marker center style is square.
### Marker center
To change the marker center style of your QR code, click on one of the two options below the QR code preview. You can choose between square, or circle center styles. The default marker center style is square.
![QR code marker center style options]() ### Marker border
To change the marker border style of your QR code, click on one of the three options below the QR code preview. You can choose between square, rounded, or circle border styles. The default marker border style is square.
### Marker border
To change the marker border style of your QR code, click on one of the three options below the QR code preview. You can choose between square, rounded, or circle border styles. The default marker border style is square.
![QR code marker border style options]() ### Colors
Dub gives you the ability to edit both the dot and marker colors of your QR code. To change the colors of your QR code, you can either enter a custom hex color code or use the color palette picker. The default dot and marker color is black (#000000).
### Colors
Dub gives you the ability to edit both the dot and marker colors of your QR code. To change the colors of your QR code, you can either enter a custom hex color code or use the color palette picker. The default dot and marker color is black (#000000).
![QR code color options]() By default, the dot and marker colors will be synced, but if you select a different color for the marker, they will be unsynced. If you want to sync the colors again, simply click on the **Match dot color** button above the marker color picker.
By default, the dot and marker colors will be synced, but if you select a different color for the marker, they will be unsynced. If you want to sync the colors again, simply click on the **Match dot color** button above the marker color picker.
![QR code color match]() ## Programmatically creating QR codes
Once you've set a custom QR code logo, you can use our [QR Code API](/docs/api-reference/endpoint/retrieve-a-qr-code) to create QR codes programmatically as well.
On our Pro plans and above, you can choose to include your logo in the generated QR codes or hide it if you want.
* If your workspace has a logo set, your QR codes will automatically have that logo as well, but you can choose to hide it using the `hideLogo` prop ([example](https://api.dub.co/qr?url=https://d.to/try?qr=1))
* If your workspace has no logo set, your QR codes will have no logo.
* Alternatively, you can also pass a custom logo in your QR codes using the `logo` prop ([example](https://api.dub.co/qr?url=https://d.to/try?qr=1\&logo=https://assets.dub.co/wordmark-square.png)).
## Downloading you QR code
To download your QR code, click the **Download** button in the top right of the editor and select your format. You're able to download your QR code in SVG, PNG, or JPG formats.
## Programmatically creating QR codes
Once you've set a custom QR code logo, you can use our [QR Code API](/docs/api-reference/endpoint/retrieve-a-qr-code) to create QR codes programmatically as well.
On our Pro plans and above, you can choose to include your logo in the generated QR codes or hide it if you want.
* If your workspace has a logo set, your QR codes will automatically have that logo as well, but you can choose to hide it using the `hideLogo` prop ([example](https://api.dub.co/qr?url=https://d.to/try?qr=1))
* If your workspace has no logo set, your QR codes will have no logo.
* Alternatively, you can also pass a custom logo in your QR codes using the `logo` prop ([example](https://api.dub.co/qr?url=https://d.to/try?qr=1\&logo=https://assets.dub.co/wordmark-square.png)).
## Downloading you QR code
To download your QR code, click the **Download** button in the top right of the editor and select your format. You're able to download your QR code in SVG, PNG, or JPG formats.
![Downloading your QR code]() ## Copying your QR code
To copy your QR code, click the **Copy** button in the top right of the editor. You're able to copy the image version of your QR code, or the URL of the QR code image.
## Copying your QR code
To copy your QR code, click the **Copy** button in the top right of the editor. You're able to copy the image version of your QR code, or the URL of the QR code image.
![Copying your QR code]() # Customer insights
Source: https://dub.co/help/article/customer-insights
Get deeper, real-time insights about your customers' demographics, purchasing behavior, and lifetime value (LTV).
One of the most important parts of marketing is accurate attribution – understanding how your marketing efforts and spend are converting to customer acquisition and revenue.
With Dub, you can turn your short links into end-to-end attribution engines by tracking how your clicks convert to [signups](/docs/quickstart/server#tracking-lead-events) and [sales](/docs/quickstart/server#tracking-sale-events).
As part of lead tracking, Dub creates customer objects to visualize how your users interact with your links and how much they spend on your product.
Now with **Customer Insights**, you can get a deeper understanding of your customers' demographics, purchasing behavior, and lifetime value (LTV).
# Customer insights
Source: https://dub.co/help/article/customer-insights
Get deeper, real-time insights about your customers' demographics, purchasing behavior, and lifetime value (LTV).
One of the most important parts of marketing is accurate attribution – understanding how your marketing efforts and spend are converting to customer acquisition and revenue.
With Dub, you can turn your short links into end-to-end attribution engines by tracking how your clicks convert to [signups](/docs/quickstart/server#tracking-lead-events) and [sales](/docs/quickstart/server#tracking-sale-events).
As part of lead tracking, Dub creates customer objects to visualize how your users interact with your links and how much they spend on your product.
Now with **Customer Insights**, you can get a deeper understanding of your customers' demographics, purchasing behavior, and lifetime value (LTV).
![Customer insights on Dub]() ## Customers overview
Your Dub workspace now has a new **Customers** tab that shows you a list of all your customers and which short link they came from.
## Customers overview
Your Dub workspace now has a new **Customers** tab that shows you a list of all your customers and which short link they came from.
![Customers table on Dub]() In this table, you can also filter by country or a specific link, or search for a specific customer by their name, email, or [external ID](/docs/api-reference/endpoint/track-lead#body-external-id).
### Available columns
The data columns available to you are:
| Column | Description |
| ----------- | ---------------------------------------------------------------- |
| Country | The customers country |
| Link | The short link used to visit your domain |
| LTV | The total amount of revenue the customer has generated over time |
| Created | The date the customer was created |
| Paid | The date the customer made their first sale |
| Cancelled | The date the customer canceled their subscription |
| External ID | The unique identifier within your database |
## Individual customer pages
For a given customer, you can also open up their individual customer page to see a view of their recent sales and historical activity.
In this table, you can also filter by country or a specific link, or search for a specific customer by their name, email, or [external ID](/docs/api-reference/endpoint/track-lead#body-external-id).
### Available columns
The data columns available to you are:
| Column | Description |
| ----------- | ---------------------------------------------------------------- |
| Country | The customers country |
| Link | The short link used to visit your domain |
| LTV | The total amount of revenue the customer has generated over time |
| Created | The date the customer was created |
| Paid | The date the customer made their first sale |
| Cancelled | The date the customer canceled their subscription |
| External ID | The unique identifier within your database |
## Individual customer pages
For a given customer, you can also open up their individual customer page to see a view of their recent sales and historical activity.
![Customers page on Dub]() This is useful for understanding which of your links a given customer interacted with before signing up for your app, allowing you to optimize your campaigns accordingly.
On the top of each page, you're able to see the customer's first sale date, time to sale, lifetime value, and if they are no longer a customer, their canceled date.
On the right sidebar, you can also see all the individual details for a given customer – from their geolocation, device type, and browser info, and which UTM campaigns they originated from.
## Partner program customers
If the customer was referred by a partner, you'll be able to view which partner referred them, the partner's earnings and which link was used.
Learn more about [Dub Partner Programs](https://dub.co/partners).
This is useful for understanding which of your links a given customer interacted with before signing up for your app, allowing you to optimize your campaigns accordingly.
On the top of each page, you're able to see the customer's first sale date, time to sale, lifetime value, and if they are no longer a customer, their canceled date.
On the right sidebar, you can also see all the individual details for a given customer – from their geolocation, device type, and browser info, and which UTM campaigns they originated from.
## Partner program customers
If the customer was referred by a partner, you'll be able to view which partner referred them, the partner's earnings and which link was used.
Learn more about [Dub Partner Programs](https://dub.co/partners).
![Partner referral customer pages on Dub]() # What are default Dub domains?
Source: https://dub.co/help/article/default-dub-domains
Learn more about the default branded domains provided by Dub and how you can use them to share your links.
Dub is the only link management platform that provides [default branded domains](https://app.dub.co/settings/domains/default) for you to use. These domains are automatically set up for you when you create a new account on Dub.
## List of default branded domains
Dub offers the following default branded domains:
1. `dub.sh`: This domain is the default domain for all new Dub accounts. You can use this domain to shorten any link you want to share.
2. `spti.fi`: Branded domain for Spotify links (songs, playlists, etc.).
3. `git.new`: Branded domain for GitHub links (repositories, gists, etc.).
4. `ggl.link`: Branded domain for Google links (search, docs, sheets, slides, drive, maps, etc.).
5. `chatg.pt`: Branded domain for ChatGPT links (convos, custom GPTs).
6. `amzn.id`: Branded domain for Amazon links (products, wishlists, etc.).
You can use these domains to shorten links related to the respective platforms. For example, if you want to share a Spotify link, you can use the `spti.fi` domain to shorten it.
## Dub.sh links vs custom domain links
Once you create a workspace on Dub, you have the option to choose between the default `dub.sh` domain or [your own custom domain](/help/article/how-to-add-custom-domain) to create short links.
Here are the difference between the two options:
| | Default `dub.sh` links | Custom domain links |
| -------------- | ----------------------------------------------------------------- | ------------------------------------------------------------------------------------------------------------------------------- |
| **Setup ease** | No setup required – you can start creating short links right away | You will need to [set up your custom domain](/help/article/how-to-add-custom-domain) before you can start creating short links. |
| **Branding** | Dub branding on the short link | Your own branding on the short link |
# How to use device targeting on Dub?
Source: https://dub.co/help/article/device-targeting
Learn how to use device targeting on Dub to personalize the destination URL for your links based on the user's device type.
This feature is only available on [Pro plans and
above](https://dub.co/pricing).
Device targeting is a powerful feature that lets you personalize the destination URL for your links based on the user's device type.
For example, you can set a custom destination URL for iOS devices by toggling the "iOS Targeting" switch in the [link builder](/help/article/dub-link-builder), and a different URL for Android devices by toggling the "Android Targeting" switch in the link builder.
To use this feature, click on the **Targeting** button in the link builder. This will open a new modal with device targeting options.
You can also quickly access the Targeting feature by using the keyboard shortcut `G` while in the link builder.
# What are default Dub domains?
Source: https://dub.co/help/article/default-dub-domains
Learn more about the default branded domains provided by Dub and how you can use them to share your links.
Dub is the only link management platform that provides [default branded domains](https://app.dub.co/settings/domains/default) for you to use. These domains are automatically set up for you when you create a new account on Dub.
## List of default branded domains
Dub offers the following default branded domains:
1. `dub.sh`: This domain is the default domain for all new Dub accounts. You can use this domain to shorten any link you want to share.
2. `spti.fi`: Branded domain for Spotify links (songs, playlists, etc.).
3. `git.new`: Branded domain for GitHub links (repositories, gists, etc.).
4. `ggl.link`: Branded domain for Google links (search, docs, sheets, slides, drive, maps, etc.).
5. `chatg.pt`: Branded domain for ChatGPT links (convos, custom GPTs).
6. `amzn.id`: Branded domain for Amazon links (products, wishlists, etc.).
You can use these domains to shorten links related to the respective platforms. For example, if you want to share a Spotify link, you can use the `spti.fi` domain to shorten it.
## Dub.sh links vs custom domain links
Once you create a workspace on Dub, you have the option to choose between the default `dub.sh` domain or [your own custom domain](/help/article/how-to-add-custom-domain) to create short links.
Here are the difference between the two options:
| | Default `dub.sh` links | Custom domain links |
| -------------- | ----------------------------------------------------------------- | ------------------------------------------------------------------------------------------------------------------------------- |
| **Setup ease** | No setup required – you can start creating short links right away | You will need to [set up your custom domain](/help/article/how-to-add-custom-domain) before you can start creating short links. |
| **Branding** | Dub branding on the short link | Your own branding on the short link |
# How to use device targeting on Dub?
Source: https://dub.co/help/article/device-targeting
Learn how to use device targeting on Dub to personalize the destination URL for your links based on the user's device type.
This feature is only available on [Pro plans and
above](https://dub.co/pricing).
Device targeting is a powerful feature that lets you personalize the destination URL for your links based on the user's device type.
For example, you can set a custom destination URL for iOS devices by toggling the "iOS Targeting" switch in the [link builder](/help/article/dub-link-builder), and a different URL for Android devices by toggling the "Android Targeting" switch in the link builder.
To use this feature, click on the **Targeting** button in the link builder. This will open a new modal with device targeting options.
You can also quickly access the Targeting feature by using the keyboard shortcut `G` while in the link builder.
![Use device targeting to personalize your link's behavior based on the user's device type]() This is particularly useful if you want to send iOS users to the App Store to download your iOS app, and Android users to the Google Play Store to download your Android app.
In both cases, the main **Destination URL** will be used as the fallback URL that will be used if the user's device type does not match the targeting rules.
## Priority when combining with other features
If you enable multiple targeting features on the same link, they are evaluated in the following order:
1. **Device targeting** (iOS/Android) – checked first
2. **[Geo targeting](/help/article/geo-targeting)** – checked next if no device rule matches
3. **[A/B testing](/help/article/ab-testing)** – applied last, only to traffic not already redirected by device or geo targeting
This means device targeting always takes the highest priority. For example, if a user on iOS clicks your link and you have an iOS destination URL configured, they will be sent there regardless of any geo targeting or A/B testing rules.
# Offering dual-sided incentives
Source: https://dub.co/help/article/dual-sided-incentives
Learn how to offer dual-sided incentives to your partners and the users they refer.
This feature is only available on [Business plans and
above](https://dub.co/pricing/partners).
With [Dub Partners](https://dub.co/partners), you can create dual-sided incentives for your affiliate/referral programs, which give special discounts to customers who sign up via a referral link.
Some examples include:
* 25% discount for the first 12 months
* 30% lifetime discount
* \$50 one-off discount
This can drive powerful word-of-mouth growth as partners are more likely to share their link if it gives their audience/user base additional discounts, and on the other hand, their users are more likely to click on their links as well if they're getting a special deal.
In this article, we'll learn how to set up dual-sided incentives with Dub Partners.
## Option 1: Direct link-based discounts (recommended)
If you're using Stripe for payments, you can follow these steps to set up direct link-based discounts for your partner referral links:
Link-based discounts provide **better attribution accuracy** since you get
visibility into the customer's geolocation, device info, referrer details, and
UTM data.
The trade-off here is that it requires some engineering work to set up.
First, navigate to the partner group that you want to create a discount for. Under the Discount tab, you'll be able to create a discount for the group
This is particularly useful if you want to send iOS users to the App Store to download your iOS app, and Android users to the Google Play Store to download your Android app.
In both cases, the main **Destination URL** will be used as the fallback URL that will be used if the user's device type does not match the targeting rules.
## Priority when combining with other features
If you enable multiple targeting features on the same link, they are evaluated in the following order:
1. **Device targeting** (iOS/Android) – checked first
2. **[Geo targeting](/help/article/geo-targeting)** – checked next if no device rule matches
3. **[A/B testing](/help/article/ab-testing)** – applied last, only to traffic not already redirected by device or geo targeting
This means device targeting always takes the highest priority. For example, if a user on iOS clicks your link and you have an iOS destination URL configured, they will be sent there regardless of any geo targeting or A/B testing rules.
# Offering dual-sided incentives
Source: https://dub.co/help/article/dual-sided-incentives
Learn how to offer dual-sided incentives to your partners and the users they refer.
This feature is only available on [Business plans and
above](https://dub.co/pricing/partners).
With [Dub Partners](https://dub.co/partners), you can create dual-sided incentives for your affiliate/referral programs, which give special discounts to customers who sign up via a referral link.
Some examples include:
* 25% discount for the first 12 months
* 30% lifetime discount
* \$50 one-off discount
This can drive powerful word-of-mouth growth as partners are more likely to share their link if it gives their audience/user base additional discounts, and on the other hand, their users are more likely to click on their links as well if they're getting a special deal.
In this article, we'll learn how to set up dual-sided incentives with Dub Partners.
## Option 1: Direct link-based discounts (recommended)
If you're using Stripe for payments, you can follow these steps to set up direct link-based discounts for your partner referral links:
Link-based discounts provide **better attribution accuracy** since you get
visibility into the customer's geolocation, device info, referrer details, and
UTM data.
The trade-off here is that it requires some engineering work to set up.
First, navigate to the partner group that you want to create a discount for. Under the Discount tab, you'll be able to create a discount for the group
![Group discounts page]() If you already have a discount set up for your default group, you can just duplicate it. If not, click Create to create your first group discount:
If you already have a discount set up for your default group, you can just duplicate it. If not, click Create to create your first group discount:
![Program discounts tab]() **New Stripe coupon**
If you don't have a coupon set up on Stripe yet, you can use the New Stripe coupon option to create a new coupon based on the discount type (percentage vs flat), amount, and duration set in Dub.
**Use Stripe coupon ID**
If you already have an existing coupon on Stripe, you can enter the Stripe coupon ID (should be an 8 alphanumeric code) under the Use Stripe coupon ID option.
Since Stripe doesn't support updating coupons after creation, you'd need to delete your discount in Dub and create a new one if you want to update any of the discount parameters.
Note: Deleting a discount on Dub does not delete the corresponding Stripe coupon.
The key to implementing link-based discounts is to check if a customer is eligible for a discount using Dub's Customers API, then automatically apply the appropriate Stripe coupon to their checkout session.
Here's how the flow works:
1. When a user clicks a partner referral link, Dub tracks them as a potential customer
2. During checkout, you query the Dub Customers API using the user's ID
3. If they're eligible for a discount, you apply the coupon to their Stripe checkout session
4. If not, you allow them to enter promotion codes manually
```ts TypeScript expandable theme={null}
import { dub } from "@/lib/dub.ts";
import Stripe from "stripe";
const stripe = new Stripe(process.env.STRIPE_SECRET_KEY!);
// Get customer discount eligibility from Dub
const customers = await dub.customers.list({
externalId: userId, // their user ID within your app
includeExpandedFields: true,
});
const customerDiscount = customers.length > 0 ? customers[0].discount : null;
// Create Stripe checkout session with conditional discount
const stripeSession = await stripe.checkout.sessions.create({
success_url: "https://app.domain.com/upgraded",
cancel_url: "https://app.domain.com/pricing",
line_items: [
{
price: "price_1MotwRLkdIwHu7ixYcPLm5uZ",
quantity: 1,
},
],
mode: "subscription", // or "payment" for one-time purchases
...(customerDiscount
? {
// Apply discount automatically if customer is eligible
discounts: [
{
coupon:
process.env.NODE_ENV !== "production" &&
customerDiscount.couponTestId
? customerDiscount.couponTestId
: customerDiscount.couponId,
},
],
}
: {
// Allow manual promo code entry if no automatic discount
allow_promotion_codes: true,
}),
customer_email: userEmail,
metadata: {
userId: userId,
...(customerDiscount && { dubDiscountId: customerDiscount.id }),
},
});
```
```python Python expandable theme={null}
import stripe
from dub import Dub
import os
stripe.api_key = os.environ.get("STRIPE_SECRET_KEY")
dub_client = Dub(token=os.environ.get("DUB_API_KEY"))
user_id = "user_123" # the user's ID in your app
# Get customer discount eligibility from Dub
customers = dub_client.customers.list(
email=None,
external_id=user_id,
include_expanded_fields=True
)
# Prepare checkout session parameters
session_params = {
"success_url": "https://app.domain.com/upgraded",
"cancel_url": "https://app.domain.com/pricing",
"line_items": [{"price": "price_1MotwRLkdIwHu7ixYcPLm5uZ", "quantity": 1}],
"mode": "subscription", # or "payment" for one-time purchases
"customer_email": user_email,
"metadata": {
"userId": user_id,
},
}
# Apply discount if customer is eligible
if customers and hasattr(customers[0], "discount") and customers[0].discount and customers[0].discount.coupon_id:
coupon_id = customers[0].discount.coupon_test_id if (
os.environ.get("NODE_ENV") != "production"
) and hasattr(customers[0].discount, "coupon_test_id") else customers[0].discount.coupon_id
session_params["discounts"] = [{"coupon": coupon_id}]
session_params["metadata"]["dubDiscountId"] = customers[0].discount.id
else:
session_params["allow_promotion_codes"] = True
# Create the checkout session
session = stripe.checkout.Session.create(**session_params)
```
```ruby Ruby expandable theme={null}
require 'stripe'
require 'dub'
# Initialize clients
Stripe.api_key = ENV['STRIPE_SECRET_KEY']
dub_client = ::OpenApiSDK::Dub.new
dub_client.config_security(
::OpenApiSDK::Shared::Security.new(
token: ENV['DUB_API_KEY'],
)
)
# Get customer discount eligibility from Dub
user_id = "user_123" # the user's ID in your app
customers = dub_client.customers.list(
::OpenApiSDK::Operations::ListCustomersRequest.new(
request: ::OpenApiSDK::Operations::ListCustomersRequestBody.new(
external_id: user_id,
include_expanded_fields: true
)
)
)
# Create checkout session parameters
session_params = {
success_url: 'https://app.domain.com/upgraded',
cancel_url: 'https://app.domain.com/pricing',
line_items: [
{
price: 'price_1MotwRLkdIwHu7ixYcPLm5uZ',
quantity: 1,
},
],
mode: 'subscription', # or 'payment' for one-time purchases
customer_email: user_email,
metadata: {
userId: user_id,
},
}
# Apply discount if customer is eligible
if customers.respond_to?(:customers) &&
!customers.customers.empty? &&
customers.customers[0].discount &&
customers.customers[0].discount.coupon_id
coupon_id = if ENV['NODE_ENV'] != 'production' &&
customers.customers[0].discount.coupon_test_id
customers.customers[0].discount.coupon_test_id
else
customers.customers[0].discount.coupon_id
end
session_params[:discounts] = [{ coupon: coupon_id }]
session_params[:metadata][:dubDiscountId] = customers.customers[0].discount.id
else
session_params[:allow_promotion_codes] = true
end
# Create the checkout session
session = Stripe::Checkout::Session.create(session_params)
```
```go Go expandable theme={null}
package main
import (
"context"
"os"
"github.com/stripe/stripe-go/v72"
"github.com/stripe/stripe-go/v72/checkout/session"
"github.com/dubinc/go-sdk/dub"
"github.com/dubinc/go-sdk/operations"
)
func main() {
// Initialize clients
stripe.Key = os.Getenv("STRIPE_SECRET_KEY")
dubClient := dub.New(
dub.WithSecurity(os.Getenv("DUB_API_KEY")),
)
// Get customer discount eligibility from Dub
userId := "user_123" // the user's ID in your app
ctx := context.Background()
listRequest := operations.ListCustomersRequest{
Request: &operations.ListCustomersRequestBody{
ExternalId: &userId,
IncludeExpandedFields: true,
},
}
customers, err := dubClient.Customers.List(ctx, listRequest)
if err != nil {
// Handle error
return
}
// Create checkout session parameters
params := &stripe.CheckoutSessionParams{
SuccessURL: stripe.String("https://app.domain.com/upgraded"),
CancelURL: stripe.String("https://app.domain.com/pricing"),
LineItems: []*stripe.CheckoutSessionLineItemParams{
{
Price: stripe.String("price_1MotwRLkdIwHu7ixYcPLm5uZ"),
Quantity: stripe.Int64(1),
},
},
Mode: stripe.String(string(stripe.CheckoutSessionModeSubscription)),
CustomerEmail: stripe.String(userEmail),
}
// Add metadata
params.AddMetadata("userId", userId)
// Apply discount if customer is eligible
if len(customers.Customers) > 0 && customers.Customers[0].Discount != nil && customers.Customers[0].Discount.CouponId != nil {
var couponId string
if os.Getenv("NODE_ENV") != "production" && customers.Customers[0].Discount.CouponTestId != nil {
couponId = *customers.Customers[0].Discount.CouponTestId
} else {
couponId = *customers.Customers[0].Discount.CouponId
}
params.Discounts = []*stripe.CheckoutSessionDiscountParams{
{
Coupon: stripe.String(couponId),
},
}
params.AddMetadata("dubDiscountId", *customers.Customers[0].Discount.Id)
} else {
params.AllowPromotionCodes = stripe.Bool(true)
}
// Create the checkout session
s, err := session.New(params)
if err != nil {
// Handle error
return
}
}
```
Once this is set up, eligible customers will automatically see the coupon code applied at checkout:
**New Stripe coupon**
If you don't have a coupon set up on Stripe yet, you can use the New Stripe coupon option to create a new coupon based on the discount type (percentage vs flat), amount, and duration set in Dub.
**Use Stripe coupon ID**
If you already have an existing coupon on Stripe, you can enter the Stripe coupon ID (should be an 8 alphanumeric code) under the Use Stripe coupon ID option.
Since Stripe doesn't support updating coupons after creation, you'd need to delete your discount in Dub and create a new one if you want to update any of the discount parameters.
Note: Deleting a discount on Dub does not delete the corresponding Stripe coupon.
The key to implementing link-based discounts is to check if a customer is eligible for a discount using Dub's Customers API, then automatically apply the appropriate Stripe coupon to their checkout session.
Here's how the flow works:
1. When a user clicks a partner referral link, Dub tracks them as a potential customer
2. During checkout, you query the Dub Customers API using the user's ID
3. If they're eligible for a discount, you apply the coupon to their Stripe checkout session
4. If not, you allow them to enter promotion codes manually
```ts TypeScript expandable theme={null}
import { dub } from "@/lib/dub.ts";
import Stripe from "stripe";
const stripe = new Stripe(process.env.STRIPE_SECRET_KEY!);
// Get customer discount eligibility from Dub
const customers = await dub.customers.list({
externalId: userId, // their user ID within your app
includeExpandedFields: true,
});
const customerDiscount = customers.length > 0 ? customers[0].discount : null;
// Create Stripe checkout session with conditional discount
const stripeSession = await stripe.checkout.sessions.create({
success_url: "https://app.domain.com/upgraded",
cancel_url: "https://app.domain.com/pricing",
line_items: [
{
price: "price_1MotwRLkdIwHu7ixYcPLm5uZ",
quantity: 1,
},
],
mode: "subscription", // or "payment" for one-time purchases
...(customerDiscount
? {
// Apply discount automatically if customer is eligible
discounts: [
{
coupon:
process.env.NODE_ENV !== "production" &&
customerDiscount.couponTestId
? customerDiscount.couponTestId
: customerDiscount.couponId,
},
],
}
: {
// Allow manual promo code entry if no automatic discount
allow_promotion_codes: true,
}),
customer_email: userEmail,
metadata: {
userId: userId,
...(customerDiscount && { dubDiscountId: customerDiscount.id }),
},
});
```
```python Python expandable theme={null}
import stripe
from dub import Dub
import os
stripe.api_key = os.environ.get("STRIPE_SECRET_KEY")
dub_client = Dub(token=os.environ.get("DUB_API_KEY"))
user_id = "user_123" # the user's ID in your app
# Get customer discount eligibility from Dub
customers = dub_client.customers.list(
email=None,
external_id=user_id,
include_expanded_fields=True
)
# Prepare checkout session parameters
session_params = {
"success_url": "https://app.domain.com/upgraded",
"cancel_url": "https://app.domain.com/pricing",
"line_items": [{"price": "price_1MotwRLkdIwHu7ixYcPLm5uZ", "quantity": 1}],
"mode": "subscription", # or "payment" for one-time purchases
"customer_email": user_email,
"metadata": {
"userId": user_id,
},
}
# Apply discount if customer is eligible
if customers and hasattr(customers[0], "discount") and customers[0].discount and customers[0].discount.coupon_id:
coupon_id = customers[0].discount.coupon_test_id if (
os.environ.get("NODE_ENV") != "production"
) and hasattr(customers[0].discount, "coupon_test_id") else customers[0].discount.coupon_id
session_params["discounts"] = [{"coupon": coupon_id}]
session_params["metadata"]["dubDiscountId"] = customers[0].discount.id
else:
session_params["allow_promotion_codes"] = True
# Create the checkout session
session = stripe.checkout.Session.create(**session_params)
```
```ruby Ruby expandable theme={null}
require 'stripe'
require 'dub'
# Initialize clients
Stripe.api_key = ENV['STRIPE_SECRET_KEY']
dub_client = ::OpenApiSDK::Dub.new
dub_client.config_security(
::OpenApiSDK::Shared::Security.new(
token: ENV['DUB_API_KEY'],
)
)
# Get customer discount eligibility from Dub
user_id = "user_123" # the user's ID in your app
customers = dub_client.customers.list(
::OpenApiSDK::Operations::ListCustomersRequest.new(
request: ::OpenApiSDK::Operations::ListCustomersRequestBody.new(
external_id: user_id,
include_expanded_fields: true
)
)
)
# Create checkout session parameters
session_params = {
success_url: 'https://app.domain.com/upgraded',
cancel_url: 'https://app.domain.com/pricing',
line_items: [
{
price: 'price_1MotwRLkdIwHu7ixYcPLm5uZ',
quantity: 1,
},
],
mode: 'subscription', # or 'payment' for one-time purchases
customer_email: user_email,
metadata: {
userId: user_id,
},
}
# Apply discount if customer is eligible
if customers.respond_to?(:customers) &&
!customers.customers.empty? &&
customers.customers[0].discount &&
customers.customers[0].discount.coupon_id
coupon_id = if ENV['NODE_ENV'] != 'production' &&
customers.customers[0].discount.coupon_test_id
customers.customers[0].discount.coupon_test_id
else
customers.customers[0].discount.coupon_id
end
session_params[:discounts] = [{ coupon: coupon_id }]
session_params[:metadata][:dubDiscountId] = customers.customers[0].discount.id
else
session_params[:allow_promotion_codes] = true
end
# Create the checkout session
session = Stripe::Checkout::Session.create(session_params)
```
```go Go expandable theme={null}
package main
import (
"context"
"os"
"github.com/stripe/stripe-go/v72"
"github.com/stripe/stripe-go/v72/checkout/session"
"github.com/dubinc/go-sdk/dub"
"github.com/dubinc/go-sdk/operations"
)
func main() {
// Initialize clients
stripe.Key = os.Getenv("STRIPE_SECRET_KEY")
dubClient := dub.New(
dub.WithSecurity(os.Getenv("DUB_API_KEY")),
)
// Get customer discount eligibility from Dub
userId := "user_123" // the user's ID in your app
ctx := context.Background()
listRequest := operations.ListCustomersRequest{
Request: &operations.ListCustomersRequestBody{
ExternalId: &userId,
IncludeExpandedFields: true,
},
}
customers, err := dubClient.Customers.List(ctx, listRequest)
if err != nil {
// Handle error
return
}
// Create checkout session parameters
params := &stripe.CheckoutSessionParams{
SuccessURL: stripe.String("https://app.domain.com/upgraded"),
CancelURL: stripe.String("https://app.domain.com/pricing"),
LineItems: []*stripe.CheckoutSessionLineItemParams{
{
Price: stripe.String("price_1MotwRLkdIwHu7ixYcPLm5uZ"),
Quantity: stripe.Int64(1),
},
},
Mode: stripe.String(string(stripe.CheckoutSessionModeSubscription)),
CustomerEmail: stripe.String(userEmail),
}
// Add metadata
params.AddMetadata("userId", userId)
// Apply discount if customer is eligible
if len(customers.Customers) > 0 && customers.Customers[0].Discount != nil && customers.Customers[0].Discount.CouponId != nil {
var couponId string
if os.Getenv("NODE_ENV") != "production" && customers.Customers[0].Discount.CouponTestId != nil {
couponId = *customers.Customers[0].Discount.CouponTestId
} else {
couponId = *customers.Customers[0].Discount.CouponId
}
params.Discounts = []*stripe.CheckoutSessionDiscountParams{
{
Coupon: stripe.String(couponId),
},
}
params.AddMetadata("dubDiscountId", *customers.Customers[0].Discount.Id)
} else {
params.AllowPromotionCodes = stripe.Bool(true)
}
// Create the checkout session
s, err := session.New(params)
if err != nil {
// Handle error
return
}
}
```
Once this is set up, eligible customers will automatically see the coupon code applied at checkout:
![Stripe coupon applied]() ## Option 2: Using Stripe promo codes (no code required)
If you prefer a no-code solution, you can set up Stripe promo-code-based discounts for your partners.
Stripe promo-code-based discounts is much easier to set up (no code required).
However, you do sacrifice on attribution accuracy since you won't have any
insights into the customer's geolocation, device info, referrer details, and
UTM data. Our Stripe integration will try to derive the customer's location
based on their Stripe billing address, but it can sometimes be inaccurate.
First, navigate to the partner group that you want to create a discount for. Under the Discount tab, you'll be able to create a discount for the group
## Option 2: Using Stripe promo codes (no code required)
If you prefer a no-code solution, you can set up Stripe promo-code-based discounts for your partners.
Stripe promo-code-based discounts is much easier to set up (no code required).
However, you do sacrifice on attribution accuracy since you won't have any
insights into the customer's geolocation, device info, referrer details, and
UTM data. Our Stripe integration will try to derive the customer's location
based on their Stripe billing address, but it can sometimes be inaccurate.
First, navigate to the partner group that you want to create a discount for. Under the Discount tab, you'll be able to create a discount for the group
![Group discounts page]() If you already have a discount set up for your default group, you can just duplicate it. If not, click Create to create your first group discount:
If you already have a discount set up for your default group, you can just duplicate it. If not, click Create to create your first group discount:
![Program discounts tab]() **New Stripe coupon**
If you don't have a coupon set up on Stripe yet, you can use the New Stripe coupon option to create a new coupon based on the discount type (percentage vs flat), amount, and duration set in Dub.
**Use Stripe coupon ID**
If you already have an existing coupon on Stripe, you can enter the Stripe coupon ID (should be an 8 alphanumeric code) under the Use Stripe coupon ID option.
Since Stripe doesn't support updating coupons after creation, you'd need to delete your discount in Dub and create a new one if you want to update any of the discount parameters.
Note: Deleting a discount on Dub does not delete the corresponding Stripe coupon.
### Auto-provision discount codes
When enabled, discount codes will be automatically created for all existing partners in this group and future partners when they join this group.
**New Stripe coupon**
If you don't have a coupon set up on Stripe yet, you can use the New Stripe coupon option to create a new coupon based on the discount type (percentage vs flat), amount, and duration set in Dub.
**Use Stripe coupon ID**
If you already have an existing coupon on Stripe, you can enter the Stripe coupon ID (should be an 8 alphanumeric code) under the Use Stripe coupon ID option.
Since Stripe doesn't support updating coupons after creation, you'd need to delete your discount in Dub and create a new one if you want to update any of the discount parameters.
Note: Deleting a discount on Dub does not delete the corresponding Stripe coupon.
### Auto-provision discount codes
When enabled, discount codes will be automatically created for all existing partners in this group and future partners when they join this group.
![Auto provision discount codes]() Open the partner profile that you'd like to create a discount code for, then click Create Code in the "Discount codes" section.
Open the partner profile that you'd like to create a discount code for, then click Create Code in the "Discount codes" section.
![Partner links page]() Here you can select which referral link you'd like to associate the code with. Then you can create the discount code.
Here you can select which referral link you'd like to associate the code with. Then you can create the discount code.
![Partner links page]() Discount codes cannot be edited after creation, so ensure that you have
everything correct before creating the code
After the code has been created, you'll see its value populated in the Discount Code section, and it is ready for use. In the Partner Dashboard, they'll also see the associated discount code within their partner links.
Discount codes cannot be edited after creation, so ensure that you have
everything correct before creating the code
After the code has been created, you'll see its value populated in the Discount Code section, and it is ready for use. In the Partner Dashboard, they'll also see the associated discount code within their partner links.
![Partner links page with discount code]() ## Displaying discount banner
Once you've set up dual-sided incentives, a potential next step would be to display the discount information on your pricing page / landing page hero.
To do that, all you need is to install the [Dub Analytics script](/docs/sdks/client-side/introduction) with client-side click-tracking enabled – then, when someone lands on your site via a valid referral link, the script will automatically fetch the partner and discount data for you.
This data will be stored as a JSON-stringified object in the `dub_partner_data` cookie in the following format:
```json theme={null}
{
"clickId": "xxx", // unique ID of the click event
"partner": {
"id": "pn_xxx", // unique ID of the partner on Dub
"name": "John Doe", // name of the partner
"image": "https://example.com/john.png", // avatar of the partner
"groupId": "grp_xxx", // unique ID of the group the partner belongs to
"tenantId": "user_xxx" // partner's unique ID in your database
},
"discount": {
"id": "disc_xxx", // unique ID of the discount on Dub
"amount": 25, // discount amount (either a percentage or a fixed amount)
"type": "percentage", // type of the discount (either "percentage" or "fixed")
"maxDuration": 3, // maximum duration of the discount in months
"couponId": "XZuejd0Q", // Stripe coupon code
"couponTestId": "2NMXz81x" // Stripe test coupon ID
}
}
```
You can access partner and discount data in your application code using the `useAnalytics()` hook. If you’re working in a non-React environment, you can use the `DubAnalytics` object directly.
Here is a quick example of how you can display a discount banner using the `useAnalytics()` hook:
```javascript HTML theme={null}
// Display a banner that says: _"John referred you to Acme and gave you 25% off"_
dubAnalytics("ready", function () {
if (DubAnalytics.partner && DubAnalytics.discount) {
const banner = document.createElement("div");
banner.innerHTML = `
## Displaying discount banner
Once you've set up dual-sided incentives, a potential next step would be to display the discount information on your pricing page / landing page hero.
To do that, all you need is to install the [Dub Analytics script](/docs/sdks/client-side/introduction) with client-side click-tracking enabled – then, when someone lands on your site via a valid referral link, the script will automatically fetch the partner and discount data for you.
This data will be stored as a JSON-stringified object in the `dub_partner_data` cookie in the following format:
```json theme={null}
{
"clickId": "xxx", // unique ID of the click event
"partner": {
"id": "pn_xxx", // unique ID of the partner on Dub
"name": "John Doe", // name of the partner
"image": "https://example.com/john.png", // avatar of the partner
"groupId": "grp_xxx", // unique ID of the group the partner belongs to
"tenantId": "user_xxx" // partner's unique ID in your database
},
"discount": {
"id": "disc_xxx", // unique ID of the discount on Dub
"amount": 25, // discount amount (either a percentage or a fixed amount)
"type": "percentage", // type of the discount (either "percentage" or "fixed")
"maxDuration": 3, // maximum duration of the discount in months
"couponId": "XZuejd0Q", // Stripe coupon code
"couponTestId": "2NMXz81x" // Stripe test coupon ID
}
}
```
You can access partner and discount data in your application code using the `useAnalytics()` hook. If you’re working in a non-React environment, you can use the `DubAnalytics` object directly.
Here is a quick example of how you can display a discount banner using the `useAnalytics()` hook:
```javascript HTML theme={null}
// Display a banner that says: _"John referred you to Acme and gave you 25% off"_
dubAnalytics("ready", function () {
if (DubAnalytics.partner && DubAnalytics.discount) {
const banner = document.createElement("div");
banner.innerHTML = `
${DubAnalytics.partner.name} referred you to Acme and gave you ${DubAnalytics.discount.amount} ${DubAnalytics.discount.type} off
`;
document.body.appendChild(banner);
}
});
```
```typescript React/Next.js theme={null}
// Display a banner that says: _"John referred you to Acme and gave you 25% off"_
import { useAnalytics } from "@dub/analytics/react";
function DiscountBanner() {
const { partner, discount } = useAnalytics();
if (!partner || !discount) {
return null;
}
return (
{partner.name} referred you to Acme and gave you {discount.amount}{" "}
{discount.type} off
);
}
```
Here's an example of how the discount banner will look like:
![A screenshot of the Dub partner data example]() # Dub Analytics Overview
Source: https://dub.co/help/article/dub-analytics
Learn about how you can use Dub Analytics to better understand your audience.
On any given day, Dub Analytics tracks upwards of **10 million clicks and [conversion events](/help/article/dub-conversions)**.
With the sheer volume of data that's tracked, it is important to be able to easily filter and create reports to help marketing teams make informed decisions.
In this guide, we'll walk you through how to use Dub Analytics to get the most out of your click events and engagement data.
## Live Demo
To give you some context before we dive in, here's a live demo of Dub's Analytics dashboard:
This public page was created using Dub's shareable link feature. You can
create your own shareable link by following the steps in the [Share your
analytics](/help/article/share-analytics) guide.
## Analytics Views
Dub's Analytics dashboard consists of several views:
1. [Time-series analytics chart](#1-time-series-analytics-chart)
2. [Aggregated data for different facets (top views)](#2-aggregated-data-for-different-facets-top-views)
3. [Real-time events stream](#3-real-time-events-stream)
### 1. Time-series analytics chart
This is the default view and shows you the number of click events over time.
# Dub Analytics Overview
Source: https://dub.co/help/article/dub-analytics
Learn about how you can use Dub Analytics to better understand your audience.
On any given day, Dub Analytics tracks upwards of **10 million clicks and [conversion events](/help/article/dub-conversions)**.
With the sheer volume of data that's tracked, it is important to be able to easily filter and create reports to help marketing teams make informed decisions.
In this guide, we'll walk you through how to use Dub Analytics to get the most out of your click events and engagement data.
## Live Demo
To give you some context before we dive in, here's a live demo of Dub's Analytics dashboard:
This public page was created using Dub's shareable link feature. You can
create your own shareable link by following the steps in the [Share your
analytics](/help/article/share-analytics) guide.
## Analytics Views
Dub's Analytics dashboard consists of several views:
1. [Time-series analytics chart](#1-time-series-analytics-chart)
2. [Aggregated data for different facets (top views)](#2-aggregated-data-for-different-facets-top-views)
3. [Real-time events stream](#3-real-time-events-stream)
### 1. Time-series analytics chart
This is the default view and shows you the number of click events over time.
![Time-series line chart]() ### 2. Aggregated data for different facets (top views)
These are more commonly known as the "Top Views" in Dub Analytics. These views show you the top links, countries, cities, devices, and more.
### 2. Aggregated data for different facets (top views)
These are more commonly known as the "Top Views" in Dub Analytics. These views show you the top links, countries, cities, devices, and more.
![Aggregated data for different facets]() ### 3. Real-time events stream
Dub also offers a [Real-time Events Stream](/help/article/real-time-events-stream) view that shows you the events that are happening in real-time. These events are sorted by the time they occurred, so you can see the most recent events first.
### 3. Real-time events stream
Dub also offers a [Real-time Events Stream](/help/article/real-time-events-stream) view that shows you the events that are happening in real-time. These events are sorted by the time they occurred, so you can see the most recent events first.
![The Events Stream dashboard on Dub]() The real-time events stream lives in your workspace's [**Events** tab](https://app.dub.co/events), but you can also access it via the **View Events** button in the Analytics tab:
The real-time events stream lives in your workspace's [**Events** tab](https://app.dub.co/events), but you can also access it via the **View Events** button in the Analytics tab:
![Quick link to open-up the events stream from the Analytics tab]() When you click on the **View Events** button, the same filters you have
applied in the Analytics tab are applied to the Events tab as well.
## Date Range Picker
Dub Analytics comes with a powerful date range picker that allows you to select custom date ranges for your reports.
This is especially useful when you want to compare data over different time periods, or when you want to focus on a specific time frame that is not covered by the preset date ranges.
When you click on the **View Events** button, the same filters you have
applied in the Analytics tab are applied to the Events tab as well.
## Date Range Picker
Dub Analytics comes with a powerful date range picker that allows you to select custom date ranges for your reports.
This is especially useful when you want to compare data over different time periods, or when you want to focus on a specific time frame that is not covered by the preset date ranges.
![New Date Range Picker for custom date ranges]() Pro-tip: You can use keyboard shortcuts to toggle between different preset date ranges:
* `D` – Last 24 hours
* `W` – Last 7 days
* `T` – Last 30 days
* `3` – Last 3 months
* `L` – Last 12 months
* `M` – Month to Date
* `Q` – Quarter to Date
* `Y` – Year to date
* `A` – All time
## Filtering data
Dub's analytics dashboard comes with a sleek and keyboard-friendly filter bar at the top of the dashboard that you can use to filter your data.
Here are some of the filter facets you can use:
* **Domain** – Filter by domain (e.g. `dub.sh`, `git.new`, `spti.fi`)
* **Tags** – [Filter by tags](/help/article/filter-analytics-by-tags) (e.g. Social Media, Email Campaign, Blog Post)
* **Folders** – [Filter by folders](/help/article/filter-analytics-by-folders) (e.g. Partner links, Marketing links)
* **Trigger** – [Filter by event trigger](/help/article/filter-analytics-by-trigger) (e.g. link click, QR code scan)
* **Device** – Filter by device type (e.g. Mobile, Desktop, Tablet)
* **Country** – Filter by country (e.g. United States, India, Germany)
* **City** – Filter by city (e.g. San Francisco, New York, London)
* **Region** – Filter by region (e.g. California, New York, London)
* **Continent** – Filter by continent (e.g. North America, Europe, Asia)
* **Browser** – Filter by browser (e.g. Chrome, Safari, Firefox)
* **OS** – Filter by operating system (e.g. iOS, Android, Windows)
* **Referrer** – Filter by referrer (e.g. Direct, Google, Facebook)
* **UTM Parameters** – [Filter by UTM parameters](/help/article/filter-analytics-by-utms) (e.g. `utm_source`, `utm_content`)
Additionally, with [Dub Partners](https://dub.co/partners), you can also filter by the following:
* **Partner** – Filter by [individual partners](/help/article/managing-program-partners) to measure partner activity and ROI across different time ranges
* **Partner Group** – Filter by [partner group](/help/article/partner-groups) (e.g. "Influencers" vs "User Referrals" vs "Affiliates" vs "Publishers") to understand the ROI on each of your partnership channels
Pro-tip: You can use the `F` keyboard shortcut to open up the filter bar.
## Advanced analytics filters
You can also use our built-in advanced filtering capabilities to create powerful, customized reports for your marketing campaigns:
### Multi-filtering ("IS ONE OF")
If you need to pull stats for multiple entities at once, you can now do so with our multi-filtering feature:
Pro-tip: You can use keyboard shortcuts to toggle between different preset date ranges:
* `D` – Last 24 hours
* `W` – Last 7 days
* `T` – Last 30 days
* `3` – Last 3 months
* `L` – Last 12 months
* `M` – Month to Date
* `Q` – Quarter to Date
* `Y` – Year to date
* `A` – All time
## Filtering data
Dub's analytics dashboard comes with a sleek and keyboard-friendly filter bar at the top of the dashboard that you can use to filter your data.
Here are some of the filter facets you can use:
* **Domain** – Filter by domain (e.g. `dub.sh`, `git.new`, `spti.fi`)
* **Tags** – [Filter by tags](/help/article/filter-analytics-by-tags) (e.g. Social Media, Email Campaign, Blog Post)
* **Folders** – [Filter by folders](/help/article/filter-analytics-by-folders) (e.g. Partner links, Marketing links)
* **Trigger** – [Filter by event trigger](/help/article/filter-analytics-by-trigger) (e.g. link click, QR code scan)
* **Device** – Filter by device type (e.g. Mobile, Desktop, Tablet)
* **Country** – Filter by country (e.g. United States, India, Germany)
* **City** – Filter by city (e.g. San Francisco, New York, London)
* **Region** – Filter by region (e.g. California, New York, London)
* **Continent** – Filter by continent (e.g. North America, Europe, Asia)
* **Browser** – Filter by browser (e.g. Chrome, Safari, Firefox)
* **OS** – Filter by operating system (e.g. iOS, Android, Windows)
* **Referrer** – Filter by referrer (e.g. Direct, Google, Facebook)
* **UTM Parameters** – [Filter by UTM parameters](/help/article/filter-analytics-by-utms) (e.g. `utm_source`, `utm_content`)
Additionally, with [Dub Partners](https://dub.co/partners), you can also filter by the following:
* **Partner** – Filter by [individual partners](/help/article/managing-program-partners) to measure partner activity and ROI across different time ranges
* **Partner Group** – Filter by [partner group](/help/article/partner-groups) (e.g. "Influencers" vs "User Referrals" vs "Affiliates" vs "Publishers") to understand the ROI on each of your partnership channels
Pro-tip: You can use the `F` keyboard shortcut to open up the filter bar.
## Advanced analytics filters
You can also use our built-in advanced filtering capabilities to create powerful, customized reports for your marketing campaigns:
### Multi-filtering ("IS ONE OF")
If you need to pull stats for multiple entities at once, you can now do so with our multi-filtering feature:
![Advanced filters IS]() Examples:
* Filtering by multiple [partners](/help/article/managing-program-partners)
* Filtering by multiple [partner groups](/help/article/partner-groups)
* Filtering by multiple [folders](/help/article/filter-analytics-by-folders)
* Filtering by multiple [tags](/help/article/filter-analytics-by-tags)
### Negative filtering ("IS NOT")
Additionally, you can also pull stats for all entities \*\*\*except\*\*\* a select few to make more reporting more robust.
Examples:
* Filtering by multiple [partners](/help/article/managing-program-partners)
* Filtering by multiple [partner groups](/help/article/partner-groups)
* Filtering by multiple [folders](/help/article/filter-analytics-by-folders)
* Filtering by multiple [tags](/help/article/filter-analytics-by-tags)
### Negative filtering ("IS NOT")
Additionally, you can also pull stats for all entities \*\*\*except\*\*\* a select few to make more reporting more robust.
![Advanced filters IS NOT]() Examples:
* Filtering for non-US traffic
* Filtering for all [partners](/help/article/managing-program-partners) except a few outliers
* Filtering for all [partner groups](/help/article/partner-groups) except for "User referrals"
* Filtering for all [tags](/help/article/filter-analytics-by-tags) except for "General links"
Best part? You can also mix and match both multi-filtering and negative-filtering as well:
Examples:
* Filtering for non-US traffic
* Filtering for all [partners](/help/article/managing-program-partners) except a few outliers
* Filtering for all [partner groups](/help/article/partner-groups) except for "User referrals"
* Filtering for all [tags](/help/article/filter-analytics-by-tags) except for "General links"
Best part? You can also mix and match both multi-filtering and negative-filtering as well:
![Mix and match analytics filters]() This is available for both [Dub Partners](https://dub.co/partners) & [Dub Links](https://dub.co/links), and you can filter across [all of the facets mentioned above](#filtering-data).
Check out [an example here](https://app.dub.co/share/dash_6NSA6vNm017MZwfzt8SubNSZ?interval=30d\&country=-IN%2CVN).
## Exporting your analytics data
You can also [export your analytics data](/help/article/how-to-export-analytics) or [events stream data](/help/article/real-time-events-stream#filtering-and-exporting-events) to a CSV file at any time. This can be useful if you want to analyze the data in a business intelligence (BI) tool, share it with your team, or import it into a spreadsheet.
This is available for both [Dub Partners](https://dub.co/partners) & [Dub Links](https://dub.co/links), and you can filter across [all of the facets mentioned above](#filtering-data).
Check out [an example here](https://app.dub.co/share/dash_6NSA6vNm017MZwfzt8SubNSZ?interval=30d\&country=-IN%2CVN).
## Exporting your analytics data
You can also [export your analytics data](/help/article/how-to-export-analytics) or [events stream data](/help/article/real-time-events-stream#filtering-and-exporting-events) to a CSV file at any time. This can be useful if you want to analyze the data in a business intelligence (BI) tool, share it with your team, or import it into a spreadsheet.
![Click on the download icon to export the data]() ## Bonus: "Ask AI" feature
You can also use the "Ask AI" feature to query your analytics with natural language.
For example, you can ask questions like:
* "mobile chrome users US only"
* "QR scans last quarter"
* "UK android users"
* "[filter for new sales only](https://dub.co/changelog/filter-sale-type) last 30 days"
And [Dub AI](https://dub.co/blog/introducing-dub-ai) will automatically select the right filters and generate a report for you.
# Dub Analytics Limits
Source: https://dub.co/help/article/dub-analytics-limits
Learn about the different limits for Dub Analytics and how many clicks you can track on each plan.
Dub has one of the most generous analytics limits of any link management platform.
With [Dub Analytics](/help/article/dub-analytics), you can track up to 1,000 clicks per month for free – no credit card required. You also get access to advanced analytics features like:
* Breakdown by location (country, city, continent)
* Breakdown by device (type, browser, operating system)
* Top links, UTM parameters, and referrer data
* [AI filtering](/help/article/dub-analytics#bonus-ask-ai-feature) feature
* Filtering by [tags](/help/article/filter-analytics-by-tags), [QR code vs link clicks](/help/article/filter-analytics-by-trigger) and more
* Real-time [analytics-sharing](/help/article/share-analytics)
## Dub Analytics limits by plan
Here are the tracked clicks limits for each plan on Dub:
| Plan | Limit |
| ---------- | ------------------------ |
| Free | 1,000 clicks / month |
| Pro | 50,000 clicks / month |
| Business | 250,000 clicks / month |
| Advanced | 1,000,000 clicks / month |
| Enterprise | Custom |
On Dub's paid plans, you also have access to advanced features like:
* [Analytics API](/docs/api-reference/endpoint/retrieve-analytics) – Pro plan and above
* [Real-time events stream](/help/article/real-time-events-stream) – Business plan and above
* [Event Webhooks](/docs/webhooks/introduction) – Business plan and above
* [Dub Partners](/help/article/dub-partners) – Business plan and above
If you don't have a destination URL configured on your [root domain link](/help/article/how-to-redirect-root-domain), clicks on your root domain link won't count towards your monthly clicks limit. Learn more [here](/help/article/how-to-redirect-root-domain).
## What happens when I exceed the tracked clicks limit on my plan?
If you exceed your monthly tracked clicks limits, your existing links will still work and we will continue to track clicks on them. However, you will need to [upgrade your plan](https://app.dub.co/upgrade) to view their analytics.
You will receive two email notifications when you exceed your tracked clicks limit – once when you first exceed the limit, and once more in 3 days if you still have not upgraded your plan.
We currently do not bill for overages. However, to prevent abuse, if you exceed your tracked clicks limit by a certain threshold, your clicks will not be reset at the start of your billing period.
Here are the thresholds for each plan:
| Plan | Threshold |
| --------------- | ------------------------------------------- |
| Free | 4x your plan's monthly limit (4,000 clicks) |
| All other plans | 2x your plan's monthly limit |
When that happens, you can [upgrade your plan](https://app.dub.co/upgrade) to reset your tracked clicks limit.
# Conversion tracking
Source: https://dub.co/help/article/dub-conversions
Learn how you can use Dub to track how your link clicks are converting to signups and sales.
This feature is only available on [Dub Business](https://dub.co/pricing) and
above.
Data is the lifeblood of any business. It helps you understand your customers, make data-driven decisions, and drive growth.
Whenever you run a marketing campaign, merely tracking link clicks is not sufficient to paint a complete picture of your customer acquisition funnel.
You need to track how those clicks are converting to signups & sales to be able to determine which campaigns/channels are performing the best.
**This is where Dub comes in.**
With Dub, you can turn any [short link you create on Dub](/help/article/how-to-create-link) into a full attribution engine. This allows you to understand how well your links are translating to actual users and revenue dollars.
## How does conversion tracking work on Dub?
The way conversion tracking on Dub works can be boiled down to 3 simple steps:
This is the first step in the conversion funnel. It can either be:
* A link click on a social media post/ad
* A link click in an email/SMS
* A QR code scan for physical (or video) campaigns
When a user performs an action that indicates interest in your product or
service. This could be anything from:
* Signing up for an account
* Adding a product to cart
* Joining a mailing list
When a user purchases your product or service. Examples include:
* Subscribing to a paid plan
* Usage expansion (upgrading from one plan to another)
* Purchasing a product
With this 3-step process, marketing teams can make better decisions about which content or marketing efforts to invest more in – backed by real-world conversion data.
## How are conversions tracked?
Dub uses a simple first-party cookie and server-side event tracking to track conversions.
### Step 1: Storing click ID as a first-party cookie
When a user clicks on a conversion-enabled link, Dub generates a unique `dub_id` query parameter and stores it as a first-party cookie on your domain (e.g. `.dub.co`).
## Bonus: "Ask AI" feature
You can also use the "Ask AI" feature to query your analytics with natural language.
For example, you can ask questions like:
* "mobile chrome users US only"
* "QR scans last quarter"
* "UK android users"
* "[filter for new sales only](https://dub.co/changelog/filter-sale-type) last 30 days"
And [Dub AI](https://dub.co/blog/introducing-dub-ai) will automatically select the right filters and generate a report for you.
# Dub Analytics Limits
Source: https://dub.co/help/article/dub-analytics-limits
Learn about the different limits for Dub Analytics and how many clicks you can track on each plan.
Dub has one of the most generous analytics limits of any link management platform.
With [Dub Analytics](/help/article/dub-analytics), you can track up to 1,000 clicks per month for free – no credit card required. You also get access to advanced analytics features like:
* Breakdown by location (country, city, continent)
* Breakdown by device (type, browser, operating system)
* Top links, UTM parameters, and referrer data
* [AI filtering](/help/article/dub-analytics#bonus-ask-ai-feature) feature
* Filtering by [tags](/help/article/filter-analytics-by-tags), [QR code vs link clicks](/help/article/filter-analytics-by-trigger) and more
* Real-time [analytics-sharing](/help/article/share-analytics)
## Dub Analytics limits by plan
Here are the tracked clicks limits for each plan on Dub:
| Plan | Limit |
| ---------- | ------------------------ |
| Free | 1,000 clicks / month |
| Pro | 50,000 clicks / month |
| Business | 250,000 clicks / month |
| Advanced | 1,000,000 clicks / month |
| Enterprise | Custom |
On Dub's paid plans, you also have access to advanced features like:
* [Analytics API](/docs/api-reference/endpoint/retrieve-analytics) – Pro plan and above
* [Real-time events stream](/help/article/real-time-events-stream) – Business plan and above
* [Event Webhooks](/docs/webhooks/introduction) – Business plan and above
* [Dub Partners](/help/article/dub-partners) – Business plan and above
If you don't have a destination URL configured on your [root domain link](/help/article/how-to-redirect-root-domain), clicks on your root domain link won't count towards your monthly clicks limit. Learn more [here](/help/article/how-to-redirect-root-domain).
## What happens when I exceed the tracked clicks limit on my plan?
If you exceed your monthly tracked clicks limits, your existing links will still work and we will continue to track clicks on them. However, you will need to [upgrade your plan](https://app.dub.co/upgrade) to view their analytics.
You will receive two email notifications when you exceed your tracked clicks limit – once when you first exceed the limit, and once more in 3 days if you still have not upgraded your plan.
We currently do not bill for overages. However, to prevent abuse, if you exceed your tracked clicks limit by a certain threshold, your clicks will not be reset at the start of your billing period.
Here are the thresholds for each plan:
| Plan | Threshold |
| --------------- | ------------------------------------------- |
| Free | 4x your plan's monthly limit (4,000 clicks) |
| All other plans | 2x your plan's monthly limit |
When that happens, you can [upgrade your plan](https://app.dub.co/upgrade) to reset your tracked clicks limit.
# Conversion tracking
Source: https://dub.co/help/article/dub-conversions
Learn how you can use Dub to track how your link clicks are converting to signups and sales.
This feature is only available on [Dub Business](https://dub.co/pricing) and
above.
Data is the lifeblood of any business. It helps you understand your customers, make data-driven decisions, and drive growth.
Whenever you run a marketing campaign, merely tracking link clicks is not sufficient to paint a complete picture of your customer acquisition funnel.
You need to track how those clicks are converting to signups & sales to be able to determine which campaigns/channels are performing the best.
**This is where Dub comes in.**
With Dub, you can turn any [short link you create on Dub](/help/article/how-to-create-link) into a full attribution engine. This allows you to understand how well your links are translating to actual users and revenue dollars.
## How does conversion tracking work on Dub?
The way conversion tracking on Dub works can be boiled down to 3 simple steps:
This is the first step in the conversion funnel. It can either be:
* A link click on a social media post/ad
* A link click in an email/SMS
* A QR code scan for physical (or video) campaigns
When a user performs an action that indicates interest in your product or
service. This could be anything from:
* Signing up for an account
* Adding a product to cart
* Joining a mailing list
When a user purchases your product or service. Examples include:
* Subscribing to a paid plan
* Usage expansion (upgrading from one plan to another)
* Purchasing a product
With this 3-step process, marketing teams can make better decisions about which content or marketing efforts to invest more in – backed by real-world conversion data.
## How are conversions tracked?
Dub uses a simple first-party cookie and server-side event tracking to track conversions.
### Step 1: Storing click ID as a first-party cookie
When a user clicks on a conversion-enabled link, Dub generates a unique `dub_id` query parameter and stores it as a first-party cookie on your domain (e.g. `.dub.co`).
![A diagram showing how click events are tracked in the conversion funnel]() This allows Dub to attribute any subsequent conversion events to the original click – and by extension, **the link that was clicked on**.
To enable this, you need to [install the Dub Analytics script](/docs/sdks/client-side/installation-guides/react) in your project.
This package will handle the detection of the `dub_id` query parameter and storing it as a first-party cookie.
### Step 2: Attributing conversion events to the original click
Then, when a conversion event occurs (e.g. a user signs up for an account), you can check for the `dub_id` cookie and attribute the conversion to the original click.
This allows Dub to attribute any subsequent conversion events to the original click – and by extension, **the link that was clicked on**.
To enable this, you need to [install the Dub Analytics script](/docs/sdks/client-side/installation-guides/react) in your project.
This package will handle the detection of the `dub_id` query parameter and storing it as a first-party cookie.
### Step 2: Attributing conversion events to the original click
Then, when a conversion event occurs (e.g. a user signs up for an account), you can check for the `dub_id` cookie and attribute the conversion to the original click.
![A diagram showing how lead events are tracked in the conversion funnel]() For example, if you're using a Next.js app with NextAuth for authentication, here's how you can [send lead conversion events for new user signups](/docs/conversions/leads/next-auth).
When sending a lead conversion event, you can include the following properties:
| Property | Description | Required |
| :------------------- | :----------------------------------------------------------------------------------------------------------------------- | :------- |
| `clickId` | The unique `dub_id` parameter that the lead conversion event is attributed to. | Yes |
| `eventName` | The name of the event. Example: "Sign up". | Yes |
| `customerExternalId` | The unique ID of the customer in your system. Will be used to identify and attribute all future events to this customer. | Yes |
| `customerEmail` | The email address of the customer. If not passed, a random email address will be generated. | No |
| `customerName` | The name of the customer. If not passed, a random name will be generated (e.g. "Big Red Caribou"). | No |
| `customerAvatar` | The avatar URL of the customer. If not passed, a random avatar URL will be generated. | No |
The lead event will serve as the source of truth for the customer's identity and which link they came from. This means that all subsequent actions performed by the customer (e.g. upgrading their plan, purchasing a product) will automatically be attributed to the original link.
### Step 3: Sending sale events
The final step in the conversion funnel is to track sale events and attribute them to the original link click. This can be done in 3 ways:
For example, if you're using a Next.js app with NextAuth for authentication, here's how you can [send lead conversion events for new user signups](/docs/conversions/leads/next-auth).
When sending a lead conversion event, you can include the following properties:
| Property | Description | Required |
| :------------------- | :----------------------------------------------------------------------------------------------------------------------- | :------- |
| `clickId` | The unique `dub_id` parameter that the lead conversion event is attributed to. | Yes |
| `eventName` | The name of the event. Example: "Sign up". | Yes |
| `customerExternalId` | The unique ID of the customer in your system. Will be used to identify and attribute all future events to this customer. | Yes |
| `customerEmail` | The email address of the customer. If not passed, a random email address will be generated. | No |
| `customerName` | The name of the customer. If not passed, a random name will be generated (e.g. "Big Red Caribou"). | No |
| `customerAvatar` | The avatar URL of the customer. If not passed, a random avatar URL will be generated. | No |
The lead event will serve as the source of truth for the customer's identity and which link they came from. This means that all subsequent actions performed by the customer (e.g. upgrading their plan, purchasing a product) will automatically be attributed to the original link.
### Step 3: Sending sale events
The final step in the conversion funnel is to track sale events and attribute them to the original link click. This can be done in 3 ways:
![A diagram showing how sale events are tracked in the conversion funnel]() **Option 1: Stripe integration (recommended)**
At Dub, we have a [native Stripe integration](/docs/integrations/stripe) that you can set up in 2-3 clicks and automatically send sale events to Dub.
The way the integration works is as follows:
1. Install our [Stripe integration](https://app.dub.co/integrations/stripe) in your Dub workspace. For security reasons, the integration will have *read-only access* to your Stripe account.
2. When a user creates a checkout session on your app, pass the user's unique ID in your system as the `dubCustomerId` property in the `metadata` field.
3. This way, when the user completes their checkout session, Dub will receive a webhook from Stripe containing the `dubCustomerId`.
4. If the `dubCustomerId` matches a customer that came from a conversion-enabled link, Dub will track the sale as a result of that link.
**Option 2: Shopify integration**
We also have a [native Shopify integration](/docs/integrations/stripe) that you can install in 2-3 clicks and automatically track sale events with Dub.
The way the integration works is as follows:
1. Install the [Dub Shopify app](https://dub.co/integrations/shopify) in your Shopify store.
2. When a sale is made, the integration will automatically detect and track a laed + sale event in Dub.
**Option 3: Manually sending sale events**
Alternatively, if you prefer to send sale events manually, you can do so using our [server-side SDKs](/docs/sdks/overview).
We expose a `POST /track/sale` [endpoint](/docs/api-reference/endpoint/track-sale) that you can use to send sale events to Dub. Here's an example using the Dub [TypeScript SDK](/docs/sdks/typescript/overview):
```ts title="/api/billing/upgrade" theme={null}
import { Dub } from "dub";
const dub = new Dub();
await dub.track.sale({
customerExternalId: "123",
amount: 5900, // in cents
paymentProcessor: "stripe",
eventName: "Subscription creation",
});
```
Here are the properties you can include when sending a sale event:
| Property | Description | Required |
| :------------------- | :---------------------------------------------------------- | :------- |
| `customerExternalId` | The unique ID of the customer in your system. | Yes |
| `amount` | The amount of the sale in cents. | Yes |
| `paymentProcessor` | The name of the payment processor that processed the sale. | No |
| `eventName` | The name of the event. Defaults to "Purchase". | No |
| `invoiceId` | The unique ID of the invoice in your system. | No |
| `currency` | The currency of the sale. Defaults to "usd". | No |
| `metadata` | An object containing additional information about the sale. | No |
## How do I see the conversions?
All your tracked conversions will show up on your [Analytics dashboard](/help/article/dub-analytics). We provide 3 different views to help you understand your conversions:
* **Time-series**: A [time-series view](/help/article/dub-analytics#1-time-series-analytics-chart) of the number clicks, leads and sales.
**Option 1: Stripe integration (recommended)**
At Dub, we have a [native Stripe integration](/docs/integrations/stripe) that you can set up in 2-3 clicks and automatically send sale events to Dub.
The way the integration works is as follows:
1. Install our [Stripe integration](https://app.dub.co/integrations/stripe) in your Dub workspace. For security reasons, the integration will have *read-only access* to your Stripe account.
2. When a user creates a checkout session on your app, pass the user's unique ID in your system as the `dubCustomerId` property in the `metadata` field.
3. This way, when the user completes their checkout session, Dub will receive a webhook from Stripe containing the `dubCustomerId`.
4. If the `dubCustomerId` matches a customer that came from a conversion-enabled link, Dub will track the sale as a result of that link.
**Option 2: Shopify integration**
We also have a [native Shopify integration](/docs/integrations/stripe) that you can install in 2-3 clicks and automatically track sale events with Dub.
The way the integration works is as follows:
1. Install the [Dub Shopify app](https://dub.co/integrations/shopify) in your Shopify store.
2. When a sale is made, the integration will automatically detect and track a laed + sale event in Dub.
**Option 3: Manually sending sale events**
Alternatively, if you prefer to send sale events manually, you can do so using our [server-side SDKs](/docs/sdks/overview).
We expose a `POST /track/sale` [endpoint](/docs/api-reference/endpoint/track-sale) that you can use to send sale events to Dub. Here's an example using the Dub [TypeScript SDK](/docs/sdks/typescript/overview):
```ts title="/api/billing/upgrade" theme={null}
import { Dub } from "dub";
const dub = new Dub();
await dub.track.sale({
customerExternalId: "123",
amount: 5900, // in cents
paymentProcessor: "stripe",
eventName: "Subscription creation",
});
```
Here are the properties you can include when sending a sale event:
| Property | Description | Required |
| :------------------- | :---------------------------------------------------------- | :------- |
| `customerExternalId` | The unique ID of the customer in your system. | Yes |
| `amount` | The amount of the sale in cents. | Yes |
| `paymentProcessor` | The name of the payment processor that processed the sale. | No |
| `eventName` | The name of the event. Defaults to "Purchase". | No |
| `invoiceId` | The unique ID of the invoice in your system. | No |
| `currency` | The currency of the sale. Defaults to "usd". | No |
| `metadata` | An object containing additional information about the sale. | No |
## How do I see the conversions?
All your tracked conversions will show up on your [Analytics dashboard](/help/article/dub-analytics). We provide 3 different views to help you understand your conversions:
* **Time-series**: A [time-series view](/help/article/dub-analytics#1-time-series-analytics-chart) of the number clicks, leads and sales.
![Time-series line chart]() * **Funnel chart**: A funnel chart view visualizing the conversion & dropoff rates across the different steps in the conversion funnel (clicks → leads → sales).
* **Funnel chart**: A funnel chart view visualizing the conversion & dropoff rates across the different steps in the conversion funnel (clicks → leads → sales).
![Funnel chart view showing the conversion & dropoff rates from clicks → leads → sales]() * **Real-time events stream**: A [real-time events stream](/help/article/real-time-events-stream) of every single conversion event that occurs across all your links in your workspace.
* **Real-time events stream**: A [real-time events stream](/help/article/real-time-events-stream) of every single conversion event that occurs across all your links in your workspace.
![The Events Stream dashboard on Dub]() ## What can I build with Dub?
There are various use cases for Dub. Here are a few examples:
### 1. White-labeled affiliate/referral programs
With [Dub Partners](https://dub.co/partners) (built on top of Dub), you can track how well your affiliate/referral links are performing and [display the real-time analytics directly inside your application](/docs/partners/embedded-referrals).
For instance, here's a screenshot of our very own Dub referral program – powered by Dub – that [lives within the Dub dashboard](https://app.dub.co/referrals):
## What can I build with Dub?
There are various use cases for Dub. Here are a few examples:
### 1. White-labeled affiliate/referral programs
With [Dub Partners](https://dub.co/partners) (built on top of Dub), you can track how well your affiliate/referral links are performing and [display the real-time analytics directly inside your application](/docs/partners/embedded-referrals).
For instance, here's a screenshot of our very own Dub referral program – powered by Dub – that [lives within the Dub dashboard](https://app.dub.co/referrals):
![A demo of the Dub Referrals dashboard]() With Dub's [real-time webhooks feature](/docs/webhooks/introduction), you can also build custom [dual-sided incentive structures](/help/article/dual-sided-incentives) – e.g. rewarding the referrer an additional 100 credits when a new user signs up with their link.
### 2. Influencer campaigns attribution tracking
You can also use [Dub Partners](https://dub.co/partners) to better [understand the performance of your influencer campaigns](/help/article/program-analytics) – not just the number of clicks, but also the number of signups/purchases.
You can then use the data to make data-driven decisions about which influencers to work with and how to better allocate your budget to maximize your ROI.
## Getting started with conversion tracking on Dub
To get started with conversion tracking on Dub, check out our [quickstart guide](/docs/quickstart/server).
# What is the Dub link builder?
Source: https://dub.co/help/article/dub-link-builder
Learn more about the Dub link builder, how to open it (with various shortcuts), and how to use it to create a short link.
Short links are the bread and butter of Dub. With Dub's link management platform, you can create short links and [QR codes](/help/article/custom-qr-codes) for your marketing campaigns and get [world-class analytics](/help/article/dub-analytics) on them.
At the center of Dub is the Dub link builder. This is where you'll find all the tools & features you need to create a short link on Dub.
With Dub's [real-time webhooks feature](/docs/webhooks/introduction), you can also build custom [dual-sided incentive structures](/help/article/dual-sided-incentives) – e.g. rewarding the referrer an additional 100 credits when a new user signs up with their link.
### 2. Influencer campaigns attribution tracking
You can also use [Dub Partners](https://dub.co/partners) to better [understand the performance of your influencer campaigns](/help/article/program-analytics) – not just the number of clicks, but also the number of signups/purchases.
You can then use the data to make data-driven decisions about which influencers to work with and how to better allocate your budget to maximize your ROI.
## Getting started with conversion tracking on Dub
To get started with conversion tracking on Dub, check out our [quickstart guide](/docs/quickstart/server).
# What is the Dub link builder?
Source: https://dub.co/help/article/dub-link-builder
Learn more about the Dub link builder, how to open it (with various shortcuts), and how to use it to create a short link.
Short links are the bread and butter of Dub. With Dub's link management platform, you can create short links and [QR codes](/help/article/custom-qr-codes) for your marketing campaigns and get [world-class analytics](/help/article/dub-analytics) on them.
At the center of Dub is the Dub link builder. This is where you'll find all the tools & features you need to create a short link on Dub.
![The Dub link builder]() ## Features of the Dub link builder
On the left half of the link builder, Dub offers a variety of advanced link features that you can use to create and manage your short links.
1. **Tag selector**: Organize your links with tags to make them easy to find. [Learn more](/help/article/how-to-use-tags).
2. **Custom link previews**: Customize how your link appears on social media with the help of AI to improve conversion rates [Learn more](/help/article/custom-link-previews).
3. **UTM Builder**: Add UTM parameters to your links. [Learn more](/help/article/utm-builder).
4. **Link Cloaking**: Mask your destination URL with your short link. [Learn more](/help/article/link-cloaking).
5. **Password Protection**: Protect your links with a password. [Learn more](/help/article/password-protected-links).
6. **Expiration Date**: Set an expiration date for your links. [Learn more](/help/article/link-expiration).
7. **Device Targeting**: Set a custom destination URL for iOS and Android devices. [Learn more](/help/article/device-targeting).
8. **Geo Targeting**: Redirect your users to different links based on their location. [Learn more](/help/article/geo-targeting).
9. **Search Engine Indexing**: Control how your links are indexed by search engines. [Learn more](/help/article/how-noindex-works).
10. **Comments**: Add comments to your links – for you and your team. [Learn more](/help/article/link-comments).
On the right half of the link builder, you get a live preview of how your short link will look on social media platforms like **X (formerly Twitter)**, **Facebook**, and **LinkedIn**.
## Keyboard shortcuts in the Dub link builder
The Dub link builder also comes with a variety of keyboard shortcuts to help you create links faster. Here's a list of all the keyboard shortcuts you can use:
| Shortcut | Action |
| -------- | ---------------------------------------------------------------------- |
| `D` | Open the domain selector |
| `T` | Open the tag selector |
| `Q` | Open the QR code modal |
| `L` | Open the [link preview](/help/article/custom-link-previews) modal |
| `U` | Open the [UTM builder](/help/article/utm-builder) |
| `E` | Open the [link expiration](/help/article/link-expiration) modal |
| `G` | Open the [geo/device targeting](/help/article/geo-targeting) modal |
| `P` | Open the [link password](/help/article/password-protected-links) modal |
| `K` | Toggle [link cloaking](/help/article/link-cloaking) |
| `S` | Toggle [search engine indexing](/help/article/how-noindex-works) |
| `A` | Open the advanced settings modal |
## How to open the Dub link builder
There are 3 ways to open the Dub link builder:
* 🐢 **Slowest**: Click on the "Create link" button on the dashboard.
* 🐇 **Faster**: Use the keyboard shortcut `c` to open the link builder.
* 🐅 **Fastest**: Just paste in a valid URL into the dashboard. This will automatically open the link builder and pre-fill the URL field.
## Link creation shortcuts on Dub
We also have a 2 nifty shortcuts that you can use to open the link builder from anywhere on the internet:
1. Enter `dub.new` in your browser. This will open the link builder in your [default Dub workspace](/help/article/how-to-change-default-workspace).
2. Prepend your short link domain in front of any URL. This will open the link builder in your [default Dub workspace](/help/article/how-to-change-default-workspace) with the URL and domain pre-filled.
# Dub Links Overview
Source: https://dub.co/help/article/dub-links
Learn more about Dub Links, what it can do for your business and what makes it different to other solutions.
Dub Links is the modern link management platform for modern marketing teams.
With Dub, you can [create short links](/help/article/how-to-create-link) using your own [custom domain](/help/article/how-to-add-custom-domain) and get [world-class analytics](/help/article/dub-analytics) on your links' performance.
Fun fact: The name **Dub** comes from the literal definition of the word
**"dub"** – which is to "give an unofficial name or nickname to something" (*a
là what Dub Links does with longer URLs*).
## What can I do with Dub Links?
If you are a marketer or a business owner, Dub has the perfect suite of features for you to better manage your marketing campaigns with short links:
## Features of the Dub link builder
On the left half of the link builder, Dub offers a variety of advanced link features that you can use to create and manage your short links.
1. **Tag selector**: Organize your links with tags to make them easy to find. [Learn more](/help/article/how-to-use-tags).
2. **Custom link previews**: Customize how your link appears on social media with the help of AI to improve conversion rates [Learn more](/help/article/custom-link-previews).
3. **UTM Builder**: Add UTM parameters to your links. [Learn more](/help/article/utm-builder).
4. **Link Cloaking**: Mask your destination URL with your short link. [Learn more](/help/article/link-cloaking).
5. **Password Protection**: Protect your links with a password. [Learn more](/help/article/password-protected-links).
6. **Expiration Date**: Set an expiration date for your links. [Learn more](/help/article/link-expiration).
7. **Device Targeting**: Set a custom destination URL for iOS and Android devices. [Learn more](/help/article/device-targeting).
8. **Geo Targeting**: Redirect your users to different links based on their location. [Learn more](/help/article/geo-targeting).
9. **Search Engine Indexing**: Control how your links are indexed by search engines. [Learn more](/help/article/how-noindex-works).
10. **Comments**: Add comments to your links – for you and your team. [Learn more](/help/article/link-comments).
On the right half of the link builder, you get a live preview of how your short link will look on social media platforms like **X (formerly Twitter)**, **Facebook**, and **LinkedIn**.
## Keyboard shortcuts in the Dub link builder
The Dub link builder also comes with a variety of keyboard shortcuts to help you create links faster. Here's a list of all the keyboard shortcuts you can use:
| Shortcut | Action |
| -------- | ---------------------------------------------------------------------- |
| `D` | Open the domain selector |
| `T` | Open the tag selector |
| `Q` | Open the QR code modal |
| `L` | Open the [link preview](/help/article/custom-link-previews) modal |
| `U` | Open the [UTM builder](/help/article/utm-builder) |
| `E` | Open the [link expiration](/help/article/link-expiration) modal |
| `G` | Open the [geo/device targeting](/help/article/geo-targeting) modal |
| `P` | Open the [link password](/help/article/password-protected-links) modal |
| `K` | Toggle [link cloaking](/help/article/link-cloaking) |
| `S` | Toggle [search engine indexing](/help/article/how-noindex-works) |
| `A` | Open the advanced settings modal |
## How to open the Dub link builder
There are 3 ways to open the Dub link builder:
* 🐢 **Slowest**: Click on the "Create link" button on the dashboard.
* 🐇 **Faster**: Use the keyboard shortcut `c` to open the link builder.
* 🐅 **Fastest**: Just paste in a valid URL into the dashboard. This will automatically open the link builder and pre-fill the URL field.
## Link creation shortcuts on Dub
We also have a 2 nifty shortcuts that you can use to open the link builder from anywhere on the internet:
1. Enter `dub.new` in your browser. This will open the link builder in your [default Dub workspace](/help/article/how-to-change-default-workspace).
2. Prepend your short link domain in front of any URL. This will open the link builder in your [default Dub workspace](/help/article/how-to-change-default-workspace) with the URL and domain pre-filled.
# Dub Links Overview
Source: https://dub.co/help/article/dub-links
Learn more about Dub Links, what it can do for your business and what makes it different to other solutions.
Dub Links is the modern link management platform for modern marketing teams.
With Dub, you can [create short links](/help/article/how-to-create-link) using your own [custom domain](/help/article/how-to-add-custom-domain) and get [world-class analytics](/help/article/dub-analytics) on your links' performance.
Fun fact: The name **Dub** comes from the literal definition of the word
**"dub"** – which is to "give an unofficial name or nickname to something" (*a
là what Dub Links does with longer URLs*).
## What can I do with Dub Links?
If you are a marketer or a business owner, Dub has the perfect suite of features for you to better manage your marketing campaigns with short links:
![The Dub link builder]() Our [link builder](/help/article/dub-link-builder) comes with features like:
* [UTM builder](/help/article/utm-builder)
* [Custom link previews](/help/article/custom-link-previews)
* [Device targeting](/help/article/device-targeting)
* [Geo targeting](/help/article/geo-targeting)
* [Password protection](/help/article/password-protected-links)
* [Expiration dates](/help/article/link-expiration)
* [Link cloaking](/help/article/link-cloaking)
On Dub, you can create short links with your own [custom domain](/help/article/how-to-add-custom-domain) – for [better brand recognition](https://dub.co/blog/custom-domains).
We also have one of the most generous custom domain limits in the industry – you can add up to 3 custom domains to your workspace for free, and even more with our [paid plans](https://dub.co/pricing).
* [**Pro plan**](https://dub.co/pricing): 10 domains
* [**Business plan**](https://dub.co/pricing): 40 domains
* [**Enterprise plan**](https://dub.co/enterprise): Unlimited domains
We provide you with [powerful analytics](/help/article/dub-analytics) for your links, including geolocation, device, browser, and referrer information.
Some of our analytics features include:
* [Timeseries analytics chart](/help/article/dub-analytics#1-time-series-analytics-chart)
* [Real-time events stream](/help/article/real-time-events-stream)
* [Exporting your analytics data](/help/article/how-to-export-analytics)
* ["Ask AI" feature](/help/article/dub-analytics#bonus-ask-ai-feature)
QR codes and short links are like peas in a pod. That's why we've built a [QR code generator](https://dub.co/tools/qr-code) right into Dub that lets you generate branded QR codes for your links.
Dub is built for teams. You can [invite your teammates](/help/article/how-to-invite-teammates) to your account for free and manage your links together.
On Dub [Enterprise](https://dub.co/enterprise), you can also set up [SAML/SSO and SCIM Directory Sync](/help/article/okta-saml) for greater security and control.
If you're planning to use Dub to create links programmatically, we have a powerful, [enterprise-grade API](/docs/api-reference/introduction) that allows you to do just that.
We also offer native SDKs for:
* [TypeScript](https://dub.co/solutions/typescript)
* [Python](https://dub.co/solutions/python)
* [Go](https://dub.co/solutions/go)
* [Ruby](https://dub.co/solutions/ruby)
Our API is used in production by engineering teams at companies like [Raycast](https://dub.co/customers/raycast), [Whop](https://whop.com), and [Midday](https://dub.co/customers/midday).
## Who uses Dub Links?
Dub Links is perfect for modern marketing teams that want a better link management platform for their marketing campaigns.
Here are some awesome companies that use Dub Links:
* Perplexity → [pplx.ai](https://pplx.ai)
* Vercel → [vercel.fyi](https://vercel.fyi)
* Raycast → [ray.so](https://ray.so)
* Clerk → [clerk.com](https://go.clerk.com)
* Framer → [framer.link](https://framer.link)
* Nuxt → [go.nuxt.com](https://go.nuxt.com)
* Prisma → [pris.ly](https://pris.ly)
* Tinybird → [tbrd.co](https://tbrd.co)
* Hashnode → [hshno.de](https://hshno.de)
* Cal.com → [go.cal.com](https://go.cal.com)
* Replicate → [replicate.fyi](https://replicate.fyi)
* Appwrite → [apwr.dev](https://apwr.dev)
* Attio → [attio.xyz](https://attio.xyz)
* Mux → [mux.link](https://mux.link)
* ETHGlobal → [ethglob.al](https://ethglob.al)
You can check out a full list of our customers on our [customers page](https://dub.co/customers).
## How is Dub Links different from other alternatives?
At Dub, we pride ourselves on having the best design & user experience out of all the link management platforms in the market. We've spent countless hours perfecting our product, and we're constantly improving it.
Our signature feature is the ability to [customize the social media cards](/help/article/custom-link-previews) for your links. This is a feature that no other link management platform has, and it's a game-changer for marketers who want to have full control over how their links look when shared on social media.
Dub also has the most generous free plan in the industry. With Dub's free tier, you can:
* [Create links](/help/article/how-to-create-link) with [custom domains](/help/article/how-to-add-custom-domain) (add up to 3 domains)
* Update your link destination however many times you want
* Get [advanced analytics](/help/article/dub-analytics) on your links's performance (including geolocation, device, browser, and referrer information)
Learn more about how we compare to other link management platforms:
* [Dub vs Bitly](https://dub.co/compare/bitly)
* [Dub vs Rebrandly](https://dub.co/compare/rebrandly)
* [Dub vs Short.io](https://dub.co/compare/short)
Start using Dub today by [creating a workspace](/help/article/what-is-a-workspace#how-to-create-a-workspace)!
# Why are my dub.sh links not working?
Source: https://dub.co/help/article/dub-links-not-working
Our default dub.sh links are occasionally blocked by certain web browsers and ISPs, which causes them not to work. Learn more about why, and how to fix it.
Occasionally, `dub.sh` short links are blocked by web browsers and Internet Service Providers (ISPs). When that happens, you might run into the following errors when you try to visit a `dub.sh` link:
## Error 1: "Your connection is not private" (Google Chrome)
Here's an example of a "Your connection is not private" warning in Google Chrome:
Our [link builder](/help/article/dub-link-builder) comes with features like:
* [UTM builder](/help/article/utm-builder)
* [Custom link previews](/help/article/custom-link-previews)
* [Device targeting](/help/article/device-targeting)
* [Geo targeting](/help/article/geo-targeting)
* [Password protection](/help/article/password-protected-links)
* [Expiration dates](/help/article/link-expiration)
* [Link cloaking](/help/article/link-cloaking)
On Dub, you can create short links with your own [custom domain](/help/article/how-to-add-custom-domain) – for [better brand recognition](https://dub.co/blog/custom-domains).
We also have one of the most generous custom domain limits in the industry – you can add up to 3 custom domains to your workspace for free, and even more with our [paid plans](https://dub.co/pricing).
* [**Pro plan**](https://dub.co/pricing): 10 domains
* [**Business plan**](https://dub.co/pricing): 40 domains
* [**Enterprise plan**](https://dub.co/enterprise): Unlimited domains
We provide you with [powerful analytics](/help/article/dub-analytics) for your links, including geolocation, device, browser, and referrer information.
Some of our analytics features include:
* [Timeseries analytics chart](/help/article/dub-analytics#1-time-series-analytics-chart)
* [Real-time events stream](/help/article/real-time-events-stream)
* [Exporting your analytics data](/help/article/how-to-export-analytics)
* ["Ask AI" feature](/help/article/dub-analytics#bonus-ask-ai-feature)
QR codes and short links are like peas in a pod. That's why we've built a [QR code generator](https://dub.co/tools/qr-code) right into Dub that lets you generate branded QR codes for your links.
Dub is built for teams. You can [invite your teammates](/help/article/how-to-invite-teammates) to your account for free and manage your links together.
On Dub [Enterprise](https://dub.co/enterprise), you can also set up [SAML/SSO and SCIM Directory Sync](/help/article/okta-saml) for greater security and control.
If you're planning to use Dub to create links programmatically, we have a powerful, [enterprise-grade API](/docs/api-reference/introduction) that allows you to do just that.
We also offer native SDKs for:
* [TypeScript](https://dub.co/solutions/typescript)
* [Python](https://dub.co/solutions/python)
* [Go](https://dub.co/solutions/go)
* [Ruby](https://dub.co/solutions/ruby)
Our API is used in production by engineering teams at companies like [Raycast](https://dub.co/customers/raycast), [Whop](https://whop.com), and [Midday](https://dub.co/customers/midday).
## Who uses Dub Links?
Dub Links is perfect for modern marketing teams that want a better link management platform for their marketing campaigns.
Here are some awesome companies that use Dub Links:
* Perplexity → [pplx.ai](https://pplx.ai)
* Vercel → [vercel.fyi](https://vercel.fyi)
* Raycast → [ray.so](https://ray.so)
* Clerk → [clerk.com](https://go.clerk.com)
* Framer → [framer.link](https://framer.link)
* Nuxt → [go.nuxt.com](https://go.nuxt.com)
* Prisma → [pris.ly](https://pris.ly)
* Tinybird → [tbrd.co](https://tbrd.co)
* Hashnode → [hshno.de](https://hshno.de)
* Cal.com → [go.cal.com](https://go.cal.com)
* Replicate → [replicate.fyi](https://replicate.fyi)
* Appwrite → [apwr.dev](https://apwr.dev)
* Attio → [attio.xyz](https://attio.xyz)
* Mux → [mux.link](https://mux.link)
* ETHGlobal → [ethglob.al](https://ethglob.al)
You can check out a full list of our customers on our [customers page](https://dub.co/customers).
## How is Dub Links different from other alternatives?
At Dub, we pride ourselves on having the best design & user experience out of all the link management platforms in the market. We've spent countless hours perfecting our product, and we're constantly improving it.
Our signature feature is the ability to [customize the social media cards](/help/article/custom-link-previews) for your links. This is a feature that no other link management platform has, and it's a game-changer for marketers who want to have full control over how their links look when shared on social media.
Dub also has the most generous free plan in the industry. With Dub's free tier, you can:
* [Create links](/help/article/how-to-create-link) with [custom domains](/help/article/how-to-add-custom-domain) (add up to 3 domains)
* Update your link destination however many times you want
* Get [advanced analytics](/help/article/dub-analytics) on your links's performance (including geolocation, device, browser, and referrer information)
Learn more about how we compare to other link management platforms:
* [Dub vs Bitly](https://dub.co/compare/bitly)
* [Dub vs Rebrandly](https://dub.co/compare/rebrandly)
* [Dub vs Short.io](https://dub.co/compare/short)
Start using Dub today by [creating a workspace](/help/article/what-is-a-workspace#how-to-create-a-workspace)!
# Why are my dub.sh links not working?
Source: https://dub.co/help/article/dub-links-not-working
Our default dub.sh links are occasionally blocked by certain web browsers and ISPs, which causes them not to work. Learn more about why, and how to fix it.
Occasionally, `dub.sh` short links are blocked by web browsers and Internet Service Providers (ISPs). When that happens, you might run into the following errors when you try to visit a `dub.sh` link:
## Error 1: "Your connection is not private" (Google Chrome)
Here's an example of a "Your connection is not private" warning in Google Chrome:
!['Your connection is not private' warning]() ## Error 2: "This site has been reported as unsafe" (Microsoft Defender)
Here's another example of a "This site has been reported as unsafe" warning in Microsoft Defender:
## Error 2: "This site has been reported as unsafe" (Microsoft Defender)
Here's another example of a "This site has been reported as unsafe" warning in Microsoft Defender:
![Microsoft Defender's 'This site has been reported as unsafe' warning]() ## Error 3: "This site cannot provide a secure connection" (ERR\_SSL\_PROTOCOL\_ERROR)
And sometimes, certain Internet Service Providers (ISPs) will also block `dub.sh` links. This is what you might see when you try to visit a `dub.sh` link if it's blocked by your ISP:
## Error 3: "This site cannot provide a secure connection" (ERR\_SSL\_PROTOCOL\_ERROR)
And sometimes, certain Internet Service Providers (ISPs) will also block `dub.sh` links. This is what you might see when you try to visit a `dub.sh` link if it's blocked by your ISP:
!['This site cannot provide a secure connection' error]() ## Why does this happen?
This is because `dub.sh` links are the default short link on Dub, and can sometimes be used by malicious actors to hide the true destination of a link – which can be a phishing site, or a site that downloads malware onto your computer.
As an unfortunate side effect, this means that sometimes, legitimate `dub.sh` links are also blocked by certain web browsers and ISPs, causing them not to work.
## Solution 1: Petition your ISP or browser antivirus software
One way to fix it is by sending a petition to your [Internet Service Provider (ISP)](https://support.google.com/googlenest/answer/6246513) or browser antivirus software to unblock the link. Here's an example verbiage you can use:
> Hi there,
>
> I would like to petition for the dub.sh domain to be unblocked. Dub ([https://dub.co](https://dub.co)) is a link management platform (similar to Bitly) that I use to share links with my friends and family. It is not a malicious site.
>
> Occasionally, there might be malicious links that are created on Dub, but Dub has processes in place that actively monitors and removes these links. I have also personally reported malicious links to Dub, and they have been removed within 24 hours.
>
> If you do discover any malicious links, you can report them here: [https://dub.co/legal/abuse](https://dub.co/legal/abuse)
>
> Thank you!
This is the most effective way to unblock the link, but it can take some time for the request to be processed.
## Solution 2: Use a custom domain
Alternatively, you can also [use Dub with your custom domain](/help/article/how-to-add-custom-domain), instead of the default `dub.sh` domain.
This will ensure that your links are never blocked by web browsers, and also give your links a more professional, branded look. Custom domains are also more trustworthy and can lead to **30% higher click-through rates**.
Learn more about [why you should use a custom domain](https://dub.co/blog/custom-domains) and how to [choose the right one](/help/article/choosing-a-custom-domain).
We also launched [1-year free .link domains on all paid plans](https://dub.co/blog/introducing-free-domains) recently that you can use for your short links:
## Why does this happen?
This is because `dub.sh` links are the default short link on Dub, and can sometimes be used by malicious actors to hide the true destination of a link – which can be a phishing site, or a site that downloads malware onto your computer.
As an unfortunate side effect, this means that sometimes, legitimate `dub.sh` links are also blocked by certain web browsers and ISPs, causing them not to work.
## Solution 1: Petition your ISP or browser antivirus software
One way to fix it is by sending a petition to your [Internet Service Provider (ISP)](https://support.google.com/googlenest/answer/6246513) or browser antivirus software to unblock the link. Here's an example verbiage you can use:
> Hi there,
>
> I would like to petition for the dub.sh domain to be unblocked. Dub ([https://dub.co](https://dub.co)) is a link management platform (similar to Bitly) that I use to share links with my friends and family. It is not a malicious site.
>
> Occasionally, there might be malicious links that are created on Dub, but Dub has processes in place that actively monitors and removes these links. I have also personally reported malicious links to Dub, and they have been removed within 24 hours.
>
> If you do discover any malicious links, you can report them here: [https://dub.co/legal/abuse](https://dub.co/legal/abuse)
>
> Thank you!
This is the most effective way to unblock the link, but it can take some time for the request to be processed.
## Solution 2: Use a custom domain
Alternatively, you can also [use Dub with your custom domain](/help/article/how-to-add-custom-domain), instead of the default `dub.sh` domain.
This will ensure that your links are never blocked by web browsers, and also give your links a more professional, branded look. Custom domains are also more trustworthy and can lead to **30% higher click-through rates**.
Learn more about [why you should use a custom domain](https://dub.co/blog/custom-domains) and how to [choose the right one](/help/article/choosing-a-custom-domain).
We also launched [1-year free .link domains on all paid plans](https://dub.co/blog/introducing-free-domains) recently that you can use for your short links:
![Free .link domain]() # Dub Partners Overview
Source: https://dub.co/help/article/dub-partners
Learn how you can use Dub to recruit, manage, and pay out your affiliates, publishers, influencers, UGC creators, user referrals, and more.
This feature is only available on [Business plans and
above](https://dub.co/pricing/partners).
In today's day and age, especially with the rise of AI, the best ideas and products are no longer sufficient to rise above the competition and become a category leader.
What works is having a powerful distribution network that can produce consistent, repeatable, and profitable results – ideally on autopilot.
A good example of this is a product-led partner program – think Dropbox's famous "Refer a friend" program, or Framer's beloved partner program that generates [close to \$1M in payouts](https://dub.co/customers/framer) every month.
**This is where [Dub Partners](https://dub.co/partners) comes in.**
# Dub Partners Overview
Source: https://dub.co/help/article/dub-partners
Learn how you can use Dub to recruit, manage, and pay out your affiliates, publishers, influencers, UGC creators, user referrals, and more.
This feature is only available on [Business plans and
above](https://dub.co/pricing/partners).
In today's day and age, especially with the rise of AI, the best ideas and products are no longer sufficient to rise above the competition and become a category leader.
What works is having a powerful distribution network that can produce consistent, repeatable, and profitable results – ideally on autopilot.
A good example of this is a product-led partner program – think Dropbox's famous "Refer a friend" program, or Framer's beloved partner program that generates [close to \$1M in payouts](https://dub.co/customers/framer) every month.
**This is where [Dub Partners](https://dub.co/partners) comes in.**
![Dub Partners]() With Dub Partners, you can [recruit](/help/article/inviting-partners), [manage](/help/article/managing-program-partners), and [pay out](/help/article/partner-payouts) your partners – whether they're affiliates, publishers, influencers, UGC creators, user referrals, or more.
## Dub Partners platform tour
Here's a quick [9-min video](https://supercut.ai/share/dub/I85bqEKFm5aDaN_DC1hGoZ) that walks you through the key features of Dub Partners and how you can use it to scale your partner revenue:
With Dub Partners, you can [recruit](/help/article/inviting-partners), [manage](/help/article/managing-program-partners), and [pay out](/help/article/partner-payouts) your partners – whether they're affiliates, publishers, influencers, UGC creators, user referrals, or more.
## Dub Partners platform tour
Here's a quick [9-min video](https://supercut.ai/share/dub/I85bqEKFm5aDaN_DC1hGoZ) that walks you through the key features of Dub Partners and how you can use it to scale your partner revenue:
## Dub Partners features
Here are some of Dub Partners' key features:
1. [Real-time analytics + reliable attribution](#real-time-reliable-attribution)
2. [Powerful reward structures (CPA/rev-share, CPL, CPC) with flexible conditions](#flexible-reward-structures)
3. [Social metrics bounties for influencer / UGC campaigns](#social-metrics-bounties)
4. [1-click global payouts + tax compliance](#global-payouts-%2B-tax-compliance)
5. [Risk monitoring (paid ads, self-referrals, etc.)](#risk-monitoring)
6. [Dual-sided incentives (via referral links / discount codes)](#dual-sided-incentives)
7. [Generate branded landing pages / application forms with AI](#landing-page-%2B-application-forms)
8. [Embed a referral dashboard directly within your app](#embedded-referral-dashboard)
### Real-time, reliable attribution
Built on top of Dub's [enterprise-grade attribution infrastructure](/docs/concepts/attribution), Dub Partners gives both you and your partners real-time visibility into the performance of your partner program, with the ability to:
* View [partner group](/help/article/partner-groups)-level analytics (conversion rates, revenue, etc.)
* Measure [individual partner performance](https://dub.co/changelog/new-partner-stats) (EPC, LTV, ROAS)
* Create custom reports with [advanced analytics filtering](/help/article/dub-analytics#advanced-analytics-filters)
![Time-series chart]() On top of that, Dub's [best-in-class Stripe integration](https://dub.co/integrations/stripe) (which you can [install in just a few clicks](/docs/integrations/stripe)) automatically tracks:
* sale (both one-time and recurring)
* [free trial](/docs/integrations/stripe#tracking-free-trials) lead events
* [refund events](/docs/conversions/sales/refunds)
...and reconciles them with your [partner commissions](/help/article/partner-commissions) – no manual calculations required.
### Flexible reward structures
With Dub Partners, you can create [flexible reward structures](/help/article/partner-rewards) to drive partner engagement and revenue:
| Reward type | Description |
| ----------------- | ------------------------------------------------------------------------------------------------------------------------------------------------------------------------------- |
| **CPA/rev-share** | This is the most common reward type, where you reward partners for driving sales to your product either via a rev-share or fixed-price commission. |
| **CPL** | A more effective alternative to pay-per-click, where you reward partners for [qualified leads](/docs/conversions/leads/deferred) (e.g. demo requests, free trial signups, etc.) |
| **CPC** | Rewarding partners for driving traffic to your product – similar to how Google Ads' pay-per-click works. |
On top of that, you can also set geo-specific, product-specific, or subscription-specific [reward conditions](/help/article/partner-rewards#adding-reward-conditions):
* [Geo-specific rewards](/help/article/partner-rewards#geo-specific) (e.g. higher rewards for sales and leads from a specific country)
* [Product-specific rewards](/help/article/partner-rewards#product-spotlight) (e.g. higher rewards for sales of specific products)
* [Partner performance tiers](/help/article/partner-rewards#partner-performance-tiers) (e.g. higher rewards for partners with more than 100 conversions)
* [Staggered reward durations](/help/article/partner-rewards#staggered-reward-durations) (e.g. higher rewards for the first 12 months, then a lower reward for the rest of the customer's lifetime)
* [Sale amount modifiers](/help/article/partner-rewards#sale-amount-modifiers) (e.g. higher rewards for sales over a specific amount)
Looking to set up non-monetary rewards for your partners (e.g. free credits,
free months)? [Check out our guide here](/help/article/non-monetary-rewards).
### Social metrics bounties
One of Dub's unique features is the ability to [reward partners for creating viral social content](/help/article/program-bounties#social-metrics) about your product via a CPM model.
Some examples include:
* Pay \$1,000 if your X/Twitter post gets 1M views
* Pay \$500 per 10K views on YouTube, up to 100K views
Aside from that, you can also reward partners a flat rate via [submission bounties](/help/article/program-bounties#manual-submission), as well as based on their performance on Dub via [performance bounties](/help/article/program-bounties#performance-bounties).
### Global payouts + tax compliance
Dub Partners supports [1-click payouts](/help/article/partner-payouts) to your partners worldwide.
If you're running a partner program with hundreds of partners, instead of manually sending payouts to each partner, you can use Dub to pay your partners in one click.
We also provide invoices for each payout, so you can easily track your spend and reconcile your payments.
For US-based partners, Dub automatically handles [tax compliance](/help/article/partner-payouts#tax-compliance) by collecting W-9 forms and sending out 1099-NEC forms to individuals or entities that received \$600 or more in payments for a given fiscal year.
Here's the list of supported payout countries on Dub:
### Risk monitoring
As your program grows, it's critical to safeguard your revenue by detecting and preventing fraudulent activity. Dub comes with several risk monitoring mechanisms to help you catch and take action on any suspicious activity:
* [Paid traffic detection](/help/article/risk-monitoring#paid-traffic)
* Self-referrals / matching customer email
* Duplicate partner accounts / payout methods
* Cross-program ban
Learn more about how [risk monitoring works](/help/article/risk-monitoring) on Dub.
### Dual-sided incentives
With Dub, you can create dual-sided incentives for your partners to give special discounts to their users – whether they're signing up via a [referral link](/help/article/dual-sided-incentives#option-1-direct-link-based-discounts-recommended) or a [discount code](/help/article/dual-sided-incentives#option-2-using-stripe-promo-codes-no-code-required).
Some examples include:
* 25% discount for the first 12 months
* 30% lifetime discount
* \$50 one-off discount
This can drive powerful word-of-mouth growth as partners are more likely to share their link if it gives their audience additional discounts, and their users are more likely to click on their links if they're getting a special deal.
Learn more about [how to create dual-sided incentives](/help/article/dual-sided-incentives) for your partner program.
### Landing page + application forms
You can also use our intelligent AI landing page generator to create a compelling, [branded landing page](/help/article/program-landing-page) for your program to drive partner signups.
You can also create customized [application forms](/help/article/program-application-form) for your partners to collect the information you need to review their applications.
### Embedded referral dashboard
One of the unique features of Dub is the ability to create an embedded referral dashboard directly inside your application.
This allows you to seamlessly onboard your users to your referral program, without them needing to leave your app and sign up on a third-party platform.
[Read the guide](/docs/partners/embedded-referrals) on how to set this up, or check out this open-source example app that shows the embedded referral dashboard in action:
## Get started
With Dub, you can build a powerful, scalable word-of-mouth flywheel by incentivizing both your users and external partners to help you grow.
To get started with Dub, follow our [program quickstart](/help/article/setting-up-your-program) and [conversion tracking](/docs/quickstart/server) guides.
Step-by-step guide from zero to a live partner program
Track conversions and attribute sign-ups and purchases
## Related articles
Organize and filter partners with flexible internal labels
Segment partners by rewards, discounts, and performance
Add partners via dashboard, API, or application form
Create flexible reward structures for partners
Enroll partners directly from wihin your app
# Sending marketing and transactional emails to your partners
Source: https://dub.co/help/article/email-campaigns
Learn how to craft and send marketing and transactional emails to your partners to increase partner engagement and drive conversions.
This feature is only available on [Advanced plans and
above](https://dub.co/pricing/partners).
On Dub, you can send marketing and transactional emails to your partners to boost partner engagement and increase conversions.
In this guide, we'll learn how to set up your email domain on Dub and start sending emails to your partners.
Sending partner emails with your own domain (e.g. `partners.acme.com`) is not
only good for branding, but will also drastically improve deliverability and
help avoid the dreaded spam folder.
## Email domain setup
To send emails to your partners in Dub, you’ll need to connect an email domain that you own. We recommend using a subdomain (e.g. `partners.acme.com`) to improve trust and deliverability.
To set up your email domain, go to the "Email domains" tab in your workspace domain settings: [app.dub.co/settings/domains/email](https://app.dub.co/settings/domains/email)
On top of that, Dub's [best-in-class Stripe integration](https://dub.co/integrations/stripe) (which you can [install in just a few clicks](/docs/integrations/stripe)) automatically tracks:
* sale (both one-time and recurring)
* [free trial](/docs/integrations/stripe#tracking-free-trials) lead events
* [refund events](/docs/conversions/sales/refunds)
...and reconciles them with your [partner commissions](/help/article/partner-commissions) – no manual calculations required.
### Flexible reward structures
With Dub Partners, you can create [flexible reward structures](/help/article/partner-rewards) to drive partner engagement and revenue:
| Reward type | Description |
| ----------------- | ------------------------------------------------------------------------------------------------------------------------------------------------------------------------------- |
| **CPA/rev-share** | This is the most common reward type, where you reward partners for driving sales to your product either via a rev-share or fixed-price commission. |
| **CPL** | A more effective alternative to pay-per-click, where you reward partners for [qualified leads](/docs/conversions/leads/deferred) (e.g. demo requests, free trial signups, etc.) |
| **CPC** | Rewarding partners for driving traffic to your product – similar to how Google Ads' pay-per-click works. |
On top of that, you can also set geo-specific, product-specific, or subscription-specific [reward conditions](/help/article/partner-rewards#adding-reward-conditions):
* [Geo-specific rewards](/help/article/partner-rewards#geo-specific) (e.g. higher rewards for sales and leads from a specific country)
* [Product-specific rewards](/help/article/partner-rewards#product-spotlight) (e.g. higher rewards for sales of specific products)
* [Partner performance tiers](/help/article/partner-rewards#partner-performance-tiers) (e.g. higher rewards for partners with more than 100 conversions)
* [Staggered reward durations](/help/article/partner-rewards#staggered-reward-durations) (e.g. higher rewards for the first 12 months, then a lower reward for the rest of the customer's lifetime)
* [Sale amount modifiers](/help/article/partner-rewards#sale-amount-modifiers) (e.g. higher rewards for sales over a specific amount)
Looking to set up non-monetary rewards for your partners (e.g. free credits,
free months)? [Check out our guide here](/help/article/non-monetary-rewards).
### Social metrics bounties
One of Dub's unique features is the ability to [reward partners for creating viral social content](/help/article/program-bounties#social-metrics) about your product via a CPM model.
Some examples include:
* Pay \$1,000 if your X/Twitter post gets 1M views
* Pay \$500 per 10K views on YouTube, up to 100K views
Aside from that, you can also reward partners a flat rate via [submission bounties](/help/article/program-bounties#manual-submission), as well as based on their performance on Dub via [performance bounties](/help/article/program-bounties#performance-bounties).
### Global payouts + tax compliance
Dub Partners supports [1-click payouts](/help/article/partner-payouts) to your partners worldwide.
If you're running a partner program with hundreds of partners, instead of manually sending payouts to each partner, you can use Dub to pay your partners in one click.
We also provide invoices for each payout, so you can easily track your spend and reconcile your payments.
For US-based partners, Dub automatically handles [tax compliance](/help/article/partner-payouts#tax-compliance) by collecting W-9 forms and sending out 1099-NEC forms to individuals or entities that received \$600 or more in payments for a given fiscal year.
Here's the list of supported payout countries on Dub:
### Risk monitoring
As your program grows, it's critical to safeguard your revenue by detecting and preventing fraudulent activity. Dub comes with several risk monitoring mechanisms to help you catch and take action on any suspicious activity:
* [Paid traffic detection](/help/article/risk-monitoring#paid-traffic)
* Self-referrals / matching customer email
* Duplicate partner accounts / payout methods
* Cross-program ban
Learn more about how [risk monitoring works](/help/article/risk-monitoring) on Dub.
### Dual-sided incentives
With Dub, you can create dual-sided incentives for your partners to give special discounts to their users – whether they're signing up via a [referral link](/help/article/dual-sided-incentives#option-1-direct-link-based-discounts-recommended) or a [discount code](/help/article/dual-sided-incentives#option-2-using-stripe-promo-codes-no-code-required).
Some examples include:
* 25% discount for the first 12 months
* 30% lifetime discount
* \$50 one-off discount
This can drive powerful word-of-mouth growth as partners are more likely to share their link if it gives their audience additional discounts, and their users are more likely to click on their links if they're getting a special deal.
Learn more about [how to create dual-sided incentives](/help/article/dual-sided-incentives) for your partner program.
### Landing page + application forms
You can also use our intelligent AI landing page generator to create a compelling, [branded landing page](/help/article/program-landing-page) for your program to drive partner signups.
You can also create customized [application forms](/help/article/program-application-form) for your partners to collect the information you need to review their applications.
### Embedded referral dashboard
One of the unique features of Dub is the ability to create an embedded referral dashboard directly inside your application.
This allows you to seamlessly onboard your users to your referral program, without them needing to leave your app and sign up on a third-party platform.
[Read the guide](/docs/partners/embedded-referrals) on how to set this up, or check out this open-source example app that shows the embedded referral dashboard in action:
## Get started
With Dub, you can build a powerful, scalable word-of-mouth flywheel by incentivizing both your users and external partners to help you grow.
To get started with Dub, follow our [program quickstart](/help/article/setting-up-your-program) and [conversion tracking](/docs/quickstart/server) guides.
Step-by-step guide from zero to a live partner program
Track conversions and attribute sign-ups and purchases
## Related articles
Organize and filter partners with flexible internal labels
Segment partners by rewards, discounts, and performance
Add partners via dashboard, API, or application form
Create flexible reward structures for partners
Enroll partners directly from wihin your app
# Sending marketing and transactional emails to your partners
Source: https://dub.co/help/article/email-campaigns
Learn how to craft and send marketing and transactional emails to your partners to increase partner engagement and drive conversions.
This feature is only available on [Advanced plans and
above](https://dub.co/pricing/partners).
On Dub, you can send marketing and transactional emails to your partners to boost partner engagement and increase conversions.
In this guide, we'll learn how to set up your email domain on Dub and start sending emails to your partners.
Sending partner emails with your own domain (e.g. `partners.acme.com`) is not
only good for branding, but will also drastically improve deliverability and
help avoid the dreaded spam folder.
## Email domain setup
To send emails to your partners in Dub, you’ll need to connect an email domain that you own. We recommend using a subdomain (e.g. `partners.acme.com`) to improve trust and deliverability.
To set up your email domain, go to the "Email domains" tab in your workspace domain settings: [app.dub.co/settings/domains/email](https://app.dub.co/settings/domains/email)
![Email domains]() Click **Add domain**, and enter the domain you want to send emails from.
Click **Add domain**, and enter the domain you want to send emails from.
![Add domain modal]() You’ll receive DNS setup instructions and values to connect the domain. A **DMARC** record will also be provided — we strongly recommend adding it to help prevent email spoofing.
You’ll receive DNS setup instructions and values to connect the domain. A **DMARC** record will also be provided — we strongly recommend adding it to help prevent email spoofing.
![DNS records]() While verifying your domain, you can still create and plan emails, but they won’t be sent until the domain is fully connected and active.
Once the connection is complete, the status will update to **Active**, and you’ll be ready to send partner emails.
While verifying your domain, you can still create and plan emails, but they won’t be sent until the domain is fully connected and active.
Once the connection is complete, the status will update to **Active**, and you’ll be ready to send partner emails.
![Active email domain]() ### Warming up your email domain
“Warming up” your domain means gradually increasing your email-sending volume to build trust and improve deliverability. The goal is to send consistently without sudden spikes that might look suspicious to inbox providers.
Any time you start using a new domain or expect a large increase in sending volume, you should warm up your domain. A thoughtful warm-up plan helps prevent greylisting, throttling, and spam filtering, while building a solid sender reputation.
Keep an eye on your [bounce rate](#email-analytics), as it should stay below **4%**. If it rises above that, slow down your sending and review the cause.
Example warm-up plan:
1. Add your custom domain and start sending **transactional** emails to warm it up.
2. After 2–3 days, send a small **marketing** campaign to your smallest group (e.g., “VIP Group”), then a slightly larger one (“Silver Group”).
3. Once your domain is fully warmed up, you can send marketing campaigns regularly to all groups (e.g., “Default Group”).
## Where to find email campaigns
In your partner program's navigation, click **Email Campaigns** under the **Engagement** section.
### Warming up your email domain
“Warming up” your domain means gradually increasing your email-sending volume to build trust and improve deliverability. The goal is to send consistently without sudden spikes that might look suspicious to inbox providers.
Any time you start using a new domain or expect a large increase in sending volume, you should warm up your domain. A thoughtful warm-up plan helps prevent greylisting, throttling, and spam filtering, while building a solid sender reputation.
Keep an eye on your [bounce rate](#email-analytics), as it should stay below **4%**. If it rises above that, slow down your sending and review the cause.
Example warm-up plan:
1. Add your custom domain and start sending **transactional** emails to warm it up.
2. After 2–3 days, send a small **marketing** campaign to your smallest group (e.g., “VIP Group”), then a slightly larger one (“Silver Group”).
3. Once your domain is fully warmed up, you can send marketing campaigns regularly to all groups (e.g., “Default Group”).
## Where to find email campaigns
In your partner program's navigation, click **Email Campaigns** under the **Engagement** section.
![Email location]() ## Creating a new campaign
Click **Create Campaign** in the top-right corner, then select the type of email you want to send.
## Creating a new campaign
Click **Create Campaign** in the top-right corner, then select the type of email you want to send.
![Create campaign]() ### Marketing
Marketing emails are one-off messages you send manually. They're great for announcements, product updates, and promotions.
**Examples**:
* “Introducing our newest feature”
* “Black Friday / Cyber Monday promotion”
* “Check out our latest blog post or promo video”
### Transactional
Transactional emails are automated messages triggered by specific partner actions – like joining your program, reaching a milestone, or staying active for a certain period.
**Examples:**
* “Welcome to the program! Here’s how to start earning.”
* “Congrats on your first conversion — here’s how to reach your next 10.”
* “You’ve crossed \$10,000 in commissions! You’re now among our top earners.”
## Email builder
Both Marketing and Transactional emails include:
* **Name**: Internal name of your campaign
* **From**: The address the email will be sent from
* **To**: Choose specific partner groups or send to All Groups
* **Subject**: The subject line of the email
* **Preview**: The short text shown next to or below the subject line in the recipient’s inbox
* **Body:** The main content of your email — include text, images, or links
### Marketing fields
For your marketing campaigns, select the date and time for when you want the email to be sent. This is helpful when planning email campaigns for the future.
### Marketing
Marketing emails are one-off messages you send manually. They're great for announcements, product updates, and promotions.
**Examples**:
* “Introducing our newest feature”
* “Black Friday / Cyber Monday promotion”
* “Check out our latest blog post or promo video”
### Transactional
Transactional emails are automated messages triggered by specific partner actions – like joining your program, reaching a milestone, or staying active for a certain period.
**Examples:**
* “Welcome to the program! Here’s how to start earning.”
* “Congrats on your first conversion — here’s how to reach your next 10.”
* “You’ve crossed \$10,000 in commissions! You’re now among our top earners.”
## Email builder
Both Marketing and Transactional emails include:
* **Name**: Internal name of your campaign
* **From**: The address the email will be sent from
* **To**: Choose specific partner groups or send to All Groups
* **Subject**: The subject line of the email
* **Preview**: The short text shown next to or below the subject line in the recipient’s inbox
* **Body:** The main content of your email — include text, images, or links
### Marketing fields
For your marketing campaigns, select the date and time for when you want the email to be sent. This is helpful when planning email campaigns for the future.
![Marketing fields]() ### Transactional fields
Transactional campaigns include trigger settings instead of a date selector since they send automatically based on partner activity.
### Transactional fields
Transactional campaigns include trigger settings instead of a date selector since they send automatically based on partner activity.
![Transactional fields]() | Logic | Description |
| ------------------- | ------------------------------------------------------------------------ |
| Joins the program | Sends an email when a partner enrolls in your program |
| Enrollment duration | Sends an email when a partner has been enrolled for a set number of days |
| Total leads | Sends an email when a partner reaches a specific number of leads |
| Total conversions | Sends an email when a partner reaches a specific number of conversions |
| Total revenue | Sends an email when a partner earns a specific amount in revenue |
| Total commissions | Sends an email when a partner earns a specific amount in commissions |
### Content types
The email builder supports a wide variety of styling and content, including markdown support. In the control area above the content, you can use these buttons to change the styling of the content or add partner variables using the `@` button.
| Logic | Description |
| ------------------- | ------------------------------------------------------------------------ |
| Joins the program | Sends an email when a partner enrolls in your program |
| Enrollment duration | Sends an email when a partner has been enrolled for a set number of days |
| Total leads | Sends an email when a partner reaches a specific number of leads |
| Total conversions | Sends an email when a partner reaches a specific number of conversions |
| Total revenue | Sends an email when a partner earns a specific amount in revenue |
| Total commissions | Sends an email when a partner earns a specific amount in commissions |
### Content types
The email builder supports a wide variety of styling and content, including markdown support. In the control area above the content, you can use these buttons to change the styling of the content or add partner variables using the `@` button.
![Email styles]() As you're creating content, you can use markdown for the following content styles and types:
| Type | Markdown |
| ----------------- | -------------------------------------------- |
| Bold | `**Bold text**` |
| Italic | `*italic text*` |
| Inline Hyperlinks | `[Dub](https://dub.co)` |
| Bulleted lists | `1. First item` `2. Second item` |
| Ordered lists | `- First item` `- Second item` |
| Headings | `# Heading level 1` and `## Heading level 2` |
| Partner variables | `@PartnerName` and `@PartnerEmail` |
## Email previews
Before launching a campaign, you can send a test version to yourself or teammates for review. Click the `⋮` in the top-right corner and select **Send Preview**. You can enter multiple email addresses separated by commas.
As you're creating content, you can use markdown for the following content styles and types:
| Type | Markdown |
| ----------------- | -------------------------------------------- |
| Bold | `**Bold text**` |
| Italic | `*italic text*` |
| Inline Hyperlinks | `[Dub](https://dub.co)` |
| Bulleted lists | `1. First item` `2. Second item` |
| Ordered lists | `- First item` `- Second item` |
| Headings | `# Heading level 1` and `## Heading level 2` |
| Partner variables | `@PartnerName` and `@PartnerEmail` |
## Email previews
Before launching a campaign, you can send a test version to yourself or teammates for review. Click the `⋮` in the top-right corner and select **Send Preview**. You can enter multiple email addresses separated by commas.
![Preview email]() ## Email analytics
After sending a Marketing email or setting up a Transactional email, click the campaign to open its analytics view.
You’ll see key metrics like **delivered**, **bounced**, and **opened** rates, along with a list of which partners opened the email. This is helpful to measure engagement and performance.
## Email analytics
After sending a Marketing email or setting up a Transactional email, click the campaign to open its analytics view.
You’ll see key metrics like **delivered**, **bounced**, and **opened** rates, along with a list of which partners opened the email. This is helpful to measure engagement and performance.
![Email metrics]() ## Partner replies
When a partner replies to any email you send through Dub, their message is always delivered to the support email address you set when creating your program. You can also view or update that address in your [resources page](/help/article/program-resources).
This means that even if you change your sending domain later, all partner replies will continue to arrive in the same inbox.
# How to filter analytics by folders
Source: https://dub.co/help/article/filter-analytics-by-folders
Learn how to create powerful campaign-specific reports for your links with our folders feature.
This feature is only available on [Pro plans and
above](https://dub.co/pricing).
On Dub, you can filter analytics by [folders](/help/article/link-folders). This allows you to create powerful campaign-specific reports for your links.
For example, you're using folders to group your affiliate links and SMS marketing links, and want to see how each of those campaigns are performing.
You can filter the analytics by each of those folders and get a real-time dashboard of their clicks and [conversion analytics](/help/article/dub-conversions).
***
Before you can filter analytics by folders, you need to [create a folder](/help/article/link-folders#creating-a-folder) and [add links to it](/help/article/link-folders#adding-links-to-a-folder).
Then, as your links start accruing clicks, you will be able to filter your analytics by folders.
In the [Analytics tab](https://app.dub.co/analytics) of your Dub workspace, click on the **Filter** button to open the filter dropdown:
## Partner replies
When a partner replies to any email you send through Dub, their message is always delivered to the support email address you set when creating your program. You can also view or update that address in your [resources page](/help/article/program-resources).
This means that even if you change your sending domain later, all partner replies will continue to arrive in the same inbox.
# How to filter analytics by folders
Source: https://dub.co/help/article/filter-analytics-by-folders
Learn how to create powerful campaign-specific reports for your links with our folders feature.
This feature is only available on [Pro plans and
above](https://dub.co/pricing).
On Dub, you can filter analytics by [folders](/help/article/link-folders). This allows you to create powerful campaign-specific reports for your links.
For example, you're using folders to group your affiliate links and SMS marketing links, and want to see how each of those campaigns are performing.
You can filter the analytics by each of those folders and get a real-time dashboard of their clicks and [conversion analytics](/help/article/dub-conversions).
***
Before you can filter analytics by folders, you need to [create a folder](/help/article/link-folders#creating-a-folder) and [add links to it](/help/article/link-folders#adding-links-to-a-folder).
Then, as your links start accruing clicks, you will be able to filter your analytics by folders.
In the [Analytics tab](https://app.dub.co/analytics) of your Dub workspace, click on the **Filter** button to open the filter dropdown:
![Analytics filter dropdown folder]() You can also use the `F` keyboard shortcut to quickly open the filter dropdown.
Select the **Folder** option in the dropdown to open the folder filter:
You can also use the `F` keyboard shortcut to quickly open the filter dropdown.
Select the **Folder** option in the dropdown to open the folder filter:
![Analytics folder filter]() Finally, click on the folder you want to filter by:
Finally, click on the folder you want to filter by:
![Filtered analytics by folder]() ## Viewing filtered analytics for a folder directly
Alternatively, you can also view the filtered analytics for a folder directly, simply by opening the `⋮` dropdown next to the folder in your links dashboard and select the "Analytics" option:
## Viewing folder analytics shortcut
## Viewing filtered analytics for a folder directly
Alternatively, you can also view the filtered analytics for a folder directly, simply by opening the `⋮` dropdown next to the folder in your links dashboard and select the "Analytics" option:
## Viewing folder analytics shortcut
![View folder analytics shortcut]() Voila! You have successfully filtered your analytics by folder. You can also [export your analytics data](/help/article/how-to-export-analytics) to a CSV file for further analysis.
# How to filter analytics by tags
Source: https://dub.co/help/article/filter-analytics-by-tags
Learn how to create powerful campaign-specific reports for your links with our tags feature.
On Dub, you can filter analytics by [tags](/help/article/how-to-use-tags). This allows you to create powerful campaign-specific reports for your links.
For example, you're running an Instagram influencer campaign with multiple links and you want to see how they're performing.
You can group the links with a **Instagram Influencers** tag and then filter the analytics by that tag to get a comprehensive report of how they're performing.
***
Before you can filter analytics by tags, you need to [create a tag](/help/article/how-to-use-tags#how-to-create-a-tag) and [assign it to the links you want to filter by](/help/article/how-to-use-tags#can-i-assign-multiple-tags-to-a-link).
Then, as your links start accruing clicks, you will be able to filter your analytics by tags.
In the [Analytics tab](https://app.dub.co/analytics) of your Dub workspace, click on the **Filter** button to open the filter dropdown:
Voila! You have successfully filtered your analytics by folder. You can also [export your analytics data](/help/article/how-to-export-analytics) to a CSV file for further analysis.
# How to filter analytics by tags
Source: https://dub.co/help/article/filter-analytics-by-tags
Learn how to create powerful campaign-specific reports for your links with our tags feature.
On Dub, you can filter analytics by [tags](/help/article/how-to-use-tags). This allows you to create powerful campaign-specific reports for your links.
For example, you're running an Instagram influencer campaign with multiple links and you want to see how they're performing.
You can group the links with a **Instagram Influencers** tag and then filter the analytics by that tag to get a comprehensive report of how they're performing.
***
Before you can filter analytics by tags, you need to [create a tag](/help/article/how-to-use-tags#how-to-create-a-tag) and [assign it to the links you want to filter by](/help/article/how-to-use-tags#can-i-assign-multiple-tags-to-a-link).
Then, as your links start accruing clicks, you will be able to filter your analytics by tags.
In the [Analytics tab](https://app.dub.co/analytics) of your Dub workspace, click on the **Filter** button to open the filter dropdown:
![Analytics filter dropdown]() You can also use the `F` keyboard shortcut to quickly open the filter dropdown.
Select the **Tags** option in the dropdown to open the tags filter:
You can also use the `F` keyboard shortcut to quickly open the filter dropdown.
Select the **Tags** option in the dropdown to open the tags filter:
![Analytics tags filter]() Finally, click on the tag you want to filter by:
Finally, click on the tag you want to filter by:
![Filtered analytics by tags]() You can also filter by multiple tags by selecting multiple tags in the dropdown.
You can also filter by multiple tags by selecting multiple tags in the dropdown.
![Filtered analytics by multiple tags]() Voila! You have successfully filtered your analytics by tags. You can also [export your analytics data](/help/article/how-to-export-analytics) to a CSV file for further analysis.
# How to filter by trigger type
Source: https://dub.co/help/article/filter-analytics-by-trigger
Learn how to filter between QR code scans, link clicks, and deep links in your Dub analytics.
On Dub, you can filter between QR code scans, link clicks, and [deep link open events](/docs/concepts/deep-links/quickstart) in your Dub analytics. This lets you understand how people are finding your links.
Here's how you can do that:
Click on the **Analytics** page in the **Insights** group of your workspace short links.
Voila! You have successfully filtered your analytics by tags. You can also [export your analytics data](/help/article/how-to-export-analytics) to a CSV file for further analysis.
# How to filter by trigger type
Source: https://dub.co/help/article/filter-analytics-by-trigger
Learn how to filter between QR code scans, link clicks, and deep links in your Dub analytics.
On Dub, you can filter between QR code scans, link clicks, and [deep link open events](/docs/concepts/deep-links/quickstart) in your Dub analytics. This lets you understand how people are finding your links.
Here's how you can do that:
Click on the **Analytics** page in the **Insights** group of your workspace short links.
![Analytics location in navigation]() Then, click on the **Filter** button to open the filter dropdown:
Then, click on the **Filter** button to open the filter dropdown:
![Analytics filter dropdown]() Click on **Trigger** to show available data options. If there are no results, filters won't appear.
Click on **Trigger** to show available data options. If there are no results, filters won't appear.
![Analytics trigger filter]() Lastly, click on the **Link click**, **QR Scan**, or **Deep Link** option to filter your data.
Lastly, click on the **Link click**, **QR Scan**, or **Deep Link** option to filter your data.
![Filtered analytics by QR code]() Voila! You have successfully filtered your analytics by QR code scans, link clicks, or deep link open events!
# Filtering and visualizing your analytics by UTM parameters
Source: https://dub.co/help/article/filter-analytics-by-utms
Learn how to create powerful campaign-specific reports for your links by filtering your analytics by their respective UTM tags.
On Dub, you can filter your analytics by [UTM parameters](/help/article/utm-builder). This allows you to create powerful campaign-specific reports for your links.
For example, you're leveraging our [UTM templates feature](/help/article/how-to-create-utm-templates) to create standardized UTM parameters for your team to use in their marketing campaigns, you'd want a way to see how each of these UTMs are performing in your Analytics tab.
With our **UTM Parameters** tab, you can easily see how each of your UTM parameters are performing in real time.
Voila! You have successfully filtered your analytics by QR code scans, link clicks, or deep link open events!
# Filtering and visualizing your analytics by UTM parameters
Source: https://dub.co/help/article/filter-analytics-by-utms
Learn how to create powerful campaign-specific reports for your links by filtering your analytics by their respective UTM tags.
On Dub, you can filter your analytics by [UTM parameters](/help/article/utm-builder). This allows you to create powerful campaign-specific reports for your links.
For example, you're leveraging our [UTM templates feature](/help/article/how-to-create-utm-templates) to create standardized UTM parameters for your team to use in their marketing campaigns, you'd want a way to see how each of these UTMs are performing in your Analytics tab.
With our **UTM Parameters** tab, you can easily see how each of your UTM parameters are performing in real time.
![]() You can also filter your analytics by a specific UTM parameter that you'd like to create a custom report for:
In the [Analytics tab](https://app.dub.co/analytics) of your Dub workspace, click on the **Filter** button to open the filter dropdown:
You can also filter your analytics by a specific UTM parameter that you'd like to create a custom report for:
In the [Analytics tab](https://app.dub.co/analytics) of your Dub workspace, click on the **Filter** button to open the filter dropdown:
![Analytics filter dropdown]() You can also use the `F` keyboard shortcut to quickly open the filter dropdown.
Select the **UTM Source** option in the dropdown to open the tags filter:
You can also use the `F` keyboard shortcut to quickly open the filter dropdown.
Select the **UTM Source** option in the dropdown to open the tags filter:
![Analytics UTM source dropdown]() If you're looking to filter by other UTM parameters, you can select them accordingly in the main filter dropdown.
Finally, click on the UTM source you want to filter by:
If you're looking to filter by other UTM parameters, you can select them accordingly in the main filter dropdown.
Finally, click on the UTM source you want to filter by:
![Filtered analytics by UTM source]() # Folders role-based access control (RBAC)
Source: https://dub.co/help/article/folders-rbac
Learn how to set role-based access control for your folders to limit access to links for select teammates.
This feature is only available on [Business plans and
above](https://dub.co/pricing).
With folders, you can limit access to your links using fine-grained role-based access controls (RBAC).
E.g. if you have marketing teams from different departments within your Dub workspace, you can create folders for each team with role-based access controls to ensure members can only see the links that they should have access to.
# Folders role-based access control (RBAC)
Source: https://dub.co/help/article/folders-rbac
Learn how to set role-based access control for your folders to limit access to links for select teammates.
This feature is only available on [Business plans and
above](https://dub.co/pricing).
With folders, you can limit access to your links using fine-grained role-based access controls (RBAC).
E.g. if you have marketing teams from different departments within your Dub workspace, you can create folders for each team with role-based access controls to ensure members can only see the links that they should have access to.
![Folders RBAC]() In this guide, we will learn how to set role-based access control for your folders to limit access to links for select teammates.
## What is role-based access control (RBAC)?
Role-based access control (RBAC) is a security approach that restricts access to resources based on the roles of individual users. Think of it like a modern office building where different employees have access to different floors based on their job roles.
In Dub's link folders, RBAC lets you control who can access specific folders and what they can do with the links inside them. For example, marketing team members might only have access to the "Marketing Campaigns" folder, while team leads have full access to all folders.
This granular control ensures that sensitive links remain secure while still allowing teams to collaborate effectively within their designated areas.
## Workspace-level permissions
When you create a folder, you can decide what the workspace-level permissions are for the folder. Workspace owners have access and full permissions to every created folder.
In this guide, we will learn how to set role-based access control for your folders to limit access to links for select teammates.
## What is role-based access control (RBAC)?
Role-based access control (RBAC) is a security approach that restricts access to resources based on the roles of individual users. Think of it like a modern office building where different employees have access to different floors based on their job roles.
In Dub's link folders, RBAC lets you control who can access specific folders and what they can do with the links inside them. For example, marketing team members might only have access to the "Marketing Campaigns" folder, while team leads have full access to all folders.
This granular control ensures that sensitive links remain secure while still allowing teams to collaborate effectively within their designated areas.
## Workspace-level permissions
When you create a folder, you can decide what the workspace-level permissions are for the folder. Workspace owners have access and full permissions to every created folder.
![Create new folder access]() There are 3 options for the workspace-level permissions:
1. **Can edit** (default): Anyone in the workspace can access the folder and its links.
2. **Can view** (view-only): Workspace members can view the folder and its links, but not edit them.
3. **No access** (private folder): Only members added to the folder and workspace owners have access (via [folder-level permissions](#folder-level-permissions)).
If you're on the [Pro plan](https://dub.co/pricing), you can only create
folders with the default **"Can edit"** settings. Only [Business
plan](https://dub.co/pricing) and above users can create folders with the
**"Can view"** or **"No access"** settings.
## Folder-level permissions
You can also set folder-level permissions for each folder. This lets you set exactly which members can access the folder and what they can do with the links inside it.
To set folder-level permissions, open the `⋮` dropdown next to the folder in your links dashboard and select the "Members" option:
There are 3 options for the workspace-level permissions:
1. **Can edit** (default): Anyone in the workspace can access the folder and its links.
2. **Can view** (view-only): Workspace members can view the folder and its links, but not edit them.
3. **No access** (private folder): Only members added to the folder and workspace owners have access (via [folder-level permissions](#folder-level-permissions)).
If you're on the [Pro plan](https://dub.co/pricing), you can only create
folders with the default **"Can edit"** settings. Only [Business
plan](https://dub.co/pricing) and above users can create folders with the
**"Can view"** or **"No access"** settings.
## Folder-level permissions
You can also set folder-level permissions for each folder. This lets you set exactly which members can access the folder and what they can do with the links inside it.
To set folder-level permissions, open the `⋮` dropdown next to the folder in your links dashboard and select the "Members" option:
![Folders dropdown]() This will open up the member access control panel, where you can set different roles to different users:
This will open up the member access control panel, where you can set different roles to different users:
![Folders member option]() | Role | Description |
| ------------- | ----------------------------------------------------------------------------------------------------------------------------- |
| **Owner** | Has full access to the folder and its links.
| Role | Description |
| ------------- | ----------------------------------------------------------------------------------------------------------------------------- |
| **Owner** | Has full access to the folder and its links.
Can also invite other members to the folder / manage their access levels. |
| **Editor** | Can edit the folder and its links. |
| **Viewer** | Can view the folder and its links. |
| **No access** | Cannot view the folder and its links. |
If you are using [machine users](/docs/api-reference/tokens#machine-users) for
your API/integrations, remember to assign them the correct folder permissions
as well – they function the same way as regular users and would require the
correct permissions to be able to perform actions within a folder.
## Requesting access to a folder
If you only have read access to a folder, you can request edit access by clicking on the **"Ask to edit"** button:
![Request edit access folder]() This will send an email to the folder admin, who can then grant edit/owner access to you to manage the folder and its links:
This will send an email to the folder admin, who can then grant edit/owner access to you to manage the folder and its links:
![Folder access request email]() # Free .link domain offer on Dub
Source: https://dub.co/help/article/free-dot-link-domain
Learn how to get a 1-year free .link domain on Dub to create short links that match your brand and improve click-through rates.
We're excited to share that we have partnered with [Nova Registry](https://nova.link/) to offer a **1-year free `.link` domain** to Dub users.
This is a great way to get started with [custom domains](https://dub.co/blog/custom-domains) and create short links that match your brand, which gives you [better brand recognition](https://dub.co/blog/custom-domains#better-brand-recognition) and improves click-through rates.
## How to get a free .link domain
To get a free `.link` domain, you need to have a paid plan on Dub ([Pro plan](https://dub.co/pricing) or above). Once you have a paid plan, you can claim your free `.link` domain by following these steps:
Go to your [workspace domain settings](https://app.dub.co/settings/domains). Here you'll see a banner prompting you to claim your free `.link` domain.
# Free .link domain offer on Dub
Source: https://dub.co/help/article/free-dot-link-domain
Learn how to get a 1-year free .link domain on Dub to create short links that match your brand and improve click-through rates.
We're excited to share that we have partnered with [Nova Registry](https://nova.link/) to offer a **1-year free `.link` domain** to Dub users.
This is a great way to get started with [custom domains](https://dub.co/blog/custom-domains) and create short links that match your brand, which gives you [better brand recognition](https://dub.co/blog/custom-domains#better-brand-recognition) and improves click-through rates.
## How to get a free .link domain
To get a free `.link` domain, you need to have a paid plan on Dub ([Pro plan](https://dub.co/pricing) or above). Once you have a paid plan, you can claim your free `.link` domain by following these steps:
Go to your [workspace domain settings](https://app.dub.co/settings/domains). Here you'll see a banner prompting you to claim your free `.link` domain.
![Banner prompting you to claim your free .link domain]() Alternatively, if you've dismissed the banner before, you can click on **Add Domain** and then click on the **Claim your free .link domain** button.
Alternatively, if you've dismissed the banner before, you can click on **Add Domain** and then click on the **Claim your free .link domain** button.
![Claim your free .link domain button]() You can also claim your free `.link` domain directly in the onboarding flow:
You can also claim your free `.link` domain directly in the onboarding flow:
![Claim your free .link domain]() Next, search for the `.link` domain that you want to claim. If the domain is unavailable, you'll see a list of alternate domains that you can choose from:
Next, search for the `.link` domain that you want to claim. If the domain is unavailable, you'll see a list of alternate domains that you can choose from:
![Search for your .link domain – domain is unavailable]() If the domain is available, you'll see a **Claim domain** button. Click on the button to claim your free `.link` domain.
If the domain is available, you'll see a **Claim domain** button. Click on the button to claim your free `.link` domain.
![Search for your .link domain – domain is available]() Once your domain is claimed, it'll show up on your domain dashboard with a **Provisioned by Dub** banner – as well as an amber **Provisioning** badge while your domain is being registered behind the scenes.
Once your domain is claimed, it'll show up on your domain dashboard with a **Provisioned by Dub** banner – as well as an amber **Provisioning** badge while your domain is being registered behind the scenes.
![Provisioning badge]() Once the domain is provisioned, you'll see a green **Active** badge next to your domain. This means that your domain is ready to use.
Once the domain is provisioned, you'll see a green **Active** badge next to your domain. This means that your domain is ready to use.
![Active badge]() The provisioning process can take anywhere between a few minutes to an hour.
If your domain is not active after 1 hour, please [reach out to our support
team](https://dub.co/contact/support).
## Terms and conditions
The free `.link` domain offer is subject to the following terms and conditions:
1. This offer is only available to users who have a paid plan on Dub.
2. Premium `.link` domains (also known as "[registry premium](https://www.dynadot.com/community/help/question/what-are-registry-premium-domains)" domains) are not eligible for this offer.
3. You can only claim one free `.link` domain per [workspace](/help/article/what-is-a-workspace).
4. The free `.link` domain offer lasts for exactly 1 year from the date of claim. A month before the end of the 1-year period, we'll send you an email prompting you to renew your domain – during which you can choose to pay the renewal fee to keep your domain, or let it expire.
5. After the free first year period, the renewal fee will be $12/year ($1/month billed yearly).
6. If you cancel your plan, your existing `.link` domain and links will still work, but you will no longer be able to create new links with it. In this case, we also reserve the right to reassign your `.link` domain to another paying Dub user.
7. We do not currently support transferring your free `.link` domain to another registrar at the moment, but we're planning to add the ability to do so after your first free year.
# Free 14-day trial
Source: https://dub.co/help/article/free-trial
Learn about the 14-day free trial on Dub, what limits apply during the trial, and what happens after it ends.
Dub offers a free trial so you can explore additional features before committing to a paid plan. The trial gives your workspace full access to paid plan features, subject to the [trial limits](#trial-limits) below.
To prevent abuse, we currently only offer one free trial per workspace.
## Trial limits
To prevent abuse, we apply additional usage limits during your trial period for certain resources:
| Resource | Trial limit |
| ----------------------------------------------------------------------------------- | ----------- |
| 👥 [**Dub Partners**](https://dub.co/partners) | |
| [Partners](/help/article/dub-partners) | 50 |
| [Partner Groups](/help/article/partner-groups) | 5 |
| [Payouts](/help/article/partner-payouts) | \$500/mo |
| | |
| 🔗 [**Dub Links**](https://dub.co/links) | |
| [Links](/help/article/dub-links) | 100/mo |
| [Analytics](/help/article/dub-analytics) | 5,000/mo |
| [Domains](/help/article/how-to-add-custom-domain) | 5 |
| [Tags](/help/article/how-to-use-tags) | 5 |
| [Folders](/help/article/link-folders) | 5 |
| | |
| 🏛️ **Other resources** | |
| [Teammates](/help/article/how-to-invite-teammates) | 3 |
| [API rate limit](/docs/api-reference/rate-limits) | 120 req/min |
| [Analytics API rate limit](/docs/api-reference/rate-limits#rate-limits-by-endpoint) | 2 req/min |
To monitor your workspace's current usage, head to [**Settings →
Billing**](https://app.dub.co/settings/billing) in your dashboard.
Once your usage reaches 100% of any of the limits above, you will need to upgrade to a paid plan to unlock full access to your plan's limits.
## Trial emails
When you start a free 14-day trial on Dub, we will send you the following emails:
* **Trial started**: The first email confirming your trial has started, along with a few resources to help you get started.
* **Mid-trial check-in**: A mid-trial check-in email to see how you're doing and if you need any help.
* **3 days before trial ends**: A final reminder email 3 days before your trial ends.
## What happens after the trial ends?
Once your trial ends, your card will be automatically charged for the first month of your paid plan.
If you don't want to proceed with the paid plan, you can cancel your subscription any time during your trial. See [canceling your subscription](/help/article/how-to-cancel-subscription) for more details.
# How to use geo targeting on Dub?
Source: https://dub.co/help/article/geo-targeting
Learn how to use geo targeting on Dub to redirect your users to different links based on their location.
This feature is only available on [Pro plans and
above](https://dub.co/pricing).
Geo Targeting is a powerful feature that lets you redirect your users to different links based on their location.
This is useful if you want to do location-based personalization. For example, you can redirect your UK users to a UK-specific landing page, with the rest of the world going to your global landing page.
To use this feature, click on the **Targeting** button in the link builder. This will open a new modal with geo targeting options.
You can also quickly access the geo targeting feature by using the keyboard shortcut `G` while in the link builder.
To set up a geo-targeted link, you'll need to provide the following information:
1. **Country**: The country that you want to target.
2. **URL**: The URL that you want to redirect your users to if they are from the country that you have selected.
The provisioning process can take anywhere between a few minutes to an hour.
If your domain is not active after 1 hour, please [reach out to our support
team](https://dub.co/contact/support).
## Terms and conditions
The free `.link` domain offer is subject to the following terms and conditions:
1. This offer is only available to users who have a paid plan on Dub.
2. Premium `.link` domains (also known as "[registry premium](https://www.dynadot.com/community/help/question/what-are-registry-premium-domains)" domains) are not eligible for this offer.
3. You can only claim one free `.link` domain per [workspace](/help/article/what-is-a-workspace).
4. The free `.link` domain offer lasts for exactly 1 year from the date of claim. A month before the end of the 1-year period, we'll send you an email prompting you to renew your domain – during which you can choose to pay the renewal fee to keep your domain, or let it expire.
5. After the free first year period, the renewal fee will be $12/year ($1/month billed yearly).
6. If you cancel your plan, your existing `.link` domain and links will still work, but you will no longer be able to create new links with it. In this case, we also reserve the right to reassign your `.link` domain to another paying Dub user.
7. We do not currently support transferring your free `.link` domain to another registrar at the moment, but we're planning to add the ability to do so after your first free year.
# Free 14-day trial
Source: https://dub.co/help/article/free-trial
Learn about the 14-day free trial on Dub, what limits apply during the trial, and what happens after it ends.
Dub offers a free trial so you can explore additional features before committing to a paid plan. The trial gives your workspace full access to paid plan features, subject to the [trial limits](#trial-limits) below.
To prevent abuse, we currently only offer one free trial per workspace.
## Trial limits
To prevent abuse, we apply additional usage limits during your trial period for certain resources:
| Resource | Trial limit |
| ----------------------------------------------------------------------------------- | ----------- |
| 👥 [**Dub Partners**](https://dub.co/partners) | |
| [Partners](/help/article/dub-partners) | 50 |
| [Partner Groups](/help/article/partner-groups) | 5 |
| [Payouts](/help/article/partner-payouts) | \$500/mo |
| | |
| 🔗 [**Dub Links**](https://dub.co/links) | |
| [Links](/help/article/dub-links) | 100/mo |
| [Analytics](/help/article/dub-analytics) | 5,000/mo |
| [Domains](/help/article/how-to-add-custom-domain) | 5 |
| [Tags](/help/article/how-to-use-tags) | 5 |
| [Folders](/help/article/link-folders) | 5 |
| | |
| 🏛️ **Other resources** | |
| [Teammates](/help/article/how-to-invite-teammates) | 3 |
| [API rate limit](/docs/api-reference/rate-limits) | 120 req/min |
| [Analytics API rate limit](/docs/api-reference/rate-limits#rate-limits-by-endpoint) | 2 req/min |
To monitor your workspace's current usage, head to [**Settings →
Billing**](https://app.dub.co/settings/billing) in your dashboard.
Once your usage reaches 100% of any of the limits above, you will need to upgrade to a paid plan to unlock full access to your plan's limits.
## Trial emails
When you start a free 14-day trial on Dub, we will send you the following emails:
* **Trial started**: The first email confirming your trial has started, along with a few resources to help you get started.
* **Mid-trial check-in**: A mid-trial check-in email to see how you're doing and if you need any help.
* **3 days before trial ends**: A final reminder email 3 days before your trial ends.
## What happens after the trial ends?
Once your trial ends, your card will be automatically charged for the first month of your paid plan.
If you don't want to proceed with the paid plan, you can cancel your subscription any time during your trial. See [canceling your subscription](/help/article/how-to-cancel-subscription) for more details.
# How to use geo targeting on Dub?
Source: https://dub.co/help/article/geo-targeting
Learn how to use geo targeting on Dub to redirect your users to different links based on their location.
This feature is only available on [Pro plans and
above](https://dub.co/pricing).
Geo Targeting is a powerful feature that lets you redirect your users to different links based on their location.
This is useful if you want to do location-based personalization. For example, you can redirect your UK users to a UK-specific landing page, with the rest of the world going to your global landing page.
To use this feature, click on the **Targeting** button in the link builder. This will open a new modal with geo targeting options.
You can also quickly access the geo targeting feature by using the keyboard shortcut `G` while in the link builder.
To set up a geo-targeted link, you'll need to provide the following information:
1. **Country**: The country that you want to target.
2. **URL**: The URL that you want to redirect your users to if they are from the country that you have selected.
![Use Geo Targeting to redirect your users to different links based on their location]() You can also add multiple geo-targeted URLs by clicking on the "Add location" button.
Once you have added the locations and URLs, click on the "Add targeting" button to create your geo-targeted link.
When your users click on the link, they will be redirected to the URL that you have specified based on their location.
## Priority when combining with other features
If you enable multiple targeting features on the same link, they are evaluated in the following order:
1. **[Device targeting](/help/article/device-targeting)** (iOS/Android) – checked first
2. **Geo targeting** – checked next if no device rule matches
3. **[A/B testing](/help/article/ab-testing)** – applied last, only to traffic not already redirected by device or geo targeting
This means device targeting takes priority over geo targeting. If a user matches a device targeting rule, that rule applies even if a geo targeting rule also exists for their location.
## Usage with the Dub API
You can also use the [Dub API](/docs/api-reference/introduction) to create geo-targeted links.
To do this, you will need to set the `geo` field in the [link creation request](/docs/api-reference/links/create). The `geo` field should be an object with a [valid country code](#list-of-valid-country-codes) as the key and the respective URL as the value.
```json theme={null}
{
"url": "https://example.com",
"geo": {
"US": "https://example.com/us",
"GB": "https://example.com/uk"
}
}
```
## List of valid country codes
Here's a list of valid country codes that you can use with the Dub API:
| Country Code | Country Name |
| ------------ | -------------------------------------------- |
| AF | Afghanistan |
| AL | Albania |
| DZ | Algeria |
| AS | American Samoa |
| AD | Andorra |
| AO | Angola |
| AI | Anguilla |
| AQ | Antarctica |
| AG | Antigua and Barbuda |
| AR | Argentina |
| AM | Armenia |
| AW | Aruba |
| AU | Australia |
| AT | Austria |
| AZ | Azerbaijan |
| BS | Bahamas |
| BH | Bahrain |
| BD | Bangladesh |
| BB | Barbados |
| BY | Belarus |
| BE | Belgium |
| BZ | Belize |
| BJ | Benin |
| BM | Bermuda |
| BT | Bhutan |
| BO | Bolivia |
| BA | Bosnia and Herzegovina |
| BW | Botswana |
| BV | Bouvet Island |
| BR | Brazil |
| IO | British Indian Ocean Territory |
| BN | Brunei Darussalam |
| BG | Bulgaria |
| BF | Burkina Faso |
| BI | Burundi |
| KH | Cambodia |
| CM | Cameroon |
| CA | Canada |
| CV | Cape Verde |
| KY | Cayman Islands |
| CF | Central African Republic |
| TD | Chad |
| CL | Chile |
| CN | China |
| CX | Christmas Island |
| CC | Cocos (Keeling) Islands |
| CO | Colombia |
| KM | Comoros |
| CG | Congo (Republic) |
| CD | Congo (Democratic Republic) |
| CK | Cook Islands |
| CR | Costa Rica |
| CI | Ivory Coast |
| HR | Croatia |
| CU | Cuba |
| CY | Cyprus |
| CZ | Czech Republic |
| DK | Denmark |
| DJ | Djibouti |
| DM | Dominica |
| DO | Dominican Republic |
| EC | Ecuador |
| EG | Egypt |
| SV | El Salvador |
| GQ | Equatorial Guinea |
| ER | Eritrea |
| EE | Estonia |
| ET | Ethiopia |
| FK | Falkland Islands |
| FO | Faroe Islands |
| FJ | Fiji |
| FI | Finland |
| FR | France |
| GF | French Guiana |
| PF | French Polynesia |
| TF | French Southern Territories |
| GA | Gabon |
| GM | Gambia |
| GE | Georgia |
| DE | Germany |
| GH | Ghana |
| GI | Gibraltar |
| GR | Greece |
| GL | Greenland |
| GD | Grenada |
| GP | Guadeloupe |
| GU | Guam |
| GT | Guatemala |
| GN | Guinea |
| GW | Guinea-Bissau |
| GY | Guyana |
| HT | Haiti |
| HM | Heard Island and McDonald Islands |
| VA | Vatican City |
| HN | Honduras |
| HK | Hong Kong |
| HU | Hungary |
| IS | Iceland |
| IN | India |
| ID | Indonesia |
| IR | Iran |
| IQ | Iraq |
| IE | Ireland |
| IL | Israel |
| IT | Italy |
| JM | Jamaica |
| JP | Japan |
| JO | Jordan |
| KZ | Kazakhstan |
| KE | Kenya |
| KI | Kiribati |
| KP | North Korea |
| KR | South Korea |
| KW | Kuwait |
| KG | Kyrgyzstan |
| LA | Laos |
| LV | Latvia |
| LB | Lebanon |
| LS | Lesotho |
| LR | Liberia |
| LY | Libya |
| LI | Liechtenstein |
| LT | Lithuania |
| LU | Luxembourg |
| MO | Macao |
| MG | Madagascar |
| MW | Malawi |
| MY | Malaysia |
| MV | Maldives |
| ML | Mali |
| MT | Malta |
| MH | Marshall Islands |
| MQ | Martinique |
| MR | Mauritania |
| MU | Mauritius |
| YT | Mayotte |
| MX | Mexico |
| FM | Micronesia |
| MD | Moldova |
| MC | Monaco |
| MN | Mongolia |
| MS | Montserrat |
| MA | Morocco |
| MZ | Mozambique |
| MM | Myanmar |
| NA | Namibia |
| NR | Nauru |
| NP | Nepal |
| NL | Netherlands |
| NC | New Caledonia |
| NZ | New Zealand |
| NI | Nicaragua |
| NE | Niger |
| NG | Nigeria |
| NU | Niue |
| NF | Norfolk Island |
| MK | Macedonia |
| MP | Northern Mariana Islands |
| NO | Norway |
| OM | Oman |
| PK | Pakistan |
| PW | Palau |
| PS | Palestine |
| PA | Panama |
| PG | Papua New Guinea |
| PY | Paraguay |
| PE | Peru |
| PH | Philippines |
| PN | Pitcairn |
| PL | Poland |
| PT | Portugal |
| PR | Puerto Rico |
| QA | Qatar |
| RE | Reunion |
| RO | Romania |
| RU | Russia |
| RW | Rwanda |
| SH | Saint Helena |
| KN | Saint Kitts and Nevis |
| LC | Saint Lucia |
| PM | Saint Pierre and Miquelon |
| VC | Saint Vincent and the Grenadines |
| WS | Samoa |
| SM | San Marino |
| ST | Sao Tome and Principe |
| SA | Saudi Arabia |
| SN | Senegal |
| SC | Seychelles |
| SL | Sierra Leone |
| SG | Singapore |
| SK | Slovakia |
| SI | Slovenia |
| SB | Solomon Islands |
| SO | Somalia |
| ZA | South Africa |
| GS | South Georgia and the South Sandwich Islands |
| ES | Spain |
| LK | Sri Lanka |
| SD | Sudan |
| SR | Suriname |
| SJ | Svalbard and Jan Mayen |
| SZ | Eswatini |
| SE | Sweden |
| CH | Switzerland |
| SY | Syrian Arab Republic |
| TW | Taiwan |
| TJ | Tajikistan |
| TZ | Tanzania |
| TH | Thailand |
| TL | Timor-Leste |
| TG | Togo |
| TK | Tokelau |
| TO | Tonga |
| TT | Trinidad and Tobago |
| TN | Tunisia |
| TR | Turkey |
| TM | Turkmenistan |
| TC | Turks and Caicos Islands |
| TV | Tuvalu |
| UG | Uganda |
| UA | Ukraine |
| AE | United Arab Emirates |
| GB | United Kingdom |
| US | United States |
| UM | United States Minor Outlying Islands |
| UY | Uruguay |
| UZ | Uzbekistan |
| VU | Vanuatu |
| VE | Venezuela |
| VN | Vietnam |
| VG | Virgin Islands, British |
| VI | Virgin Islands, U.S. |
| WF | Wallis and Futuna |
| EH | Western Sahara |
| YE | Yemen |
| ZM | Zambia |
| ZW | Zimbabwe |
| AX | Åland Islands |
| BQ | Bonaire, Sint Eustatius and Saba |
| CW | Curaçao |
| GG | Guernsey |
| IM | Isle of Man |
| JE | Jersey |
| ME | Montenegro |
| BL | Saint Barthélemy |
| MF | Saint Martin (French part) |
| RS | Serbia |
| SX | Sint Maarten (Dutch part) |
| SS | South Sudan |
| XK | Kosovo |
# Configuring SAML SSO with Google Workspace
Source: https://dub.co/help/article/google-saml
For Dub Enterprise users, you can securely manage your team's access to Dub using Google Workspace SAML SSO.
This feature is only available on [Dub Enterprise](https://dub.co/enterprise).
For Dub Enterprise users, you can securely manage your team's access to Dub using [Google Workspace SAML SSO](https://cloud.google.com/architecture/identity/single-sign-on).
## Step 1: Create SAML Integration
In your [Google Admin](https://admin.google.com/) dashboard, click on **Apps** in the sidebar and select **Web and mobile apps** from the list.
If you don't already have an existing SAML application, click on **Add app** and select **Add custom SAML app** from the dropdown menu.
You can also add multiple geo-targeted URLs by clicking on the "Add location" button.
Once you have added the locations and URLs, click on the "Add targeting" button to create your geo-targeted link.
When your users click on the link, they will be redirected to the URL that you have specified based on their location.
## Priority when combining with other features
If you enable multiple targeting features on the same link, they are evaluated in the following order:
1. **[Device targeting](/help/article/device-targeting)** (iOS/Android) – checked first
2. **Geo targeting** – checked next if no device rule matches
3. **[A/B testing](/help/article/ab-testing)** – applied last, only to traffic not already redirected by device or geo targeting
This means device targeting takes priority over geo targeting. If a user matches a device targeting rule, that rule applies even if a geo targeting rule also exists for their location.
## Usage with the Dub API
You can also use the [Dub API](/docs/api-reference/introduction) to create geo-targeted links.
To do this, you will need to set the `geo` field in the [link creation request](/docs/api-reference/links/create). The `geo` field should be an object with a [valid country code](#list-of-valid-country-codes) as the key and the respective URL as the value.
```json theme={null}
{
"url": "https://example.com",
"geo": {
"US": "https://example.com/us",
"GB": "https://example.com/uk"
}
}
```
## List of valid country codes
Here's a list of valid country codes that you can use with the Dub API:
| Country Code | Country Name |
| ------------ | -------------------------------------------- |
| AF | Afghanistan |
| AL | Albania |
| DZ | Algeria |
| AS | American Samoa |
| AD | Andorra |
| AO | Angola |
| AI | Anguilla |
| AQ | Antarctica |
| AG | Antigua and Barbuda |
| AR | Argentina |
| AM | Armenia |
| AW | Aruba |
| AU | Australia |
| AT | Austria |
| AZ | Azerbaijan |
| BS | Bahamas |
| BH | Bahrain |
| BD | Bangladesh |
| BB | Barbados |
| BY | Belarus |
| BE | Belgium |
| BZ | Belize |
| BJ | Benin |
| BM | Bermuda |
| BT | Bhutan |
| BO | Bolivia |
| BA | Bosnia and Herzegovina |
| BW | Botswana |
| BV | Bouvet Island |
| BR | Brazil |
| IO | British Indian Ocean Territory |
| BN | Brunei Darussalam |
| BG | Bulgaria |
| BF | Burkina Faso |
| BI | Burundi |
| KH | Cambodia |
| CM | Cameroon |
| CA | Canada |
| CV | Cape Verde |
| KY | Cayman Islands |
| CF | Central African Republic |
| TD | Chad |
| CL | Chile |
| CN | China |
| CX | Christmas Island |
| CC | Cocos (Keeling) Islands |
| CO | Colombia |
| KM | Comoros |
| CG | Congo (Republic) |
| CD | Congo (Democratic Republic) |
| CK | Cook Islands |
| CR | Costa Rica |
| CI | Ivory Coast |
| HR | Croatia |
| CU | Cuba |
| CY | Cyprus |
| CZ | Czech Republic |
| DK | Denmark |
| DJ | Djibouti |
| DM | Dominica |
| DO | Dominican Republic |
| EC | Ecuador |
| EG | Egypt |
| SV | El Salvador |
| GQ | Equatorial Guinea |
| ER | Eritrea |
| EE | Estonia |
| ET | Ethiopia |
| FK | Falkland Islands |
| FO | Faroe Islands |
| FJ | Fiji |
| FI | Finland |
| FR | France |
| GF | French Guiana |
| PF | French Polynesia |
| TF | French Southern Territories |
| GA | Gabon |
| GM | Gambia |
| GE | Georgia |
| DE | Germany |
| GH | Ghana |
| GI | Gibraltar |
| GR | Greece |
| GL | Greenland |
| GD | Grenada |
| GP | Guadeloupe |
| GU | Guam |
| GT | Guatemala |
| GN | Guinea |
| GW | Guinea-Bissau |
| GY | Guyana |
| HT | Haiti |
| HM | Heard Island and McDonald Islands |
| VA | Vatican City |
| HN | Honduras |
| HK | Hong Kong |
| HU | Hungary |
| IS | Iceland |
| IN | India |
| ID | Indonesia |
| IR | Iran |
| IQ | Iraq |
| IE | Ireland |
| IL | Israel |
| IT | Italy |
| JM | Jamaica |
| JP | Japan |
| JO | Jordan |
| KZ | Kazakhstan |
| KE | Kenya |
| KI | Kiribati |
| KP | North Korea |
| KR | South Korea |
| KW | Kuwait |
| KG | Kyrgyzstan |
| LA | Laos |
| LV | Latvia |
| LB | Lebanon |
| LS | Lesotho |
| LR | Liberia |
| LY | Libya |
| LI | Liechtenstein |
| LT | Lithuania |
| LU | Luxembourg |
| MO | Macao |
| MG | Madagascar |
| MW | Malawi |
| MY | Malaysia |
| MV | Maldives |
| ML | Mali |
| MT | Malta |
| MH | Marshall Islands |
| MQ | Martinique |
| MR | Mauritania |
| MU | Mauritius |
| YT | Mayotte |
| MX | Mexico |
| FM | Micronesia |
| MD | Moldova |
| MC | Monaco |
| MN | Mongolia |
| MS | Montserrat |
| MA | Morocco |
| MZ | Mozambique |
| MM | Myanmar |
| NA | Namibia |
| NR | Nauru |
| NP | Nepal |
| NL | Netherlands |
| NC | New Caledonia |
| NZ | New Zealand |
| NI | Nicaragua |
| NE | Niger |
| NG | Nigeria |
| NU | Niue |
| NF | Norfolk Island |
| MK | Macedonia |
| MP | Northern Mariana Islands |
| NO | Norway |
| OM | Oman |
| PK | Pakistan |
| PW | Palau |
| PS | Palestine |
| PA | Panama |
| PG | Papua New Guinea |
| PY | Paraguay |
| PE | Peru |
| PH | Philippines |
| PN | Pitcairn |
| PL | Poland |
| PT | Portugal |
| PR | Puerto Rico |
| QA | Qatar |
| RE | Reunion |
| RO | Romania |
| RU | Russia |
| RW | Rwanda |
| SH | Saint Helena |
| KN | Saint Kitts and Nevis |
| LC | Saint Lucia |
| PM | Saint Pierre and Miquelon |
| VC | Saint Vincent and the Grenadines |
| WS | Samoa |
| SM | San Marino |
| ST | Sao Tome and Principe |
| SA | Saudi Arabia |
| SN | Senegal |
| SC | Seychelles |
| SL | Sierra Leone |
| SG | Singapore |
| SK | Slovakia |
| SI | Slovenia |
| SB | Solomon Islands |
| SO | Somalia |
| ZA | South Africa |
| GS | South Georgia and the South Sandwich Islands |
| ES | Spain |
| LK | Sri Lanka |
| SD | Sudan |
| SR | Suriname |
| SJ | Svalbard and Jan Mayen |
| SZ | Eswatini |
| SE | Sweden |
| CH | Switzerland |
| SY | Syrian Arab Republic |
| TW | Taiwan |
| TJ | Tajikistan |
| TZ | Tanzania |
| TH | Thailand |
| TL | Timor-Leste |
| TG | Togo |
| TK | Tokelau |
| TO | Tonga |
| TT | Trinidad and Tobago |
| TN | Tunisia |
| TR | Turkey |
| TM | Turkmenistan |
| TC | Turks and Caicos Islands |
| TV | Tuvalu |
| UG | Uganda |
| UA | Ukraine |
| AE | United Arab Emirates |
| GB | United Kingdom |
| US | United States |
| UM | United States Minor Outlying Islands |
| UY | Uruguay |
| UZ | Uzbekistan |
| VU | Vanuatu |
| VE | Venezuela |
| VN | Vietnam |
| VG | Virgin Islands, British |
| VI | Virgin Islands, U.S. |
| WF | Wallis and Futuna |
| EH | Western Sahara |
| YE | Yemen |
| ZM | Zambia |
| ZW | Zimbabwe |
| AX | Åland Islands |
| BQ | Bonaire, Sint Eustatius and Saba |
| CW | Curaçao |
| GG | Guernsey |
| IM | Isle of Man |
| JE | Jersey |
| ME | Montenegro |
| BL | Saint Barthélemy |
| MF | Saint Martin (French part) |
| RS | Serbia |
| SX | Sint Maarten (Dutch part) |
| SS | South Sudan |
| XK | Kosovo |
# Configuring SAML SSO with Google Workspace
Source: https://dub.co/help/article/google-saml
For Dub Enterprise users, you can securely manage your team's access to Dub using Google Workspace SAML SSO.
This feature is only available on [Dub Enterprise](https://dub.co/enterprise).
For Dub Enterprise users, you can securely manage your team's access to Dub using [Google Workspace SAML SSO](https://cloud.google.com/architecture/identity/single-sign-on).
## Step 1: Create SAML Integration
In your [Google Admin](https://admin.google.com/) dashboard, click on **Apps** in the sidebar and select **Web and mobile apps** from the list.
If you don't already have an existing SAML application, click on **Add app** and select **Add custom SAML app** from the dropdown menu.
![Create App on the Google Admin Dashboard]() Enter the **App name** for your application, and click **Continue**.
Enter the **App name** for your application, and click **Continue**.
![Configuring SAML app name on the Google Admin Dashboard]() In the next screen, click **Download Metadata** to download the metadata XML file and click **Continue**. You'll need this file in Step 3.
In the next screen, click **Download Metadata** to download the metadata XML file and click **Continue**. You'll need this file in Step 3.
![Downloading SAML metadata on the Google Admin Dashboard]() Copy the following values and paste them under **Service provider details**:
```text title="ACS URL" theme={null}
https://api.dub.co/auth/saml/callback
```
```text title="Entity ID" theme={null}
https://saml.dub.co
```
Copy the following values and paste them under **Service provider details**:
```text title="ACS URL" theme={null}
https://api.dub.co/auth/saml/callback
```
```text title="Entity ID" theme={null}
https://saml.dub.co
```
![Service provider details on the Google Admin Dashboard]() Click **Next** to proceed to the next step.
## Step 2: Configure Attribute Mapping
On the next screen, under the **Attributes** section, click **Add Mapping** and add the following attribute mappings:
| Google Directory attributes | App attributes |
| --------------------------- | -------------- |
| `Primary email` | `email` |
| `First name` | `firstName` |
| `Last name` | `lastName` |
Click **Next** to proceed to the next step.
## Step 2: Configure Attribute Mapping
On the next screen, under the **Attributes** section, click **Add Mapping** and add the following attribute mappings:
| Google Directory attributes | App attributes |
| --------------------------- | -------------- |
| `Primary email` | `email` |
| `First name` | `firstName` |
| `Last name` | `lastName` |
![Attribute Mapping on the Google Admin Dashboard]() Once that's done, click **Finish**.
On the next screen, click **User access** to configure the application to allow users to log in.
Once that's done, click **Finish**.
On the next screen, click **User access** to configure the application to allow users to log in.
![User access on the Google Admin Dashboard]() Check the **ON for everyone** checkbox and click **Save**.
Check the **ON for everyone** checkbox and click **Save**.
![Turn on access for everyone on the Google Admin Dashboard]() This will allow users in your Google Workspace to automatically sign in to Dub with Google SAML SSO.
You can now return to the Dub dashboard to complete the SAML SSO configuration.
## Step 3: Configure SAML SSO on Dub
In your workspace settings, click on **Security** in the **Workspace** group.
This will allow users in your Google Workspace to automatically sign in to Dub with Google SAML SSO.
You can now return to the Dub dashboard to complete the SAML SSO configuration.
## Step 3: Configure SAML SSO on Dub
In your workspace settings, click on **Security** in the **Workspace** group.
![Directory Sync section on the Dub Dashboard]() Under the **SAML Single Sign-On** section, click on **Configure**. This will open up the SAML SSO modal:
1. Select **Google** as the SAML provider.
2. Upload the metadata XML file you downloaded in Step 1.
3. Click **Save changes**.
Under the **SAML Single Sign-On** section, click on **Configure**. This will open up the SAML SSO modal:
1. Select **Google** as the SAML provider.
2. Upload the metadata XML file you downloaded in Step 1.
3. Click **Save changes**.
![Google SAML SSO Modal]() That's it! You're all set – your team can now sign in to Dub using Google SAML SSO.
# How noindex works on Dub
Source: https://dub.co/help/article/how-noindex-works
Learn how Dub supports noindex response headers for short links with custom domains.
If you're familiar with SEO best practices, you might have heard of the `noindex` meta tag that tells search engines not to index a page.
This is particularly important if you're using Dub with a [custom domain](/help/article/how-to-add-custom-domain) – specifically a [subdomain](/help/article/how-to-add-custom-domain#step-2b-adding-a-subdomain) – for your short links, since having them indexed could potentially have a negative impact on your SEO.
To prevent this, Dub automatically serves short links with a `noindex` response header when you're using a custom domain. This tells search engines not to index your short links, keeping them out of search results.
```bash theme={null}
GET /noindex HTTP/2
Host: d.to
User-Agent: curl/8.6.0
HTTP/2 302
location: https://dub.co/help/article/how-noindex-works
X-Robots-Tag: noindex # [!code highlight]
X-Powered-By: Dub
```
If you're using Dub with a [default Dub-branded
domain](/help/article/default-dub-domains) (e.g. `dub.sh`, `git.new`), the
`noindex` response header is ***not applied by default***.
## How to index your short links on Google
If you would like your short links to be indexed anyway, you can easily enable indexing by following these steps:
1. Go to your [Dub dashboard](https://d.to/register).
2. Click on the `⋮` button of the link that you want to enable indexing for, which will open the dropdown menu.
3. In the dropdown menu, click on the **Edit** button, which will open the [Dub link builder](/help/article/dub-link-builder).
4. Click on the `...` button, which will open the dropdown menu.
5. In the dropdown menu, click on the **Add Search Engine Indexing** button to enable indexing.
That's it! You're all set – your team can now sign in to Dub using Google SAML SSO.
# How noindex works on Dub
Source: https://dub.co/help/article/how-noindex-works
Learn how Dub supports noindex response headers for short links with custom domains.
If you're familiar with SEO best practices, you might have heard of the `noindex` meta tag that tells search engines not to index a page.
This is particularly important if you're using Dub with a [custom domain](/help/article/how-to-add-custom-domain) – specifically a [subdomain](/help/article/how-to-add-custom-domain#step-2b-adding-a-subdomain) – for your short links, since having them indexed could potentially have a negative impact on your SEO.
To prevent this, Dub automatically serves short links with a `noindex` response header when you're using a custom domain. This tells search engines not to index your short links, keeping them out of search results.
```bash theme={null}
GET /noindex HTTP/2
Host: d.to
User-Agent: curl/8.6.0
HTTP/2 302
location: https://dub.co/help/article/how-noindex-works
X-Robots-Tag: noindex # [!code highlight]
X-Powered-By: Dub
```
If you're using Dub with a [default Dub-branded
domain](/help/article/default-dub-domains) (e.g. `dub.sh`, `git.new`), the
`noindex` response header is ***not applied by default***.
## How to index your short links on Google
If you would like your short links to be indexed anyway, you can easily enable indexing by following these steps:
1. Go to your [Dub dashboard](https://d.to/register).
2. Click on the `⋮` button of the link that you want to enable indexing for, which will open the dropdown menu.
3. In the dropdown menu, click on the **Edit** button, which will open the [Dub link builder](/help/article/dub-link-builder).
4. Click on the `...` button, which will open the dropdown menu.
5. In the dropdown menu, click on the **Add Search Engine Indexing** button to enable indexing.
![Enable search engine indexing for a Dub short link]() And that's it! Your link will now be served without the `noindex` response header:
```bash theme={null}
GET /doindex HTTP/2
Host: d.to
User-Agent: curl/8.6.0
HTTP/2 302
location: https://dub.co/help/article/how-noindex-works
X-Powered-By: Dub
```
This feature is only available on [Pro plans and
above](https://dub.co/pricing).
# How to add a custom domain to Dub
Source: https://dub.co/help/article/how-to-add-custom-domain
Learn how to add a custom domain to your Dub workspace for free - no credit card required.
Whenever you're creating a short link for marketing purposes, it is [important to use a custom domain](https://dub.co/blog/custom-domains) for better brand recognition and click-through rates.
At Dub, we have one of the most generous custom domain limits in the industry – you can add up to 3 custom domains to your workspace for free, and even more with our [paid plans](https://dub.co/pricing).
* [**Pro plan**](https://dub.co/pricing): 10 domains
* [**Business plan**](https://dub.co/pricing): 100 domains
* [**Advanced plan**](https://dub.co/pricing): 250 domains
* [**Enterprise plan**](https://dub.co/enterprise): Unlimited domains
In this guide, we will learn how to add a custom domain to your Dub workspace.
Not sure which custom domain to use? Check out our guide on [choosing a custom
domain](/help/article/choosing-a-custom-domain) for some tips.
## Complimentary .link custom domain
If you're on a paid plan on Dub ([Pro plan](https://dub.co/pricing) and above), you can claim a [complimentary .link custom domain](/help/article/free-dot-link-domain) and use it as your short link domain – no DNS setup needed.
And that's it! Your link will now be served without the `noindex` response header:
```bash theme={null}
GET /doindex HTTP/2
Host: d.to
User-Agent: curl/8.6.0
HTTP/2 302
location: https://dub.co/help/article/how-noindex-works
X-Powered-By: Dub
```
This feature is only available on [Pro plans and
above](https://dub.co/pricing).
# How to add a custom domain to Dub
Source: https://dub.co/help/article/how-to-add-custom-domain
Learn how to add a custom domain to your Dub workspace for free - no credit card required.
Whenever you're creating a short link for marketing purposes, it is [important to use a custom domain](https://dub.co/blog/custom-domains) for better brand recognition and click-through rates.
At Dub, we have one of the most generous custom domain limits in the industry – you can add up to 3 custom domains to your workspace for free, and even more with our [paid plans](https://dub.co/pricing).
* [**Pro plan**](https://dub.co/pricing): 10 domains
* [**Business plan**](https://dub.co/pricing): 100 domains
* [**Advanced plan**](https://dub.co/pricing): 250 domains
* [**Enterprise plan**](https://dub.co/enterprise): Unlimited domains
In this guide, we will learn how to add a custom domain to your Dub workspace.
Not sure which custom domain to use? Check out our guide on [choosing a custom
domain](/help/article/choosing-a-custom-domain) for some tips.
## Complimentary .link custom domain
If you're on a paid plan on Dub ([Pro plan](https://dub.co/pricing) and above), you can claim a [complimentary .link custom domain](/help/article/free-dot-link-domain) and use it as your short link domain – no DNS setup needed.
![Free .link domain]() Read our guide on [how to claim your free .link domain on Dub](/help/article/free-dot-link-domain).
## Step 1: Add a custom domain
Once you have a custom domain, you can add it to your Dub workspace by following these steps:
1. Navigate to your workspace's Domains page – you can do that by clicking on the **Domains** link in the menu bar at the top of your workspace dashboard.
2. Click on the **Add Domain** button.
3. Enter the domain you want to use and click **Add domain**.
Read our guide on [how to claim your free .link domain on Dub](/help/article/free-dot-link-domain).
## Step 1: Add a custom domain
Once you have a custom domain, you can add it to your Dub workspace by following these steps:
1. Navigate to your workspace's Domains page – you can do that by clicking on the **Domains** link in the menu bar at the top of your workspace dashboard.
2. Click on the **Add Domain** button.
3. Enter the domain you want to use and click **Add domain**.
![The Add Domain modal in Dub]() ## Step 2: Configure your domain
After adding your domain, you'll be presented with a DNS record that you'll need to add to your domain's DNS settings.
## Step 2: Configure your domain
After adding your domain, you'll be presented with a DNS record that you'll need to add to your domain's DNS settings.
![Setting up DNS records for your domains on Dub]() ## Step 2a: Adding an apex domain
If you're adding an apex domain (e.g. `example.com`), you'll need to add an `A` record with the following values:
* **Name**: `@` (or leave it blank)
* **Value**: `76.76.21.21`
* **TTL**: `86400` (or the highest value possible)
## Step 2b: Adding a subdomain
If you're adding a subdomain (e.g. `go.example.com`), you'll need to add a `CNAME` record with the following values:
* **Name**: `go` (or whatever subdomain you want to use)
* **Value**: `cname.dub.co`
* **TTL**: `86400` (or the highest value possible)
Note that we do not support using `www.` as a subdomain, since the `www.` subdomain will always redirect to the apex domain instead.
We recommend using the following variations for your subdomains:
* `go.example.com`
* `try.example.com`
* `links.example.com`
* `l.example.com`
If you're using Cloudflare as your DNS provider, you might need to configure
some extra steps for it to work properly. Please refer to our guide on [using
Cloudflare domains with Dub](/help/article/using-cloudflare-domains) for more
information.
## Step 3 (optional): Verify domain ownership
This step is only applicable if you are adding a domain that is currently
being used on [Vercel](https://vercel.com/).
Since we use Vercel as the DNS provider for Dub, you'll need to verify that you own the domain before you can add it to your Dub workspace.
## Step 2a: Adding an apex domain
If you're adding an apex domain (e.g. `example.com`), you'll need to add an `A` record with the following values:
* **Name**: `@` (or leave it blank)
* **Value**: `76.76.21.21`
* **TTL**: `86400` (or the highest value possible)
## Step 2b: Adding a subdomain
If you're adding a subdomain (e.g. `go.example.com`), you'll need to add a `CNAME` record with the following values:
* **Name**: `go` (or whatever subdomain you want to use)
* **Value**: `cname.dub.co`
* **TTL**: `86400` (or the highest value possible)
Note that we do not support using `www.` as a subdomain, since the `www.` subdomain will always redirect to the apex domain instead.
We recommend using the following variations for your subdomains:
* `go.example.com`
* `try.example.com`
* `links.example.com`
* `l.example.com`
If you're using Cloudflare as your DNS provider, you might need to configure
some extra steps for it to work properly. Please refer to our guide on [using
Cloudflare domains with Dub](/help/article/using-cloudflare-domains) for more
information.
## Step 3 (optional): Verify domain ownership
This step is only applicable if you are adding a domain that is currently
being used on [Vercel](https://vercel.com/).
Since we use Vercel as the DNS provider for Dub, you'll need to verify that you own the domain before you can add it to your Dub workspace.
![Verifying domain ownership on Dub]() To do that, you'll need to add a TXT record with the following values:
* **Name**: `_vercel`
* **Value**: `vc-domain-verify=go.yourdomain.com...` (the value will be provided to you on the Dub dashboard)
Warning: If you are using this domain for another site, setting this TXT
record will transfer domain ownership away from that site and break it. Please
exercise caution when setting this record.
<>
For example: Make sure that the domain that is shown in the TXT verification
value (e.g. `go.yourdomain.com`) is actually the domain you want to use as a
custom domain on Dub – and ***not your production site***.
## How long do I have to wait for my domain to work?
Domain configuration can take anywhere between 1 to 24 hours to complete. If your domain still doesn't work after 24 hours, please [reach out to us](https://dub.co/contact/support) and we'll be happy to help you out.
# How to cancel my Dub subscription?
Source: https://dub.co/help/article/how-to-cancel-subscription
Learn how to cancel your Dub subscription, or downgrade to a lower plan if needed.
First of all, if you are planning to cancel your subscription, we're really sorry to see you go! We would appreciate any feedback on how we could improve our platform – feel free to [reach out to us](https://dub.co/contact/support) and we'll be happy to help you out.
## How can I cancel my Dub subscription?
You can cancel your Dub subscription by following the steps below:
1. From your workspace dashboard (e.g. `app.dub.co/your-workspace`), click on the **Settings** tab.
2. On the left sidebar, click on **Billing**.
3. Click on the **Cancel subscription** button to cancel your subscription.
To do that, you'll need to add a TXT record with the following values:
* **Name**: `_vercel`
* **Value**: `vc-domain-verify=go.yourdomain.com...` (the value will be provided to you on the Dub dashboard)
Warning: If you are using this domain for another site, setting this TXT
record will transfer domain ownership away from that site and break it. Please
exercise caution when setting this record.
<>
For example: Make sure that the domain that is shown in the TXT verification
value (e.g. `go.yourdomain.com`) is actually the domain you want to use as a
custom domain on Dub – and ***not your production site***.
## How long do I have to wait for my domain to work?
Domain configuration can take anywhere between 1 to 24 hours to complete. If your domain still doesn't work after 24 hours, please [reach out to us](https://dub.co/contact/support) and we'll be happy to help you out.
# How to cancel my Dub subscription?
Source: https://dub.co/help/article/how-to-cancel-subscription
Learn how to cancel your Dub subscription, or downgrade to a lower plan if needed.
First of all, if you are planning to cancel your subscription, we're really sorry to see you go! We would appreciate any feedback on how we could improve our platform – feel free to [reach out to us](https://dub.co/contact/support) and we'll be happy to help you out.
## How can I cancel my Dub subscription?
You can cancel your Dub subscription by following the steps below:
1. From your workspace dashboard (e.g. `app.dub.co/your-workspace`), click on the **Settings** tab.
2. On the left sidebar, click on **Billing**.
3. Click on the **Cancel subscription** button to cancel your subscription.
![Billing section on Dub]() We really hope to see you back someday!
## How can I downgrade my Dub subscription?
If you would like to downgrade your subscription instead, please follow these steps:
1. From your workspace dashboard (e.g. `app.dub.co/your-workspace`), click on the **Settings** tab.
2. On the left sidebar, click on **Billing**.
3. Click on the **Manage plan** button to see all available plans on Dub.
We really hope to see you back someday!
## How can I downgrade my Dub subscription?
If you would like to downgrade your subscription instead, please follow these steps:
1. From your workspace dashboard (e.g. `app.dub.co/your-workspace`), click on the **Settings** tab.
2. On the left sidebar, click on **Billing**.
3. Click on the **Manage plan** button to see all available plans on Dub.
![Billing section on Dub]() 4. Select the plan that works best for you. You can also click on the **Adjust usage** button and choose your preferred link or event usage level.
4. Select the plan that works best for you. You can also click on the **Adjust usage** button and choose your preferred link or event usage level.
!['Manage plan' section on Dub]() If you have any questions or need further assistance, please [contact our support team](https://dub.co/contact/support).
# How to change my Dub billing information?
Source: https://dub.co/help/article/how-to-change-billing-information
Learn how to change your billing information on Dub.
First of all, thank you for upgrading to a paid plan on Dub!
As an [open-source](https://d.to/github) company, your support means the world to us and helps us continue
to build and improve Dub.
## Change your billing information on Stripe
Since we use [Stripe](https://stripe.com) to process payments, you can change your billing information on Stripe by following the steps below:
1. From your workspace dashboard (e.g. `app.dub.co/your-workspace`), click on the **Settings** tab.
2. On the left sidebar, click on **Billing**.
3. Click on the **Open billing portal** button to access your Stripe dashboard.
If you have any questions or need further assistance, please [contact our support team](https://dub.co/contact/support).
# How to change my Dub billing information?
Source: https://dub.co/help/article/how-to-change-billing-information
Learn how to change your billing information on Dub.
First of all, thank you for upgrading to a paid plan on Dub!
As an [open-source](https://d.to/github) company, your support means the world to us and helps us continue
to build and improve Dub.
## Change your billing information on Stripe
Since we use [Stripe](https://stripe.com) to process payments, you can change your billing information on Stripe by following the steps below:
1. From your workspace dashboard (e.g. `app.dub.co/your-workspace`), click on the **Settings** tab.
2. On the left sidebar, click on **Billing**.
3. Click on the **Open billing portal** button to access your Stripe dashboard.
![Billing section on Dub]() 4. Scroll down to the **Payment Method** section.
5. Here, you can add a new payment method or update your existing payment method.
# How to change my default workspace on Dub?
Source: https://dub.co/help/article/how-to-change-default-workspace
Learn how you can set a workspace as your default workspace on Dub.
On Dub, you can set a [workspace of your choice](/help/article/what-is-a-workspace) as your default workspace. This is the workspace that you will be redirected to when you [log in to Dub](https://d.to/register).
When you create your first workspace on Dub, it will automatically be set as your default workspace. However, you can change your default workspace at any time.
Here's how you can change your default workspace on Dub:
1. Go to your [account settings](https://app.dub.co/account/settings) by clicking on your profile picture in the top right corner of the Dub dashboard and selecting **Settings**.
2. Scroll down to the **Your Default Workspace** section.
3. Select the workspace that you want to set as your default workspace from the dropdown list.
4. Scroll down to the **Payment Method** section.
5. Here, you can add a new payment method or update your existing payment method.
# How to change my default workspace on Dub?
Source: https://dub.co/help/article/how-to-change-default-workspace
Learn how you can set a workspace as your default workspace on Dub.
On Dub, you can set a [workspace of your choice](/help/article/what-is-a-workspace) as your default workspace. This is the workspace that you will be redirected to when you [log in to Dub](https://d.to/register).
When you create your first workspace on Dub, it will automatically be set as your default workspace. However, you can change your default workspace at any time.
Here's how you can change your default workspace on Dub:
1. Go to your [account settings](https://app.dub.co/account/settings) by clicking on your profile picture in the top right corner of the Dub dashboard and selecting **Settings**.
2. Scroll down to the **Your Default Workspace** section.
3. Select the workspace that you want to set as your default workspace from the dropdown list.
![Selecting a default workspace in Dub]() 4. Click on the **Save Changes** button to save your selection.
That's it! Your default workspace has been updated. The next time you log in to Dub, you will be redirected to your chosen default workspace.
# How can I check a Dub link's destination before clicking on it?
Source: https://dub.co/help/article/how-to-check-link-destination
Learn how to check a Dub link's destination to make sure it's safe to click on.
If you're not sure where a Dub link will take you, you can check its destination before clicking on it by adding a `+` sign to the end of the short link.
For example, if you want to check the destination of the short link `d.to/github`, you can type `d.to/github+` into your browser's address bar and press `Enter`.
4. Click on the **Save Changes** button to save your selection.
That's it! Your default workspace has been updated. The next time you log in to Dub, you will be redirected to your chosen default workspace.
# How can I check a Dub link's destination before clicking on it?
Source: https://dub.co/help/article/how-to-check-link-destination
Learn how to check a Dub link's destination to make sure it's safe to click on.
If you're not sure where a Dub link will take you, you can check its destination before clicking on it by adding a `+` sign to the end of the short link.
For example, if you want to check the destination of the short link `d.to/github`, you can type `d.to/github+` into your browser's address bar and press `Enter`.
![Inspect a Dub link's destination]() This will take you to a page that shows you the destination URL of the short link, as well as the respective social media preview for the URL.
## Reporting a malicious link
If you suspect that a Dub link is malicious, you can report it by clicking on the `🚩` button on the link inspector page.
This will take you to a page that shows you the destination URL of the short link, as well as the respective social media preview for the URL.
## Reporting a malicious link
If you suspect that a Dub link is malicious, you can report it by clicking on the `🚩` button on the link inspector page.
![Reporting a malicious link on Dub]() This will open up a form where you can provide more information about the malicious link.
This will open up a form where you can provide more information about the malicious link.
![Reporting a malicious link on Dub]() We take these reports very seriously and will review and take appropriate action as soon as possible.
Learn more about the types of links that are against our [Terms of Service](https://dub.co/legal/terms#3-fair-use).
# How to create a short link on Dub?
Source: https://dub.co/help/article/how-to-create-link
Learn how to create your first short link on Dub and start tracking your links.
Dub's link builder comes with powerful features like [UTM builder](/help/article/utm-builder), [device targeting](/help/article/device-targeting), [password protection](/help/article/password-protected-links), [expiration dates](/help/article/link-expiration), and more.
Dub is also the only link management platform that lets you [customize the social media cards](/help/article/custom-link-previews) for your links, so you can have full control over how your links look when shared on social media.
In this article, we will take a look at how you can leverage these features to create your first short link on Dub.
## Step 1: Open the Dub link builder
There are 3 ways to open the [Dub link builder](/help/article/dub-link-builder) to create a short link:
1. **Slowest**: Click on the "Create link" button on the dashboard.
2. **Faster**: Use the keyboard shortcut `c` to open the link builder.
3. **Fastest**: Just paste in a valid URL into the dashboard. This will automatically open the link builder and pre-fill the URL field.
We take these reports very seriously and will review and take appropriate action as soon as possible.
Learn more about the types of links that are against our [Terms of Service](https://dub.co/legal/terms#3-fair-use).
# How to create a short link on Dub?
Source: https://dub.co/help/article/how-to-create-link
Learn how to create your first short link on Dub and start tracking your links.
Dub's link builder comes with powerful features like [UTM builder](/help/article/utm-builder), [device targeting](/help/article/device-targeting), [password protection](/help/article/password-protected-links), [expiration dates](/help/article/link-expiration), and more.
Dub is also the only link management platform that lets you [customize the social media cards](/help/article/custom-link-previews) for your links, so you can have full control over how your links look when shared on social media.
In this article, we will take a look at how you can leverage these features to create your first short link on Dub.
## Step 1: Open the Dub link builder
There are 3 ways to open the [Dub link builder](/help/article/dub-link-builder) to create a short link:
1. **Slowest**: Click on the "Create link" button on the dashboard.
2. **Faster**: Use the keyboard shortcut `c` to open the link builder.
3. **Fastest**: Just paste in a valid URL into the dashboard. This will automatically open the link builder and pre-fill the URL field.
![The Dub link builder]() As you can see, the link builder also gives you a preview of your short link on social media platforms like X (formerly Twitter), Facebook, and LinkedIn.
## Step 2: Enter your destination URL
Enter your destination URL in the "Destination URL" field. You can enter the URL with or without the `https://` protocol – behind the scenes, Dub will automatically make sure it's formatted correctly.
## Step 3: Set a short link slug (optional)
Under the **Short Link** field, you can either:
1. Enter your own short link slug
2. Generate a random short link slug
3. [Generate a short link slug with AI](https://dub.co/blog/introducing-dub-ai)
This step is optional. If you don't enter a short link slug, Dub will generate
one for you.
## Step 4: Customize your link previews (recommended)
You can also [set custom link previews](/help/article/custom-link-previews) for your short link to control how your links look when shared on social media platforms like X (formerly Twitter), LinkedIn, Slack, Telegram, iMessage, and more.
As you can see, the link builder also gives you a preview of your short link on social media platforms like X (formerly Twitter), Facebook, and LinkedIn.
## Step 2: Enter your destination URL
Enter your destination URL in the "Destination URL" field. You can enter the URL with or without the `https://` protocol – behind the scenes, Dub will automatically make sure it's formatted correctly.
## Step 3: Set a short link slug (optional)
Under the **Short Link** field, you can either:
1. Enter your own short link slug
2. Generate a random short link slug
3. [Generate a short link slug with AI](https://dub.co/blog/introducing-dub-ai)
This step is optional. If you don't enter a short link slug, Dub will generate
one for you.
## Step 4: Customize your link previews (recommended)
You can also [set custom link previews](/help/article/custom-link-previews) for your short link to control how your links look when shared on social media platforms like X (formerly Twitter), LinkedIn, Slack, Telegram, iMessage, and more.
![Create custom link previews for your links]() You can also use AI to generate custom link previews for your links. [Learn more](/help/article/custom-link-previews).
## Step 5: Add tags to your short link (optional)
Optionally, you can add tags to your short link to help organize your links and make them easier to find.
You can also use AI to generate custom link previews for your links. [Learn more](/help/article/custom-link-previews).
## Step 5: Add tags to your short link (optional)
Optionally, you can add tags to your short link to help organize your links and make them easier to find.
![Fun fact: You can assign multiple tags to a given Dub link]() You can also [filter your analytics by tags](/help/article/filter-analytics-by-tags), which allows you to create powerful campaign-specific reports for your links.
That's it! You've just created your first short link on Dub.
## Advanced link features
Additionally, Dub also offers a variety of advanced link features that you can use to enhance your short links:
1. **UTM Builder**: Add UTM parameters to your links. [Learn more](/help/article/utm-builder).
2. **Link Cloaking**: Mask your destination URL with your short link. [Learn more](/help/article/link-cloaking).
3. **Password Protection**: Protect your links with a password. [Learn more](/help/article/password-protected-links).
4. **Expiration Date**: Set an expiration date for your links. [Learn more](/help/article/link-expiration).
5. **Device Targeting**: Set a custom destination URL for iOS and Android devices. [Learn more](/help/article/device-targeting).
6. **Geo Targeting**: Redirect your users to different links based on their location. [Learn more](/help/article/geo-targeting).
7. **Search Engine Indexing**: Control how your links are indexed by search engines. [Learn more](/help/article/how-noindex-works).
8. **Comments**: Add comments to your links – for you and your team. [Learn more](/help/article/link-comments).
## Can I edit the destination URL of my link after it's created?
Yes, you can edit the destination URL of your link after it's created. To do so, click on the `⋮` button next to the link in the links list and select "Edit link".
You can also [filter your analytics by tags](/help/article/filter-analytics-by-tags), which allows you to create powerful campaign-specific reports for your links.
That's it! You've just created your first short link on Dub.
## Advanced link features
Additionally, Dub also offers a variety of advanced link features that you can use to enhance your short links:
1. **UTM Builder**: Add UTM parameters to your links. [Learn more](/help/article/utm-builder).
2. **Link Cloaking**: Mask your destination URL with your short link. [Learn more](/help/article/link-cloaking).
3. **Password Protection**: Protect your links with a password. [Learn more](/help/article/password-protected-links).
4. **Expiration Date**: Set an expiration date for your links. [Learn more](/help/article/link-expiration).
5. **Device Targeting**: Set a custom destination URL for iOS and Android devices. [Learn more](/help/article/device-targeting).
6. **Geo Targeting**: Redirect your users to different links based on their location. [Learn more](/help/article/geo-targeting).
7. **Search Engine Indexing**: Control how your links are indexed by search engines. [Learn more](/help/article/how-noindex-works).
8. **Comments**: Add comments to your links – for you and your team. [Learn more](/help/article/link-comments).
## Can I edit the destination URL of my link after it's created?
Yes, you can edit the destination URL of your link after it's created. To do so, click on the `⋮` button next to the link in the links list and select "Edit link".
![Edit link popover]() This will open the [individual link settings page](https://dub.co/changelog/link-pages), where you can edit the destination URL and save the changes.
Unlike other link platforms like [Bitly](https://dub.co/compare/bitly) where you need to [pay a whopping \$1](https://support.bitly.com/hc/en-us/articles/14354987499661-How-do-I-purchase-more-links-or-redirects) every time you want to update the destination URL of a short link, you can edit the destination URL of your link on Dub for free – for as many times as you want.
# How to create UTM templates on Dub
Source: https://dub.co/help/article/how-to-create-utm-templates
Learn how to create UTM templates on Dub to streamline UTM campaign management across your team.
UTM (short for *"Urchin Tracking Module"*) tags are one of the most common ways to track the performance of your marketing campaigns. They are a set of parameters that you can add to your links to track how users interact with your links.
Here's a list of the most common UTM parameters:
* `utm_source`: The source of the traffic, e.g. Google, Facebook, LinkedIn
* `utm_medium`: The medium of the traffic, e.g. cpc, organic, referral
* `utm_campaign`: The name of the campaign, e.g. summer\_sale, newsletter\_campaign
* `utm_term`: The term that triggered the traffic, e.g. "running shoes"
* `utm_content`: The specific content that triggered the traffic, e.g. "text\_link"
When working on a marketing team, it's important to be able to create standard UTM templates that can be reused across multiple links. This allows you to streamline your UTM campaign management and ensure consistency across your campaigns – which in turn improves the accuracy of your data.
Learn more about the best practices when it comes to UTM tracking with our
[Ultimate Guide to UTM Tracking](https://dub.co/blog/utm-guide).
On Dub, we support creating UTM templates that live on a workspace-level, allowing you to create a standardized set of UTM parameters that you can share with your team.
There are two ways to create UTM templates on Dub:
1. **Directly in the UTM Builder**
2. **In the UTM Templates Settings Page**
## Creating UTM Templates in the UTM Builder
To create a new UTM template in the [UTM Builder](/help/article/utm-builder), follow these steps:
First, [create a link](/help/article/how-to-create-link) using the [Dub link builder](/help/article/dub-link-builder).
This will open the [individual link settings page](https://dub.co/changelog/link-pages), where you can edit the destination URL and save the changes.
Unlike other link platforms like [Bitly](https://dub.co/compare/bitly) where you need to [pay a whopping \$1](https://support.bitly.com/hc/en-us/articles/14354987499661-How-do-I-purchase-more-links-or-redirects) every time you want to update the destination URL of a short link, you can edit the destination URL of your link on Dub for free – for as many times as you want.
# How to create UTM templates on Dub
Source: https://dub.co/help/article/how-to-create-utm-templates
Learn how to create UTM templates on Dub to streamline UTM campaign management across your team.
UTM (short for *"Urchin Tracking Module"*) tags are one of the most common ways to track the performance of your marketing campaigns. They are a set of parameters that you can add to your links to track how users interact with your links.
Here's a list of the most common UTM parameters:
* `utm_source`: The source of the traffic, e.g. Google, Facebook, LinkedIn
* `utm_medium`: The medium of the traffic, e.g. cpc, organic, referral
* `utm_campaign`: The name of the campaign, e.g. summer\_sale, newsletter\_campaign
* `utm_term`: The term that triggered the traffic, e.g. "running shoes"
* `utm_content`: The specific content that triggered the traffic, e.g. "text\_link"
When working on a marketing team, it's important to be able to create standard UTM templates that can be reused across multiple links. This allows you to streamline your UTM campaign management and ensure consistency across your campaigns – which in turn improves the accuracy of your data.
Learn more about the best practices when it comes to UTM tracking with our
[Ultimate Guide to UTM Tracking](https://dub.co/blog/utm-guide).
On Dub, we support creating UTM templates that live on a workspace-level, allowing you to create a standardized set of UTM parameters that you can share with your team.
There are two ways to create UTM templates on Dub:
1. **Directly in the UTM Builder**
2. **In the UTM Templates Settings Page**
## Creating UTM Templates in the UTM Builder
To create a new UTM template in the [UTM Builder](/help/article/utm-builder), follow these steps:
First, [create a link](/help/article/how-to-create-link) using the [Dub link builder](/help/article/dub-link-builder).
![The Dub link builder]() Click on the **UTM** button in the link builder. This will open the **UTM Builder** modal.
You can also quickly access the **UTM Builder** feature by using the keyboard shortcut `U` while in the link builder.
Click on the **UTM** button in the link builder. This will open the **UTM Builder** modal.
You can also quickly access the **UTM Builder** feature by using the keyboard shortcut `U` while in the link builder.
![Use the UTM builder to populate UTM parameters for your links]() Here, you can populate the UTM parameters for your link. Some example values include:
* **UTM Source**: `google`
* **UTM Medium**: `cpc`
* **UTM Campaign**: `sale`
Then, click on the **Templates** button in the UTM Builder. This will open the UTM templates dropdown.
You can then save your UTM parameters as a new template by entering a name for the template, and clicking **Enter**.
Here, you can populate the UTM parameters for your link. Some example values include:
* **UTM Source**: `google`
* **UTM Medium**: `cpc`
* **UTM Campaign**: `sale`
Then, click on the **Templates** button in the UTM Builder. This will open the UTM templates dropdown.
You can then save your UTM parameters as a new template by entering a name for the template, and clicking **Enter**.
![The UTM templates dropdown]() ## Creating UTM Templates in the UTM Templates Settings Page
To create a new UTM template in the UTM Templates Settings Page, follow these steps:
Go to the [UTM Templates Settings Page](https://app.dub.co/settings/library/utm) in your Dub workspace.
## Creating UTM Templates in the UTM Templates Settings Page
To create a new UTM template in the UTM Templates Settings Page, follow these steps:
Go to the [UTM Templates Settings Page](https://app.dub.co/settings/library/utm) in your Dub workspace.
![The UTM templates settings page]() Click on the **Create Template** button to open up the UTM template editor.
Click on the **Create Template** button to open up the UTM template editor.
![The UTM template editor]() Here, you can add your UTM parameters to the template.
Once you're done, click on the **Create template** button to save the template.
This will create a new UTM template that you can use in the UTM Builder.
Here, you can add your UTM parameters to the template.
Once you're done, click on the **Create template** button to save the template.
This will create a new UTM template that you can use in the UTM Builder.
![A UTM template entry in the UTM templates list]() ## Using UTM Templates
There are two ways to use a UTM template:
First, [create a link](/help/article/how-to-create-link) using the [Dub link builder](/help/article/dub-link-builder).
## Using UTM Templates
There are two ways to use a UTM template:
First, [create a link](/help/article/how-to-create-link) using the [Dub link builder](/help/article/dub-link-builder).
![The Dub link builder]() Then, click on the UTM icon right above the destination URL field. This will open up the list of UTM templates you have created in your workspace, which you can then select.
Then, click on the UTM icon right above the destination URL field. This will open up the list of UTM templates you have created in your workspace, which you can then select.
![UTM icon in the link builder]() That's it! Your link will now have the UTM parameters from the template applied to it.
Alternative, you can also click on the **UTM** button in the link builder. This will open the **UTM Builder** modal.
You can also quickly access the **UTM Builder** feature by using the keyboard shortcut `U` while in the link builder.
That's it! Your link will now have the UTM parameters from the template applied to it.
Alternative, you can also click on the **UTM** button in the link builder. This will open the **UTM Builder** modal.
You can also quickly access the **UTM Builder** feature by using the keyboard shortcut `U` while in the link builder.
![Use the UTM builder to populate UTM parameters for your links]() In the UTM Builder, click on the **Templates** button. This will open the UTM templates dropdown.
You can then select your UTM template from the dropdown.
In the UTM Builder, click on the **Templates** button. This will open the UTM templates dropdown.
You can then select your UTM template from the dropdown.
![Selecting a UTM template from the dropdown]() # How to delete my Dub account?
Source: https://dub.co/help/article/how-to-delete-account
Learn how to delete your account on Dub
First of all, if you're reading this article and are looking to delete your Dub account, we're sorry to see you go!
We would appreciate any feedback on how we could improve our platform – feel free to [reach out to us](https://dub.co/contact/support) to let us know.
You can delete your Dub account by following the steps below:
1. Navigate to your [account settings](https://app.dub.co/account/settings) on Dub.
2. Scroll down to the bottom of the Settings page, where you will find the **Delete Account** option.
3. Click on the **Delete Account** button. You will be prompted to enter the words **confirm delete account** in the input field.
4. After confirming, your account will be permanently deleted. Please note that this action is irreversible.
**You cannot delete your account if you're an owner of a workspace.** You can
either delete the workspace or transfer ownership to another user before
deleting your account.
## How to delete my workspace?
You can delete your workspace by following these steps below:
1. Navigate to your workspace settings:
# How to delete my Dub account?
Source: https://dub.co/help/article/how-to-delete-account
Learn how to delete your account on Dub
First of all, if you're reading this article and are looking to delete your Dub account, we're sorry to see you go!
We would appreciate any feedback on how we could improve our platform – feel free to [reach out to us](https://dub.co/contact/support) to let us know.
You can delete your Dub account by following the steps below:
1. Navigate to your [account settings](https://app.dub.co/account/settings) on Dub.
2. Scroll down to the bottom of the Settings page, where you will find the **Delete Account** option.
3. Click on the **Delete Account** button. You will be prompted to enter the words **confirm delete account** in the input field.
4. After confirming, your account will be permanently deleted. Please note that this action is irreversible.
**You cannot delete your account if you're an owner of a workspace.** You can
either delete the workspace or transfer ownership to another user before
deleting your account.
## How to delete my workspace?
You can delete your workspace by following these steps below:
1. Navigate to your workspace settings:
![Workspace settings]() 2. Scroll down to the bottom of the Settings page, where you will find the
Delete Workspace option. 3. Click on the Delete Workspace button. You will be
prompted to enter the words confirm delete workspace in the input field.
You can access your workspace settings by inserting your workspace slug into
this link:
[https://app.dub.co/Your-Workspace-Slug/settings](https://app.dub.co/Your-Workspace-Slug/settings)
If you have any questions or need further assistance, please [contact our support team](https://dub.co/contact/support).
We hope to see you back someday!
## When I delete my account, do you remove all my data?
Yes, when you delete your Dub account, all of your data will be permanently removed from our systems. This includes your Dub workspace, all of your data within the workspace, and any other data that is associated with your account.
Your email address will also be removed from our mailing list, and you will no longer receive any emails from Dub.
# How can I download my Dub invoice?
Source: https://dub.co/help/article/how-to-download-invoice
Learn how to download your Dub invoice.
First of all, thank you for upgrading to a paid plan on Dub! Your support means the world to us and helps us continue to build and improve Dub.
You can download your Dub subscription invoices from the [Invoices tab in your Dub workspace](https://app.dub.co/settings/billing/invoices):
2. Scroll down to the bottom of the Settings page, where you will find the
Delete Workspace option. 3. Click on the Delete Workspace button. You will be
prompted to enter the words confirm delete workspace in the input field.
You can access your workspace settings by inserting your workspace slug into
this link:
[https://app.dub.co/Your-Workspace-Slug/settings](https://app.dub.co/Your-Workspace-Slug/settings)
If you have any questions or need further assistance, please [contact our support team](https://dub.co/contact/support).
We hope to see you back someday!
## When I delete my account, do you remove all my data?
Yes, when you delete your Dub account, all of your data will be permanently removed from our systems. This includes your Dub workspace, all of your data within the workspace, and any other data that is associated with your account.
Your email address will also be removed from our mailing list, and you will no longer receive any emails from Dub.
# How can I download my Dub invoice?
Source: https://dub.co/help/article/how-to-download-invoice
Learn how to download your Dub invoice.
First of all, thank you for upgrading to a paid plan on Dub! Your support means the world to us and helps us continue to build and improve Dub.
You can download your Dub subscription invoices from the [Invoices tab in your Dub workspace](https://app.dub.co/settings/billing/invoices):
![Dub invoice download]() Then, click on the "View invoice" to download the invoice you want.
# How to export link analytics data from Dub
Source: https://dub.co/help/article/how-to-export-analytics
Learn more about how to export link analytics data from Dub
Analytics can be powerful in understanding how your audience is interacting with your content and to make data-driven decisions.
For Dub, it's always been a top priority to provide [world-class analytics](/help/article/dub-analytics) to everyone.
Then, click on the "View invoice" to download the invoice you want.
# How to export link analytics data from Dub
Source: https://dub.co/help/article/how-to-export-analytics
Learn more about how to export link analytics data from Dub
Analytics can be powerful in understanding how your audience is interacting with your content and to make data-driven decisions.
For Dub, it's always been a top priority to provide [world-class analytics](/help/article/dub-analytics) to everyone.
![CSV files are agnostic and can be opened in a variety of tools]() To get more out of your analytics, you can export your analytics data to a CSV file. This can be useful if you want to analyze the data in a business intelligence (BI) tool, share it with your team, or import it into a spreadsheet.
## Exporting link analytics data
To export data from your link analytics, follow these steps:
Go to your [Dub dashboard](https://d.to/register), and click **Analytics** from the **Insights** group of the workspace you want to export data from.
To get more out of your analytics, you can export your analytics data to a CSV file. This can be useful if you want to analyze the data in a business intelligence (BI) tool, share it with your team, or import it into a spreadsheet.
## Exporting link analytics data
To export data from your link analytics, follow these steps:
Go to your [Dub dashboard](https://d.to/register), and click **Analytics** from the **Insights** group of the workspace you want to export data from.
![Analytics page in the navigation]() Click on the `⋮` button in the top right corner to open up the more options dropdown menu
Click on the **Download as CSV** option.
Click on the `⋮` button in the top right corner to open up the more options dropdown menu
Click on the **Download as CSV** option.
![Click on the download icon to export the data]() After a few seconds, the zip file will be downloaded to your computer. It contains a CSV file for every analytics type you already know from
the dashboard (e.g. `countries.csv`, `devices.csv`, etc…).
After a few seconds, the zip file will be downloaded to your computer. It contains a CSV file for every analytics type you already know from
the dashboard (e.g. `countries.csv`, `devices.csv`, etc…).
![Find the CSV files in the downloaded zip file]() # How to export links from Dub
Source: https://dub.co/help/article/how-to-export-links
Learn more about how to export your links from your Dub workspace to a CSV file.
In your Dub workspace, you can export your links to a CSV file. This is useful if you want to analyze the data locally or share them with an external stakeholder.
To export your links, follow these steps:
In your Dub workspace, navigate to the **Links** tab.
Then, click on the `⋮` button to open the more options dropdown menu. Select the **Export links** option.
# How to export links from Dub
Source: https://dub.co/help/article/how-to-export-links
Learn more about how to export your links from your Dub workspace to a CSV file.
In your Dub workspace, you can export your links to a CSV file. This is useful if you want to analyze the data locally or share them with an external stakeholder.
To export your links, follow these steps:
In your Dub workspace, navigate to the **Links** tab.
Then, click on the `⋮` button to open the more options dropdown menu. Select the **Export links** option.
![Click on the more options dropdown menu to open the export links modal]() Choose the date range for the links you want to export. By default, Dub will export all links.
Choose the date range for the links you want to export. By default, Dub will export all links.
![Select the date range for the links you want to export]() Dub will export the following columns by default:
* Short link
* Destination URL
* Clicks
* Created at
You can select the columns you want to export under the **Columns** section.
Dub will export the following columns by default:
* Short link
* Destination URL
* Clicks
* Created at
You can select the columns you want to export under the **Columns** section.
![Select the columns that you want to export]() Optionally, you can choose to apply the current filters to the links you want to export. If you do, Dub will export the links that match the current filters; otherwise, it will export all links.
Optionally, you can choose to apply the current filters to the links you want to export. If you do, Dub will export the links that match the current filters; otherwise, it will export all links.
![Apply current filters to the links you want to export]() Once you have selected the date range and columns to export, click on **Export links**.
After a few seconds, the CSV file will be downloaded to your computer.
# How to import links from a CSV file
Source: https://dub.co/help/article/how-to-import-csv
Easily import your links from a CSV file into Dub.
You can also import your existing links into Dub via our CSV import feature. This is useful if you have a large list of links to import or if you want to [import links from another provider](/help/article/migrating-from-bitly) that we don't have a 1-click importer for.
To import your links, you can follow these steps:
Before you import your CSV file, make sure it is in the correct format. Your CSV file needs to have the following data:
| Column | Required | Description | Example |
| --------------- | -------- | -------------------------------------------------------------- | ------------------------- |
| Destination URL | **Yes** | The destination URL of the link you want to import. | `https://www.google.com` |
| Short link | **Yes** | The shortened version of the link. | `yourdomain.com/abc123` |
| Title | No | The title of the link. | `Google` |
| Description | No | The description of the link. | `Search the web` |
| Tags | No | The tags of the link – must be a comma-separated list of tags. | `search, google, web` |
| Creation date | No | The date the link was created. | `2024-01-01` |
The actual names of your columns can be anything you want, but you need to make sure that the required columns are present.
If you haven't already, [create a workspace on Dub](/help/article/what-is-a-workspace).
**Protip**: Once you create your workspace, we generally recommend you ***not
to [configure your domain](/help/article/how-to-add-custom-domain)*** until
you've migrated all your links. This will prevent any potential downtime for
your links.
Then, from your [links dashboard](https://d.to/register), click on the `⋮` button next to the **Create Link** button and select **Import from CSV**.
Once you have selected the date range and columns to export, click on **Export links**.
After a few seconds, the CSV file will be downloaded to your computer.
# How to import links from a CSV file
Source: https://dub.co/help/article/how-to-import-csv
Easily import your links from a CSV file into Dub.
You can also import your existing links into Dub via our CSV import feature. This is useful if you have a large list of links to import or if you want to [import links from another provider](/help/article/migrating-from-bitly) that we don't have a 1-click importer for.
To import your links, you can follow these steps:
Before you import your CSV file, make sure it is in the correct format. Your CSV file needs to have the following data:
| Column | Required | Description | Example |
| --------------- | -------- | -------------------------------------------------------------- | ------------------------- |
| Destination URL | **Yes** | The destination URL of the link you want to import. | `https://www.google.com` |
| Short link | **Yes** | The shortened version of the link. | `yourdomain.com/abc123` |
| Title | No | The title of the link. | `Google` |
| Description | No | The description of the link. | `Search the web` |
| Tags | No | The tags of the link – must be a comma-separated list of tags. | `search, google, web` |
| Creation date | No | The date the link was created. | `2024-01-01` |
The actual names of your columns can be anything you want, but you need to make sure that the required columns are present.
If you haven't already, [create a workspace on Dub](/help/article/what-is-a-workspace).
**Protip**: Once you create your workspace, we generally recommend you ***not
to [configure your domain](/help/article/how-to-add-custom-domain)*** until
you've migrated all your links. This will prevent any potential downtime for
your links.
Then, from your [links dashboard](https://d.to/register), click on the `⋮` button next to the **Create Link** button and select **Import from CSV**.
![Import from CSV button]() This will open a modal with a file uploader.
This will open a modal with a file uploader.
![CSV import modal]() Upload your CSV file, and you should be automatically redirected to the next step.
When you upload a CSV file, [Dub AI](https://dub.co/blog/introducing-dub-ai) will automatically map the columns in your CSV file to the [supported data fields in Dub](/docs/data-model#links).
Upload your CSV file, and you should be automatically redirected to the next step.
When you upload a CSV file, [Dub AI](https://dub.co/blog/introducing-dub-ai) will automatically map the columns in your CSV file to the [supported data fields in Dub](/docs/data-model#links).
![CSV import column mapping]() You can then review and edit the mappings before selecting **Confirm import**. In just a few seconds, all your links will be migrated to Dub.
Alternatively, you can also select **Choose another file** to upload a different CSV file.
Once all your links have been imported, we will send you an email to let you know that the migration is complete.
You can then review and edit the mappings before selecting **Confirm import**. In just a few seconds, all your links will be migrated to Dub.
Alternatively, you can also select **Choose another file** to upload a different CSV file.
Once all your links have been imported, we will send you an email to let you know that the migration is complete.
![Email notification about completed CSV import]() If there are any issues with the import, we will send you a separate email with the details of the errors.
If there are any issues with the import, we will send you a separate email with the details of the errors.
![Email notification about CSV import errors]() Once all your links are imported, you can [configure your domain](/help/article/how-to-add-custom-domain#step-2-configure-your-domain) by setting the right DNS records. Once this is done, you can start using your links!
# How to invite teammates on Dub
Source: https://dub.co/help/article/how-to-invite-teammates
Learn how to invite teammates to your Dub workspace and start collaborating with your team.
This feature is only available on [Pro plans and
above](https://dub.co/pricing).
On Dub, you can easily invite your teammates to join your Dub workspace. This is useful if you want to collaborate with your team on your short links.
To start inviting your teammates, you first need to [create a workspace](/help/article/what-is-a-workspace#how-to-create-a-workspace) on Dub.
Once you have created a workspace, you have two different ways to invite your teammates:
* Via [email](#sending-an-invite)
* Via [invite links](#using-invite-links)
## Sending an invite
To invite a teammate via email, first navigate to **Members** in your workspace settings.
Once all your links are imported, you can [configure your domain](/help/article/how-to-add-custom-domain#step-2-configure-your-domain) by setting the right DNS records. Once this is done, you can start using your links!
# How to invite teammates on Dub
Source: https://dub.co/help/article/how-to-invite-teammates
Learn how to invite teammates to your Dub workspace and start collaborating with your team.
This feature is only available on [Pro plans and
above](https://dub.co/pricing).
On Dub, you can easily invite your teammates to join your Dub workspace. This is useful if you want to collaborate with your team on your short links.
To start inviting your teammates, you first need to [create a workspace](/help/article/what-is-a-workspace#how-to-create-a-workspace) on Dub.
Once you have created a workspace, you have two different ways to invite your teammates:
* Via [email](#sending-an-invite)
* Via [invite links](#using-invite-links)
## Sending an invite
To invite a teammate via email, first navigate to **Members** in your workspace settings.
![Workspace settings navigation]() Click on the **Invite member** button to open the Invite Teammate modal.
Click on the **Invite member** button to open the Invite Teammate modal.
![Invite member button in workspace members settings]() Enter your teammate's email address and [assign them a role](/help/article/workspace-roles).
You can also click on the **Add email** button to invite multiple teammates at once. Then, click on the **Send invite** button to send the invitations to your teammates.
Enter your teammate's email address and [assign them a role](/help/article/workspace-roles).
You can also click on the **Add email** button to invite multiple teammates at once. Then, click on the **Send invite** button to send the invitations to your teammates.
![Invite member modal]() Your teammates will receive an invitation to join your Dub workspace via email:
Your teammates will receive an invitation to join your Dub workspace via email:
![Email invitation to join a Dub workspace]() Invitations will be valid for 14 days – after which you will need to send a
new one.
## Using invite links
You can also invite your teammates to join your workspace by sharing an invite link with them.
First navigate to **Members** in your workspace settings. From here, click on the **Link** button in the top-right to open the Invite Link modal.
Invitations will be valid for 14 days – after which you will need to send a
new one.
## Using invite links
You can also invite your teammates to join your workspace by sharing an invite link with them.
First navigate to **Members** in your workspace settings. From here, click on the **Link** button in the top-right to open the Invite Link modal.
!['Invite link' button in Dub]() Click on the **Copy** button to copy the invite link to your clipboard.
Click on the **Copy** button to copy the invite link to your clipboard.
![The Invite link modal in Dub]() ```text title="Example of an invite link" theme={null}
https://app.dub.co/invites/xxxxxx
```
You can then share the invite link with your teammates via email, chat, or any other communication tool.
## Revoking / resending an invite
If you want to revoke/resend an invitation, you can do so by following these steps:
1. Navigate to your workspace's Members Settings page.
2. Click on the **Invitations** tab.
3. Click on the `⋮` button next to the invitation you want to revoke.
4. Click on the **Remove** button to open the Remove Invitation modal.
5. Click on the **Confirm remove** button to confirm.
```text title="Example of an invite link" theme={null}
https://app.dub.co/invites/xxxxxx
```
You can then share the invite link with your teammates via email, chat, or any other communication tool.
## Revoking / resending an invite
If you want to revoke/resend an invitation, you can do so by following these steps:
1. Navigate to your workspace's Members Settings page.
2. Click on the **Invitations** tab.
3. Click on the `⋮` button next to the invitation you want to revoke.
4. Click on the **Remove** button to open the Remove Invitation modal.
5. Click on the **Confirm remove** button to confirm.
![The Remove Invitation modal in Dub]() ## Removing a teammate
If a teammate no longer needs access to your workspace, you can remove them from your workspace.
1. Navigate to your workspace's Members Settings page.
2. Click on the `⋮` button next to the teammate you want to remove.
3. Click on the **Remove** button to open the Remove Teammate modal.
4. Click on the **Confirm remove** button to confirm.
## Removing a teammate
If a teammate no longer needs access to your workspace, you can remove them from your workspace.
1. Navigate to your workspace's Members Settings page.
2. Click on the `⋮` button next to the teammate you want to remove.
3. Click on the **Remove** button to open the Remove Teammate modal.
4. Click on the **Confirm remove** button to confirm.
![The Remove Teammate modal in Dub]() In some cases, a user might also be associated with [created API
keys](/docs/api-reference/tokens), so you'll see a slightly different "remove
modal", showing the keys this user is associated with. If you delete a user,
their corresponding API keys will be deleted as well.
In some cases, a user might also be associated with [created API
keys](/docs/api-reference/tokens), so you'll see a slightly different "remove
modal", showing the keys this user is associated with. If you delete a user,
their corresponding API keys will be deleted as well.
![The Remove Teammate modal in Dub]() ## How many teammates can I invite?
The number of teammates you can invite depends on your Dub plan:
* **Free plan**: You cannot invite any teammates.
* **Pro plan**: You can invite up to 3 teammates.
* **Business plan**: You can invite up to 10 teammates.
* **Advanced plan:** You can invite up to 20 teammates.
* **Enterprise plan**: You can invite unlimited teammates.
For a complete comparison of features, [view all our plans available](https://dub.co/pricing).
# How to set up a redirect for your custom domain on Dub
Source: https://dub.co/help/article/how-to-redirect-root-domain
Learn how to redirect your custom domain to a URL of your choice on Dub.
This feature is only available on [Pro plans and
above](https://dub.co/pricing).
When you add a custom domain to your workspace, Dub will automatically create a placeholder page for your domain. This page will be displayed when you visit your domain.
## How many teammates can I invite?
The number of teammates you can invite depends on your Dub plan:
* **Free plan**: You cannot invite any teammates.
* **Pro plan**: You can invite up to 3 teammates.
* **Business plan**: You can invite up to 10 teammates.
* **Advanced plan:** You can invite up to 20 teammates.
* **Enterprise plan**: You can invite unlimited teammates.
For a complete comparison of features, [view all our plans available](https://dub.co/pricing).
# How to set up a redirect for your custom domain on Dub
Source: https://dub.co/help/article/how-to-redirect-root-domain
Learn how to redirect your custom domain to a URL of your choice on Dub.
This feature is only available on [Pro plans and
above](https://dub.co/pricing).
When you add a custom domain to your workspace, Dub will automatically create a placeholder page for your domain. This page will be displayed when you visit your domain.
![Placeholder page for a custom domain on Dub]() To redirect your domain to a URL of your choice, follow these steps:
1. If you haven't already, upgrade to the [Pro plan](https://dub.co/pricing).
2. Navigate to your workspace's Domains page – you can do that by clicking on the **Domains** link in the menu bar at the top of your workspace dashboard.
3. Click on the `⋮` button next to the domain you want to redirect, which will open a dropdown menu.
To redirect your domain to a URL of your choice, follow these steps:
1. If you haven't already, upgrade to the [Pro plan](https://dub.co/pricing).
2. Navigate to your workspace's Domains page – you can do that by clicking on the **Domains** link in the menu bar at the top of your workspace dashboard.
3. Click on the `⋮` button next to the domain you want to redirect, which will open a dropdown menu.
![More options popover]() 4. In the dropdown menu, click on the **Edit Link** button, which will open the [Dub link builder](/help/article/dub-link-builder) for the root domain link.
5. Enter the URL you want to redirect your domain to in the **Destination URL** field.
4. In the dropdown menu, click on the **Edit Link** button, which will open the [Dub link builder](/help/article/dub-link-builder) for the root domain link.
5. Enter the URL you want to redirect your domain to in the **Destination URL** field.
![The 'Domain Settings' modal in Dub]() 6. Click "Save changes". Your root domain link will now redirect to the URL you just specified.
If you don't have a destination URL configured on your root domain link, clicks on your root domain link won't count towards your [monthly clicks limit](/help/article/dub-analytics-limits).
## Advanced link features
Additionally, Dub also offers a variety of advanced link features that you can use to enhance your root domain links:
1. **Custom Link Previews**: Customize how your links show up on social media to improve click-through rates. [Learn more](/help/article/custom-link-previews).
2. **Tags**: Assign tags to your links to organize them. [Learn more](/help/article/how-to-use-tags).
3. **UTM Builder**: Add UTM parameters to your links. [Learn more](/help/article/utm-builder).
4. **Link Cloaking**: Mask your destination URL with your short link. [Learn more](/help/article/link-cloaking).
5. **Password Protection**: Protect your links with a password. [Learn more](/help/article/password-protected-links).
6. **Expiration Date**: Set an expiration date for your links. [Learn more](/help/article/link-expiration).
7. **Device Targeting**: Set a custom destination URL for iOS and Android devices. [Learn more](/help/article/device-targeting).
8. **Geo Targeting**: Redirect your users to different links based on their location. [Learn more](/help/article/geo-targeting).
9. **Search Engine Indexing**: Control how your links are indexed by search engines. [Learn more](/help/article/how-noindex-works).
10. **Comments**: Add comments to your links – for you and your team. [Learn more](/help/article/link-comments).
# How to set a primary domain on Dub?
Source: https://dub.co/help/article/how-to-set-primary-domain
Learn what a primary domain is on Dub and how to set it up.
Dub is the only link management platform that allows you to [add custom domains](/help/article/how-to-add-custom-domain) for free. On Dub, you can add up to 3 domains on the free plan, and 10+ domains on the [Pro plan](https://dub.co/pricing) and above.
When you add multiple domains to your Dub account, the first domain you add will automatically be set as the primary domain. This domain will be the default domain in the Dub link builder:
6. Click "Save changes". Your root domain link will now redirect to the URL you just specified.
If you don't have a destination URL configured on your root domain link, clicks on your root domain link won't count towards your [monthly clicks limit](/help/article/dub-analytics-limits).
## Advanced link features
Additionally, Dub also offers a variety of advanced link features that you can use to enhance your root domain links:
1. **Custom Link Previews**: Customize how your links show up on social media to improve click-through rates. [Learn more](/help/article/custom-link-previews).
2. **Tags**: Assign tags to your links to organize them. [Learn more](/help/article/how-to-use-tags).
3. **UTM Builder**: Add UTM parameters to your links. [Learn more](/help/article/utm-builder).
4. **Link Cloaking**: Mask your destination URL with your short link. [Learn more](/help/article/link-cloaking).
5. **Password Protection**: Protect your links with a password. [Learn more](/help/article/password-protected-links).
6. **Expiration Date**: Set an expiration date for your links. [Learn more](/help/article/link-expiration).
7. **Device Targeting**: Set a custom destination URL for iOS and Android devices. [Learn more](/help/article/device-targeting).
8. **Geo Targeting**: Redirect your users to different links based on their location. [Learn more](/help/article/geo-targeting).
9. **Search Engine Indexing**: Control how your links are indexed by search engines. [Learn more](/help/article/how-noindex-works).
10. **Comments**: Add comments to your links – for you and your team. [Learn more](/help/article/link-comments).
# How to set a primary domain on Dub?
Source: https://dub.co/help/article/how-to-set-primary-domain
Learn what a primary domain is on Dub and how to set it up.
Dub is the only link management platform that allows you to [add custom domains](/help/article/how-to-add-custom-domain) for free. On Dub, you can add up to 3 domains on the free plan, and 10+ domains on the [Pro plan](https://dub.co/pricing) and above.
When you add multiple domains to your Dub account, the first domain you add will automatically be set as the primary domain. This domain will be the default domain in the Dub link builder:
![Primary domain in the Dub link builder]() It will also be the default domain if when using the [Dub API](/docs/api-reference/introduction). Here's an example of how it works with our [TypeScript SDK](https://d.to/sdk):
```typescript title="config.js" theme={null}
import { Dub } from "dub";
const dub = new Dub();
async function main() {
const link = await dub.links.create({
url: "string",
domain: "dub.sh", // (optional - defaults to primary domain) // [!code highlight]
});
console.log(link);
}
main();
```
If you want, you can change the primary domain to another domain that you have added to your Dub account.
Here's how you can set a primary domain on Dub:
1. Go to the [Dub dashboard](https://d.to/register).
2. Click on the **Domains** tab on the top navigation bar.
3. Click on the `⋮` button of domain that you want to set as the primary domain, which will open a dropdown menu.
4. In the dropdown menu, click on the **Set as Primary** button, which will open the primary domain modal.
It will also be the default domain if when using the [Dub API](/docs/api-reference/introduction). Here's an example of how it works with our [TypeScript SDK](https://d.to/sdk):
```typescript title="config.js" theme={null}
import { Dub } from "dub";
const dub = new Dub();
async function main() {
const link = await dub.links.create({
url: "string",
domain: "dub.sh", // (optional - defaults to primary domain) // [!code highlight]
});
console.log(link);
}
main();
```
If you want, you can change the primary domain to another domain that you have added to your Dub account.
Here's how you can set a primary domain on Dub:
1. Go to the [Dub dashboard](https://d.to/register).
2. Click on the **Domains** tab on the top navigation bar.
3. Click on the `⋮` button of domain that you want to set as the primary domain, which will open a dropdown menu.
4. In the dropdown menu, click on the **Set as Primary** button, which will open the primary domain modal.
![More options popover]() 5. Click on the **Set as primary domain** button in the modal.
5. Click on the **Set as primary domain** button in the modal.
![Set as primary domain modal]() Voilà! You have successfully set a primary domain on Dub. Now, the domain you have set as the primary domain will be the default domain in your Dub link builder and when using the [Dub API](/docs/api-reference/introduction).
# Setting up a bank account for partner payouts
Source: https://dub.co/help/article/how-to-set-up-bank-account
Start paying out your program partners using your bank account (direct debit via ACH, SEPA, or PADS).
This feature is only available on [Business plans and
above](https://dub.co/pricing/partners).
With [Dub Partners](/help/article/dub-partners), you can [send payouts](/help/article/partner-payouts) to your affiliates using your credit card on file. However, for larger payouts, it might be more cost-efficient to set up your bank account for direct debit instead.
Depending on your bank's country, we support 3 different types of direct debit methods:
* **US**: Automated Clearing House (ACH)
* **Canada**: Automated Clearing Settlement System (ACSS)
* **Europe**: Single Euro Payments Area (SEPA)
Due to the fraud/dispute risks involved with SEPA direct debit, it is
currently only available on [Enterprise](https://dub.co/enterprise) plans.
## Connecting your bank account to Dub
Here's how you can connect your bank account to Dub for partner payouts:
On your [workspace's billing tab](https://app.dub.co/settings/billing), scroll down to **Payment methods** section.
Click on the **Connect** button to add a new direct debit method:
Voilà! You have successfully set a primary domain on Dub. Now, the domain you have set as the primary domain will be the default domain in your Dub link builder and when using the [Dub API](/docs/api-reference/introduction).
# Setting up a bank account for partner payouts
Source: https://dub.co/help/article/how-to-set-up-bank-account
Start paying out your program partners using your bank account (direct debit via ACH, SEPA, or PADS).
This feature is only available on [Business plans and
above](https://dub.co/pricing/partners).
With [Dub Partners](/help/article/dub-partners), you can [send payouts](/help/article/partner-payouts) to your affiliates using your credit card on file. However, for larger payouts, it might be more cost-efficient to set up your bank account for direct debit instead.
Depending on your bank's country, we support 3 different types of direct debit methods:
* **US**: Automated Clearing House (ACH)
* **Canada**: Automated Clearing Settlement System (ACSS)
* **Europe**: Single Euro Payments Area (SEPA)
Due to the fraud/dispute risks involved with SEPA direct debit, it is
currently only available on [Enterprise](https://dub.co/enterprise) plans.
## Connecting your bank account to Dub
Here's how you can connect your bank account to Dub for partner payouts:
On your [workspace's billing tab](https://app.dub.co/settings/billing), scroll down to **Payment methods** section.
Click on the **Connect** button to add a new direct debit method:
![]() This will open up a modal with the following direct debit methods:
* **US**: Automated Clearing House (ACH)
* **Canada**: Automated Clearing Settlement System (ACSS)
* **Europe**: Single Euro Payments Area (SEPA)
This will open up a modal with the following direct debit methods:
* **US**: Automated Clearing House (ACH)
* **Canada**: Automated Clearing Settlement System (ACSS)
* **Europe**: Single Euro Payments Area (SEPA)
![]() Select the correct method based on your bank's location, and you'll be redirected to the Stripe connection flow.
Next, search for your bank that you want to connect to Dub:
Select the correct method based on your bank's location, and you'll be redirected to the Stripe connection flow.
Next, search for your bank that you want to connect to Dub:
![]() Search for your bank, and follow the steps to connect your account.
Search for your bank, and follow the steps to connect your account.
![]() If you selected SEPA direct debit in the previous step, you will need to manually enter your IBAN number and account details to set it up instead:
If you selected SEPA direct debit in the previous step, you will need to manually enter your IBAN number and account details to set it up instead:
![]() Alternatively, you can also manually verify your bank account via the [micro-deposits verification method](https://stripe.com/ie/resources/more/what-is-micro-deposit-verification-here-is-how-it-works).
To do that, select the **Enter bank details manually** option:
Alternatively, you can also manually verify your bank account via the [micro-deposits verification method](https://stripe.com/ie/resources/more/what-is-micro-deposit-verification-here-is-how-it-works).
To do that, select the **Enter bank details manually** option:
![]() Then, enter your bank details (routing number, account number):
Then, enter your bank details (routing number, account number):
![]() You'll receive a micro deposit in your account within 1-2 business days that will include a six-character descriptor code starting with `SM`:
```
SMXXXX
```
Once you receive the micro-deposit, [reach out to us](https://dub.co/contact/support) with the code and we'll help you verify your bank account.
## My bank account is currently unavailable
Depending on which bank you select, Stripe might show an error that the bank is currently unavailable:
You'll receive a micro deposit in your account within 1-2 business days that will include a six-character descriptor code starting with `SM`:
```
SMXXXX
```
Once you receive the micro-deposit, [reach out to us](https://dub.co/contact/support) with the code and we'll help you verify your bank account.
## My bank account is currently unavailable
Depending on which bank you select, Stripe might show an error that the bank is currently unavailable:
![]() If that happens, follow step 3 above to manually verify your bank account.
# How to transfer domains between workspaces?
Source: https://dub.co/help/article/how-to-transfer-domains
Learn how to transfer your custom domains and their associated links from one Dub workspace to another.
This guide is for transferring custom domains between Dub workspaces. If you
want to transfer [default Dub domains](/help/article/default-dub-domains)
between workspaces, please refer to the guide on [how to transfer links
between workspaces](/help/article/how-to-transfer-links).
Transferring domains between workspaces is a common use case for many Dub users. Some examples:
* You're working with a client on a project and want to transfer the custom domains you've set up for them to their workspace
* You're [selling your custom link shortener](https://dub.co/customers/pallyy) and want to transfer the custom domain to the new owner's workspace
This guide will show you how to transfer your Dub custom domains from one workspace to another – in just a few clicks!
When transferring a custom domain between workspaces, all links associated
with the domain will also be transferred as well.
Transferring a domain will also fully reset the stats for the domain and its
associated links and is irreversible – proceed with caution.
## Step 1: Open the domain transfer modal
For a given domain, click on the `⋮` button and select **Transfer**.
If that happens, follow step 3 above to manually verify your bank account.
# How to transfer domains between workspaces?
Source: https://dub.co/help/article/how-to-transfer-domains
Learn how to transfer your custom domains and their associated links from one Dub workspace to another.
This guide is for transferring custom domains between Dub workspaces. If you
want to transfer [default Dub domains](/help/article/default-dub-domains)
between workspaces, please refer to the guide on [how to transfer links
between workspaces](/help/article/how-to-transfer-links).
Transferring domains between workspaces is a common use case for many Dub users. Some examples:
* You're working with a client on a project and want to transfer the custom domains you've set up for them to their workspace
* You're [selling your custom link shortener](https://dub.co/customers/pallyy) and want to transfer the custom domain to the new owner's workspace
This guide will show you how to transfer your Dub custom domains from one workspace to another – in just a few clicks!
When transferring a custom domain between workspaces, all links associated
with the domain will also be transferred as well.
Transferring a domain will also fully reset the stats for the domain and its
associated links and is irreversible – proceed with caution.
## Step 1: Open the domain transfer modal
For a given domain, click on the `⋮` button and select **Transfer**.
![Transfer domain option]() ## Step 2: Select the destination workspace
In the domain transfer modal, select the workspace you want to transfer the link to:
## Step 2: Select the destination workspace
In the domain transfer modal, select the workspace you want to transfer the link to:
![Transfer domain modal]() Click on **Confirm transfer** to complete the transfer.
That's it! Your domain and its associated links should now be successfully transferred to the new workspace.
Transferring a domain will also fully reset the stats for the domain and its
associated links and is irreversible – proceed with caution.
## Caveats
* Transferring a domain will also **fully reset the stats** for the domain and its associated links and is irreversible – please proceed with caution.
* You cannot transfer a [primary domain](/help/article/how-to-set-primary-domain) to another workspace. You'll need to set another domain as primary before transferring the existing primary domain.
* Link tags are not transferred when you transfer a domain and its links between workspaces. You'll need to re-apply the tags to the link in the new workspace.
* You can only transfer links to workspaces that you have access to. If you don't have access to the destination workspace, you won't be able to transfer the domain.
# How to transfer links between workspaces?
Source: https://dub.co/help/article/how-to-transfer-links
Learn how to transfer your Dub default short links from one workspace to another.
Transferring links between workspaces is a common use case for many Dub users, especially when they want to reorganize their links or consolidate them into a single workspace.
This guide will show you how to transfer your Dub short links from one workspace to another.
Transferring a link will also **fully reset its stats** and is irreversible
– please proceed with caution.
## Step 1: Open the link transfer modal
For a given link, click on the `⋮` button and select **Transfer**.
Click on **Confirm transfer** to complete the transfer.
That's it! Your domain and its associated links should now be successfully transferred to the new workspace.
Transferring a domain will also fully reset the stats for the domain and its
associated links and is irreversible – proceed with caution.
## Caveats
* Transferring a domain will also **fully reset the stats** for the domain and its associated links and is irreversible – please proceed with caution.
* You cannot transfer a [primary domain](/help/article/how-to-set-primary-domain) to another workspace. You'll need to set another domain as primary before transferring the existing primary domain.
* Link tags are not transferred when you transfer a domain and its links between workspaces. You'll need to re-apply the tags to the link in the new workspace.
* You can only transfer links to workspaces that you have access to. If you don't have access to the destination workspace, you won't be able to transfer the domain.
# How to transfer links between workspaces?
Source: https://dub.co/help/article/how-to-transfer-links
Learn how to transfer your Dub default short links from one workspace to another.
Transferring links between workspaces is a common use case for many Dub users, especially when they want to reorganize their links or consolidate them into a single workspace.
This guide will show you how to transfer your Dub short links from one workspace to another.
Transferring a link will also **fully reset its stats** and is irreversible
– please proceed with caution.
## Step 1: Open the link transfer modal
For a given link, click on the `⋮` button and select **Transfer**.
![Transfer link option]() You can also use the `T` keyboard shortcut to open the transfer modal.
## Step 2: Select the destination workspace
In the transfer modal, select the workspace you want to transfer the link to:
You can also use the `T` keyboard shortcut to open the transfer modal.
## Step 2: Select the destination workspace
In the transfer modal, select the workspace you want to transfer the link to:
![Transfer link modal]() Click on **Confirm transfer** to complete the transfer.
That's it! Your link should now be successfully transferred to the new workspace.
Transferring a link will also **fully reset its stats** and is irreversible
– please proceed with caution.
## Caveats
* Transferring a link will also **fully reset its stats** and is irreversible – please proceed with caution.
* You can only transfer [default Dub domains](/help/article/default-dub-domains) (e.g. \`dub.sh\`, \`chatg.pt\`, \`spti.fi\`, \`amzn.id\`, etc.) between workspaces. If you want to transfer a custom domain link, you'll need to [transfer the domain](/help/article/how-to-transfer-domains) itself to the new workspace.
* Link tags are not transferred when you transfer a link between workspaces. You'll need to re-apply the tags to the link in the new workspace.
* You can only transfer links to workspaces that you have access to. If you don't have access to the destination workspace, you won't be able to transfer the link.
# How to use Dub to shorten links on a subpath
Source: https://dub.co/help/article/how-to-use-dub-with-subpath
Learn how to configure Dub to handle redirects on a subpath of an existing domain.
With Dub, you can easily set up redirects on a subpath of an existing domain.
This is useful if you are already using the domain for your website/app and only want to use Dub for a specific subpath.
For example, if you have a website at `acme.com` and want to add link-sharing features under `acme.com/r/` (e.g. `acme.com/r/123`), you can use Dub to handle the redirects for this subpath without affecting the rest of your website.
## Step 1: Add a subdomain to Dub
First, you need to add a subdomain of your existing domain to Dub.
For example, if your domain is `acme.com`, you can add a subdomain like `r.acme.com`.
You can follow [these steps](/help/article/how-to-add-custom-domain#step-2b-adding-a-subdomain) to add a subdomain to Dub.
## Step 2: Configure rewrites/redirects
Once you've added the subdomain, you can use rewrites or redirects to mask the subdomain and handle the redirects on the subpath.
Click on **Confirm transfer** to complete the transfer.
That's it! Your link should now be successfully transferred to the new workspace.
Transferring a link will also **fully reset its stats** and is irreversible
– please proceed with caution.
## Caveats
* Transferring a link will also **fully reset its stats** and is irreversible – please proceed with caution.
* You can only transfer [default Dub domains](/help/article/default-dub-domains) (e.g. \`dub.sh\`, \`chatg.pt\`, \`spti.fi\`, \`amzn.id\`, etc.) between workspaces. If you want to transfer a custom domain link, you'll need to [transfer the domain](/help/article/how-to-transfer-domains) itself to the new workspace.
* Link tags are not transferred when you transfer a link between workspaces. You'll need to re-apply the tags to the link in the new workspace.
* You can only transfer links to workspaces that you have access to. If you don't have access to the destination workspace, you won't be able to transfer the link.
# How to use Dub to shorten links on a subpath
Source: https://dub.co/help/article/how-to-use-dub-with-subpath
Learn how to configure Dub to handle redirects on a subpath of an existing domain.
With Dub, you can easily set up redirects on a subpath of an existing domain.
This is useful if you are already using the domain for your website/app and only want to use Dub for a specific subpath.
For example, if you have a website at `acme.com` and want to add link-sharing features under `acme.com/r/` (e.g. `acme.com/r/123`), you can use Dub to handle the redirects for this subpath without affecting the rest of your website.
## Step 1: Add a subdomain to Dub
First, you need to add a subdomain of your existing domain to Dub.
For example, if your domain is `acme.com`, you can add a subdomain like `r.acme.com`.
You can follow [these steps](/help/article/how-to-add-custom-domain#step-2b-adding-a-subdomain) to add a subdomain to Dub.
## Step 2: Configure rewrites/redirects
Once you've added the subdomain, you can use rewrites or redirects to mask the subdomain and handle the redirects on the subpath.
![URL Rewrites example]() There are a few ways to configure this, depending on your application framework/hosting provider.
## Using Next.js
If you are using [Next.js](https://nextjs.org/), you can use the [`rewrites` property](https://nextjs.org/docs/app/api-reference/next-config-js/rewrites) in your `next.config.js` file to configure subpath redirects.
```javascript title="next.config.js" theme={null}
module.exports = {
async rewrites() {
return [
{
source: "/r/:path*",
destination: "https://r.acme.com/:path*",
},
];
},
};
```
## Using Nuxt
If you are using [Nuxt](https://nuxt.com/), you can use Nuxt's [server route](https://nuxt.com/docs/guide/directory-structure/server#server-routes) feature to configure subpath redirects.
First, create a new catch-all route in the respective subpath: `server/routes/r/[...slug].ts`
Then, in the route, add the following code:
```javascript title="server/routes/r/[...slug].ts" theme={null}
export default defineEventHandler(async (event) => {
const dubPath = getRouterParam(event, "slug");
await sendRedirect(event, `https://r.acme.com/${dubPath}`, 301); // use whatever status code you need
});
```
## Using Vercel
If you're using [Vercel](https://vercel.com/), you can use the [`rewrites` property](https://vercel.com/docs/edge-network/rewrites) in your `vercel.json` file to configure subpath redirects.
```json title="vercel.json" theme={null}
{
"rewrites": [
{
"source": "/r/:path*",
"destination": "https://r.acme.com/:path*"
}
]
}
```
## Using Netlify
If you're using [Netlify](https://www.netlify.com/), you can use the `redirects` property in your `_redirects` file to configure subpath redirects.
```plaintext title="_redirects" theme={null}
/r/* https://r.acme.com/:splat 200
```
## Using Cloudflare
If you're using [Cloudflare](https://www.cloudflare.com/), you can use the [**Redirect Rules** feature](https://developers.cloudflare.com/rules/url-forwarding/single-redirects/create-dashboard/) to configure subpath redirects.
1. Go to your Cloudflare dashboard for your website and click on **Rules > Redirect Rules**.
2. Click on **Create Rule**.
3. Give your rule a name, e.g. "Redirect subpath".
4. Under **When incoming requests match**:
* Select **Custom filter expression**
* Field: **URI Path**
* Operator: **starts with**
* Value: `/r/`
5. Under **Then**:
* Type: **Dynamic**
* Expression: `concat("https://r.acme.com/", substring(http.request.uri.path, 3))`
* Status code: `301`
* Preserve query string: ✔️
6. Click on **Deploy**.
The number in the `substring` function in the **Expression** field should be
equal to the number of characters in the subpath. In our case, the subpath is
`/r/` which has 3 characters, so we use `substring(http.request.uri.path, 3)`.
Here's an example of how the rule should look like:
There are a few ways to configure this, depending on your application framework/hosting provider.
## Using Next.js
If you are using [Next.js](https://nextjs.org/), you can use the [`rewrites` property](https://nextjs.org/docs/app/api-reference/next-config-js/rewrites) in your `next.config.js` file to configure subpath redirects.
```javascript title="next.config.js" theme={null}
module.exports = {
async rewrites() {
return [
{
source: "/r/:path*",
destination: "https://r.acme.com/:path*",
},
];
},
};
```
## Using Nuxt
If you are using [Nuxt](https://nuxt.com/), you can use Nuxt's [server route](https://nuxt.com/docs/guide/directory-structure/server#server-routes) feature to configure subpath redirects.
First, create a new catch-all route in the respective subpath: `server/routes/r/[...slug].ts`
Then, in the route, add the following code:
```javascript title="server/routes/r/[...slug].ts" theme={null}
export default defineEventHandler(async (event) => {
const dubPath = getRouterParam(event, "slug");
await sendRedirect(event, `https://r.acme.com/${dubPath}`, 301); // use whatever status code you need
});
```
## Using Vercel
If you're using [Vercel](https://vercel.com/), you can use the [`rewrites` property](https://vercel.com/docs/edge-network/rewrites) in your `vercel.json` file to configure subpath redirects.
```json title="vercel.json" theme={null}
{
"rewrites": [
{
"source": "/r/:path*",
"destination": "https://r.acme.com/:path*"
}
]
}
```
## Using Netlify
If you're using [Netlify](https://www.netlify.com/), you can use the `redirects` property in your `_redirects` file to configure subpath redirects.
```plaintext title="_redirects" theme={null}
/r/* https://r.acme.com/:splat 200
```
## Using Cloudflare
If you're using [Cloudflare](https://www.cloudflare.com/), you can use the [**Redirect Rules** feature](https://developers.cloudflare.com/rules/url-forwarding/single-redirects/create-dashboard/) to configure subpath redirects.
1. Go to your Cloudflare dashboard for your website and click on **Rules > Redirect Rules**.
2. Click on **Create Rule**.
3. Give your rule a name, e.g. "Redirect subpath".
4. Under **When incoming requests match**:
* Select **Custom filter expression**
* Field: **URI Path**
* Operator: **starts with**
* Value: `/r/`
5. Under **Then**:
* Type: **Dynamic**
* Expression: `concat("https://r.acme.com/", substring(http.request.uri.path, 3))`
* Status code: `301`
* Preserve query string: ✔️
6. Click on **Deploy**.
The number in the `substring` function in the **Expression** field should be
equal to the number of characters in the subpath. In our case, the subpath is
`/r/` which has 3 characters, so we use `substring(http.request.uri.path, 3)`.
Here's an example of how the rule should look like:
![Cloudflare Redirect Rules example]() ## Using Webflow
If you're using [Webflow](https://webflow.com/), you can use the [**Wildcard redirects** feature](https://university.webflow.com/lesson/set-301-redirects-to-maintain-seo-ranking#wildcard-redirect-examples) to configure subpath redirects.
1. Go to **Site settings** > **Publishing tab** > **301 redirects**
2. Add a new redirect with the following settings:
* **Old path**: `/r/(.*)`
* **Redirect to page**: `https://r.acme.com/%1`
3. Click on **Save**.
## Using Squarespace
If you're using [Squarespace](https://squarespace.com/), you can use the [**URL Mappings** feature](https://support.squarespace.com/hc/en-us/articles/205815308-URL-mappings#toc-redirect-multiple-blog-posts--events--or-products) to configure subpath redirects.
1. Open the [Developer tools panel](https://account.squarespace.com/project-picker?client_id=helpcenter\&redirect_url=%2Fsettings%2Fdeveloper-tools).
2. Click **URL mappings**.
3. Click into the text field and add the following redirect:
```plaintext theme={null}
/r/[slug] -> https://r.acme.com/[name] 301
```
4. Click **Save**.
# How to use Tags on Dub
Source: https://dub.co/help/article/how-to-use-tags
Easily organize & manage your links with tags on Dub.
Tags are a great way to organize your links on Dub. You can use tags to group links together and make it easier to find them later.
## Using Webflow
If you're using [Webflow](https://webflow.com/), you can use the [**Wildcard redirects** feature](https://university.webflow.com/lesson/set-301-redirects-to-maintain-seo-ranking#wildcard-redirect-examples) to configure subpath redirects.
1. Go to **Site settings** > **Publishing tab** > **301 redirects**
2. Add a new redirect with the following settings:
* **Old path**: `/r/(.*)`
* **Redirect to page**: `https://r.acme.com/%1`
3. Click on **Save**.
## Using Squarespace
If you're using [Squarespace](https://squarespace.com/), you can use the [**URL Mappings** feature](https://support.squarespace.com/hc/en-us/articles/205815308-URL-mappings#toc-redirect-multiple-blog-posts--events--or-products) to configure subpath redirects.
1. Open the [Developer tools panel](https://account.squarespace.com/project-picker?client_id=helpcenter\&redirect_url=%2Fsettings%2Fdeveloper-tools).
2. Click **URL mappings**.
3. Click into the text field and add the following redirect:
```plaintext theme={null}
/r/[slug] -> https://r.acme.com/[name] 301
```
4. Click **Save**.
# How to use Tags on Dub
Source: https://dub.co/help/article/how-to-use-tags
Easily organize & manage your links with tags on Dub.
Tags are a great way to organize your links on Dub. You can use tags to group links together and make it easier to find them later.
![Using tags to organize links on Dub]() ## What is a Tag?
A tag is a label that you can assign to a link. Tags are color-coded and can be created and assigned to a link in just a few clicks.
With tags, you can:
1. Organize your links by campaigns, clients, or any other categories you can think of.
2. Filter your links by tags and get a shareable link to the filtered results.
3. [Filter your analytics by tags](/help/article/filter-analytics-by-tags) to see how your campaigns are performing.
## How to create a Tag
To create a tag, navigate to the [Tags settings page](https://app.dub.co/settings/library/tags) in your Dub workspace.
## What is a Tag?
A tag is a label that you can assign to a link. Tags are color-coded and can be created and assigned to a link in just a few clicks.
With tags, you can:
1. Organize your links by campaigns, clients, or any other categories you can think of.
2. Filter your links by tags and get a shareable link to the filtered results.
3. [Filter your analytics by tags](/help/article/filter-analytics-by-tags) to see how your campaigns are performing.
## How to create a Tag
To create a tag, navigate to the [Tags settings page](https://app.dub.co/settings/library/tags) in your Dub workspace.
![Tags settings page]() Click on **Create Tag** to open up the tag creation modal, where you can create a new tag and choose a color for it:
Click on **Create Tag** to open up the tag creation modal, where you can create a new tag and choose a color for it:
![Tag creation modal]() You can also create new tags directly inside the [Dub link builder](/help/article/dub-link-builder). Once you've [created a link](/help/article/how-to-create-link), click on the tag input field and type in the name of the tag you want to create.
You can also create new tags directly inside the [Dub link builder](/help/article/dub-link-builder). Once you've [created a link](/help/article/how-to-create-link), click on the tag input field and type in the name of the tag you want to create.
![Input the name of the tag you want to create (e.g. 'New Tag')]() If the tag already exists, you can select it from the dropdown. Otherwise, press `Enter ↩` to create a new tag.
Once the tag is created, click on the "Create Link" button to assign the tag to the link.
## How to edit or delete a Tag
Tags can be edited via the [Tags settings page](https://app.dub.co/settings/library/tags) in your Dub workspace.
If the tag already exists, you can select it from the dropdown. Otherwise, press `Enter ↩` to create a new tag.
Once the tag is created, click on the "Create Link" button to assign the tag to the link.
## How to edit or delete a Tag
Tags can be edited via the [Tags settings page](https://app.dub.co/settings/library/tags) in your Dub workspace.
![Editing tags in the Tags settings page]() Simply click on the `⋮` button to open the menu popover for the tag, which gives you the following options:
* Edit the tag
* Copy the tag's unique ID (for [programmatic API use](/help/article/how-to-use-tags#managing-tags-programmatically))
* Delete the tag
Simply click on the `⋮` button to open the menu popover for the tag, which gives you the following options:
* Edit the tag
* Copy the tag's unique ID (for [programmatic API use](/help/article/how-to-use-tags#managing-tags-programmatically))
* Delete the tag
![Edit a tag by clicking on the ⋮ icon]() You can also use the following keyboard shortcuts to manage your tags:
| Keyboard Shortcut | Action |
| ----------------- | ------------------------ |
| `E` | Edit a tag |
| `I` | Copy the tag's unique ID |
| `X` | Delete a tag |
To open the tag editing modal, click on the "Edit" button. Inside the tag editing modal, you can:
* Rename the tag
* Change the color of the tag
You can also use the following keyboard shortcuts to manage your tags:
| Keyboard Shortcut | Action |
| ----------------- | ------------------------ |
| `E` | Edit a tag |
| `I` | Copy the tag's unique ID |
| `X` | Delete a tag |
To open the tag editing modal, click on the "Edit" button. Inside the tag editing modal, you can:
* Rename the tag
* Change the color of the tag
![Tag editing modal]() ## Can I assign multiple tags to a link?
Yes you can. In the tags section for a given link, you can select multiple tags to assign to the link.
## Can I assign multiple tags to a link?
Yes you can. In the tags section for a given link, you can select multiple tags to assign to the link.
![Assign multiple tags to a link]() The tags will show up in the link's details, and you can filter your links by these tags.
The tags will show up in the link's details, and you can filter your links by these tags.
![Multiple tags assigned to a link]() ## How many tags can I create?
The number of tags you can create depends on your plan:
* **Free plan**: Up to 5 tags
* [**Pro plan**](https://dub.co/pricing): Up to 25 tags
* [**Business plan**](https://dub.co/pricing): Unlimited tags
* [**Enterprise plan**](https://dub.co/enterprise): Unlimited tags
Check out our [pricing page](https://dub.co/pricing) for more information on our plans.
## Managing tags programmatically
You can also manage tags programmatically using the [Dub API](/docs/api-reference/introduction).
Here are a few things you can do with the API:
* [Create a New Tag](/docs/api-reference/tags/create)
* [Retrieve a List of Tags](/docs/api-reference/endpoint/retrieve-a-list-of-tags)
# Importing partners
Source: https://dub.co/help/article/importing-partners
Learn how to import partners from supported platforms into your Dub program.
This feature is only available on [Business plans and
above](https://dub.co/pricing/partners).
## Where to import partners
In the **Partner Program** menu, click **All Partners** to open your program's partner table.
## How many tags can I create?
The number of tags you can create depends on your plan:
* **Free plan**: Up to 5 tags
* [**Pro plan**](https://dub.co/pricing): Up to 25 tags
* [**Business plan**](https://dub.co/pricing): Unlimited tags
* [**Enterprise plan**](https://dub.co/enterprise): Unlimited tags
Check out our [pricing page](https://dub.co/pricing) for more information on our plans.
## Managing tags programmatically
You can also manage tags programmatically using the [Dub API](/docs/api-reference/introduction).
Here are a few things you can do with the API:
* [Create a New Tag](/docs/api-reference/tags/create)
* [Retrieve a List of Tags](/docs/api-reference/endpoint/retrieve-a-list-of-tags)
# Importing partners
Source: https://dub.co/help/article/importing-partners
Learn how to import partners from supported platforms into your Dub program.
This feature is only available on [Business plans and
above](https://dub.co/pricing/partners).
## Where to import partners
In the **Partner Program** menu, click **All Partners** to open your program's partner table.
![All Partners location]() ## Importing partners
From the partner table, click the `⋮` menu to import partners from supported platforms into your Dub program.
## Importing partners
From the partner table, click the `⋮` menu to import partners from supported platforms into your Dub program.
![Importing partners]() Dub currently supports importing from:
* [Rewardful](/help/article/migrating-from-rewardful)
* [Tolt](/help/article/migrating-from-tolt)
* [PartnerStack](/help/article/migrating-from-partnerstack)
* [FirstPromoter](/help/article/migrating-from-firstpromoter)
If you’d like to import from other platforms, [let us know](https://dub.co/contact/support).
# Why are my analytics country or city data incorrect?
Source: https://dub.co/help/article/incorrect-analytics-geolocation-data
Learn why the clicks on your links might be showing up in a different country/city than expected.
When you're [configuring your custom domain](/help/article/how-to-add-custom-domain), you might run into an issue where clicks on your links might be showing up in a different country/city than expected.
This is most likely because your domain is using a proxy in front of Dub (e.g. [Cloudflare Proxy](/help/article/using-cloudflare-domains#using-cloudflares-proxy)).
This is because using a proxy will send all your click traffic through the proxy
first, then to Dub. This will result in incorrect geolocation data being
presented and the public IP address of your proxy being sent.
To fix this, you should remove the proxy – this will make sure that click requests from your users will be sent directly to Dub and will be accurately recorded.
In Cloudflare's case, you can [use Cloudflare's DNS only mode](/help/article/using-cloudflare-domains#using-cloudflares-dns-only-recommended) instead of using their proxy:
Dub currently supports importing from:
* [Rewardful](/help/article/migrating-from-rewardful)
* [Tolt](/help/article/migrating-from-tolt)
* [PartnerStack](/help/article/migrating-from-partnerstack)
* [FirstPromoter](/help/article/migrating-from-firstpromoter)
If you’d like to import from other platforms, [let us know](https://dub.co/contact/support).
# Why are my analytics country or city data incorrect?
Source: https://dub.co/help/article/incorrect-analytics-geolocation-data
Learn why the clicks on your links might be showing up in a different country/city than expected.
When you're [configuring your custom domain](/help/article/how-to-add-custom-domain), you might run into an issue where clicks on your links might be showing up in a different country/city than expected.
This is most likely because your domain is using a proxy in front of Dub (e.g. [Cloudflare Proxy](/help/article/using-cloudflare-domains#using-cloudflares-proxy)).
This is because using a proxy will send all your click traffic through the proxy
first, then to Dub. This will result in incorrect geolocation data being
presented and the public IP address of your proxy being sent.
To fix this, you should remove the proxy – this will make sure that click requests from your users will be sent directly to Dub and will be accurately recorded.
In Cloudflare's case, you can [use Cloudflare's DNS only mode](/help/article/using-cloudflare-domains#using-cloudflares-dns-only-recommended) instead of using their proxy:
![]() # Inviting partners to your program
Source: https://dub.co/help/article/inviting-partners
Learn how to invite partners to join your affiliate/referral program on Dub Partners
This feature is only available on [Business plans and
above](https://dub.co/pricing/partners).
There are a few ways you can invite partners to join your affiliate/referral program on Dub Partners:
1. [Inviting via the dashboard](#inviting-via-the-dashboard)
2. [Enrolling a partner automatically](#enrolling-a-partner-automatically)
3. [Via a branded application form](#via-a-branded-application-form)
## Inviting via the dashboard
The easiest way to invite a partner to join your program is by sending them an invitation email.
To do that, go to your [program's](https://app.dub.co/programs) Partners tab and select **Invite Partner**.
# Inviting partners to your program
Source: https://dub.co/help/article/inviting-partners
Learn how to invite partners to join your affiliate/referral program on Dub Partners
This feature is only available on [Business plans and
above](https://dub.co/pricing/partners).
There are a few ways you can invite partners to join your affiliate/referral program on Dub Partners:
1. [Inviting via the dashboard](#inviting-via-the-dashboard)
2. [Enrolling a partner automatically](#enrolling-a-partner-automatically)
3. [Via a branded application form](#via-a-branded-application-form)
## Inviting via the dashboard
The easiest way to invite a partner to join your program is by sending them an invitation email.
To do that, go to your [program's](https://app.dub.co/programs) Partners tab and select **Invite Partner**.
![Merge account button]() This will open the partner invite sheet, where you can enter the partner's name, email, and optionally select the [group](/help/article/partner-groups) they're being added to.
This will open the partner invite sheet, where you can enter the partner's name, email, and optionally select the [group](/help/article/partner-groups) they're being added to.
![Partner invite form]() ### Bulk invitations
Invite multiple partners at once by separating their email addresses with commas. Each partner will receive an individual email with a unique link to accept the invitation.
### Bulk invitations
Invite multiple partners at once by separating their email addresses with commas. Each partner will receive an individual email with a unique link to accept the invitation.
![Bulk invite email addresses]() ### Updating invitation email
You're also able to edit the email that is sent to the invited partner. To do this, click **Edit** on the email preview section, and open the editor.
### Updating invitation email
You're also able to edit the email that is sent to the invited partner. To do this, click **Edit** on the email preview section, and open the editor.
![Partner email invite editor]() You can change the email subject, title, and content for the invite. Changes made here don't replace the default content.
In the content editor you can change the styling of the text using the Bold and Italic buttons at the bottom, or add a link to your text. If you prefer markdown, we also support the following styles:
| Type | Markdown |
| ----------------- | -------------------------------- |
| Bold | `**Bold text**` |
| Italic | `*italic text*` |
| Inline Hyperlinks | `[Dub](https://dub.co)` |
| Bulleted lists | `1. First item` `2. Second item` |
| Ordered lists | `- First item` `- Second item` |
| Blockquote | `> Content shows here` |
Click **Save** to update the email content, or **Cancel** to revert back to the default content.
Once your invite is ready to send, click on **Send invite**. Your partner will receive an email in their inbox to join your program.
Want to send these invites using your company email instead for better
brandability? [Set up your email domain on
Dub](/help/article/email-campaigns#email-domain-setup) (e.g.
`partners.acme.com`) and start sending branded emails to your partners.
### Viewing past invites
To view your previous invites, click the **Filter** button in the top left of the Partners table, click **Status**, then **Invited**.
You can change the email subject, title, and content for the invite. Changes made here don't replace the default content.
In the content editor you can change the styling of the text using the Bold and Italic buttons at the bottom, or add a link to your text. If you prefer markdown, we also support the following styles:
| Type | Markdown |
| ----------------- | -------------------------------- |
| Bold | `**Bold text**` |
| Italic | `*italic text*` |
| Inline Hyperlinks | `[Dub](https://dub.co)` |
| Bulleted lists | `1. First item` `2. Second item` |
| Ordered lists | `- First item` `- Second item` |
| Blockquote | `> Content shows here` |
Click **Save** to update the email content, or **Cancel** to revert back to the default content.
Once your invite is ready to send, click on **Send invite**. Your partner will receive an email in their inbox to join your program.
Want to send these invites using your company email instead for better
brandability? [Set up your email domain on
Dub](/help/article/email-campaigns#email-domain-setup) (e.g.
`partners.acme.com`) and start sending branded emails to your partners.
### Viewing past invites
To view your previous invites, click the **Filter** button in the top left of the Partners table, click **Status**, then **Invited**.
![]() This will filter the partners by your invited partners, where you can resend your previous invites if needed.
To prevent spamming inboxes, you can only resend an invite every 24 hours.
## Enrolling a partner automatically
Instead of sending an invitation email and waiting for them to accept it, you can also automatically enroll known partners in your program.
A few use cases for this approach:
* Programmatically adding your apps users to your [in-app referral program](/docs/partners/embedded-referrals)
* Migrating your partners over from another platform like [Rewardful](/help/article/migrating-from-rewardful)
If you're integrating with Dub Partners programatically, you can use our [POST /partners API endpoint](/docs/api-reference/endpoint/create-a-partner) to enroll a partner into your program via our API.
Before auto-enrolling a partner to your program, make sure to get their
consent – either explicitly or via the acceptance of your Terms of Service.
Enrolling partners that are unfamiliar with your program is against our [terms
of service](https://dub.co/legal/terms).
## Via a branded application form
Alternatively, you can also have your partners apply via a branded application form:
Learn more about [how to create a branded application form](/help/article/program-application-form) with Dub Partners.
# How to use link cloaking on Dub?
Source: https://dub.co/help/article/link-cloaking
Learn how to use link cloaking on Dub to mask your destination URL with your short link.
This feature is only available on [Pro plans and
above](https://dub.co/pricing).
With Dub, you can mask your destination URL with your short link.
To enable link cloaking, click on the more options button `...` in the link builder and select the **Add Link Cloaking** option.
This will filter the partners by your invited partners, where you can resend your previous invites if needed.
To prevent spamming inboxes, you can only resend an invite every 24 hours.
## Enrolling a partner automatically
Instead of sending an invitation email and waiting for them to accept it, you can also automatically enroll known partners in your program.
A few use cases for this approach:
* Programmatically adding your apps users to your [in-app referral program](/docs/partners/embedded-referrals)
* Migrating your partners over from another platform like [Rewardful](/help/article/migrating-from-rewardful)
If you're integrating with Dub Partners programatically, you can use our [POST /partners API endpoint](/docs/api-reference/endpoint/create-a-partner) to enroll a partner into your program via our API.
Before auto-enrolling a partner to your program, make sure to get their
consent – either explicitly or via the acceptance of your Terms of Service.
Enrolling partners that are unfamiliar with your program is against our [terms
of service](https://dub.co/legal/terms).
## Via a branded application form
Alternatively, you can also have your partners apply via a branded application form:
Learn more about [how to create a branded application form](/help/article/program-application-form) with Dub Partners.
# How to use link cloaking on Dub?
Source: https://dub.co/help/article/link-cloaking
Learn how to use link cloaking on Dub to mask your destination URL with your short link.
This feature is only available on [Pro plans and
above](https://dub.co/pricing).
With Dub, you can mask your destination URL with your short link.
To enable link cloaking, click on the more options button `...` in the link builder and select the **Add Link Cloaking** option.
![Toggling the 'Link Cloaking' switch in the link builder]() This is useful when you want to show your brand or custom domain instead of the actual destination URL.
When this is enabled, your short link will be shown in your users' browser address bar when they visit your link instead of the destination URL.
This is useful when you want to show your brand or custom domain instead of the actual destination URL.
When this is enabled, your short link will be shown in your users' browser address bar when they visit your link instead of the destination URL.
![Masking 'steventey.com' with 'stey.me']() ## Link cloaking caveats
A few caveats for the link cloaking feature:
1. For link cloaking to work, make sure you use `https` for your destination URL. If your destination URL is `http`, the browser will show a "Not Secure" warning, and link cloaking will not work.
2. Link cloaking might not work for certain websites that have security measures in place to prevent this:
* `X-Frame-Options` header set to `DENY`
* `content-security-policy` header set to `frame-ancestors 'none'`
## Link cloaking with security headers
If you have control over the destination URL that you are cloaking, you can leverage security headers to enable link cloaking on Dub while also disabling iframe embedding everywhere else.
### Adding security headers to your destination URL
To do this, you need to whitelist your [Dub short domain](/help/article/how-to-add-custom-domain) as an allowed origin on your site by adding the following response headers to your site:
```bash theme={null}
Content-Security-Policy: frame-ancestors 'self' [shortdomain.com]
```
For example, if your Dub short domain is `dub.sh`, you would need to add the following headers to your destination URL:
```bash theme={null}
Content-Security-Policy: frame-ancestors 'self' dub.sh
```
### Whitelisting multiple domains
You can also whitelist multiple domains by separating them with a space:
```bash theme={null}
Content-Security-Policy: frame-ancestors 'self' dub.sh otherdomain.com
```
This will ensure that your site cannot be embedded in third-party sites but can still be cloaked by your Dub short domain.
### Secure link cloaking demo
Here's a demo of how this works:
* Code example: [git.new/zAD0CkJ](https://git.new/zAD0CkJ)
* Demo site: [link-cloaking-security.vercel.app](https://link-cloaking-security.vercel.app)
* Demo short link (enabled): [dub.link/secure-cloak](https://dub.link/secure-cloak)
* Any other iframes (disabled): [iframetester.com/?url=https://link-cloaking-security.vercel.app](https://iframetester.com/?url=https://link-cloaking-security.vercel.app)
# How to add comments to your links in Dub?
Source: https://dub.co/help/article/link-comments
Learn how to add comments to your links in Dub to provide more context.
On Dub, you can add comments to your links by using the "Comments" section in the link builder.
## Link cloaking caveats
A few caveats for the link cloaking feature:
1. For link cloaking to work, make sure you use `https` for your destination URL. If your destination URL is `http`, the browser will show a "Not Secure" warning, and link cloaking will not work.
2. Link cloaking might not work for certain websites that have security measures in place to prevent this:
* `X-Frame-Options` header set to `DENY`
* `content-security-policy` header set to `frame-ancestors 'none'`
## Link cloaking with security headers
If you have control over the destination URL that you are cloaking, you can leverage security headers to enable link cloaking on Dub while also disabling iframe embedding everywhere else.
### Adding security headers to your destination URL
To do this, you need to whitelist your [Dub short domain](/help/article/how-to-add-custom-domain) as an allowed origin on your site by adding the following response headers to your site:
```bash theme={null}
Content-Security-Policy: frame-ancestors 'self' [shortdomain.com]
```
For example, if your Dub short domain is `dub.sh`, you would need to add the following headers to your destination URL:
```bash theme={null}
Content-Security-Policy: frame-ancestors 'self' dub.sh
```
### Whitelisting multiple domains
You can also whitelist multiple domains by separating them with a space:
```bash theme={null}
Content-Security-Policy: frame-ancestors 'self' dub.sh otherdomain.com
```
This will ensure that your site cannot be embedded in third-party sites but can still be cloaked by your Dub short domain.
### Secure link cloaking demo
Here's a demo of how this works:
* Code example: [git.new/zAD0CkJ](https://git.new/zAD0CkJ)
* Demo site: [link-cloaking-security.vercel.app](https://link-cloaking-security.vercel.app)
* Demo short link (enabled): [dub.link/secure-cloak](https://dub.link/secure-cloak)
* Any other iframes (disabled): [iframetester.com/?url=https://link-cloaking-security.vercel.app](https://iframetester.com/?url=https://link-cloaking-security.vercel.app)
# How to add comments to your links in Dub?
Source: https://dub.co/help/article/link-comments
Learn how to add comments to your links in Dub to provide more context.
On Dub, you can add comments to your links by using the "Comments" section in the link builder.
![Adding comments to your links in the Dub link builder]() Note: Hyperlinks are supported in comments. You can use this to add more
context to your links.
When you add a comment to your link, it will be visible to you and your team as a
message bubble on the link card.
Note: Hyperlinks are supported in comments. You can use this to add more
context to your links.
When you add a comment to your link, it will be visible to you and your team as a
message bubble on the link card.
![Comments are visible as message bubbles on the link card]() # Does Dub allow for double link redirects?
Source: https://dub.co/help/article/link-double-redirects
Yes, Dub allows for double link redirects – where you can easily create short links for any brand you work with, improving brand recognition and revenue.
[Content creators](https://dub.co/solutions/creators) on Dub create thousands of short links daily for the brands they work with. Oftentimes, these brands would also use their own link shorteners/affiliate links, which the creator would then shorten with [their own branded domains](/help/article/how-to-add-custom-domain).
However, platforms like [PixelMe](https://www.pixelme.app/) restrict this, which means you're forced to use the generic short links used by the brands you work with.
On Dub, **double link directs work out of the box**. This means you can easily create short links for any brand you work with, which gives you several benefits:
1. [**Improved brand recognition**](https://dub.co/blog/custom-domains): Instead of sharing a generic `brandname.xyz` link, you can share something like `yourname.link/brand`, which helps builds trust with your audience.
2. [**Real-time click analytics**](https://dub.co/analytics): Dub gives you accurate real-time click data that you can leverage to negotiate higher revenue with the brands you work with.
# How to set an expiration date for your Dub links?
Source: https://dub.co/help/article/link-expiration
Learn how to use automatically expire your Dub links after a certain date & time.
This feature is only available on [Pro plans and
above](https://dub.co/pricing).
On Dub, you can set an expiration date for your links by clicking the **Expiration** button in the link builder. This will open a new modal called **Link Expiration**.
You can also quickly access the Link Expiration feature by using the keyboard shortcut `E` while in the link builder.
Enter the following fields to set the expiration:
1. **Date and Time**: Date and time when the link will expire.
2. **Expiration URL**: The URL that the user will be redirected to if the link expires.
Now click on the **Add expiration** button to set the expiration date and time for your link.
You can use natural language to set the date and time. For example, you can type "in 2 hours" or "tomorrow at 5PM" and Dub will automatically set the expiration date in the correct date-time format for you.
Alternatively, you can also set the expiration date manually by selecting the date and time from the date-time picker.
If you set an expiration date for your link, the user will see an "Expired Link" page when they try to access the link after the expiration date ([example](https://dub.sh/expired)).
# Does Dub allow for double link redirects?
Source: https://dub.co/help/article/link-double-redirects
Yes, Dub allows for double link redirects – where you can easily create short links for any brand you work with, improving brand recognition and revenue.
[Content creators](https://dub.co/solutions/creators) on Dub create thousands of short links daily for the brands they work with. Oftentimes, these brands would also use their own link shorteners/affiliate links, which the creator would then shorten with [their own branded domains](/help/article/how-to-add-custom-domain).
However, platforms like [PixelMe](https://www.pixelme.app/) restrict this, which means you're forced to use the generic short links used by the brands you work with.
On Dub, **double link directs work out of the box**. This means you can easily create short links for any brand you work with, which gives you several benefits:
1. [**Improved brand recognition**](https://dub.co/blog/custom-domains): Instead of sharing a generic `brandname.xyz` link, you can share something like `yourname.link/brand`, which helps builds trust with your audience.
2. [**Real-time click analytics**](https://dub.co/analytics): Dub gives you accurate real-time click data that you can leverage to negotiate higher revenue with the brands you work with.
# How to set an expiration date for your Dub links?
Source: https://dub.co/help/article/link-expiration
Learn how to use automatically expire your Dub links after a certain date & time.
This feature is only available on [Pro plans and
above](https://dub.co/pricing).
On Dub, you can set an expiration date for your links by clicking the **Expiration** button in the link builder. This will open a new modal called **Link Expiration**.
You can also quickly access the Link Expiration feature by using the keyboard shortcut `E` while in the link builder.
Enter the following fields to set the expiration:
1. **Date and Time**: Date and time when the link will expire.
2. **Expiration URL**: The URL that the user will be redirected to if the link expires.
Now click on the **Add expiration** button to set the expiration date and time for your link.
You can use natural language to set the date and time. For example, you can type "in 2 hours" or "tomorrow at 5PM" and Dub will automatically set the expiration date in the correct date-time format for you.
Alternatively, you can also set the expiration date manually by selecting the date and time from the date-time picker.
If you set an expiration date for your link, the user will see an "Expired Link" page when they try to access the link after the expiration date ([example](https://dub.sh/expired)).
![Expired link page]() Note: All clicks to the link after the expiration date will ***not*** be
tracked.
## Setting a custom expiration URL
You can also set a custom expiration URL for your links. This is useful if you want to redirect users to a specific page when the link expires.
To set a custom expiration URL, simply enter a custom URL in the **Expiration URL** field under the **Link Expiration** section.
Note: All clicks to the link after the expiration date will ***not*** be
tracked.
## Setting a custom expiration URL
You can also set a custom expiration URL for your links. This is useful if you want to redirect users to a specific page when the link expires.
To set a custom expiration URL, simply enter a custom URL in the **Expiration URL** field under the **Link Expiration** section.
![Expired link page]() ## Setting a default expiration URL for all links under a domain
Alternatively, you can also set a default expiration URL for all links under a domain. This is useful if you want to redirect users to a specific page when *any link under the domain* expires.
Here's how you can set a default expiration URL for all links under a domain:
1. Go to the [Domains settings page](https://app.dub.co/domains) in your Dub dashboard.
2. Click on the `⋮` button of domain that you want to set the default expiration URL for, which will open a dropdown menu.
## Setting a default expiration URL for all links under a domain
Alternatively, you can also set a default expiration URL for all links under a domain. This is useful if you want to redirect users to a specific page when *any link under the domain* expires.
Here's how you can set a default expiration URL for all links under a domain:
1. Go to the [Domains settings page](https://app.dub.co/domains) in your Dub dashboard.
2. Click on the `⋮` button of domain that you want to set the default expiration URL for, which will open a dropdown menu.
![More options popover]() 4. In the dropdown menu, select the **Edit Domain** option, which will open the Edit Domain modal.
5. Under the **Default Expiration URL** field, enter the URL that you want to redirect users to when any link under the domain expires.
4. In the dropdown menu, select the **Edit Domain** option, which will open the Edit Domain modal.
5. Under the **Default Expiration URL** field, enter the URL that you want to redirect users to when any link under the domain expires.
![Default expiration URL for a domain]() 7. Click on the **Save changes** button to save the changes.
# Managing links with folders
Source: https://dub.co/help/article/link-folders
Learn how to organize and manage access to your links on Dub using folders.
This feature is only available on [Pro plans and
above](https://dub.co/pricing).
Folders are a great way to organize and manage access to your links on Dub.
With folders, you can:
1. **Organize links by marketing channels**. E.g. if you're using Dub for both your [affiliate program](https://dub.co/partners) and for SMS marketing, you can create folders for both so those links doesn't clutter your main links dashboard.
2. **Manage access to links across your team**. E.g. if you have marketing teams from different departments within your Dub workspace, you can create folders for each team with [role-based access controls](/help/article/folders-rbac) to ensure members can only see the links that they should have access to.
7. Click on the **Save changes** button to save the changes.
# Managing links with folders
Source: https://dub.co/help/article/link-folders
Learn how to organize and manage access to your links on Dub using folders.
This feature is only available on [Pro plans and
above](https://dub.co/pricing).
Folders are a great way to organize and manage access to your links on Dub.
With folders, you can:
1. **Organize links by marketing channels**. E.g. if you're using Dub for both your [affiliate program](https://dub.co/partners) and for SMS marketing, you can create folders for both so those links doesn't clutter your main links dashboard.
2. **Manage access to links across your team**. E.g. if you have marketing teams from different departments within your Dub workspace, you can create folders for each team with [role-based access controls](/help/article/folders-rbac) to ensure members can only see the links that they should have access to.
![Link folders]() In this guide, we'll walk through how to use folders to organize and manage access to your links on Dub.
## Creating a folder
There are a few ways you can create a new folder:
You can quickly create a new folder within your links dashboard:
In this guide, we'll walk through how to use folders to organize and manage access to your links on Dub.
## Creating a folder
There are a few ways you can create a new folder:
You can quickly create a new folder within your links dashboard:
![New folder links dashboard]() You can also create a new folder directly inside the [link builder](/help/article/dub-link-builder):
You can also create a new folder directly inside the [link builder](/help/article/dub-link-builder):
![New folder link builder]() Last but not least, you can also create a folder inside your [folder library](http://app.dub.co/settings/library/folders):
Last but not least, you can also create a folder inside your [folder library](http://app.dub.co/settings/library/folders):
![New folder link builder]() Creating a folder is fairly simple. First, give it a name:
Creating a folder is fairly simple. First, give it a name:
![Create new folder]() Then, you can also choose the [workspace-level permission](/help/article/folders-rbac) for the folder:
Then, you can also choose the [workspace-level permission](/help/article/folders-rbac) for the folder:
![Create new folder access]() ## Adding links to a folder
To add links to a folder, simply select the folder you want to move the link to within the [link edit page](https://dub.co/changelog/link-pages) and click "Save changes":
## Adding links to a folder
To add links to a folder, simply select the folder you want to move the link to within the [link edit page](https://dub.co/changelog/link-pages) and click "Save changes":
![Move link to folder]() Alternatively, you can also move a link to a folder directly within the links dashboard:
Alternatively, you can also move a link to a folder directly within the links dashboard:
![Move link to folder shortcut]() Last but not least, you can use [bulk link actions](/help/article/bulk-link-actions) to move multiple links to a folder at once:
Last but not least, you can use [bulk link actions](/help/article/bulk-link-actions) to move multiple links to a folder at once:
![Move link to folder bulk]() ## Setting a default folder
Once you've created a few folders, you can choose one to show up by default when you open your links dashboard.
To do that, click the `❯` button next to the **Create link** button to open the folder quick view. Then click the `⋮` dropdown and select the "Set as Default" option:
## Setting a default folder
Once you've created a few folders, you can choose one to show up by default when you open your links dashboard.
To do that, click the `❯` button next to the **Create link** button to open the folder quick view. Then click the `⋮` dropdown and select the "Set as Default" option:
![Set default folder]() You can also do this inside your [folder library](http://app.dub.co/settings/library/folders):
You can also do this inside your [folder library](http://app.dub.co/settings/library/folders):
![Set default folder library]() ## How many folders can I create?
The number of folders you can create depends on your plan:
* **Pro plan**: Up to 3 folders
* **Business plan**: Up to 20 folders
* **Advanced plan**: Up to 50 folders
* **Enterprise plan**: Unlimited folders
Check out our [pricing page](https://dub.co/pricing) for more information on our plans.
## Managing folders programmatically
You can also manage folders programmatically using the [Dub API](/docs/api-reference/introduction).
Here are a few things you can do with the API:
* [Create a folder](/docs/api-reference/endpoint/create-a-folder)
* [Update a folder](/docs/api-reference/endpoint/update-a-folder)
* [Delete a folder](/docs/api-reference/endpoint/delete-a-folder)
* [Retrieve a list of folders](/docs/api-reference/endpoint/retrieve-a-list-of-folders)
# Inviting your partner team
Source: https://dub.co/help/article/managing-partner-teams
Learn how to invite team members, assign roles, and manage access to your partner profile on Dub.
On Dub, Partner teams let you share access to your [Dub partner profile](/help/article/partner-profile) with the people you work with. This is useful for creators, agencies, or anyone who wants more than one person managing partner activity.
## Where to manage your team
To manage your partner team, select the **Partner profile** icon in the left sidebar, then navigate to the **Members** tab.
## How many folders can I create?
The number of folders you can create depends on your plan:
* **Pro plan**: Up to 3 folders
* **Business plan**: Up to 20 folders
* **Advanced plan**: Up to 50 folders
* **Enterprise plan**: Unlimited folders
Check out our [pricing page](https://dub.co/pricing) for more information on our plans.
## Managing folders programmatically
You can also manage folders programmatically using the [Dub API](/docs/api-reference/introduction).
Here are a few things you can do with the API:
* [Create a folder](/docs/api-reference/endpoint/create-a-folder)
* [Update a folder](/docs/api-reference/endpoint/update-a-folder)
* [Delete a folder](/docs/api-reference/endpoint/delete-a-folder)
* [Retrieve a list of folders](/docs/api-reference/endpoint/retrieve-a-list-of-folders)
# Inviting your partner team
Source: https://dub.co/help/article/managing-partner-teams
Learn how to invite team members, assign roles, and manage access to your partner profile on Dub.
On Dub, Partner teams let you share access to your [Dub partner profile](/help/article/partner-profile) with the people you work with. This is useful for creators, agencies, or anyone who wants more than one person managing partner activity.
## Where to manage your team
To manage your partner team, select the **Partner profile** icon in the left sidebar, then navigate to the **Members** tab.
![Partner members]() This view lists everyone with access, including their email and assigned role.
## Roles and permissions
Partner team members support two role types: owner and member.
### Owner
The Owner has full control of the partner account. This includes:
* [Updating partner profile settings](/help/article/partner-profile)
* Managing team members (inviting and removing members)
* [Managing payout details](/help/article/receiving-payouts)
### Member
Members have standard access. They can view and manage partner activity across all programs, but cannot manage team members or payout details.
## Inviting a new member
To invite a new member to your partner team, click the **Invite member** button in the top right.
This view lists everyone with access, including their email and assigned role.
## Roles and permissions
Partner team members support two role types: owner and member.
### Owner
The Owner has full control of the partner account. This includes:
* [Updating partner profile settings](/help/article/partner-profile)
* Managing team members (inviting and removing members)
* [Managing payout details](/help/article/receiving-payouts)
### Member
Members have standard access. They can view and manage partner activity across all programs, but cannot manage team members or payout details.
## Inviting a new member
To invite a new member to your partner team, click the **Invite member** button in the top right.
![Invite member]() Enter the member's email address, and select their role. You can invite more than one member at a time, and they'll each receive their own invite email to accept membership.
Enter the member's email address, and select their role. You can invite more than one member at a time, and they'll each receive their own invite email to accept membership.
![Invite details]() You can only invite up to 10 teammates per partner team.
## Changing a role
Only Owner-roled members in a partner team can change another member’s role. To change a member's role, click the role dropdown in the members table and select a new role.
You can only invite up to 10 teammates per partner team.
## Changing a role
Only Owner-roled members in a partner team can change another member’s role. To change a member's role, click the role dropdown in the members table and select a new role.
![Role change]() This will open the confirmation modal, where you can confirm the update:
This will open the confirmation modal, where you can confirm the update:
![Confirm role change]() ## Removing a member
To remove a member from your team, click the `⋯` dropdown and select **Remove member**.
## Removing a member
To remove a member from your team, click the `⋯` dropdown and select **Remove member**.
![Remove team partner]() This deletes the team member, and the person can no longer sign in to your partner profile.
# Partner details
Source: https://dub.co/help/article/managing-program-partners
Learn how to view and manage all your program partners, and view individual partners' profiles.
This feature is only available on [Business plans and
above](https://dub.co/pricing/partners).
## Where to find your program partners
In the **Partner Program** menu, click **All Partners** to see everyone in your program.
This deletes the team member, and the person can no longer sign in to your partner profile.
# Partner details
Source: https://dub.co/help/article/managing-program-partners
Learn how to view and manage all your program partners, and view individual partners' profiles.
This feature is only available on [Business plans and
above](https://dub.co/pricing/partners).
## Where to find your program partners
In the **Partner Program** menu, click **All Partners** to see everyone in your program.
![Programs partners location]() ## Partner table
The partner table gives you a complete view of everyone in your program. By default, partners are sorted by **net revenue**, starting with your highest performers. This makes it easy to see who is driving the most value at a glance.
## Partner table
The partner table gives you a complete view of everyone in your program. By default, partners are sorted by **net revenue**, starting with your highest performers. This makes it easy to see who is driving the most value at a glance.
![Partners table]() You can sort the table by any column header. For example, select **Conversions** to sort partners by the number of conversions instead of revenue.
### Columns
You can customize which columns appear in the partner table. This lets you keep the table focused on the partner attributes and performance metrics that matter most to your workflow.
| Column | Description |
| ------------- | --------------------------------------------------------- |
| Group | The group this partner is in |
| Tags | Tags assigned to this partner |
| Enrolled | The date the partner enrolled in your program |
| Location | The partner's declared location |
| Clicks | Total number of clicks on the partner's links |
| Leads | Total number of leads generated by the partner's links |
| Conversions | Total number of leads that converted to paying customers |
| Revenue | Total revenue generated by the partner's links |
| Commissions | Total commissions paid to the partner for their referrals |
| Net Revenue | Net revenue after commissions |
| EPC | Earnings Per Click |
| Avg LTV | Average lifetime value for each paying customer |
| Click -> Lead | Percentage of clicks that become leads |
| Click -> Conv | Percentage of clicks that convert to paying customers |
| Lead -> Conv | Percentage of leads that convert to paying customers |
| ROAS | Return On Ad Spend |
You can sort the table by any column header. For example, select **Conversions** to sort partners by the number of conversions instead of revenue.
### Columns
You can customize which columns appear in the partner table. This lets you keep the table focused on the partner attributes and performance metrics that matter most to your workflow.
| Column | Description |
| ------------- | --------------------------------------------------------- |
| Group | The group this partner is in |
| Tags | Tags assigned to this partner |
| Enrolled | The date the partner enrolled in your program |
| Location | The partner's declared location |
| Clicks | Total number of clicks on the partner's links |
| Leads | Total number of leads generated by the partner's links |
| Conversions | Total number of leads that converted to paying customers |
| Revenue | Total revenue generated by the partner's links |
| Commissions | Total commissions paid to the partner for their referrals |
| Net Revenue | Net revenue after commissions |
| EPC | Earnings Per Click |
| Avg LTV | Average lifetime value for each paying customer |
| Click -> Lead | Percentage of clicks that become leads |
| Click -> Conv | Percentage of clicks that convert to paying customers |
| Lead -> Conv | Percentage of leads that convert to paying customers |
| ROAS | Return On Ad Spend |
![Partners table]() Click the `Gear icon` in the top right of the table to enable or disable columns at any time.
### Filter and search
Use filters to sort partners by group, status, or location. Filters help you spot top-performing partners.
You can also use the search field to search by name, email, or link. This is helpful when looking for a specific partner.
Click the `Gear icon` in the top right of the table to enable or disable columns at any time.
### Filter and search
Use filters to sort partners by group, status, or location. Filters help you spot top-performing partners.
You can also use the search field to search by name, email, or link. This is helpful when looking for a specific partner.
![Partner filters]() You can also use [partner tags](/help/article/partner-tags) to organize partners with flexible labels and filter your partner table by internal workflows, campaigns, or relationship type.
**Status filter**
Filter by status to see who’s active and who isn’t.
| Status | Description |
| ----------- | ---------------------------------------------------------------------------------------------------------------------------------------------------------------------- |
| Approved | Partner has joined and can earn rewards |
| Invited | Partners that have been invited to your program but haven't accepted the invite yet |
| Declined | Partners that have declined your invitation to join |
| Archived | Partner has been removed from the program |
| Banned | Partners that you have banned from your program |
| Deactivated | Partners that you've deactivated your partnership with. This could be used for ending a partnership for non abuse-related reasons (e.g. commercial/financial reasons). |
### More dropdown
For each partner, click the ⋯ menu to see more controls.
You can also use [partner tags](/help/article/partner-tags) to organize partners with flexible labels and filter your partner table by internal workflows, campaigns, or relationship type.
**Status filter**
Filter by status to see who’s active and who isn’t.
| Status | Description |
| ----------- | ---------------------------------------------------------------------------------------------------------------------------------------------------------------------- |
| Approved | Partner has joined and can earn rewards |
| Invited | Partners that have been invited to your program but haven't accepted the invite yet |
| Declined | Partners that have declined your invitation to join |
| Archived | Partner has been removed from the program |
| Banned | Partners that you have banned from your program |
| Deactivated | Partners that you've deactivated your partnership with. This could be used for ending a partnership for non abuse-related reasons (e.g. commercial/financial reasons). |
### More dropdown
For each partner, click the ⋯ menu to see more controls.
![Partner controls]() These additional controls include:
* **Approved partners**: View commissions, Archive partner, and Ban Partner
Archive partner, and Ban Partner
* **Invited partners**: Resend invite and
Delete invite
* **Archived partners**: View commissions, Unarchive partner, and
Ban partner.
* **Banned partners**: View commissions, Archive partner, and Unban partner.
## Viewing partner details
In the **Partner Program** menu, click **All Partners**, then click on a partner's row to open their details page. This page includes their profile, performance, referral links, payouts, comments, commissions, and [tags](/help/article/partner-tags).
These additional controls include:
* **Approved partners**: View commissions, Archive partner, and Ban Partner
Archive partner, and Ban Partner
* **Invited partners**: Resend invite and
Delete invite
* **Archived partners**: View commissions, Unarchive partner, and
Ban partner.
* **Banned partners**: View commissions, Archive partner, and Unban partner.
## Viewing partner details
In the **Partner Program** menu, click **All Partners**, then click on a partner's row to open their details page. This page includes their profile, performance, referral links, payouts, comments, commissions, and [tags](/help/article/partner-tags).
![Partner details]() ### Links
To see all referral links for this partner, click **Links**. You'll also see partner discount codes if they have been added. Learn more about partner [discount codes](/help/article/dual-sided-incentives#option-2-using-stripe-promo-codes-no-code-required).
### Links
To see all referral links for this partner, click **Links**. You'll also see partner discount codes if they have been added. Learn more about partner [discount codes](/help/article/dual-sided-incentives#option-2-using-stripe-promo-codes-no-code-required).
![Partner links]() If you need to create a link for your partner, click **Create link**.
If you need to create a link for your partner, click **Create link**.
![Create partner link]() ### Payouts
Click **Payouts** to see all payouts for a partner. Click any payout row to view its details.
### Payouts
Click **Payouts** to see all payouts for a partner. Click any payout row to view its details.
![Partner payouts]() ### Profile
To view the partner's profile details, click the **Profile** button next to their name in the right column.
### Profile
To view the partner's profile details, click the **Profile** button next to their name in the right column.
![Partner profile button]() This will open a panel where you can view details like their country, bio, and connected websites or social accounts. You'll also be able to view the partner's original application response when they first applied.
This will open a panel where you can view details like their country, bio, and connected websites or social accounts. You'll also be able to view the partner's original application response when they first applied.
![About the partner]() ### Comments
Click **Comments** to view and add comments for this partner, which only your workspace can view. You can also edit and delete your own comments in case a mistake was made.
### Comments
Click **Comments** to view and add comments for this partner, which only your workspace can view. You can also edit and delete your own comments in case a mistake was made.
![Partner comments]() ### Commissions
Click **Commissions** to open a page showing commissions filtered for this partner. [Learn more about partner commissions here](/help/article/partner-commissions).
### Commissions
Click **Commissions** to open a page showing commissions filtered for this partner. [Learn more about partner commissions here](/help/article/partner-commissions).
![Partner commissions]() ### Manual commission
Occasionally, you might need to create a one-off or recurring commission to account for a missed commission or other reasons. On Dub, you can easily create those commissions via the dashboard, and they will be included in the next payout for that partner.
Click **Create commission** to get started. [Learn more about manual commissions here](/help/article/partner-commissions#creating-manual-commissions).
### Manual commission
Occasionally, you might need to create a one-off or recurring commission to account for a missed commission or other reasons. On Dub, you can easily create those commissions via the dashboard, and they will be included in the next payout for that partner.
Click **Create commission** to get started. [Learn more about manual commissions here](/help/article/partner-commissions#creating-manual-commissions).
![Create commission]() ### Advanced settings
Use caution when changing any of the advanced partner settings.
To access your partner's advanced settings, from their profile page, click the `⋮` dropdown and select **Advanced settings**.
### Advanced settings
Use caution when changing any of the advanced partner settings.
To access your partner's advanced settings, from their profile page, click the `⋮` dropdown and select **Advanced settings**.
![Advanced settings]() #### Tenant ID
If you need to update the partner's tenant ID, changing the ID here will update the [tenantId for all their links](/docs/concepts/links/organization#tenant-id) as well. This could potentially impact any custom integration you have set up, so only change if you're certain the information is correct and necessary.
#### Customer data sharing
Enabling this setting allows this partner to see customer data on any leads or sales the partner has made.
Instead of the hidden email addresses, they will see the full customer email address and their name. They'll also be able to click through the customer to view the sales history.
#### Tenant ID
If you need to update the partner's tenant ID, changing the ID here will update the [tenantId for all their links](/docs/concepts/links/organization#tenant-id) as well. This could potentially impact any custom integration you have set up, so only change if you're certain the information is correct and necessary.
#### Customer data sharing
Enabling this setting allows this partner to see customer data on any leads or sales the partner has made.
Instead of the hidden email addresses, they will see the full customer email address and their name. They'll also be able to click through the customer to view the sales history.
![Partner customer view]() #### Ignore group move rules
Enabling this setting allows this partner to stay within the set group, and ignore any [group move rules](/help/article/partner-groups#moving-partners-between-groups) that may apply to them.
#### Exclude from risk monitoring
Enabling this setting will exclude this partner from any risk monitoring, and they won't be able to be flagged for any [risk events](/help/article/risk-monitoring). Only enable this setting if you trust this partner completely.
## Exporting partners
Click the `⋮` menu and choose **Export as CSV** to download your partner data for use anywhere.
#### Ignore group move rules
Enabling this setting allows this partner to stay within the set group, and ignore any [group move rules](/help/article/partner-groups#moving-partners-between-groups) that may apply to them.
#### Exclude from risk monitoring
Enabling this setting will exclude this partner from any risk monitoring, and they won't be able to be flagged for any [risk events](/help/article/risk-monitoring). Only enable this setting if you trust this partner completely.
## Exporting partners
Click the `⋮` menu and choose **Export as CSV** to download your partner data for use anywhere.
![Partners dropdown]() # Merging your partner accounts
Source: https://dub.co/help/article/merging-partner-accounts
Learn how to merge one of your partner accounts with another, to keep things organized and better managed.
Merging your accounts is a permanent action and cannot be undone once it's complete.
## Reasons to merge accounts
There are some reasons why you want to merge your partner accounts on Dub:
* **Consolidate accounts:** You were enrolled in 2 affiliate programs on Dub under different emails.
* **Simplify management**: You want to be able to manage your payouts, programs, and reporting all from one place.
* **Stay compliant**: For compliance reasons, having multiple partner accounts on Dub is strictly prohibited [as per our terms](https://dub.co/legal/partners). We recommend merging your partner accounts to stay compliant.
## What merges?
All of the following merge with this action:
* [](/help/article/commissions-payouts#payout-statuses)[Enrolled programs](/help/article/navigating-partner-program)
* [Referral links](/help/article/navigating-partner-program#links)
* [Analytics](/help/article/navigating-partner-program#analytics) (clicks, leads, and sales data)
* [Commissions](/help/article/commissions-payouts#commission-statuses)
* [Payouts](/help/article/commissions-payouts#payout-statuses)
## What doesn't merge?
* [Profile info](/help/article/partner-profile)
* [Website and social accounts](/help/article/partner-profile#website-and-socials)
* [Connected payout methods](/help/article/receiving-payouts)
* Duplicate bounty submissions (the ones on the source account will be deleted)
## Where to find the merge option
From your **Partner info** page, click **Merge accounts** in the top right, next to **Save changes**.
# Merging your partner accounts
Source: https://dub.co/help/article/merging-partner-accounts
Learn how to merge one of your partner accounts with another, to keep things organized and better managed.
Merging your accounts is a permanent action and cannot be undone once it's complete.
## Reasons to merge accounts
There are some reasons why you want to merge your partner accounts on Dub:
* **Consolidate accounts:** You were enrolled in 2 affiliate programs on Dub under different emails.
* **Simplify management**: You want to be able to manage your payouts, programs, and reporting all from one place.
* **Stay compliant**: For compliance reasons, having multiple partner accounts on Dub is strictly prohibited [as per our terms](https://dub.co/legal/partners). We recommend merging your partner accounts to stay compliant.
## What merges?
All of the following merge with this action:
* [](/help/article/commissions-payouts#payout-statuses)[Enrolled programs](/help/article/navigating-partner-program)
* [Referral links](/help/article/navigating-partner-program#links)
* [Analytics](/help/article/navigating-partner-program#analytics) (clicks, leads, and sales data)
* [Commissions](/help/article/commissions-payouts#commission-statuses)
* [Payouts](/help/article/commissions-payouts#payout-statuses)
## What doesn't merge?
* [Profile info](/help/article/partner-profile)
* [Website and social accounts](/help/article/partner-profile#website-and-socials)
* [Connected payout methods](/help/article/receiving-payouts)
* Duplicate bounty submissions (the ones on the source account will be deleted)
## Where to find the merge option
From your **Partner info** page, click **Merge accounts** in the top right, next to **Save changes**.
![Merge account dropdown]() Clicking this will open a dialog window that has 3 steps to merging your account.
## Steps to merge
Enter the email addresses of the accounts you'd like to merge. You'll need to have access to both email accounts to verify them.
Clicking this will open a dialog window that has 3 steps to merging your account.
## Steps to merge
Enter the email addresses of the accounts you'd like to merge. You'll need to have access to both email accounts to verify them.
![Source and target account emails]() There are two fields to complete:
* **Source account** - the email address of the account you want to merge into the `target account`
* **Target account** - the email address of the account you want the `source account` to merge into
Once these have been added, click **Send codes** to continue the verification process.
We'll send an email to each address with a OTP (one-time password) that will be input on this step.
The emails will look like this:
There are two fields to complete:
* **Source account** - the email address of the account you want to merge into the `target account`
* **Target account** - the email address of the account you want the `source account` to merge into
Once these have been added, click **Send codes** to continue the verification process.
We'll send an email to each address with a OTP (one-time password) that will be input on this step.
The emails will look like this:
![One-time password email]() Enter the OTP for each email address into their required field, and click
**Verify accounts** to confirm the codes.
Enter the OTP for each email address into their required field, and click
**Verify accounts** to confirm the codes.
![Email verification]() This is the final step to confirm the accounts are correct and that you still want to merge. At this point, you're still able to cancel the merge, and nothing will change.
If everything looks good, click **Merge accounts**, and the merge will be completed instantly.
This is the final step to confirm the accounts are correct and that you still want to merge. At this point, you're still able to cancel the merge, and nothing will change.
If everything looks good, click **Merge accounts**, and the merge will be completed instantly.
![Final confirmation]() After the merge is complete, an email will be sent to both accounts confirming the merger.
# Messaging your partners
Source: https://dub.co/help/article/messaging-partners
Learn how to use the messaging center to communicate with your partners in real time, with email notifications & read statuses built in.
This feature is only available on [Advanced plans and
above](https://dub.co/pricing/partners).
On Dub, you can use the Messaging Center to communicate directly with the partners in your program. Partners get notified via email and can respond to your messages in real-time.
## Messages location
In your program navigation, click **Messages** to see your inbox and compose new messages.
After the merge is complete, an email will be sent to both accounts confirming the merger.
# Messaging your partners
Source: https://dub.co/help/article/messaging-partners
Learn how to use the messaging center to communicate with your partners in real time, with email notifications & read statuses built in.
This feature is only available on [Advanced plans and
above](https://dub.co/pricing/partners).
On Dub, you can use the Messaging Center to communicate directly with the partners in your program. Partners get notified via email and can respond to your messages in real-time.
## Messages location
In your program navigation, click **Messages** to see your inbox and compose new messages.
![Messages location]() ## Messages overview
The messaging center has three panels:
## Messages overview
The messaging center has three panels:
![Message panels]() | Panel | Content |
| ------------ | ----------------------------------------------- |
| Inbox | All your conversations in one place. |
| Conversation | The full thread with your selected partner. |
| Details | Key info and performance stats for the partner. |
### Inbox panel
Your Inbox lists every conversation with your partners. Select one to pick up where you left off, or click the **Pencil** button in the top right to compose something new.
| Panel | Content |
| ------------ | ----------------------------------------------- |
| Inbox | All your conversations in one place. |
| Conversation | The full thread with your selected partner. |
| Details | Key info and performance stats for the partner. |
### Inbox panel
Your Inbox lists every conversation with your partners. Select one to pick up where you left off, or click the **Pencil** button in the top right to compose something new.
![Inbox panel]() Each conversation row shows:
* **Unread indicator** – shows if you've read the message
* **Partner** – partner's name and profile image
* **Last activity** – most recent message from you or the partner
* **Excerpt** – short preview of the latest message
Each conversation row shows:
* **Unread indicator** – shows if you've read the message
* **Partner** – partner's name and profile image
* **Last activity** – most recent message from you or the partner
* **Excerpt** – short preview of the latest message
![Inbox pieces]() ### Conversation panel
In the Conversation panel, you’ll see the full thread with your partner. Workspace members can reply too, with their profile images shown beside each message.
### Conversation panel
In the Conversation panel, you’ll see the full thread with your partner. Workspace members can reply too, with their profile images shown beside each message.
![Conversation panel]() ### Message attachments
Messages can also include file attachments. This is helpful for sharing things like contracts, guidelines, or promotional materials.
To add attachments, click the paper clip button in the message composer or drag
and drop files into the message area.
### Message attachments
Messages can also include file attachments. This is helpful for sharing things like contracts, guidelines, or promotional materials.
To add attachments, click the paper clip button in the message composer or drag
and drop files into the message area.
![Message attachments]() Supported attachment types are `PNG`, `JPG/JPEG`, `WEBP`, and `PDF` files. Each attachment can be up to 10 MB, and you can send up to 5 attachments per message.
Supported attachment types are `PNG`, `JPG/JPEG`, `WEBP`, and `PDF` files. Each attachment can be up to 10 MB, and you can send up to 5 attachments per message.
![Message attachments sent]() ### Message status
Each message sent has a check mark next to the send time:
* **Single check mark** – delivered
* **Double check marks** – delivered and read
(either in email or in the app)
### Details panel
The details panel is collapsible and shows partner information and performance stats. You can also change their program group here.
### Message status
Each message sent has a check mark next to the send time:
* **Single check mark** – delivered
* **Double check marks** – delivered and read
(either in email or in the app)
### Details panel
The details panel is collapsible and shows partner information and performance stats. You can also change their program group here.
![Details panel]() ## Disabling messaging
If you prefer to handle support outside Dub, you can disable partner messaging.
To disable messaging, head to your program **Resources** and in the **Help and Support** section, click the switch to off to disable partner messaging.
## Disabling messaging
If you prefer to handle support outside Dub, you can disable partner messaging.
To disable messaging, head to your program **Resources** and in the **Help and Support** section, click the switch to off to disable partner messaging.
![Disable messages]() When messaging is disabled, partners who try to message you will see your support email address instead:
When messaging is disabled, partners who try to message you will see your support email address instead:
![Details panel]() # Migrating from Bitly
Source: https://dub.co/help/article/migrating-from-bitly
Easily migrate your links from Bitly to Dub in less than 3 minutes.
Bitly is a popular URL shortener that lets you create short links, which can be used in your marketing campaigns, social media posts, and more.
## How to migrate from Bitly to Dub
If you're looking to migrate from Bitly to Dub, we've built a custom migration tool that will help you migrate your links in just 2-3 clicks.
If you haven't already, [create a workspace on Dub](/help/article/what-is-a-workspace#how-to-create-a-workspace).
**Protip**: Once you create your workspace, we generally recommend you ***not
to [configure your domain](/help/article/how-to-add-custom-domain)*** until
you've migrated all your links. This will prevent any potential downtime for
your links.
Then, from your workspace dashboard, click on the `⋮` button next to the **Create Link** button and select **Import from Bitly**.
# Migrating from Bitly
Source: https://dub.co/help/article/migrating-from-bitly
Easily migrate your links from Bitly to Dub in less than 3 minutes.
Bitly is a popular URL shortener that lets you create short links, which can be used in your marketing campaigns, social media posts, and more.
## How to migrate from Bitly to Dub
If you're looking to migrate from Bitly to Dub, we've built a custom migration tool that will help you migrate your links in just 2-3 clicks.
If you haven't already, [create a workspace on Dub](/help/article/what-is-a-workspace#how-to-create-a-workspace).
**Protip**: Once you create your workspace, we generally recommend you ***not
to [configure your domain](/help/article/how-to-add-custom-domain)*** until
you've migrated all your links. This will prevent any potential downtime for
your links.
Then, from your workspace dashboard, click on the `⋮` button next to the **Create Link** button and select **Import from Bitly**.
![Import from Bitly button]() This will open a modal that prompts you to sign in with Bitly.
This will open a modal that prompts you to sign in with Bitly.
![Import from Bitly modal]() In the sign in screen, click "Allow" and you'll be redirected back to Dub.
In the sign in screen, click "Allow" and you'll be redirected back to Dub.
![Signing in with Bitly]() Behind the scenes, we'll fetch all your Bitly groups and their respective custom domains and number of tags. You'll be presented with a list of groups that we've found.
Behind the scenes, we'll fetch all your Bitly groups and their respective custom domains and number of tags. You'll be presented with a list of groups that we've found.
![List of Bitly groups found for your account]() If you accidentally signed in to the wrong Bitly account, you can click on the
**Sign in with a different account?** link to sign in with a different Bitly
account.
Select the domains you want to migrate and choose if you'd like to import their respective tags as well. You can learn more about [how tags work on Dub](/help/article/how-to-use-tags).
Once you're done, click **Confirm import**. In just a few seconds, all your links will be migrated to Dub.
If you accidentally signed in to the wrong Bitly account, you can click on the
**Sign in with a different account?** link to sign in with a different Bitly
account.
Select the domains you want to migrate and choose if you'd like to import their respective tags as well. You can learn more about [how tags work on Dub](/help/article/how-to-use-tags).
Once you're done, click **Confirm import**. In just a few seconds, all your links will be migrated to Dub.
![Links imported from Bitly]() Once all your links have been imported, we will send you an email to let you know that the migration is complete.
Once all your links have been imported, we will send you an email to let you know that the migration is complete.
![Email notification about completed Bitly migration]() Once you receive the email, you can [configure your domain](/help/article/how-to-add-custom-domain#step-2-configure-your-domain) by setting the right DNS records. This will ensure that your links are pointing to Dub and not Bitly. Once you've done this, you can start using your links!
## Which Bitly link attributes are migrated?
Here's a list of attributes that are migrated from Bitly to Dub:
1. Destination URL
2. Short link slug
3. Link creation date
4. [Link tags](/help/article/how-to-use-tags)
5. Archived status
If there are any other attributes that you'd like to see migrated, please [reach out to us](https://dub.co/contact/support) and let us know!
# Migrating from FirstPromoter
Source: https://dub.co/help/article/migrating-from-firstpromoter
Easily migrate your affiliate program from FirstPromoter to Dub Partners in just a few clicks.
Dub Partners is only available on [Business plans and
above](https://dub.co/pricing/partners).
FirstPromoter is a practical option for companies just starting out with their affiliate programs.
Over time, companies outgrow FirstPromoter's basic features and look for more advanced solutions to overcome some limitations, including:
1. **Frequent payout failures**: FirstPromoter supports multiple payout methods. PayPal and Wise mass payments are manual and often result in payout failures. Companies must handle tax compliance themselves, which becomes time-consuming as their affiliate base grows. FirstPromoter also offers 1-click global payouts, but this feature is only available on their [Enterprise 2 plan or higher](https://help.firstpromoter.com/en/articles/9998853-how-managed-auto-payouts-work).
2. **No affiliate network**: Since FirstPromoter doesn't offer an affiliate network, companies have to recruit affiliates on their own.
3. **Basic reward structures:** Companies can choose between two reward types: recurring or one-time sales rewards.
**With [Dub Partners](https://dub.co/partners), scaling affiliate programs is seamless.**
1. **Payouts you can rely on:** We let you [pay your partners globally](/help/article/partner-payouts) in 1-click, with tax compliance built-in, so you can have peace of mind knowing that all payouts are completed successfully.
2. **Powerful affiliate network**: With over 5,000 active affiliates in our network, Dub makes it easy to find and recruit high-performing partners with a proven track record of driving results.
3. **Advanced reward structures**: On Dub, you can choose between [3 reward types](/help/article/partner-rewards#configuring-reward-types) – per click, per lead, and per sale (flat/percentage). You can also set different [reward conditions](/help/article/partner-rewards#adding-reward-conditions) (e.g., a higher reward for customers based in the U.S. vs other countries) and create [bounties](/help/article/program-bounties) to provide additional rewards for your affiliates.
[Learn how Framer switched from FirstPromoter to
Dub](https://dub.co/customers/framer) to power 7,000+ global affiliates and
\$900,000+ in monthly payouts.
In this article, we'll learn how to import your FirstPromoter affiliate program to[ Dub Partners](/help/article/dub-partners) for a more powerful and scalable partner management experience.
## How to migrate from FirstPromoter to Dub?
If you're looking to migrate from FirstPromoter to Dub Partners, we've built a custom migration tool that will help you migrate everything over in just 2-3 clicks – without breaking any existing FirstPromoter affiliate links.
Before starting the migration process, you'll need to add a custom domain to Dub. This domain will be used to create short links for each affiliate link that we import from FirstPromoter.
If you haven't added a custom domain to Dub yet, you can [follow this guide to set that up](/help/article/how-to-add-custom-domain).
Next, [set up conversion tracking](/docs/quickstart/server) to track signup and sale events. We also have some [in-app guides that you can reference here](https://app.dub.co/guides).
For backward compatibility, we also recommend setting up [client-side click-tracking](/docs/sdks/client-side/features/click-tracking) when installing the [Dub Analytics script](/docs/sdks/client-side/introduction) on your site. This will ensure all your existing `domain.com?fp_ref=affiliate` links will keep working as expected, which gives affiliates time to update their links to the new format.
You can [follow our guide](/docs/sdks/client-side/features/click-tracking) on how to set up client-side click-tracking for your Dub short links to set that up.
[Follow this guide](https://docs.firstpromoter.com/api-reference-v1/authentication) to get your FirstPromoter API key – API keys can be created in the [Settings tab of your FirstPromoter dashboard](https://app.firstpromoter.com/settings/integrations).
You will also need to get your FirstPromoter Account ID under your [Settings tab](https://app.firstpromoter.com/settings/integrations) as well.
We will use the API key and Account ID to retrieve and import your existing FirstPromoter affiliate program campaigns to Dub.
Once you've [set up your Dub partner program](/help/article/setting-up-your-program), go to your [Partners tab](https://app.dub.co/program/partners), click on the `⋮` button and select "Import from FirstPromoter".
To save you some time, [here's a quicklink](https://app.dub.co/program/partners?import=firstpromoter) that will get you directly to the FirstPromoter import flow.
Once you receive the email, you can [configure your domain](/help/article/how-to-add-custom-domain#step-2-configure-your-domain) by setting the right DNS records. This will ensure that your links are pointing to Dub and not Bitly. Once you've done this, you can start using your links!
## Which Bitly link attributes are migrated?
Here's a list of attributes that are migrated from Bitly to Dub:
1. Destination URL
2. Short link slug
3. Link creation date
4. [Link tags](/help/article/how-to-use-tags)
5. Archived status
If there are any other attributes that you'd like to see migrated, please [reach out to us](https://dub.co/contact/support) and let us know!
# Migrating from FirstPromoter
Source: https://dub.co/help/article/migrating-from-firstpromoter
Easily migrate your affiliate program from FirstPromoter to Dub Partners in just a few clicks.
Dub Partners is only available on [Business plans and
above](https://dub.co/pricing/partners).
FirstPromoter is a practical option for companies just starting out with their affiliate programs.
Over time, companies outgrow FirstPromoter's basic features and look for more advanced solutions to overcome some limitations, including:
1. **Frequent payout failures**: FirstPromoter supports multiple payout methods. PayPal and Wise mass payments are manual and often result in payout failures. Companies must handle tax compliance themselves, which becomes time-consuming as their affiliate base grows. FirstPromoter also offers 1-click global payouts, but this feature is only available on their [Enterprise 2 plan or higher](https://help.firstpromoter.com/en/articles/9998853-how-managed-auto-payouts-work).
2. **No affiliate network**: Since FirstPromoter doesn't offer an affiliate network, companies have to recruit affiliates on their own.
3. **Basic reward structures:** Companies can choose between two reward types: recurring or one-time sales rewards.
**With [Dub Partners](https://dub.co/partners), scaling affiliate programs is seamless.**
1. **Payouts you can rely on:** We let you [pay your partners globally](/help/article/partner-payouts) in 1-click, with tax compliance built-in, so you can have peace of mind knowing that all payouts are completed successfully.
2. **Powerful affiliate network**: With over 5,000 active affiliates in our network, Dub makes it easy to find and recruit high-performing partners with a proven track record of driving results.
3. **Advanced reward structures**: On Dub, you can choose between [3 reward types](/help/article/partner-rewards#configuring-reward-types) – per click, per lead, and per sale (flat/percentage). You can also set different [reward conditions](/help/article/partner-rewards#adding-reward-conditions) (e.g., a higher reward for customers based in the U.S. vs other countries) and create [bounties](/help/article/program-bounties) to provide additional rewards for your affiliates.
[Learn how Framer switched from FirstPromoter to
Dub](https://dub.co/customers/framer) to power 7,000+ global affiliates and
\$900,000+ in monthly payouts.
In this article, we'll learn how to import your FirstPromoter affiliate program to[ Dub Partners](/help/article/dub-partners) for a more powerful and scalable partner management experience.
## How to migrate from FirstPromoter to Dub?
If you're looking to migrate from FirstPromoter to Dub Partners, we've built a custom migration tool that will help you migrate everything over in just 2-3 clicks – without breaking any existing FirstPromoter affiliate links.
Before starting the migration process, you'll need to add a custom domain to Dub. This domain will be used to create short links for each affiliate link that we import from FirstPromoter.
If you haven't added a custom domain to Dub yet, you can [follow this guide to set that up](/help/article/how-to-add-custom-domain).
Next, [set up conversion tracking](/docs/quickstart/server) to track signup and sale events. We also have some [in-app guides that you can reference here](https://app.dub.co/guides).
For backward compatibility, we also recommend setting up [client-side click-tracking](/docs/sdks/client-side/features/click-tracking) when installing the [Dub Analytics script](/docs/sdks/client-side/introduction) on your site. This will ensure all your existing `domain.com?fp_ref=affiliate` links will keep working as expected, which gives affiliates time to update their links to the new format.
You can [follow our guide](/docs/sdks/client-side/features/click-tracking) on how to set up client-side click-tracking for your Dub short links to set that up.
[Follow this guide](https://docs.firstpromoter.com/api-reference-v1/authentication) to get your FirstPromoter API key – API keys can be created in the [Settings tab of your FirstPromoter dashboard](https://app.firstpromoter.com/settings/integrations).
You will also need to get your FirstPromoter Account ID under your [Settings tab](https://app.firstpromoter.com/settings/integrations) as well.
We will use the API key and Account ID to retrieve and import your existing FirstPromoter affiliate program campaigns to Dub.
Once you've [set up your Dub partner program](/help/article/setting-up-your-program), go to your [Partners tab](https://app.dub.co/program/partners), click on the `⋮` button and select "Import from FirstPromoter".
To save you some time, [here's a quicklink](https://app.dub.co/program/partners?import=firstpromoter) that will get you directly to the FirstPromoter import flow.
![Import FirstPromoter modal]() Then, add your FirstPromoter API key + Account ID and select **Continue.**
## What data is migrated?
Our FirstPromoter migration tool imports the following attributes to Dub Partners:
### Campaigns / Groups
Each of your [campaigns](https://help.firstpromoter.com/en/articles/8971305-what-are-campaigns) on FirstPromoter will be mapped to a [partner group](/help/article/partner-groups) on Dub.
Since FirstPromoter doesn't expose a `/rewards` endpoint, your FirstPromoter
program terms will not be migrated – all partners will be assigned to your
program's default reward and you would need to manually update the reward terms afterwards.
Learn more about how [Partner
rewards](/help/article/partner-rewards) work on Dub.
### Promoters / Partners
To ensure the efficiency of your partner program, we automatically filter out dormant promoters and only import the ones that are both:
* In an "accepted" state ([docs](https://docs.firstpromoter.com/api-reference-v2/api-admin/promoters/get-available-promoters#parameter-filters-state))
* Have at least 1 referral (`referrals_count > 1` → [docs](https://docs.firstpromoter.com/api-reference-v2/api-admin/promoters/get-available-promoters#parameter-filters-referrals-count))
We also automatically import all your promoters' links and recreate them in Dub using your program's domain and default URL.
### Referrals / Customers
By default, we import all referrals that are associated with an affiliate in your FirstPromoter program. This ensures that all subsequent subscription renewal events will continue to be tracked on Dub.
Some referrals might not have a valid Stripe customer ID. Those referrals will
still be imported, with the Stripe customer ID updated afterwards.
### Commissions
We also import all commissions associated with any customers that were imported above. Depending on the commission state on FirstPromoter, they will be marked accordingly on Dub as well:
| FirstPromoter | Dub |
| ------------- | ----------- |
| `Pending` | `Pending` |
| `Approved` | `Processed` |
| `Denied` | `Canceled` |
Dub also supports 4 additional commission states:
* `Paid`: When the payout containing the commission has been paid.
* `Refunded`: If the sale for the commission was refunded.
* `Fraud`: Useful for marking a sale as fraudulent and excluding it from any future payouts.
* `Duplicate`: Useful for marketing if a commission was rewarded more than once and needs to be marked as a duplicate event.
Commissions for a referral that do not have a valid Stripe customer ID or a
transaction trace will not be imported.
If there are any other attributes that you'd like to see migrated (or if you would like to customize any of the rules above), please [reach out to us](https://dub.co/contact/support) and let us know!
## Next steps
After importing your program, here are some recommended next steps:
### 1. Set up your bank account for partner payouts
Dub Partners supports [1-click payouts](/help/article/partner-payouts) to partners all across the globe.
We generally recommend using ACH for partner payouts as it is the most cost-effective option. Here's [how you can set up your bank account](/help/article/how-to-set-up-bank-account) for ACH payouts.
### 2. Notify your affiliates about the platform change
Next, you'd want to reach out to your existing partners and let them know about the platform change. To do that, you can send them an email with the following example verbiage:
> Hey,
>
> Starting today, we are switching the \[Your Company] Affiliate Program from FirstPromoter to [Dub Partners](https://dub.co/partners/).
>
> To get started, follow these steps:
>
> 1. Sign up for a Dub Partners account here: `partners.dub.co/{your_program_slug}/register`
> 2. [Connect a payout method](https://partners.dub.co/settings/payouts) to receive your commissions.
> 3. Start sharing your shiny new referral link with your audience 🚀
>
> Let us know if you have any questions!
## Take your affiliate program to the next level with Dub
Ready to take your affiliate program to the next level? [Sign up today](https://app.dub.co/register) and join companies like [Framer](https://dub.co/customers/framer) that have migrated from FirstPromoter to Dub.
Have any questions? Feel free to [reach out to us](https://dub.co/contact)!
# Migrating from PartnerStack
Source: https://dub.co/help/article/migrating-from-partnerstack
Easily migrate your affiliate program from PartnerStack to Dub Partners in just a few clicks.
Dub Partners is only available on [Business plans and
above](https://dub.co/pricing/partners).
PartnerStack is a go-to affiliate management platform for many businesses worldwide.
While widely used, PartnerStack has its limitations that are especially noticeable if you are just starting your affiliate program:
1. **Pricing**: Companies must contact sales for a quote, with the average customer paying [\$18,000](https://www.vendr.com/marketplace/partnerstack) annually, plus a ‘take fee’ on affiliate payouts that can be [as high as 15%](http://d.to/partnerstack-fees). These costly annual contracts lock you in before your affiliate program has a chance to scale.
2. **Complex UI**: PartnerStack has every feature you can think of, resulting in dense navigation, buried settings, and workflows that require documentation to understand.
3. **Affiliate network**: PartnerStack has one of the largest affiliate networks with 65,000+ users. But customer feedback consistently shows that most of these ‘partners’ generate no results. You have to manually go through thousands of profiles to find the few who actually drive revenue.
**This is where [Dub Partners](https://dub.co/partners) comes in.**
1. **Pricing that scales with your success**: You can start your affiliate program on Dub with [as little as \$90/month](https://dub.co/pricing/partners) and only 5% payout fees. As you grow, payout fees drop to 3%, giving you the flexibility to reward partners without high costs eating into your margins.
2. **Modern UI with enterprise-grade capabilities**: Dub's modern interface makes it simple for both you and your partners to navigate without a learning curve. You can use our [Embedded Referral Dashboard](/docs/partners/embedded-referrals) to create a seamless referral experience, or leverage our best-in-class [Risk Monitoring](/help/article/risk-monitoring) feature to ensure the safety/compliance of your program. The possibilities are endless.
3. **Powerful affiliate network**: With over 5,000 meticulously vetted affiliates in our partner network, Dub makes it easy to find and recruit high-performing partners with a proven track record of driving results.
In this article, we'll learn how to import your PartnerStack affiliate program to[ Dub Partners](/help/article/dub-partners) for a more powerful, scalable, and branded partner management experience.
## How to migrate from PartnerStack to Dub?
If you're looking to migrate from PartnerStack to Dub Partners, we've built a custom migration tool that will help you migrate everything over in just 2-3 clicks – without breaking any existing PartnerStack affiliate links.
Before starting the migration process, you'll need to add a custom domain to Dub. This domain will be used to create short links for each affiliate link that we import from PartnerStack.
If you haven't added a custom domain to Dub yet, you can [follow this guide to set that up](/help/article/how-to-add-custom-domain).
Next, [set up conversion tracking](/docs/quickstart/server) to track signup and sale events. We also have some [in-app guides that you can reference here](https://app.dub.co/guides).
[Follow this guide](https://docs.tolt.com/authentication) to get your PartnerStack API keys – API keys can be created in the [Settings → API](https://app.partnerstack.com/settings/integrations) tab of your PartnerStack dashboard:
Then, add your FirstPromoter API key + Account ID and select **Continue.**
## What data is migrated?
Our FirstPromoter migration tool imports the following attributes to Dub Partners:
### Campaigns / Groups
Each of your [campaigns](https://help.firstpromoter.com/en/articles/8971305-what-are-campaigns) on FirstPromoter will be mapped to a [partner group](/help/article/partner-groups) on Dub.
Since FirstPromoter doesn't expose a `/rewards` endpoint, your FirstPromoter
program terms will not be migrated – all partners will be assigned to your
program's default reward and you would need to manually update the reward terms afterwards.
Learn more about how [Partner
rewards](/help/article/partner-rewards) work on Dub.
### Promoters / Partners
To ensure the efficiency of your partner program, we automatically filter out dormant promoters and only import the ones that are both:
* In an "accepted" state ([docs](https://docs.firstpromoter.com/api-reference-v2/api-admin/promoters/get-available-promoters#parameter-filters-state))
* Have at least 1 referral (`referrals_count > 1` → [docs](https://docs.firstpromoter.com/api-reference-v2/api-admin/promoters/get-available-promoters#parameter-filters-referrals-count))
We also automatically import all your promoters' links and recreate them in Dub using your program's domain and default URL.
### Referrals / Customers
By default, we import all referrals that are associated with an affiliate in your FirstPromoter program. This ensures that all subsequent subscription renewal events will continue to be tracked on Dub.
Some referrals might not have a valid Stripe customer ID. Those referrals will
still be imported, with the Stripe customer ID updated afterwards.
### Commissions
We also import all commissions associated with any customers that were imported above. Depending on the commission state on FirstPromoter, they will be marked accordingly on Dub as well:
| FirstPromoter | Dub |
| ------------- | ----------- |
| `Pending` | `Pending` |
| `Approved` | `Processed` |
| `Denied` | `Canceled` |
Dub also supports 4 additional commission states:
* `Paid`: When the payout containing the commission has been paid.
* `Refunded`: If the sale for the commission was refunded.
* `Fraud`: Useful for marking a sale as fraudulent and excluding it from any future payouts.
* `Duplicate`: Useful for marketing if a commission was rewarded more than once and needs to be marked as a duplicate event.
Commissions for a referral that do not have a valid Stripe customer ID or a
transaction trace will not be imported.
If there are any other attributes that you'd like to see migrated (or if you would like to customize any of the rules above), please [reach out to us](https://dub.co/contact/support) and let us know!
## Next steps
After importing your program, here are some recommended next steps:
### 1. Set up your bank account for partner payouts
Dub Partners supports [1-click payouts](/help/article/partner-payouts) to partners all across the globe.
We generally recommend using ACH for partner payouts as it is the most cost-effective option. Here's [how you can set up your bank account](/help/article/how-to-set-up-bank-account) for ACH payouts.
### 2. Notify your affiliates about the platform change
Next, you'd want to reach out to your existing partners and let them know about the platform change. To do that, you can send them an email with the following example verbiage:
> Hey,
>
> Starting today, we are switching the \[Your Company] Affiliate Program from FirstPromoter to [Dub Partners](https://dub.co/partners/).
>
> To get started, follow these steps:
>
> 1. Sign up for a Dub Partners account here: `partners.dub.co/{your_program_slug}/register`
> 2. [Connect a payout method](https://partners.dub.co/settings/payouts) to receive your commissions.
> 3. Start sharing your shiny new referral link with your audience 🚀
>
> Let us know if you have any questions!
## Take your affiliate program to the next level with Dub
Ready to take your affiliate program to the next level? [Sign up today](https://app.dub.co/register) and join companies like [Framer](https://dub.co/customers/framer) that have migrated from FirstPromoter to Dub.
Have any questions? Feel free to [reach out to us](https://dub.co/contact)!
# Migrating from PartnerStack
Source: https://dub.co/help/article/migrating-from-partnerstack
Easily migrate your affiliate program from PartnerStack to Dub Partners in just a few clicks.
Dub Partners is only available on [Business plans and
above](https://dub.co/pricing/partners).
PartnerStack is a go-to affiliate management platform for many businesses worldwide.
While widely used, PartnerStack has its limitations that are especially noticeable if you are just starting your affiliate program:
1. **Pricing**: Companies must contact sales for a quote, with the average customer paying [\$18,000](https://www.vendr.com/marketplace/partnerstack) annually, plus a ‘take fee’ on affiliate payouts that can be [as high as 15%](http://d.to/partnerstack-fees). These costly annual contracts lock you in before your affiliate program has a chance to scale.
2. **Complex UI**: PartnerStack has every feature you can think of, resulting in dense navigation, buried settings, and workflows that require documentation to understand.
3. **Affiliate network**: PartnerStack has one of the largest affiliate networks with 65,000+ users. But customer feedback consistently shows that most of these ‘partners’ generate no results. You have to manually go through thousands of profiles to find the few who actually drive revenue.
**This is where [Dub Partners](https://dub.co/partners) comes in.**
1. **Pricing that scales with your success**: You can start your affiliate program on Dub with [as little as \$90/month](https://dub.co/pricing/partners) and only 5% payout fees. As you grow, payout fees drop to 3%, giving you the flexibility to reward partners without high costs eating into your margins.
2. **Modern UI with enterprise-grade capabilities**: Dub's modern interface makes it simple for both you and your partners to navigate without a learning curve. You can use our [Embedded Referral Dashboard](/docs/partners/embedded-referrals) to create a seamless referral experience, or leverage our best-in-class [Risk Monitoring](/help/article/risk-monitoring) feature to ensure the safety/compliance of your program. The possibilities are endless.
3. **Powerful affiliate network**: With over 5,000 meticulously vetted affiliates in our partner network, Dub makes it easy to find and recruit high-performing partners with a proven track record of driving results.
In this article, we'll learn how to import your PartnerStack affiliate program to[ Dub Partners](/help/article/dub-partners) for a more powerful, scalable, and branded partner management experience.
## How to migrate from PartnerStack to Dub?
If you're looking to migrate from PartnerStack to Dub Partners, we've built a custom migration tool that will help you migrate everything over in just 2-3 clicks – without breaking any existing PartnerStack affiliate links.
Before starting the migration process, you'll need to add a custom domain to Dub. This domain will be used to create short links for each affiliate link that we import from PartnerStack.
If you haven't added a custom domain to Dub yet, you can [follow this guide to set that up](/help/article/how-to-add-custom-domain).
Next, [set up conversion tracking](/docs/quickstart/server) to track signup and sale events. We also have some [in-app guides that you can reference here](https://app.dub.co/guides).
[Follow this guide](https://docs.tolt.com/authentication) to get your PartnerStack API keys – API keys can be created in the [Settings → API](https://app.partnerstack.com/settings/integrations) tab of your PartnerStack dashboard:
![PartnerStack API key]() Make sure to use your production API keys to import live partners only (since
test partners won't be imported).
We will use the generated Public and Secret keys to retrieve and import your existing PartnerStack program to Dub.
Once you've [set up your Dub partner program](/help/article/setting-up-your-program), go to your [Partners tab](https://app.dub.co/program/partners), click on the `⋮` button and select "Import from PartnerStack".
To save you some time, [here's a quicklink](https://app.dub.co/program/partners?import=partnerstack) that will get you directly to the PartnerStack import flow.
Make sure to use your production API keys to import live partners only (since
test partners won't be imported).
We will use the generated Public and Secret keys to retrieve and import your existing PartnerStack program to Dub.
Once you've [set up your Dub partner program](/help/article/setting-up-your-program), go to your [Partners tab](https://app.dub.co/program/partners), click on the `⋮` button and select "Import from PartnerStack".
To save you some time, [here's a quicklink](https://app.dub.co/program/partners?import=partnerstack) that will get you directly to the PartnerStack import flow.
![Import PartnerStack modal]() Then, add your PartnerStack Public and Secret keys and select **Continue.**
## What data is migrated?
Our PartnerStack migration tool imports the following attributes to Dub Partners:
### Affiliates / Partners
To ensure the efficiency of your partner program, we automatically filter out dormant affiliates and only import the ones that are both:
* In an "active" state ([docs](https://developers.rewardful.com/rest-api/affiliates/object#state))
* Have at least 1 lead / referral
We also automatically import all your affiliates' links and recreate them in Dub using your program's domain and default URL.
Since PartnerStack doesn't expose a `/triggers` endpoint, your PartnerStack triggers will not be migrated – all partners will be assigned to your program's default reward.
Learn more about how [Partner rewards](/help/article/partner-rewards) work on Dub.
Feel free to [reach out to support](https://dub.co/contact/support) if you need help manually configuring specific reward groups for your importer partners.
### Referrals / Customers
By default, we import all referrals that are associated with an affiliate in your PartnerStack campaign. This ensures that all subsequent subscription renewal events will continue to be tracked on Dub.
Certain customers will not be imported, such as test accounts or any customer that is not associated with an affiliate link.
Some referrals might not have a valid Stripe customer ID. Those referrals will
still be imported, with the Stripe customer ID updated afterwards.
### Commissions
We also import all commissions associated with any customers that were imported above. Depending on the commission state on PartnerStack, they will be marked accordingly on Dub as well:
| PartnerStack | Dub |
| ------------ | ----------- |
| `Pending` | `Pending` |
| `Approved` | `Processed` |
| `Paid` | `Paid` |
| `Declined` | `Canceled` |
| `Hold` | `Fraud` |
Additionally, Dub also supports 2 additional commission states:
* `Refunded`: When the sale for the commission was refunded. With our [Stripe integration](/docs/integrations/stripe), this is automatically detected and updated.
* `Duplicate`: Useful for marketing if a commission was rewarded more than once and needs to be marked as a duplicate event.
Commissions for a referral that do not have a valid Stripe customer ID or a
transaction trace will not be imported.
If there are any other attributes that you'd like to see migrated (or if you would like to customize any of the rules above), please [reach out to us](https://dub.co/contact/support) and let us know!
## Next steps
After importing your campaign, here are some recommended next steps:
### 1. Set up your bank account for partner payouts
Dub Partners supports [1-click payouts](/help/article/partner-payouts) to partners all across the globe.
We generally recommend using ACH for partner payouts as it is the most cost-effective option. Here's [how you can set up your bank account](/help/article/how-to-set-up-bank-account) for ACH payouts.
### 2. Notify your affiliates about the platform change
Next, you'd want to reach out to your existing partners and let them know about the platform change. To do that, you can send them an email with the following example verbiage:
> Hey,
>
> Starting today, we are switching the \[Your Company] Affiliate Program from PartnerStack to [Dub Partners](https://dub.co/partners/).
>
> To get started, follow these steps:
>
> 1. Sign up for a Dub Partners account here: `partners.dub.co/{your_program_slug}/register`
> 2. [Connect a payout method](https://partners.dub.co/settings/payouts) to receive your commissions.
> 3. Start sharing your shiny new referral link with your audience 🚀
>
> Let us know if you have any questions!
## Take your affiliate program to the next level with Dub
Ready to take your affiliate program to the next level? [Sign up today](https://app.dub.co/register) and join companies like [Privy](https://partners.dub.co/privy) that have migrated from PartnerStack to Dub.
Have any questions? Feel free to [reach out to us](https://dub.co/contact)!
# Migrating from Rebrandly
Source: https://dub.co/help/article/migrating-from-rebrandly
How you can migrate from Rebrandly to Dub in a few simple steps.
Rebrandly is a popular URL shortener that lets you create short links, which can be used in your marketing campaigns, social media posts, and more.
## How to migrate from Rebrandly to Dub
If you're looking to migrate from Rebrandly to Dub, we've built a custom migration tool that will help you migrate your links in a few simple steps.
First, log into your Rebrandly account and navigate to [Account > API](https://app.rebrandly.com/account/api).
API" section in Rebrandly`} />
If you don't have an API key yet, click on "New API Key", which will create a new API key for you.
Copy the created API key. You'll need it in the next step.
Then, add your PartnerStack Public and Secret keys and select **Continue.**
## What data is migrated?
Our PartnerStack migration tool imports the following attributes to Dub Partners:
### Affiliates / Partners
To ensure the efficiency of your partner program, we automatically filter out dormant affiliates and only import the ones that are both:
* In an "active" state ([docs](https://developers.rewardful.com/rest-api/affiliates/object#state))
* Have at least 1 lead / referral
We also automatically import all your affiliates' links and recreate them in Dub using your program's domain and default URL.
Since PartnerStack doesn't expose a `/triggers` endpoint, your PartnerStack triggers will not be migrated – all partners will be assigned to your program's default reward.
Learn more about how [Partner rewards](/help/article/partner-rewards) work on Dub.
Feel free to [reach out to support](https://dub.co/contact/support) if you need help manually configuring specific reward groups for your importer partners.
### Referrals / Customers
By default, we import all referrals that are associated with an affiliate in your PartnerStack campaign. This ensures that all subsequent subscription renewal events will continue to be tracked on Dub.
Certain customers will not be imported, such as test accounts or any customer that is not associated with an affiliate link.
Some referrals might not have a valid Stripe customer ID. Those referrals will
still be imported, with the Stripe customer ID updated afterwards.
### Commissions
We also import all commissions associated with any customers that were imported above. Depending on the commission state on PartnerStack, they will be marked accordingly on Dub as well:
| PartnerStack | Dub |
| ------------ | ----------- |
| `Pending` | `Pending` |
| `Approved` | `Processed` |
| `Paid` | `Paid` |
| `Declined` | `Canceled` |
| `Hold` | `Fraud` |
Additionally, Dub also supports 2 additional commission states:
* `Refunded`: When the sale for the commission was refunded. With our [Stripe integration](/docs/integrations/stripe), this is automatically detected and updated.
* `Duplicate`: Useful for marketing if a commission was rewarded more than once and needs to be marked as a duplicate event.
Commissions for a referral that do not have a valid Stripe customer ID or a
transaction trace will not be imported.
If there are any other attributes that you'd like to see migrated (or if you would like to customize any of the rules above), please [reach out to us](https://dub.co/contact/support) and let us know!
## Next steps
After importing your campaign, here are some recommended next steps:
### 1. Set up your bank account for partner payouts
Dub Partners supports [1-click payouts](/help/article/partner-payouts) to partners all across the globe.
We generally recommend using ACH for partner payouts as it is the most cost-effective option. Here's [how you can set up your bank account](/help/article/how-to-set-up-bank-account) for ACH payouts.
### 2. Notify your affiliates about the platform change
Next, you'd want to reach out to your existing partners and let them know about the platform change. To do that, you can send them an email with the following example verbiage:
> Hey,
>
> Starting today, we are switching the \[Your Company] Affiliate Program from PartnerStack to [Dub Partners](https://dub.co/partners/).
>
> To get started, follow these steps:
>
> 1. Sign up for a Dub Partners account here: `partners.dub.co/{your_program_slug}/register`
> 2. [Connect a payout method](https://partners.dub.co/settings/payouts) to receive your commissions.
> 3. Start sharing your shiny new referral link with your audience 🚀
>
> Let us know if you have any questions!
## Take your affiliate program to the next level with Dub
Ready to take your affiliate program to the next level? [Sign up today](https://app.dub.co/register) and join companies like [Privy](https://partners.dub.co/privy) that have migrated from PartnerStack to Dub.
Have any questions? Feel free to [reach out to us](https://dub.co/contact)!
# Migrating from Rebrandly
Source: https://dub.co/help/article/migrating-from-rebrandly
How you can migrate from Rebrandly to Dub in a few simple steps.
Rebrandly is a popular URL shortener that lets you create short links, which can be used in your marketing campaigns, social media posts, and more.
## How to migrate from Rebrandly to Dub
If you're looking to migrate from Rebrandly to Dub, we've built a custom migration tool that will help you migrate your links in a few simple steps.
First, log into your Rebrandly account and navigate to [Account > API](https://app.rebrandly.com/account/api).
API" section in Rebrandly`} />
If you don't have an API key yet, click on "New API Key", which will create a new API key for you.
Copy the created API key. You'll need it in the next step.
![Copy the created API key]() If you haven't already, [create a workspace on Dub](/help/article/what-is-a-workspace#how-to-create-a-workspace).
**Protip**: Once you create your workspace, we generally recommend you ***not
to [configure your domain](/help/article/how-to-add-custom-domain)*** until
you've migrated all your links. This will prevent any potential downtime for
your links.
Then, from your workspace dashboard, click on the `⋮` button next to the **Create Link** button and select **Import from Rebrandly**.
If you haven't already, [create a workspace on Dub](/help/article/what-is-a-workspace#how-to-create-a-workspace).
**Protip**: Once you create your workspace, we generally recommend you ***not
to [configure your domain](/help/article/how-to-add-custom-domain)*** until
you've migrated all your links. This will prevent any potential downtime for
your links.
Then, from your workspace dashboard, click on the `⋮` button next to the **Create Link** button and select **Import from Rebrandly**.
![Import from Rebrandly button]() You'll be prompted to enter your Rebrandly API key. Paste the API key you copied in the previous step and click **Confirm API Key**.
You'll be prompted to enter your Rebrandly API key. Paste the API key you copied in the previous step and click **Confirm API Key**.
![Import from Rebrandly modal]() Behind the scenes, we'll fetch all your Rebrandly custom domains and their respective number of links. You'll be presented with a list of domains that we've found.
Behind the scenes, we'll fetch all your Rebrandly custom domains and their respective number of links. You'll be presented with a list of domains that we've found.
![Domains found in Rebrandly and their respective number of links]() Select the domains you want to migrate. You can also choose if you'd like to import their respective tags as well. You can learn more about [how tags work on Dub](/help/article/how-to-use-tags).
One you're done, click **Confirm import**. In just a few seconds, all your links and their respective tags will be migrated to Dub.
Select the domains you want to migrate. You can also choose if you'd like to import their respective tags as well. You can learn more about [how tags work on Dub](/help/article/how-to-use-tags).
One you're done, click **Confirm import**. In just a few seconds, all your links and their respective tags will be migrated to Dub.
![Links imported from Rebrandly]() Once all your links have been imported, we will send you an email to let you know that the migration is complete.
Once all your links have been imported, we will send you an email to let you know that the migration is complete.
![Email notification about completed Rebrandly migration]() Once you receive the email, you can [configure your domain](/help/article/how-to-add-custom-domain#step-2-configure-your-domain) by setting the right DNS records. This will ensure that your links are pointing to Dub and not Rebrandly. Once you've done this, you can start using your links!
## Which Rebrandly link attributes are migrated?
Here's a list of attributes that are migrated from Rebrandly to Dub:
1. Destination URL
2. Short link slug
3. Link creation date
4. Link updated date
5. [Link tags](/help/article/how-to-use-tags)
6. Link title (as part of Dub's [Custom Link Previews](/help/article/custom-link-previews) feature)
Here are the attributes that are not migrated:
1. [Device targeting](/help/article/device-targeting)
2. [Geo targeting](/help/article/geo-targeting)
3. Deep links
If there are any attributes that you'd like to see migrated, please [reach out to us](https://dub.co/contact/support) and let us know!
# Migrating from Rewardful
Source: https://dub.co/help/article/migrating-from-rewardful
Easily migrate your affiliate program from Rewardful to Dub Partners in just a few clicks.
Dub Partners is only available on [Business plans and
above](https://dub.co/pricing/partners).
Rewardful is a popular affiliate management platform, especially for businesses that use Stripe for payments.
However, Rewardful can be pretty limiting for companies that want to run their affiliate programs at scale:
1. **No payouts support**: Companies generally have to resort to using PayPal/Wise to pay out their affiliates manually and deal with the all-too-common payout failures.
2. **Basic reward structures:** Companies can choose between two reward types: recurring or one-time sales rewards.
3. **Limited white-labeling support**: It's not possible to embed Rewardful's dashboard inside your application.
4. **No affiliate network**: Rewardful is a standalone affiliate software, which means you're on your own when it comes to finding and recruiting high-quality affiliates to join your program.
**This is where [Dub Partners](https://dub.co/partners) comes in.**
1. **Payouts you can rely on:** We let you [pay your partners globally](/help/article/partner-payouts) in 1-click, with tax compliance built-in, so you can have peace of mind knowing that all payouts are completed successfully.
2. **Advanced reward structures**: On Dub, you can choose between [3 reward types](/help/article/partner-rewards#configuring-reward-types) – per click, per lead, and per sale (flat/percentage). You can also set different [reward conditions](/help/article/partner-rewards#adding-reward-conditions) (e.g., a higher reward for customers based in the U.S. vs other countries) and create [bounties](/help/article/program-bounties) to provide additional rewards for your affiliates.
3. **White-labeling**: You can [embed a white-labeled referral dashboard into your application](/docs/partners/embedded-referrals) for a better user experience.
4. **Powerful affiliate network**: With over 5,000 active affiliates in our network, Dub makes it easy to find and recruit high-performing partners with a proven track record of driving results.
Case in point: [Tella](https://partners.dub.co/tella) migrated their affiliate program from Rewardful to Dub and saw a [38% increase in revenue and 2x more partner signups](https://dub.co/customers/tella).
Read the [full comparison article between Dub and Rewardful here](https://dub.co/blog/dub-vs-rewardful).
In this article, we'll learn how to import your Rewardful affiliate program to[ Dub Partners](/help/article/dub-partners) for a more powerful, scalable, and branded partner management experience.
## How to migrate from Rewardful to Dub?
If you're looking to migrate from Rewardful to Dub Partners, we've built a custom migration tool that will help you migrate everything over in just 2-3 clicks – without breaking any existing Rewardful affiliate links.
Before starting the migration process, you'll need to add a custom domain to Dub. This domain will be used to create short links for each affiliate link that we import from Rewardful.
If you haven't added a custom domain to Dub yet, you can [follow this guide to set that up](/help/article/how-to-add-custom-domain).
Next, [set up conversion tracking](/docs/quickstart/server) to track signup and sale events. We also have some [in-app guides that you can reference here](https://app.dub.co/guides).
For backward compatibility, we also recommend setting up [client-side click-tracking](/docs/sdks/client-side/features/click-tracking) when installing the [Dub Analytics script](/docs/sdks/client-side/introduction) on your site. This will ensure all your existing `domain.com?via=affiliate` links will keep working as expected, which gives affiliates time to update their links to the new format.
You can [follow our guide](/docs/sdks/client-side/features/click-tracking) on how to set up client-side click-tracking for your Dub short links to set that up.
Go to your [Company settings page on Rewardful](https://app.getrewardful.com/company/edit) to retrieve your Rewardful API secret:
Once you receive the email, you can [configure your domain](/help/article/how-to-add-custom-domain#step-2-configure-your-domain) by setting the right DNS records. This will ensure that your links are pointing to Dub and not Rebrandly. Once you've done this, you can start using your links!
## Which Rebrandly link attributes are migrated?
Here's a list of attributes that are migrated from Rebrandly to Dub:
1. Destination URL
2. Short link slug
3. Link creation date
4. Link updated date
5. [Link tags](/help/article/how-to-use-tags)
6. Link title (as part of Dub's [Custom Link Previews](/help/article/custom-link-previews) feature)
Here are the attributes that are not migrated:
1. [Device targeting](/help/article/device-targeting)
2. [Geo targeting](/help/article/geo-targeting)
3. Deep links
If there are any attributes that you'd like to see migrated, please [reach out to us](https://dub.co/contact/support) and let us know!
# Migrating from Rewardful
Source: https://dub.co/help/article/migrating-from-rewardful
Easily migrate your affiliate program from Rewardful to Dub Partners in just a few clicks.
Dub Partners is only available on [Business plans and
above](https://dub.co/pricing/partners).
Rewardful is a popular affiliate management platform, especially for businesses that use Stripe for payments.
However, Rewardful can be pretty limiting for companies that want to run their affiliate programs at scale:
1. **No payouts support**: Companies generally have to resort to using PayPal/Wise to pay out their affiliates manually and deal with the all-too-common payout failures.
2. **Basic reward structures:** Companies can choose between two reward types: recurring or one-time sales rewards.
3. **Limited white-labeling support**: It's not possible to embed Rewardful's dashboard inside your application.
4. **No affiliate network**: Rewardful is a standalone affiliate software, which means you're on your own when it comes to finding and recruiting high-quality affiliates to join your program.
**This is where [Dub Partners](https://dub.co/partners) comes in.**
1. **Payouts you can rely on:** We let you [pay your partners globally](/help/article/partner-payouts) in 1-click, with tax compliance built-in, so you can have peace of mind knowing that all payouts are completed successfully.
2. **Advanced reward structures**: On Dub, you can choose between [3 reward types](/help/article/partner-rewards#configuring-reward-types) – per click, per lead, and per sale (flat/percentage). You can also set different [reward conditions](/help/article/partner-rewards#adding-reward-conditions) (e.g., a higher reward for customers based in the U.S. vs other countries) and create [bounties](/help/article/program-bounties) to provide additional rewards for your affiliates.
3. **White-labeling**: You can [embed a white-labeled referral dashboard into your application](/docs/partners/embedded-referrals) for a better user experience.
4. **Powerful affiliate network**: With over 5,000 active affiliates in our network, Dub makes it easy to find and recruit high-performing partners with a proven track record of driving results.
Case in point: [Tella](https://partners.dub.co/tella) migrated their affiliate program from Rewardful to Dub and saw a [38% increase in revenue and 2x more partner signups](https://dub.co/customers/tella).
Read the [full comparison article between Dub and Rewardful here](https://dub.co/blog/dub-vs-rewardful).
In this article, we'll learn how to import your Rewardful affiliate program to[ Dub Partners](/help/article/dub-partners) for a more powerful, scalable, and branded partner management experience.
## How to migrate from Rewardful to Dub?
If you're looking to migrate from Rewardful to Dub Partners, we've built a custom migration tool that will help you migrate everything over in just 2-3 clicks – without breaking any existing Rewardful affiliate links.
Before starting the migration process, you'll need to add a custom domain to Dub. This domain will be used to create short links for each affiliate link that we import from Rewardful.
If you haven't added a custom domain to Dub yet, you can [follow this guide to set that up](/help/article/how-to-add-custom-domain).
Next, [set up conversion tracking](/docs/quickstart/server) to track signup and sale events. We also have some [in-app guides that you can reference here](https://app.dub.co/guides).
For backward compatibility, we also recommend setting up [client-side click-tracking](/docs/sdks/client-side/features/click-tracking) when installing the [Dub Analytics script](/docs/sdks/client-side/introduction) on your site. This will ensure all your existing `domain.com?via=affiliate` links will keep working as expected, which gives affiliates time to update their links to the new format.
You can [follow our guide](/docs/sdks/client-side/features/click-tracking) on how to set up client-side click-tracking for your Dub short links to set that up.
Go to your [Company settings page on Rewardful](https://app.getrewardful.com/company/edit) to retrieve your Rewardful API secret:
![Rewardful API secret]() We will use this API key to retrieve and import your existing Rewardful campaign to Dub.
Once you've [set up your Dub partner program](/help/article/setting-up-your-program), go to your [Partners tab](https://app.dub.co/program/partners), click on the `⋮` button and select "Import from Rewardful".
To save you some time, [here's a quicklink](https://app.dub.co/program/partners?import=rewardful) that will get you directly to the Rewardful import flow.
We will use this API key to retrieve and import your existing Rewardful campaign to Dub.
Once you've [set up your Dub partner program](/help/article/setting-up-your-program), go to your [Partners tab](https://app.dub.co/program/partners), click on the `⋮` button and select "Import from Rewardful".
To save you some time, [here's a quicklink](https://app.dub.co/program/partners?import=rewardful) that will get you directly to the Rewardful import flow.
![Import Rewardful modal]() Then, add your Rewardful API secret and select **Fetch campaigns**. From the retrieved list of Rewardful campaigns, select the main campaign you want to import first and click **Continue**.
If you have multiple campaigns on Rewardful, you can [import multiple
campaigns](#migrating-multiple-campaigns) into Dub as well.
## What data is migrated?
Our Rewarful migration tool imports the following attributes to Dub Partners:
### Program terms
Depending on the Rewardful campaign you import, we'll automatically configure the same reward rules on your Dub partner program:
* Commission type (dollar amount or percentage) and amount
* Commission duration (e.g. up to 12 months or lifetime recurring)
### Affiliates / Partners
To ensure the efficiency of your partner program, we automatically filter out dormant affiliates and only import the ones that are both:
* In an "active" state ([docs](https://developers.rewardful.com/rest-api/affiliates/object#state))
* Have at least 1 lead / referral
We also automatically import all your affiliates' links and recreate them in Dub using your program's domain and default URL.
### Referrals / Customers
By default, we import all referrals that are associated with an affiliate in your Rewardful campaign. This ensures that all subsequent subscription renewal events will continue to be tracked on Dub.
Referrals that do not have a valid Stripe customer ID will not be imported.
### Commissions
We also import all commissions associated with any customers that were imported above. Depending on the commission state on Rewardful, they will be marked accordingly on Dub as well:
| Rewardful | Dub |
| --------- | ---------- |
| `Pending` | `Pending` |
| `Due` | `Pending` |
| `Paid` | `Paid` |
| `Voided` | `Canceled` |
Additionally, Dub also supports 3 additional commission states:
* `Processed`: When a commission has been added to a [payout](/help/article/partner-payouts) (after any applicable holding period).
* `Refunded`: When the sale for the commission was refunded. With our [Stripe integration](/docs/integrations/stripe), this is automatically detected and updated.
* `Fraud`: Useful for marking a sale as fraudulent and excluding it from any future payouts.
* `Duplicate`: Useful for marketing if a commission was rewarded more than once and needs to be marked as a duplicate event.
Similar to referrals, commissions for a referral that do not have a valid
Stripe customer ID will not be imported.
If there are any other attributes that you'd like to see migrated (or if you would like to customize any of the rules above), please [reach out to us](https://dub.co/contact/support) and let us know!
## Migrating multiple campaigns
If needed, you can migrate multiple Rewardful campaigns to Dub. We recommend starting with the main campaign, and then restarting the import flow to import the remaining campaigns. Our importer is built in an idempotent fashion, so it will import everything only once.
To start another import flow, go to your program's **Partners** tab and click on the `⋮` button next to **Invite partner**. From the dropdown, select **Import from Rewardful**.
Then, add your Rewardful API secret and select **Fetch campaigns**. From the retrieved list of Rewardful campaigns, select the main campaign you want to import first and click **Continue**.
If you have multiple campaigns on Rewardful, you can [import multiple
campaigns](#migrating-multiple-campaigns) into Dub as well.
## What data is migrated?
Our Rewarful migration tool imports the following attributes to Dub Partners:
### Program terms
Depending on the Rewardful campaign you import, we'll automatically configure the same reward rules on your Dub partner program:
* Commission type (dollar amount or percentage) and amount
* Commission duration (e.g. up to 12 months or lifetime recurring)
### Affiliates / Partners
To ensure the efficiency of your partner program, we automatically filter out dormant affiliates and only import the ones that are both:
* In an "active" state ([docs](https://developers.rewardful.com/rest-api/affiliates/object#state))
* Have at least 1 lead / referral
We also automatically import all your affiliates' links and recreate them in Dub using your program's domain and default URL.
### Referrals / Customers
By default, we import all referrals that are associated with an affiliate in your Rewardful campaign. This ensures that all subsequent subscription renewal events will continue to be tracked on Dub.
Referrals that do not have a valid Stripe customer ID will not be imported.
### Commissions
We also import all commissions associated with any customers that were imported above. Depending on the commission state on Rewardful, they will be marked accordingly on Dub as well:
| Rewardful | Dub |
| --------- | ---------- |
| `Pending` | `Pending` |
| `Due` | `Pending` |
| `Paid` | `Paid` |
| `Voided` | `Canceled` |
Additionally, Dub also supports 3 additional commission states:
* `Processed`: When a commission has been added to a [payout](/help/article/partner-payouts) (after any applicable holding period).
* `Refunded`: When the sale for the commission was refunded. With our [Stripe integration](/docs/integrations/stripe), this is automatically detected and updated.
* `Fraud`: Useful for marking a sale as fraudulent and excluding it from any future payouts.
* `Duplicate`: Useful for marketing if a commission was rewarded more than once and needs to be marked as a duplicate event.
Similar to referrals, commissions for a referral that do not have a valid
Stripe customer ID will not be imported.
If there are any other attributes that you'd like to see migrated (or if you would like to customize any of the rules above), please [reach out to us](https://dub.co/contact/support) and let us know!
## Migrating multiple campaigns
If needed, you can migrate multiple Rewardful campaigns to Dub. We recommend starting with the main campaign, and then restarting the import flow to import the remaining campaigns. Our importer is built in an idempotent fashion, so it will import everything only once.
To start another import flow, go to your program's **Partners** tab and click on the `⋮` button next to **Invite partner**. From the dropdown, select **Import from Rewardful**.
![Import from Rewardful]() This will open up the Rewardful importer, which you can then use to import more campaigns to Dub.
This will open up the Rewardful importer, which you can then use to import more campaigns to Dub.
![Import Rewardful modal]() Each campaign that is migrated to Dub will create a new [partner group](/help/article/partner-groups) with the imported partners. If needed, you can also delete the imported partner groups to consolidate partners under your main program reward.
## Next steps
After importing your campaign, here are some recommended next steps:
### 1. Set up your bank account for partner payouts
Dub Partners supports [1-click payouts](/help/article/partner-payouts) to partners all across the globe.
We generally recommend using ACH for partner payouts as it is the most cost-effective option. Here's [how you can set up your bank account](/help/article/how-to-set-up-bank-account) for ACH payouts.
### 2. Notify your affiliates about the platform change
Next, you'd want to reach out to your existing partners and let them know about the platform change. To do that, you can send them an email with the following example verbiage:
> Hey,
>
> Starting today, we are switching the \[Your Company] Affiliate Program from Rewardful to [Dub Partners](https://dub.co/partners/).
>
> To get started, follow these steps:
>
> 1. Sign up for a Dub Partners account here: `partners.dub.co/{your_program_slug}/register`
> 2. [Connect a payout method](https://partners.dub.co/settings/payouts) to receive your commissions.
> 3. Start sharing your shiny new referral link with your audience 🚀
>
> Let us know if you have any questions!
## Take your affiliate program to the next level with Dub
Ready to take your affiliate program to the next level? [Sign up today](https://app.dub.co/register) and join companies like [Beehiiv](https://partners.dub.co/programs/marketplace/beehiiv), [Chatbase](https://partners.dub.co/chatbase), [Tella](https://dub.co/customers/tella), and more who have migrated from Rewardful to Dub.
Have any questions? Feel free to [reach out to us](https://dub.co/contact)!
# Migrating from Short.io
Source: https://dub.co/help/article/migrating-from-short
How you can migrate from Short.io to Dub in a few simple steps.
Short.io is a popular URL shortener that lets you create short links, which can be used in your marketing campaigns, social media posts, and more.
## How to migrate from Short.io to Dub
If you're looking to migrate from Short.io to Dub, we've built a custom migration tool that will help you migrate your links in a few simple steps.
First, log into your Short.io account and navigate to the [Integrations & API](https://app.short.io/settings/integrations/api-key) page.
Each campaign that is migrated to Dub will create a new [partner group](/help/article/partner-groups) with the imported partners. If needed, you can also delete the imported partner groups to consolidate partners under your main program reward.
## Next steps
After importing your campaign, here are some recommended next steps:
### 1. Set up your bank account for partner payouts
Dub Partners supports [1-click payouts](/help/article/partner-payouts) to partners all across the globe.
We generally recommend using ACH for partner payouts as it is the most cost-effective option. Here's [how you can set up your bank account](/help/article/how-to-set-up-bank-account) for ACH payouts.
### 2. Notify your affiliates about the platform change
Next, you'd want to reach out to your existing partners and let them know about the platform change. To do that, you can send them an email with the following example verbiage:
> Hey,
>
> Starting today, we are switching the \[Your Company] Affiliate Program from Rewardful to [Dub Partners](https://dub.co/partners/).
>
> To get started, follow these steps:
>
> 1. Sign up for a Dub Partners account here: `partners.dub.co/{your_program_slug}/register`
> 2. [Connect a payout method](https://partners.dub.co/settings/payouts) to receive your commissions.
> 3. Start sharing your shiny new referral link with your audience 🚀
>
> Let us know if you have any questions!
## Take your affiliate program to the next level with Dub
Ready to take your affiliate program to the next level? [Sign up today](https://app.dub.co/register) and join companies like [Beehiiv](https://partners.dub.co/programs/marketplace/beehiiv), [Chatbase](https://partners.dub.co/chatbase), [Tella](https://dub.co/customers/tella), and more who have migrated from Rewardful to Dub.
Have any questions? Feel free to [reach out to us](https://dub.co/contact)!
# Migrating from Short.io
Source: https://dub.co/help/article/migrating-from-short
How you can migrate from Short.io to Dub in a few simple steps.
Short.io is a popular URL shortener that lets you create short links, which can be used in your marketing campaigns, social media posts, and more.
## How to migrate from Short.io to Dub
If you're looking to migrate from Short.io to Dub, we've built a custom migration tool that will help you migrate your links in a few simple steps.
First, log into your Short.io account and navigate to the [Integrations & API](https://app.short.io/settings/integrations/api-key) page.
![]() Click on "Create API Key", which will open up a modal. Leave all the options as default and click "Create".
Click on "Create API Key", which will open up a modal. Leave all the options as default and click "Create".
![API key creation modal in Short.io]() Copy the created API key. You'll need it in the next step.
Copy the created API key. You'll need it in the next step.
![Copy the created API key]() If you haven't already, [create a workspace on Dub](/help/article/what-is-a-workspace#how-to-create-a-workspace).
**Protip**: Once you create your workspace, we generally recommend you ***not
to [configure your domain](/help/article/how-to-add-custom-domain)*** until
you've migrated all your links. This will prevent any potential downtime for
your links.
Then, from your workspace dashboard, click on the `⋮` button next to the **Create Link** button and select **Import from Short.io**.
If you haven't already, [create a workspace on Dub](/help/article/what-is-a-workspace#how-to-create-a-workspace).
**Protip**: Once you create your workspace, we generally recommend you ***not
to [configure your domain](/help/article/how-to-add-custom-domain)*** until
you've migrated all your links. This will prevent any potential downtime for
your links.
Then, from your workspace dashboard, click on the `⋮` button next to the **Create Link** button and select **Import from Short.io**.
![Import from Short.io button]() You'll be prompted to enter your Short.io API key. Paste the API key you copied in the previous step and click **Confirm API Key**.
You'll be prompted to enter your Short.io API key. Paste the API key you copied in the previous step and click **Confirm API Key**.
![Import from Short.io modal]() Behind the scenes, we'll fetch all your Short.io custom domains and their respective number of links. You'll be presented with a list of domains that we've found.
Behind the scenes, we'll fetch all your Short.io custom domains and their respective number of links. You'll be presented with a list of domains that we've found.
![Domains found in Short.io and their respective number of links]() Select the domains you want to migrate and click **Confirm import**. In just a few seconds, all your links will be migrated to Dub.
Select the domains you want to migrate and click **Confirm import**. In just a few seconds, all your links will be migrated to Dub.
![Links imported from Short.io]() Once all your links have been imported, we will send you an email to let you know that the migration is complete.
Once all your links have been imported, we will send you an email to let you know that the migration is complete.
![Email notification about completed Short.io migration]() Once you receive the email, you can [configure your domain](/help/article/how-to-add-custom-domain#step-2-configure-your-domain) by setting the right DNS records. This will ensure that your links are pointing to Dub and not Short.io. Once you've done this, you can start using your links!
## Which Short.io link attributes are migrated?
Here's a list of attributes that are migrated from Short.io to Dub:
1. Destination URL
2. Short link slug
3. Link creation date
4. iOS device Targeting (if enabled)
5. Android device targeting (if enabled)
6. Archived status
7. Link title (as part of Dub's [Custom Link Previews](/help/article/custom-link-previews) feature)
8. [Link tags](/help/article/how-to-use-tags)
Here are the attributes that are not migrated:
1. Password protection
2. Link 404 URL
3. Link expiration date
4. Link redirect type (Dub uses 307 redirects for all links)
5. Link cloaking
If there are any attributes that you'd like to see migrated, please [reach out to us](https://dub.co/contact/support) and let us know!
# Migrating from Tolt
Source: https://dub.co/help/article/migrating-from-tolt
Easily migrate your affiliate program from Tolt to Dub Partners in just a few clicks.
Dub Partners is only available on [Business plans and
above](https://dub.co/pricing/partners).
Tolt is a go-to affiliate management platform for many early-stage companies.
However, Tolt is limiting for companies that want to run their affiliate programs at scale:
1. **Basic analytics**: While Tolt shows basic clicks and leads, it lacks UTM and referrer data. You see the numbers but not what drives them.
2. **Frequent payout failures**: Tolt offers automated payouts on higher-tier plans, but customers who migrated to Dub reported frequent payout failures. This means spending hours troubleshooting payments and managing frustrated partners.
3. **No affiliate network**: As standalone software, Tolt leaves the task of finding and recruiting high-quality affiliates entirely to you.
4. **Outdated UI:** Tolt’s UI feels outdated, despite the platform positioning itself for SaaS companies, where intuitive, modern dashboards are typically a priority.
**This is where [Dub Partners](https://dub.co/partners) comes in.**
1. **Comprehensive analytics**: Dub offers [powerful real-time analytics](https://dub.co/analytics), including [conversion tracking](/help/article/dub-conversions), device, browser, referrer, country, and more. Our [AI feature](/help/article/dub-analytics#bonus-ask-ai-feature) makes filtering data intuitive and quick.
2. **Payouts you can rely on:** We let you [pay your partners globally](/help/article/partner-payouts) in 1-click, with tax compliance built-in, so you can have peace of mind knowing that all payouts are completed successfully.
3. **Powerful affiliate network**: With over 5,000 active affiliates in our network, Dub makes it easy to find and recruit high-performing partners with a proven track record of driving results.
4. **Advanced reward structures**: On Dub, you can choose between [3 reward types](/help/article/partner-rewards#configuring-reward-types) – per click, per lead, and per sale (flat/percentage). You can also set different [reward conditions](/help/article/partner-rewards#adding-reward-conditions) (e.g., a higher reward for customers based in the U.S. vs other countries) and create [bounties](/help/article/program-bounties) to provide additional rewards for your affiliates.
In this article, we'll learn how to import your Tolt affiliate program to[ Dub Partners](/help/article/dub-partners) for a more powerful, scalable, and branded partner management experience.
## How to migrate from Tolt to Dub?
If you're looking to migrate from Tolt to Dub Partners, we've built a custom migration tool that will help you migrate everything over in just 2-3 clicks – without breaking any existing Tolt affiliate links.
Before starting the migration process, you'll need to add a custom domain to Dub. This domain will be used to create short links for each affiliate link that we import from Tolt.
If you haven't added a custom domain to Dub yet, you can [follow this guide to set that up](/help/article/how-to-add-custom-domain).
Next, [set up conversion tracking](/docs/quickstart/server) to track signup and sale events. We also have some [in-app guides that you can reference here](https://app.dub.co/guides).
For backward compatibility, we also recommend setting up [client-side click-tracking](/docs/sdks/client-side/features/click-tracking) when installing the [Dub Analytics script](/docs/sdks/client-side/introduction) on your site. This will ensure all your existing `domain.com?via=affiliate` links will keep working as expected, which gives affiliates time to update their links to the new format.
You can [follow our guide](/docs/sdks/client-side/features/click-tracking) on how to set up client-side click-tracking for your Dub short links to set that up.
[Follow this guide](https://docs.tolt.com/authentication) to get your Tolt API key – API keys can be created in the [Settings → Integrations](https://app.tolt.io/settings?tab=integrations) tab of your Tolt dashboard:
Once you receive the email, you can [configure your domain](/help/article/how-to-add-custom-domain#step-2-configure-your-domain) by setting the right DNS records. This will ensure that your links are pointing to Dub and not Short.io. Once you've done this, you can start using your links!
## Which Short.io link attributes are migrated?
Here's a list of attributes that are migrated from Short.io to Dub:
1. Destination URL
2. Short link slug
3. Link creation date
4. iOS device Targeting (if enabled)
5. Android device targeting (if enabled)
6. Archived status
7. Link title (as part of Dub's [Custom Link Previews](/help/article/custom-link-previews) feature)
8. [Link tags](/help/article/how-to-use-tags)
Here are the attributes that are not migrated:
1. Password protection
2. Link 404 URL
3. Link expiration date
4. Link redirect type (Dub uses 307 redirects for all links)
5. Link cloaking
If there are any attributes that you'd like to see migrated, please [reach out to us](https://dub.co/contact/support) and let us know!
# Migrating from Tolt
Source: https://dub.co/help/article/migrating-from-tolt
Easily migrate your affiliate program from Tolt to Dub Partners in just a few clicks.
Dub Partners is only available on [Business plans and
above](https://dub.co/pricing/partners).
Tolt is a go-to affiliate management platform for many early-stage companies.
However, Tolt is limiting for companies that want to run their affiliate programs at scale:
1. **Basic analytics**: While Tolt shows basic clicks and leads, it lacks UTM and referrer data. You see the numbers but not what drives them.
2. **Frequent payout failures**: Tolt offers automated payouts on higher-tier plans, but customers who migrated to Dub reported frequent payout failures. This means spending hours troubleshooting payments and managing frustrated partners.
3. **No affiliate network**: As standalone software, Tolt leaves the task of finding and recruiting high-quality affiliates entirely to you.
4. **Outdated UI:** Tolt’s UI feels outdated, despite the platform positioning itself for SaaS companies, where intuitive, modern dashboards are typically a priority.
**This is where [Dub Partners](https://dub.co/partners) comes in.**
1. **Comprehensive analytics**: Dub offers [powerful real-time analytics](https://dub.co/analytics), including [conversion tracking](/help/article/dub-conversions), device, browser, referrer, country, and more. Our [AI feature](/help/article/dub-analytics#bonus-ask-ai-feature) makes filtering data intuitive and quick.
2. **Payouts you can rely on:** We let you [pay your partners globally](/help/article/partner-payouts) in 1-click, with tax compliance built-in, so you can have peace of mind knowing that all payouts are completed successfully.
3. **Powerful affiliate network**: With over 5,000 active affiliates in our network, Dub makes it easy to find and recruit high-performing partners with a proven track record of driving results.
4. **Advanced reward structures**: On Dub, you can choose between [3 reward types](/help/article/partner-rewards#configuring-reward-types) – per click, per lead, and per sale (flat/percentage). You can also set different [reward conditions](/help/article/partner-rewards#adding-reward-conditions) (e.g., a higher reward for customers based in the U.S. vs other countries) and create [bounties](/help/article/program-bounties) to provide additional rewards for your affiliates.
In this article, we'll learn how to import your Tolt affiliate program to[ Dub Partners](/help/article/dub-partners) for a more powerful, scalable, and branded partner management experience.
## How to migrate from Tolt to Dub?
If you're looking to migrate from Tolt to Dub Partners, we've built a custom migration tool that will help you migrate everything over in just 2-3 clicks – without breaking any existing Tolt affiliate links.
Before starting the migration process, you'll need to add a custom domain to Dub. This domain will be used to create short links for each affiliate link that we import from Tolt.
If you haven't added a custom domain to Dub yet, you can [follow this guide to set that up](/help/article/how-to-add-custom-domain).
Next, [set up conversion tracking](/docs/quickstart/server) to track signup and sale events. We also have some [in-app guides that you can reference here](https://app.dub.co/guides).
For backward compatibility, we also recommend setting up [client-side click-tracking](/docs/sdks/client-side/features/click-tracking) when installing the [Dub Analytics script](/docs/sdks/client-side/introduction) on your site. This will ensure all your existing `domain.com?via=affiliate` links will keep working as expected, which gives affiliates time to update their links to the new format.
You can [follow our guide](/docs/sdks/client-side/features/click-tracking) on how to set up client-side click-tracking for your Dub short links to set that up.
[Follow this guide](https://docs.tolt.com/authentication) to get your Tolt API key – API keys can be created in the [Settings → Integrations](https://app.tolt.io/settings?tab=integrations) tab of your Tolt dashboard:
![Tolt API key]() You will also need to get your Tolt Program ID under [Program Settings](https://app.tolt.io/program-settings?page=general-settings):
You will also need to get your Tolt Program ID under [Program Settings](https://app.tolt.io/program-settings?page=general-settings):
![Tolt Program ID]() We will use the API key and Program ID to retrieve and import your existing Tolt affiliate program to Dub.
Once you've [set up your Dub partner program](/help/article/setting-up-your-program), go to your [Partners tab](https://app.dub.co/program/partners), click on the `⋮` button and select "Import from Tolt".
To save you some time, [here's a quicklink](https://app.dub.co/program/partners?import=tolt) that will get you directly to the Tolt import flow.
We will use the API key and Program ID to retrieve and import your existing Tolt affiliate program to Dub.
Once you've [set up your Dub partner program](/help/article/setting-up-your-program), go to your [Partners tab](https://app.dub.co/program/partners), click on the `⋮` button and select "Import from Tolt".
To save you some time, [here's a quicklink](https://app.dub.co/program/partners?import=tolt) that will get you directly to the Tolt import flow.
![Import Tolt modal]() Then, add your Tolt API key + Program ID and select **Continue.**
## What data is migrated?
Our Tolt migration tool imports the following attributes to Dub Partners:
### Affiliates / Partners
To ensure the efficiency of your partner program, we automatically filter out dormant affiliates and only import the ones that are both:
* In an "active" state ([docs](https://developers.rewardful.com/rest-api/affiliates/object#state))
* Have at least 1 lead / referral
We also automatically import all your affiliates' links and recreate them in Dub using your program's domain and default URL.
Since Tolt doesn't expose a `/rewards` endpoint, your Tolt program terms will not be migrated – all partners will be assigned to your program's default reward.
Learn more about how [Partner rewards](/help/article/partner-rewards) work on Dub.
### Referrals / Customers
By default, we import all referrals that are associated with an affiliate in your Tolt program. This ensures that all subsequent subscription renewal events will continue to be tracked on Dub.
Some referrals might not have a valid Stripe customer ID. Those referrals will
still be imported, with the Stripe customer ID updated afterwards.
### Commissions
We also import all commissions associated with any customers that were imported above. Depending on the commission state on Tolt, they will be marked accordingly on Dub as well:
| Tolt | Dub |
| ---------- | ---------- |
| `Pending` | `Pending` |
| `Approved` | `Pending` |
| `Paid` | `Paid` |
| `Rejected` | `Canceled` |
| `Refunded` | `Refunded` |
Additionally, Dub also supports 3 additional commission states:
* `Fraud`: Useful for marking a sale as fraudulent and excluding it from any future payouts.
* `Processed`: When a commission has been added to a [payout](/help/article/partner-payouts) (after any applicable holding period).
* `Duplicate`: Useful for marketing if a commission was rewarded more than once and needs to be marked as a duplicate event.
Commissions for a referral that do not have a valid Stripe customer ID or a
transaction trace will not be imported.
If there are any other attributes that you'd like to see migrated (or if you would like to customize any of the rules above), please [reach out to us](https://dub.co/contact/support) and let us know!
## Next steps
After importing your program, here are some recommended next steps:
### 1. Set up your bank account for partner payouts
Dub Partners supports [1-click payouts](/help/article/partner-payouts) to partners all across the globe.
We generally recommend using ACH for partner payouts as it is the most cost-effective option. Here's [how you can set up your bank account](/help/article/how-to-set-up-bank-account) for ACH payouts.
### 2. Notify your affiliates about the platform change
Next, you'd want to reach out to your existing partners and let them know about the platform change. To do that, you can send them an email with the following example verbiage:
> Hey,
>
> Starting today, we are switching the \[Your Company] Affiliate Program from Tolt to [Dub Partners](https://dub.co/partners/).
>
> To get started, follow these steps:
>
> 1. Sign up for a Dub Partners account here: `partners.dub.co/{your_program_slug}/register`
> 2. [Connect a payout method](https://partners.dub.co/settings/payouts) to receive your commissions.
> 3. Start sharing your shiny new referral link with your audience 🚀
>
> Let us know if you have any questions!
## Take your affiliate program to the next level with Dub
Ready to take your affiliate program to the next level? [Sign up today](https://app.dub.co/register) and join companies like [Anara](https://partners.dub.co/anara) that have migrated from Tolt to Dub.
Have any questions? Feel free to [reach out to us](https://dub.co/contact)!
# Navigating a partner program
Source: https://dub.co/help/article/navigating-partner-program
Learn how to navigate your programs, measure your performance, manage your referral links, and view your earnings.
## How to view your joined programs
From the **All** **programs** navigation, click **Programs** to view all the partner programs you've joined. If you haven't joined any programs, you'll see an empty state here.
Then, add your Tolt API key + Program ID and select **Continue.**
## What data is migrated?
Our Tolt migration tool imports the following attributes to Dub Partners:
### Affiliates / Partners
To ensure the efficiency of your partner program, we automatically filter out dormant affiliates and only import the ones that are both:
* In an "active" state ([docs](https://developers.rewardful.com/rest-api/affiliates/object#state))
* Have at least 1 lead / referral
We also automatically import all your affiliates' links and recreate them in Dub using your program's domain and default URL.
Since Tolt doesn't expose a `/rewards` endpoint, your Tolt program terms will not be migrated – all partners will be assigned to your program's default reward.
Learn more about how [Partner rewards](/help/article/partner-rewards) work on Dub.
### Referrals / Customers
By default, we import all referrals that are associated with an affiliate in your Tolt program. This ensures that all subsequent subscription renewal events will continue to be tracked on Dub.
Some referrals might not have a valid Stripe customer ID. Those referrals will
still be imported, with the Stripe customer ID updated afterwards.
### Commissions
We also import all commissions associated with any customers that were imported above. Depending on the commission state on Tolt, they will be marked accordingly on Dub as well:
| Tolt | Dub |
| ---------- | ---------- |
| `Pending` | `Pending` |
| `Approved` | `Pending` |
| `Paid` | `Paid` |
| `Rejected` | `Canceled` |
| `Refunded` | `Refunded` |
Additionally, Dub also supports 3 additional commission states:
* `Fraud`: Useful for marking a sale as fraudulent and excluding it from any future payouts.
* `Processed`: When a commission has been added to a [payout](/help/article/partner-payouts) (after any applicable holding period).
* `Duplicate`: Useful for marketing if a commission was rewarded more than once and needs to be marked as a duplicate event.
Commissions for a referral that do not have a valid Stripe customer ID or a
transaction trace will not be imported.
If there are any other attributes that you'd like to see migrated (or if you would like to customize any of the rules above), please [reach out to us](https://dub.co/contact/support) and let us know!
## Next steps
After importing your program, here are some recommended next steps:
### 1. Set up your bank account for partner payouts
Dub Partners supports [1-click payouts](/help/article/partner-payouts) to partners all across the globe.
We generally recommend using ACH for partner payouts as it is the most cost-effective option. Here's [how you can set up your bank account](/help/article/how-to-set-up-bank-account) for ACH payouts.
### 2. Notify your affiliates about the platform change
Next, you'd want to reach out to your existing partners and let them know about the platform change. To do that, you can send them an email with the following example verbiage:
> Hey,
>
> Starting today, we are switching the \[Your Company] Affiliate Program from Tolt to [Dub Partners](https://dub.co/partners/).
>
> To get started, follow these steps:
>
> 1. Sign up for a Dub Partners account here: `partners.dub.co/{your_program_slug}/register`
> 2. [Connect a payout method](https://partners.dub.co/settings/payouts) to receive your commissions.
> 3. Start sharing your shiny new referral link with your audience 🚀
>
> Let us know if you have any questions!
## Take your affiliate program to the next level with Dub
Ready to take your affiliate program to the next level? [Sign up today](https://app.dub.co/register) and join companies like [Anara](https://partners.dub.co/anara) that have migrated from Tolt to Dub.
Have any questions? Feel free to [reach out to us](https://dub.co/contact)!
# Navigating a partner program
Source: https://dub.co/help/article/navigating-partner-program
Learn how to navigate your programs, measure your performance, manage your referral links, and view your earnings.
## How to view your joined programs
From the **All** **programs** navigation, click **Programs** to view all the partner programs you've joined. If you haven't joined any programs, you'll see an empty state here.
![Programs navigation location]() There are two ways to view all the pages related to a specific program:
On the **Programs** page, we show you a grid of all the programs you've
joined. We also show you your default referral link and your total earnings.
Click on the card to view that program page.
There are two ways to view all the pages related to a specific program:
On the **Programs** page, we show you a grid of all the programs you've
joined. We also show you your default referral link and your total earnings.
Click on the card to view that program page.
![Program grid]() The other way you can navigate to your programs is to click **All programs**
at the top of the sidebar, and that will open a dropdown. From here, you can
search and click on any of the programs listed. You can also click on **All
programs** in this dropdown, and that will take you back to the grid view
anytime.
The other way you can navigate to your programs is to click **All programs**
at the top of the sidebar, and that will open a dropdown. From here, you can
search and click on any of the programs listed. You can also click on **All
programs** in this dropdown, and that will take you back to the grid view
anytime.
![Program dropdown]() ## Program pages
### Overview
This is your main program overview page, is the first page you'll want to check to see how your programs are performing.
## Program pages
### Overview
This is your main program overview page, is the first page you'll want to check to see how your programs are performing.
![Program overview]() The page has the following sections:
* **Program summary** - find your default referral link and the rewards and discounts you are eligible for on this program. If you want to hide this section, click the **Hide details** button in the top right, and it won't show until you click the button again.
* **Program earnings and payouts** - see how much you've earned over time, and your most recent payouts. The earnings section also allows you to change the date range to view results from further in the past.
* **Link analytics** - View your clicks, leads and sales for this program, keep track of all their activity.
* **Recent earnings** - A detailed breakdown of your most recent earnings and their payout status.
### Links
You'll find all your program referral links on this page, including the clicks, leads, and sales for each.
The page has the following sections:
* **Program summary** - find your default referral link and the rewards and discounts you are eligible for on this program. If you want to hide this section, click the **Hide details** button in the top right, and it won't show until you click the button again.
* **Program earnings and payouts** - see how much you've earned over time, and your most recent payouts. The earnings section also allows you to change the date range to view results from further in the past.
* **Link analytics** - View your clicks, leads and sales for this program, keep track of all their activity.
* **Recent earnings** - A detailed breakdown of your most recent earnings and their payout status.
### Links
You'll find all your program referral links on this page, including the clicks, leads, and sales for each.
![Program links]() Clicking on the link card opens a dialog window that will allow you to edit the
short link, destination URL, QR code, and add comments. If you change an
existing short link, be sure to update it wherever it's being shared; otherwise,
the previous short link will stop tracking, and you won't be able to earn any
new rewards for that link.
Clicking on the link card opens a dialog window that will allow you to edit the
short link, destination URL, QR code, and add comments. If you change an
existing short link, be sure to update it wherever it's being shared; otherwise,
the previous short link will stop tracking, and you won't be able to earn any
new rewards for that link.
![Link editor]() From this page, you're also able to create new short links by clicking **Create
link** in the top right of this page.
### Resources
Quite often, programs will provide additional assets and resources to help their partners when sharing their referral links.
From this page, you're also able to create new short links by clicking **Create
link** in the top right of this page.
### Resources
Quite often, programs will provide additional assets and resources to help their partners when sharing their referral links.
![Program resources]() The resources are split into three sections:
1. **Brand logos** - These are the official logo and brand files from the program.
2. **Colors** - Make sure you're using the correct hex values in your campaigns or other marketing assets.
3. **Additional files** - This is for anything else that may fall outside of the brand logos and colors. It could be additional marketing images, documents to read, or campaign examples. If anything is missing that you'll need to be successful, make sure to contact the program's support at the [bottom of the program navigation](/help/article/navigating-partner-program#program-help-and-support).
### Earnings
View your earnings performance over time and the details associated with each item.
The resources are split into three sections:
1. **Brand logos** - These are the official logo and brand files from the program.
2. **Colors** - Make sure you're using the correct hex values in your campaigns or other marketing assets.
3. **Additional files** - This is for anything else that may fall outside of the brand logos and colors. It could be additional marketing images, documents to read, or campaign examples. If anything is missing that you'll need to be successful, make sure to contact the program's support at the [bottom of the program navigation](/help/article/navigating-partner-program#program-help-and-support).
### Earnings
View your earnings performance over time and the details associated with each item.
![Program earnings]() In the top section, you can change the view type by **Link** or **Type**, to be
able to see which links are performing better, or which reward type has earned
more (pending the program offers rewards for clicks, leads, and sales).
### Analytics
View your program performance analytics, and filter and organize by clicks, leads, and sales.
In the top section, you can change the view type by **Link** or **Type**, to be
able to see which links are performing better, or which reward type has earned
more (pending the program offers rewards for clicks, leads, and sales).
### Analytics
View your program performance analytics, and filter and organize by clicks, leads, and sales.
![Program analytics]() #### Data toggle
You can change the data displayed by clicking the `123 | $` toggle in the top right of the data type section.
By default `$` is selected, as it is related directly to your reward earnings. Switching to `123` will change any monetary values to their specific reward count. If the program you're on has other monetary rewards (clicks, leads, sales), their dollar amount will show as well.
#### Data toggle
You can change the data displayed by clicking the `123 | $` toggle in the top right of the data type section.
By default `$` is selected, as it is related directly to your reward earnings. Switching to `123` will change any monetary values to their specific reward count. If the program you're on has other monetary rewards (clicks, leads, sales), their dollar amount will show as well.
![Time-series chart]() #### Chart toggle
You can change the chart type displayed by clicking the `time-chart | conversion funnel` toggle in the top right of the chart area.
#### Chart toggle
You can change the chart type displayed by clicking the `time-chart | conversion funnel` toggle in the top right of the chart area.
![Time-series chart]() When the chart type is switched to **conversion funnel**, you can view the percentage of customers that complete each stage of the sales conversion. In this example, 0.58% of clicks have resulted in a referral making a purchase.
When the chart type is switched to **conversion funnel**, you can view the percentage of customers that complete each stage of the sales conversion. In this example, 0.58% of clicks have resulted in a referral making a purchase.
![Time-series chart]() #### Aggregated data for different facets (top views)
These are more commonly known as the "Top Views" in Dub Analytics. These views show your top links, countries, cities, devices, and more.
#### Aggregated data for different facets (top views)
These are more commonly known as the "Top Views" in Dub Analytics. These views show your top links, countries, cities, devices, and more.
![Aggregated data for different facets]() Each section has their own tabs to select different data for you to explore your program data further. These are grouped by the following categories:
* **Links** - Short Links and Destination URLs
* **Referrals** - Referrers and UTM Parameters
* **Location** - Countries, Cities, Regions, and Continents
* **Tech** - Devices, Browser, OS, and Triggers
### Events
View your program events, and filter and organize by clicks, leads, and sales. Dub's real-time events stream is a detailed, real-time stream of events across each program you've joined.
Each section has their own tabs to select different data for you to explore your program data further. These are grouped by the following categories:
* **Links** - Short Links and Destination URLs
* **Referrals** - Referrers and UTM Parameters
* **Location** - Countries, Cities, Regions, and Continents
* **Tech** - Devices, Browser, OS, and Triggers
### Events
View your program events, and filter and organize by clicks, leads, and sales. Dub's real-time events stream is a detailed, real-time stream of events across each program you've joined.
![Program events]() You can filter this data, select a different date range, and change the data
shown by clicking on Clicks, Leads, and Sales in the top section.
## Program help and support
Every program provides email support for its partners and the questions you have that are specific to the program. Optionally, a program may also provide a link to the help documentation and up-to-date terms of service.
You can filter this data, select a different date range, and change the data
shown by clicking on Clicks, Leads, and Sales in the top section.
## Program help and support
Every program provides email support for its partners and the questions you have that are specific to the program. Optionally, a program may also provide a link to the help documentation and up-to-date terms of service.
![Program support]() The section is always located at the bottom of the program page navigation to
make it easy to find, so you know where to access support at the right moment.
For Dub platform support, reporting bugs, or other partner-related issues, [reach out to us](https://dub.co/contact/support) anytime.
# Dub Network referral bonus
Source: https://dub.co/help/article/network-referral-bonus
Learn how the Dub Network referral bonus works and how you can share your referral link to start earning.
Dub offers a Network referral bonus that lets you earn rewards when you invite other partners to join the Dub partner network and they start earning commissions on Dub.
When another partner joins Dub through your referral link, you can earn **50% of your referred partners' [payout fees](#what-are-payout-fees) for their first 12 months**.
## How to access the Network Referrals page
You can access the Network Referrals page via this permalink: [partners.dub.co/referrals](https://partners.dub.co/referrals)
Alternatively, you can also click on the gift icon in the bottom left corner from the main navigation:
The section is always located at the bottom of the program page navigation to
make it easy to find, so you know where to access support at the right moment.
For Dub platform support, reporting bugs, or other partner-related issues, [reach out to us](https://dub.co/contact/support) anytime.
# Dub Network referral bonus
Source: https://dub.co/help/article/network-referral-bonus
Learn how the Dub Network referral bonus works and how you can share your referral link to start earning.
Dub offers a Network referral bonus that lets you earn rewards when you invite other partners to join the Dub partner network and they start earning commissions on Dub.
When another partner joins Dub through your referral link, you can earn **50% of your referred partners' [payout fees](#what-are-payout-fees) for their first 12 months**.
## How to access the Network Referrals page
You can access the Network Referrals page via this permalink: [partners.dub.co/referrals](https://partners.dub.co/referrals)
Alternatively, you can also click on the gift icon in the bottom left corner from the main navigation:
![Network referrals navigation]() ## Sharing your referral link
On the Network Referrals page, copy your referral link and share it with partners you want to invite to Dub.
## Sharing your referral link
On the Network Referrals page, copy your referral link and share it with partners you want to invite to Dub.
![Network referral link]() Alternatively, you can also link directly to any program on Dub by appending your Dub username to the end of the link.
For example, if your Dub username is `steven` and you want to link to [Dub's affiliate program](https://partners.dub.co/dub), you can share the following link: [`partners.dub.co/dub/apply?via=steven`](https://partners.dub.co/dub/apply?via=steven)
Then, when someone signs up through your link, Dub attributes that partner and all their future commissions for the first 12 months to your Dub partner account.
If the program you're linking to already has a [Partner Referral
reward](/help/article/partner-referrals) that you're eligible for, the Partner
Referral reward will take precedence over the Dub Network Referral bonus.
## Tracking referrals and earnings
The Dub [Network Referrals page](https://partners.dub.co/referrals) shows:
* **Referred partners** – the number of partners who joined Dub through your referral link
* **Your earnings** – the referral bonus earnings attributed to your network referrals
* **Referral rewards** – the current network referral reward terms
* **Referred partner details** – the partner's join date, location, active programs, and your earnings from that partner
Alternatively, you can also link directly to any program on Dub by appending your Dub username to the end of the link.
For example, if your Dub username is `steven` and you want to link to [Dub's affiliate program](https://partners.dub.co/dub), you can share the following link: [`partners.dub.co/dub/apply?via=steven`](https://partners.dub.co/dub/apply?via=steven)
Then, when someone signs up through your link, Dub attributes that partner and all their future commissions for the first 12 months to your Dub partner account.
If the program you're linking to already has a [Partner Referral
reward](/help/article/partner-referrals) that you're eligible for, the Partner
Referral reward will take precedence over the Dub Network Referral bonus.
## Tracking referrals and earnings
The Dub [Network Referrals page](https://partners.dub.co/referrals) shows:
* **Referred partners** – the number of partners who joined Dub through your referral link
* **Your earnings** – the referral bonus earnings attributed to your network referrals
* **Referral rewards** – the current network referral reward terms
* **Referred partner details** – the partner's join date, location, active programs, and your earnings from that partner
![Network referrals dashboard]() ## FAQ
### How do I get paid for my network referrals?
Network referral rewards are paid through your Dub partner account – similar to how you receive commissions from the programs you're working with.
To receive your network referral rewards, make sure you have [connected your payout method](/help/article/receiving-payouts). Once your rewards are eligible for payout, they follow the same payout process as your other Dub partner earnings.
### What are payout fees?
Whenever a program sends a payout to their partners on Dub, we charge a small processing fee that averages around 3% per payout.
For example: if you refer a partner who earns **\$20,000 in commissions**, their payout fees will be **\$600**, and you will earn 50% of that, which is **\$300**.
The more high quality partners you refer, the more you can earn in network referral rewards – there is no limit to how much you can earn.
### Can I link to any program on Dub even if I'm not an active partner in that program?
Yes, you can link to any program on Dub even if you're not an active partner in that program – all you need to do is append your Dub username to the end of the link.
For example, if your Dub username is `steven` and you want to link to [Dub's affiliate program](https://partners.dub.co/dub), you can share the following link: [`partners.dub.co/dub/apply?via=steven`](https://partners.dub.co/dub/apply?via=steven)
Caveat: If the program you're linking to already has a [Partner Referral
reward](/help/article/partner-referrals) that you're eligible for, the Partner
Referral reward will take precedence over the Dub Network Referral bonus.
# Non-monetary rewards
Source: https://dub.co/help/article/non-monetary-rewards
Learn how to create non-monetary rewards (e.g. free credits, free months, etc.) for your referral partners.
This feature is only available on [Business plans and
above](https://dub.co/pricing/partners).
With Dub Partners, you can create non-monetary rewards for your partners, such as:
* Free usage credits for every new user they refer
* Free month of service for every new user they refer – up to 12 months
This is specifically useful for referral programs – especially when you're using the [embedded referral dashboard](/docs/partners/embedded-referrals) – since it gives you an easy way to incentivize your existing userbase to refer new users to your product.
While non-monetary rewards are easy to set up, we've seen that cash incentives are generally more impactful/sustainable in the long run – especially when you're working with influencers and larger affiliates.
To get the best of both worlds, you can potentially start your users on a [non-monetary referral partner group](#step-1-set-up-a-separate-partner-group-for-non-monetary-rewards) and [graduate them to a monetary reward group](#graduating-partners-from-non-monetary-rewards-to-monetary-rewards) once they've referred a certain number of users.
## Step 1: Set up a separate partner group for non-monetary rewards
First, you would want to create a separate [partner group](/help/article/partner-groups) for your user referral program.
In this group, you can set up a [non-monetary reward](/help/article/partner-rewards) that can be either a lead or a sale-based reward:
* Lead reward: Rewarding partners for new user signups (or qualified leads if you're using [deferred lead tracking](/docs/conversions/leads/deferred))
* Sale reward: Rewarding partners for paid customer referrals
When creating the reward, you would want to set the reward amount to \$0 and add a [custom description](/help/article/partner-rewards#custom-reward-descriptions) to explain the reward to your partners:
## FAQ
### How do I get paid for my network referrals?
Network referral rewards are paid through your Dub partner account – similar to how you receive commissions from the programs you're working with.
To receive your network referral rewards, make sure you have [connected your payout method](/help/article/receiving-payouts). Once your rewards are eligible for payout, they follow the same payout process as your other Dub partner earnings.
### What are payout fees?
Whenever a program sends a payout to their partners on Dub, we charge a small processing fee that averages around 3% per payout.
For example: if you refer a partner who earns **\$20,000 in commissions**, their payout fees will be **\$600**, and you will earn 50% of that, which is **\$300**.
The more high quality partners you refer, the more you can earn in network referral rewards – there is no limit to how much you can earn.
### Can I link to any program on Dub even if I'm not an active partner in that program?
Yes, you can link to any program on Dub even if you're not an active partner in that program – all you need to do is append your Dub username to the end of the link.
For example, if your Dub username is `steven` and you want to link to [Dub's affiliate program](https://partners.dub.co/dub), you can share the following link: [`partners.dub.co/dub/apply?via=steven`](https://partners.dub.co/dub/apply?via=steven)
Caveat: If the program you're linking to already has a [Partner Referral
reward](/help/article/partner-referrals) that you're eligible for, the Partner
Referral reward will take precedence over the Dub Network Referral bonus.
# Non-monetary rewards
Source: https://dub.co/help/article/non-monetary-rewards
Learn how to create non-monetary rewards (e.g. free credits, free months, etc.) for your referral partners.
This feature is only available on [Business plans and
above](https://dub.co/pricing/partners).
With Dub Partners, you can create non-monetary rewards for your partners, such as:
* Free usage credits for every new user they refer
* Free month of service for every new user they refer – up to 12 months
This is specifically useful for referral programs – especially when you're using the [embedded referral dashboard](/docs/partners/embedded-referrals) – since it gives you an easy way to incentivize your existing userbase to refer new users to your product.
While non-monetary rewards are easy to set up, we've seen that cash incentives are generally more impactful/sustainable in the long run – especially when you're working with influencers and larger affiliates.
To get the best of both worlds, you can potentially start your users on a [non-monetary referral partner group](#step-1-set-up-a-separate-partner-group-for-non-monetary-rewards) and [graduate them to a monetary reward group](#graduating-partners-from-non-monetary-rewards-to-monetary-rewards) once they've referred a certain number of users.
## Step 1: Set up a separate partner group for non-monetary rewards
First, you would want to create a separate [partner group](/help/article/partner-groups) for your user referral program.
In this group, you can set up a [non-monetary reward](/help/article/partner-rewards) that can be either a lead or a sale-based reward:
* Lead reward: Rewarding partners for new user signups (or qualified leads if you're using [deferred lead tracking](/docs/conversions/leads/deferred))
* Sale reward: Rewarding partners for paid customer referrals
When creating the reward, you would want to set the reward amount to \$0 and add a [custom description](/help/article/partner-rewards#custom-reward-descriptions) to explain the reward to your partners:
![Lead reward description tooltip]() You can also set up a [custom reward
tooltip](/help/article/partner-rewards#custom-reward-descriptions) which
supports markdown formatting, so you'd be able to add links to your terms and
conditions or other relevant information.
Additionally, you can also set up [dual-sided incentives](/help/article/dual-sided-incentives) for your users to offer discounts to their users who sign up via their referral link (e.g. "25% off for the first 3 months").
Once this is set up, your partners will be able to see the reward and discount in the [embedded referral dashboard](/docs/partners/embedded-referrals):
You can also set up a [custom reward
tooltip](/help/article/partner-rewards#custom-reward-descriptions) which
supports markdown formatting, so you'd be able to add links to your terms and
conditions or other relevant information.
Additionally, you can also set up [dual-sided incentives](/help/article/dual-sided-incentives) for your users to offer discounts to their users who sign up via their referral link (e.g. "25% off for the first 3 months").
Once this is set up, your partners will be able to see the reward and discount in the [embedded referral dashboard](/docs/partners/embedded-referrals):
![Dual-sided incentives]() ## Step 2: Listen to Dub webhooks and provision rewards to your partners
To provision the non-monetary rewards (credits, free months, etc.) to your partners, you would need to listen to Dub's [webhook events](/docs/webhooks/event-types) to detect when a new signup / sale is tracked.
Depending on the reward you're offering, you would need to listen to:
* [`lead.created`](/docs/webhooks/events/lead-created) - if you're offering a lead reward
* [`sale.created`](/docs/webhooks/events/sale-created) - if you're offering a sale reward
Then, within the webhook handler, you can update the partner's Stripe subscription to provision the free credits / months accordingly:
```ts title="app/api/webhooks/dub/lead-created/route.ts" theme={null}
import Stripe from "stripe";
// Install via npm i dub / yarn add dub / pnpm add dub
import { LeadCreatedEvent } from "dub/models/components";
const stripe = new Stripe(process.env.STRIPE_SECRET_KEY!);
export async function leadCreated(data: LeadCreatedEvent["data"]) {
const { partner } = data;
if (!partner?.tenantId) return;
// Limit the number of free credits / months that a partner can receive (max 10 referrals)
if (partner.totalLeads >= 10) return;
// Get customer based on partner's tenant ID (getCustomerByTenantId is your own function)
const customer = await getCustomerByTenantId(partner.tenantId);
if (!customer?.stripeCustomerId) return;
// Get the customer's active subscription (e.g. for metered usage / free months)
// Get the customer's active subscription (e.g. for metered usage / free months)
const subscriptions = await stripe.subscriptions.list({
customer: customer.stripeCustomerId,
status: "active",
limit: 1,
});
const [subscription] = subscriptions.data;
if (!subscription?.items.data[0]) return;
// Option A: Add free credits via metered usage
await stripe.subscriptionItems.createUsageRecord(
subscription.items.data[0].id,
{ quantity: 500, timestamp: Math.floor(Date.now() / 1000) },
);
// Option B: Or extend the subscription (e.g. add 1 free month via promotion/coupon)
// await stripe.subscriptions.update(subscription.id, {
// promotion_code: "promo_free_month_per_referral",
// });
}
```
## Step 3: Graduating partners from non-monetary rewards to monetary rewards
Once a partner has referred a certain number of users, you can move them to a separate [partner group](/help/article/partner-groups) with monetary rewards (e.g. 30% commission per sale for 12 months).
There are two ways to do this:
1. [Manually move the partner](/help/article/partner-groups#moving-partners-between-groups) to the new group from the [partner details page](/help/article/managing-program-partners#viewing-partner-details) or via the [partner table](https://app.dub.co/program/partners).
2. Automatically move the partner to the new group via [group move rules](/help/article/partner-groups#group-move-rules) based on their performance metrics (e.g. total leads, total sales, total commissions, etc.).
## Step 2: Listen to Dub webhooks and provision rewards to your partners
To provision the non-monetary rewards (credits, free months, etc.) to your partners, you would need to listen to Dub's [webhook events](/docs/webhooks/event-types) to detect when a new signup / sale is tracked.
Depending on the reward you're offering, you would need to listen to:
* [`lead.created`](/docs/webhooks/events/lead-created) - if you're offering a lead reward
* [`sale.created`](/docs/webhooks/events/sale-created) - if you're offering a sale reward
Then, within the webhook handler, you can update the partner's Stripe subscription to provision the free credits / months accordingly:
```ts title="app/api/webhooks/dub/lead-created/route.ts" theme={null}
import Stripe from "stripe";
// Install via npm i dub / yarn add dub / pnpm add dub
import { LeadCreatedEvent } from "dub/models/components";
const stripe = new Stripe(process.env.STRIPE_SECRET_KEY!);
export async function leadCreated(data: LeadCreatedEvent["data"]) {
const { partner } = data;
if (!partner?.tenantId) return;
// Limit the number of free credits / months that a partner can receive (max 10 referrals)
if (partner.totalLeads >= 10) return;
// Get customer based on partner's tenant ID (getCustomerByTenantId is your own function)
const customer = await getCustomerByTenantId(partner.tenantId);
if (!customer?.stripeCustomerId) return;
// Get the customer's active subscription (e.g. for metered usage / free months)
// Get the customer's active subscription (e.g. for metered usage / free months)
const subscriptions = await stripe.subscriptions.list({
customer: customer.stripeCustomerId,
status: "active",
limit: 1,
});
const [subscription] = subscriptions.data;
if (!subscription?.items.data[0]) return;
// Option A: Add free credits via metered usage
await stripe.subscriptionItems.createUsageRecord(
subscription.items.data[0].id,
{ quantity: 500, timestamp: Math.floor(Date.now() / 1000) },
);
// Option B: Or extend the subscription (e.g. add 1 free month via promotion/coupon)
// await stripe.subscriptions.update(subscription.id, {
// promotion_code: "promo_free_month_per_referral",
// });
}
```
## Step 3: Graduating partners from non-monetary rewards to monetary rewards
Once a partner has referred a certain number of users, you can move them to a separate [partner group](/help/article/partner-groups) with monetary rewards (e.g. 30% commission per sale for 12 months).
There are two ways to do this:
1. [Manually move the partner](/help/article/partner-groups#moving-partners-between-groups) to the new group from the [partner details page](/help/article/managing-program-partners#viewing-partner-details) or via the [partner table](https://app.dub.co/program/partners).
2. Automatically move the partner to the new group via [group move rules](/help/article/partner-groups#group-move-rules) based on their performance metrics (e.g. total leads, total sales, total commissions, etc.).
![Example group move settings]() # Configuring SAML SSO with Okta
Source: https://dub.co/help/article/okta-saml
For Dub Enterprise users, you can securely manage your team's access to Dub using Okta SAML SSO.
This feature is only available on [Dub Enterprise](https://dub.co/enterprise).
For Dub Enterprise users, you can securely manage your team's access to Dub using [Okta SAML SSO](https://support.okta.com/help/s/article/okta-saml).
## Step 1: Create SAML Integration
In your Okta Dashboard, click on **Applications** in the sidebar.
# Configuring SAML SSO with Okta
Source: https://dub.co/help/article/okta-saml
For Dub Enterprise users, you can securely manage your team's access to Dub using Okta SAML SSO.
This feature is only available on [Dub Enterprise](https://dub.co/enterprise).
For Dub Enterprise users, you can securely manage your team's access to Dub using [Okta SAML SSO](https://support.okta.com/help/s/article/okta-saml).
## Step 1: Create SAML Integration
In your Okta Dashboard, click on **Applications** in the sidebar.
![Applications tab on the Okta Dashboard]() Then, click on **Create App Integration**.
Then, click on **Create App Integration**.
![Create App Integration button on the Okta Dashboard]() Select **SAML 2.0** as the sign on method, and click **Next**.
Select **SAML 2.0** as the sign on method, and click **Next**.
![Saml 2.0 option on the Okta Dashboard]() In the **General Settings** page, enter "Dub" as the app name, and click **Next**.
In the **General Settings** page, enter "Dub" as the app name, and click **Next**.
![General Settings page on the Okta Dashboard]() Copy the following values and paste them into the **SAML Settings** > **General** section:
```text title="Single sign-on URL" theme={null}
https://api.dub.co/auth/saml/callback
```
```text title="Audience URI (SP Entity ID)" theme={null}
https://saml.dub.co
```
Copy the following values and paste them into the **SAML Settings** > **General** section:
```text title="Single sign-on URL" theme={null}
https://api.dub.co/auth/saml/callback
```
```text title="Audience URI (SP Entity ID)" theme={null}
https://saml.dub.co
```
![SAML Settings page on the Okta Dashboard]() ## Step 2: Configure Attribute Statements
Right below the **General** section, you'll see the **Attribute Statements** section.
## Step 2: Configure Attribute Statements
Right below the **General** section, you'll see the **Attribute Statements** section.
![Attribute Statements section on the Okta Dashboard]() Click on **Add Row** and add the following attribute statements:
| Name | Value |
| ----------- | ---------------- |
| `id` | `user.id` |
| `email` | `user.email` |
| `firstName` | `user.firstName` |
| `lastName` | `user.lastName` |
Once that's done, click **Next**.
## Step 3: Submit Feedback
Under the **Feedback** section, select **This is an internal app we have created** and click **Finish**.
Click on **Add Row** and add the following attribute statements:
| Name | Value |
| ----------- | ---------------- |
| `id` | `user.id` |
| `email` | `user.email` |
| `firstName` | `user.firstName` |
| `lastName` | `user.lastName` |
Once that's done, click **Next**.
## Step 3: Submit Feedback
Under the **Feedback** section, select **This is an internal app we have created** and click **Finish**.
![Feedback section on the Okta Dashboard]() ## Step 4: Copy the Metadata URL
After you've submitted the feedback, you'll be redirected to the **Sign On** tab, which contains the metadata URL.
## Step 4: Copy the Metadata URL
After you've submitted the feedback, you'll be redirected to the **Sign On** tab, which contains the metadata URL.
![Sign On tab on the Okta Dashboard]() Copy the metadata URL and return to the Dub dashboard.
## Step 5: Configure SAML SSO on Dub
In your workspace settings, click on **Security** in the **Workspace** group.
Copy the metadata URL and return to the Dub dashboard.
## Step 5: Configure SAML SSO on Dub
In your workspace settings, click on **Security** in the **Workspace** group.
![Directory Sync section on the Dub Dashboard]() Under the **SAML Single Sign-On** section, click on **Configure**. This will open up the SAML SSO modal:
1. Select **Okta** as the SAML provider.
2. Enter the Metadata URL value that you copied from Step 4.
3. Click **Save changes**.
Under the **SAML Single Sign-On** section, click on **Configure**. This will open up the SAML SSO modal:
1. Select **Okta** as the SAML provider.
2. Enter the Metadata URL value that you copied from Step 4.
3. Click **Save changes**.
![SAML SSO Modal]() ## Step 6: Assign Users
We highly recommend configuring [SCIM Directory Sync](/help/article/okta-scim)
before assigning users & groups to your workspace. This will ensure that your
users are automatically added to your workspace when they sign in for the
first time, as well as automatically removed when they are deactivated in
Okta.
Once you've configured SAML SSO, you can start assigning users & groups to your workspace.
Click on the **Assignments** tab, and click **Assign**. You can choose to assign users individually, or assign them in bulk by group.
## Step 6: Assign Users
We highly recommend configuring [SCIM Directory Sync](/help/article/okta-scim)
before assigning users & groups to your workspace. This will ensure that your
users are automatically added to your workspace when they sign in for the
first time, as well as automatically removed when they are deactivated in
Okta.
Once you've configured SAML SSO, you can start assigning users & groups to your workspace.
Click on the **Assignments** tab, and click **Assign**. You can choose to assign users individually, or assign them in bulk by group.
![Assigning users in Okta]() Select the users or groups you want to assign and click **Assign**.
Select the users or groups you want to assign and click **Assign**.
![Assigning users in Okta choose users]() In the next screen, scroll to the bottom and click **Save and Go Back**.
In the next screen, scroll to the bottom and click **Save and Go Back**.
![Saving Okta assignment]() Your assigned users should now receive an invitation email to join your Dub workspace.
Your assigned users should now receive an invitation email to join your Dub workspace.
![SAML invite email]() They will also be able to sign in to Dub using Okta SSO.
# Configuring SCIM Directory Sync with Okta
Source: https://dub.co/help/article/okta-scim
For Dub Enterprise users, you can automatically provision and deprovision users from your Okta directory to Dub using SCIM Directory Sync.
This feature is only available on [Dub Enterprise](https://dub.co/enterprise).
For Dub Enterprise users, you can automatically provision and deprovision users from your Okta directory to Dub using [SCIM Directory Sync](https://developer.okta.com/docs/concepts/scim/).
## Step 1: Configure Directory Sync on Dub
In your workspace settings, click on **Security** in the **Workspace** group.
They will also be able to sign in to Dub using Okta SSO.
# Configuring SCIM Directory Sync with Okta
Source: https://dub.co/help/article/okta-scim
For Dub Enterprise users, you can automatically provision and deprovision users from your Okta directory to Dub using SCIM Directory Sync.
This feature is only available on [Dub Enterprise](https://dub.co/enterprise).
For Dub Enterprise users, you can automatically provision and deprovision users from your Okta directory to Dub using [SCIM Directory Sync](https://developer.okta.com/docs/concepts/scim/).
## Step 1: Configure Directory Sync on Dub
In your workspace settings, click on **Security** in the **Workspace** group.
![Directory Sync section on the Dub Dashboard]() Under the **Directory Sync** section, click on **Configure**. This will open up the Directory Sync modal:
1. Select **Okta** as the Directory Provider.
2. Click **Save changes**.
Under the **Directory Sync** section, click on **Configure**. This will open up the Directory Sync modal:
1. Select **Okta** as the Directory Provider.
2. Click **Save changes**.
![SCIM Modal]() This will generate a Directory Sync connection for your Dub workspace, and return 2 values, which will be needed in Step 2:
1. **SCIM 2.0 Base URL**
2. **OAuth Bearer Token**
This will generate a Directory Sync connection for your Dub workspace, and return 2 values, which will be needed in Step 2:
1. **SCIM 2.0 Base URL**
2. **OAuth Bearer Token**
![SCIM Modal Configured]() ## Step 2: Add Provisioning to SAML Application
Go to the **General** tab of your existing Dub Okta SAML application that you want to enable SCIM provisioning for. Under **App Settings** click **Edit**.
## Step 2: Add Provisioning to SAML Application
Go to the **General** tab of your existing Dub Okta SAML application that you want to enable SCIM provisioning for. Under **App Settings** click **Edit**.
![General tab of Okta SAML application]() Select the "Enable SCIM provisioning" option and click **Save**.
Select the "Enable SCIM provisioning" option and click **Save**.
![Enable SCIM provisioning]() You should now see a **Provisioning** tab. Select it and click **Edit**.
You should now see a **Provisioning** tab. Select it and click **Edit**.
![Provisioning tab of Okta SAML application]() 1. Under the **SCIM connector base URL** field, enter the **SCIM 2.0 Base URL** value from Step 1.
2. Under **Unique identifier field for users**, enter `userName`.
```text title="Copy this unique identifier" theme={null}
userName
```
3. Under **Supported provisioning actions**, select the following options:
* Push New Users
* Push Profile Updates
* Push groups
4. Under **Authentication Mode**, select **HTTP Header**.
5. Copy & paste the **OAuth Bearer Token** value from Step 1 into the **Authorization** field.
1. Under the **SCIM connector base URL** field, enter the **SCIM 2.0 Base URL** value from Step 1.
2. Under **Unique identifier field for users**, enter `userName`.
```text title="Copy this unique identifier" theme={null}
userName
```
3. Under **Supported provisioning actions**, select the following options:
* Push New Users
* Push Profile Updates
* Push groups
4. Under **Authentication Mode**, select **HTTP Header**.
5. Copy & paste the **OAuth Bearer Token** value from Step 1 into the **Authorization** field.
![Configure SCIM provisioning]() Click "Test Connector Configuration" to verify that the connection is working, and then click "Save".
## Step 3: Configure Provisioning Actions
Under the **To App** section, click **Edit**.
Check the following options, and click **Save**:
* Create Users
* Update User Attributes
* Deactivate Users
Click "Test Connector Configuration" to verify that the connection is working, and then click "Save".
## Step 3: Configure Provisioning Actions
Under the **To App** section, click **Edit**.
Check the following options, and click **Save**:
* Create Users
* Update User Attributes
* Deactivate Users
![SCIM Provisioning Actions]() ## Step 4: Assign Users
Once you've configured Directory sync, you can assign users to Dub directly within Okta.
Click on the **Assignments** tab, and click **Assign**. You can choose to assign users individually, or assign them in bulk by group.
## Step 4: Assign Users
Once you've configured Directory sync, you can assign users to Dub directly within Okta.
Click on the **Assignments** tab, and click **Assign**. You can choose to assign users individually, or assign them in bulk by group.
![Assigning users in Okta]() Select the users or groups you want to assign and click **Assign**.
Select the users or groups you want to assign and click **Assign**.
![Assigning users in Okta choose users]() In the next screen, scroll to the bottom and click **Save and Go Back**.
In the next screen, scroll to the bottom and click **Save and Go Back**.
![Saving Okta assignment]() Your assigned users should now receive an invitation email to join your Dub workspace.
Your assigned users should now receive an invitation email to join your Dub workspace.
![SAML invite email]() They will also be able to sign in to Dub using Okta SSO.
# How to pass query parameters in short links?
Source: https://dub.co/help/article/parameter-passing
Learn more about how Dub supports query parameter passing from your short links to their destination URLs.
Query parameters such as [UTM parameters](/help/article/utm-builder) are a fantastic way to understand how your marketing links are performing. Whether it is to understand which social media channels are driving the most traffic, or to understand which campaigns are the most effective, query parameters are a great way to do just that.
With Dub, you can [add UTM parameters](/help/article/utm-builder#how-to-use-the-dub-utm-builder) using our UTM builder before shortening them. This gives you the best of both worlds – the benefits of using UTMs but still have a short, brandable, and easily shareable links.
But what about *after* you have shortened your links? For that, you can leverage our parameter passing feature.
## How does parameter passing work?
With parameter passing, you can attach UTM parameters – or any other query parameter – to your short link and they're passed on to the destination URL.
For example, you can pass a `utm_source` parameter with the value `website` to a short link like [d.to/passthrough](https://d.to/passthrough) and they're passed on to the destination URL.
| Short link | Destination URL |
| ----------------------------------------------------------------------------------- | -------------------------------------------------------------------- |
| [d.to/passthrough](https://d.to/passthrough) | `dub.co/changelog/pass-url-parameters?ref=dub` |
| [d.to/passthrough?utm\_source=website](https://d.to/passthrough?utm_source=website) | `dub.co/changelog/pass-url-parameters?ref=dub.co&utm_source=website` |
If there are any duplicate parameters, the parameter in the short link will override its counterpart in the destination URL:
| Short link | Destination URL |
| ------------------------------------------------------------------ | ------------------------------------------------- |
| [d.to/passthrough](https://d.to/passthrough) | `dub.co/changelog/pass-url-parameters?ref=dub` |
| [d.to/passthrough?ref=dub.co](https://d.to/passthrough?ref=dub.co) | `dub.co/changelog/pass-url-parameters?ref=dub.co` |
This is particularly helpful when you're posting the same short link across multiple social media channels and want to quickly customize the UTM parameters for each channel without having to create a new short link for each one.
## How much does parameter passing cost?
Other link management platforms like Bitly restrict the parameter passing feature to their [Enterprise tier](https://support.bitly.com/hc/en-us/articles/4416831519373-What-is-parameter-passing).
On Dub, however, **parameter passing is built into every single Dub link**. This means you can use parameter passing even on the free plan.
# Managing partner commissions
Source: https://dub.co/help/article/partner-commissions
Learn how partner commissions work on Dub, and how to create manual commissions or clawbacks (negative commissions).
This feature is only available on [Business plans and
above](https://dub.co/pricing).
## Where to find your program commissions?
When viewing your Partner Program navigation, click on the **Commissions** page, under the **Insights** group:
They will also be able to sign in to Dub using Okta SSO.
# How to pass query parameters in short links?
Source: https://dub.co/help/article/parameter-passing
Learn more about how Dub supports query parameter passing from your short links to their destination URLs.
Query parameters such as [UTM parameters](/help/article/utm-builder) are a fantastic way to understand how your marketing links are performing. Whether it is to understand which social media channels are driving the most traffic, or to understand which campaigns are the most effective, query parameters are a great way to do just that.
With Dub, you can [add UTM parameters](/help/article/utm-builder#how-to-use-the-dub-utm-builder) using our UTM builder before shortening them. This gives you the best of both worlds – the benefits of using UTMs but still have a short, brandable, and easily shareable links.
But what about *after* you have shortened your links? For that, you can leverage our parameter passing feature.
## How does parameter passing work?
With parameter passing, you can attach UTM parameters – or any other query parameter – to your short link and they're passed on to the destination URL.
For example, you can pass a `utm_source` parameter with the value `website` to a short link like [d.to/passthrough](https://d.to/passthrough) and they're passed on to the destination URL.
| Short link | Destination URL |
| ----------------------------------------------------------------------------------- | -------------------------------------------------------------------- |
| [d.to/passthrough](https://d.to/passthrough) | `dub.co/changelog/pass-url-parameters?ref=dub` |
| [d.to/passthrough?utm\_source=website](https://d.to/passthrough?utm_source=website) | `dub.co/changelog/pass-url-parameters?ref=dub.co&utm_source=website` |
If there are any duplicate parameters, the parameter in the short link will override its counterpart in the destination URL:
| Short link | Destination URL |
| ------------------------------------------------------------------ | ------------------------------------------------- |
| [d.to/passthrough](https://d.to/passthrough) | `dub.co/changelog/pass-url-parameters?ref=dub` |
| [d.to/passthrough?ref=dub.co](https://d.to/passthrough?ref=dub.co) | `dub.co/changelog/pass-url-parameters?ref=dub.co` |
This is particularly helpful when you're posting the same short link across multiple social media channels and want to quickly customize the UTM parameters for each channel without having to create a new short link for each one.
## How much does parameter passing cost?
Other link management platforms like Bitly restrict the parameter passing feature to their [Enterprise tier](https://support.bitly.com/hc/en-us/articles/4416831519373-What-is-parameter-passing).
On Dub, however, **parameter passing is built into every single Dub link**. This means you can use parameter passing even on the free plan.
# Managing partner commissions
Source: https://dub.co/help/article/partner-commissions
Learn how partner commissions work on Dub, and how to create manual commissions or clawbacks (negative commissions).
This feature is only available on [Business plans and
above](https://dub.co/pricing).
## Where to find your program commissions?
When viewing your Partner Program navigation, click on the **Commissions** page, under the **Insights** group:
![Commissions page within your dashboard]() This opens up the commissions table view, where you can see a list of your historical commissions for your program:
This opens up the commissions table view, where you can see a list of your historical commissions for your program:
![Commissions page within your dashboard]() | Column | Data |
| ------------------ | --------------------------------------------------------------------------------------------------------------------- |
| Date | Commission date |
| Customer | The customer associated with the lead or sale |
| Partner | The partner earning the commission |
| Group | The group the partner belongs to |
| Type | The commission type (custom, click, lead, or sale) |
| Amount | The sale amount, or single count for custom, click, or lead rewards |
| Commission | The amount the partner will receive |
| Status | Current status of the commission. [Learn more about statuses](/help/article/partner-commissions#commission-statuses). |
| Additional actions | Actions to edit the commission, and copy the invoice ID |
To analyze commission earnings over time, see [Commission
analytics](/help/article/commission-analytics).
## Commission statuses
When a commission is recorded on Dub, it goes through the following statuses:
* `Pending`: This is the initial status for a commission. Depending on your program's [holding period](/help/article/partner-payouts#payout-holding-period), commissions can stay in "pending" status anywhere from less than a day to 90 days.
* `Processed`: When a commission has been added to a payout (after any applicable [holding period](/help/article/partner-payouts#payout-holding-period)), its status will change from "pending" to "processed".
* `Paid`: When the payout containing the commission has been paid, the commission will be updated to "paid" status.
If needed, you can also update the status for a given commission accordingly:
* `Refunded`: If the sale for the commission was refunded. This is usually automatically detected via our [Stripe integration](https://dub.co/integrations/stripe), or can also be manually set via the dashboard or the [API](/docs/api-reference/endpoint/update-a-commission).
* `Fraud`: If a commission event was found to be fraudulent, you can mark them as "Fraud" via the dashboard or the [API](/docs/api-reference/endpoint/update-a-commission). **This action cannot be undone.**
* `Canceled`: If a commission event was canceled/voided (e.g. in cases of self-referrals where commissions are not eligible for payout), you can mark them as "Canceled" via the dashboard or the [API](/docs/api-reference/endpoint/update-a-commission). **This action cannot be undone.**
* `Duplicate`: If a commission event was found to be a duplicate, you can mark them as "Duplicate" via the dashboard or the [API](/docs/api-reference/endpoint/update-a-commission). **This action cannot be undone.**
[Learn more about changing commissions statuses](/help/article/partner-commissions#commission-status).
## Single commission view
Each commission has its own page that provides further details about the commission, associated payout, and activity. This can be helpful when you need more details about a commission, or you want to know when something changed.
| Column | Data |
| ------------------ | --------------------------------------------------------------------------------------------------------------------- |
| Date | Commission date |
| Customer | The customer associated with the lead or sale |
| Partner | The partner earning the commission |
| Group | The group the partner belongs to |
| Type | The commission type (custom, click, lead, or sale) |
| Amount | The sale amount, or single count for custom, click, or lead rewards |
| Commission | The amount the partner will receive |
| Status | Current status of the commission. [Learn more about statuses](/help/article/partner-commissions#commission-statuses). |
| Additional actions | Actions to edit the commission, and copy the invoice ID |
To analyze commission earnings over time, see [Commission
analytics](/help/article/commission-analytics).
## Commission statuses
When a commission is recorded on Dub, it goes through the following statuses:
* `Pending`: This is the initial status for a commission. Depending on your program's [holding period](/help/article/partner-payouts#payout-holding-period), commissions can stay in "pending" status anywhere from less than a day to 90 days.
* `Processed`: When a commission has been added to a payout (after any applicable [holding period](/help/article/partner-payouts#payout-holding-period)), its status will change from "pending" to "processed".
* `Paid`: When the payout containing the commission has been paid, the commission will be updated to "paid" status.
If needed, you can also update the status for a given commission accordingly:
* `Refunded`: If the sale for the commission was refunded. This is usually automatically detected via our [Stripe integration](https://dub.co/integrations/stripe), or can also be manually set via the dashboard or the [API](/docs/api-reference/endpoint/update-a-commission).
* `Fraud`: If a commission event was found to be fraudulent, you can mark them as "Fraud" via the dashboard or the [API](/docs/api-reference/endpoint/update-a-commission). **This action cannot be undone.**
* `Canceled`: If a commission event was canceled/voided (e.g. in cases of self-referrals where commissions are not eligible for payout), you can mark them as "Canceled" via the dashboard or the [API](/docs/api-reference/endpoint/update-a-commission). **This action cannot be undone.**
* `Duplicate`: If a commission event was found to be a duplicate, you can mark them as "Duplicate" via the dashboard or the [API](/docs/api-reference/endpoint/update-a-commission). **This action cannot be undone.**
[Learn more about changing commissions statuses](/help/article/partner-commissions#commission-status).
## Single commission view
Each commission has its own page that provides further details about the commission, associated payout, and activity. This can be helpful when you need more details about a commission, or you want to know when something changed.
![Single commission view]() ## Editing commissions
You can change a commission's status and edit the earnings amount for all unpaid commissions. This can be completed from one of two areas:
From the Commissions table, click the `⋯` button and select **Edit commission**.
## Editing commissions
You can change a commission's status and edit the earnings amount for all unpaid commissions. This can be completed from one of two areas:
From the Commissions table, click the `⋯` button and select **Edit commission**.
![Edit commission table]() From the [single commission page](/help/article/partner-commissions#single-commission-view), click the **Edit** button in the top right.
From the [single commission page](/help/article/partner-commissions#single-commission-view), click the **Edit** button in the top right.
![Single commission edit]() With the edit commission modal open, you can change the status and earnings amount of any commission that hasn't been paid yet.
With the edit commission modal open, you can change the status and earnings amount of any commission that hasn't been paid yet.
![Edit commission modal]() If you change a commission's status to `Canceled` or `Fraud`, you're also able to mark all previous commissions for this customer-partner pair as that status too. This will also prevent the partner from earning future commissions from this customer.
If you change a commission's status to `Canceled` or `Fraud`, you're also able to mark all previous commissions for this customer-partner pair as that status too. This will also prevent the partner from earning future commissions from this customer.
![Mark all commissions]() ### Earnings amount
You can only edit the earnings amount for [custom commissions](#one-time-commissions) that haven't been paid yet. If the earnings amount is changed, it will also appear in the activity log on the [commissions page](/help/article/partner-commissions#single-commission-view).
### Earnings amount
You can only edit the earnings amount for [custom commissions](#one-time-commissions) that haven't been paid yet. If the earnings amount is changed, it will also appear in the activity log on the [commissions page](/help/article/partner-commissions#single-commission-view).
![Edit commission earnings modal]() ### Bulk editing
You can bulk edit the status of multiple commissions at once by clicking the checkboxes next to the commissions you want to edit, then click **Edit commissions**.
### Bulk editing
You can bulk edit the status of multiple commissions at once by clicking the checkboxes next to the commissions you want to edit, then click **Edit commissions**.
![Bulk edit commissions selection]() From the modal, select the new status for the commissions and click **save**.
From the modal, select the new status for the commissions and click **save**.
![Bulk edit commissions editing]() You can only bulk edit the status of commissions that haven't been paid yet.
## Creating manual commissions
Occasionally, you might need to create a one-off or recurring commission to account for a missed commission or other reasons. On Dub, you can easily create those commissions via the dashboard, and they will be included in the next payout for that partner.
This can be accomplished by clicking **Create commission** from your **Commissions** page.
You can only bulk edit the status of commissions that haven't been paid yet.
## Creating manual commissions
Occasionally, you might need to create a one-off or recurring commission to account for a missed commission or other reasons. On Dub, you can easily create those commissions via the dashboard, and they will be included in the next payout for that partner.
This can be accomplished by clicking **Create commission** from your **Commissions** page.
![Create one-time commission]() It can also be accomplished by clicking **Create commission** from an individual partner profile
It can also be accomplished by clicking **Create commission** from an individual partner profile
![Create one-time commission]() ### One-time commissions
Manual one-time commissions are often used when you want to send a thank-you or bonus, fix a missed commission due to a clerical or tracking error, or create a payout that isn’t tied to a customer, referral link, or transaction.
### One-time commissions
Manual one-time commissions are often used when you want to send a thank-you or bonus, fix a missed commission due to a clerical or tracking error, or create a payout that isn’t tied to a customer, referral link, or transaction.
![Create one-time commission]() | Input | Description | Required |
| ---------------- | --------------------------------------------------------------------------------------------------------- | -------- |
| Amount | Commission amount | ✅ |
| Description | Add a custom description | ❌ |
| Commission date | Enable to add a custom date. If a custom date isn't added, it will auto-fill to the current date and time | ❌ |
### Lead commission
Manual lead commissions are one-time and based on your [reward settings](/help/article/partner-rewards), so the commission is automatically calculated. Use this for rewarding a partner for a qualified signup or referral. If your program doesn't have a lead reward, this option won't show.
| Input | Description | Required |
| ---------------- | --------------------------------------------------------------------------------------------------------- | -------- |
| Amount | Commission amount | ✅ |
| Description | Add a custom description | ❌ |
| Commission date | Enable to add a custom date. If a custom date isn't added, it will auto-fill to the current date and time | ❌ |
### Lead commission
Manual lead commissions are one-time and based on your [reward settings](/help/article/partner-rewards), so the commission is automatically calculated. Use this for rewarding a partner for a qualified signup or referral. If your program doesn't have a lead reward, this option won't show.
![Create one-time commission]() | Input | Description | Required |
| --------------- | -------------------------------------------------------------------------------------------------------------------------------------- | -------- |
| Referral link | The referral link that the lead is attributed to | ✅ |
| Customer | The customer associated with the lead. [Read more about adding a customer ](/help/article/partner-commissions#creating-a-new-customer) | ✅ |
| Lead event date | The date of the lead event. If no date is selected, it will auto-fill to the current date and time | ❌ |
| Lead event name | The name of the lead event. | ❌ |
### Recurring sale commission
Manual sale commissions are recurring and based on your [reward settings](/help/article/partner-rewards), so the partner commission is calculated automatically after entering the sale amount. Sale commissions also create a `sale event` under your analytics, and updates your revenue statistics.
| Input | Description | Required |
| --------------- | -------------------------------------------------------------------------------------------------------------------------------------- | -------- |
| Referral link | The referral link that the lead is attributed to | ✅ |
| Customer | The customer associated with the lead. [Read more about adding a customer ](/help/article/partner-commissions#creating-a-new-customer) | ✅ |
| Lead event date | The date of the lead event. If no date is selected, it will auto-fill to the current date and time | ❌ |
| Lead event name | The name of the lead event. | ❌ |
### Recurring sale commission
Manual sale commissions are recurring and based on your [reward settings](/help/article/partner-rewards), so the partner commission is calculated automatically after entering the sale amount. Sale commissions also create a `sale event` under your analytics, and updates your revenue statistics.
![Create sale commission]() | Input | Description | Required |
| ------------- | ---------------------------------------------------------------------------------------------- | --------------------------------------- |
| Referral link | The referral link that the sale is attributed to | ✅ |
| Customer | The customer associated with the sale. Read more about adding a customer | ✅ |
| Event source | Create a new sale event, or import from Stripe | ✅ |
| Sale date | The date of the sale. If no date is selected, it will auto-fill with the current date and time | ❌ |
| Sale amount | The amount of the sale in USD. | Required if not reusing existing events |
| Invoice ID | The invoice ID of the sale. Can be used to fetch the commission later via the API | ❌ |
| Product ID | The product ID of the sale. Can be used to fetch the commission later via the API | ❌ |
### Creating a new customer
If the customer you need to associate the commission with doesn't exist, you can create one in Dub to match your records. To do this, when searching for a customer in the customer field, click on **Create new customer**.
This will open up a modal where you can add your customer's details or import from Stripe.
| Input | Description | Required |
| ------------- | ---------------------------------------------------------------------------------------------- | --------------------------------------- |
| Referral link | The referral link that the sale is attributed to | ✅ |
| Customer | The customer associated with the sale. Read more about adding a customer | ✅ |
| Event source | Create a new sale event, or import from Stripe | ✅ |
| Sale date | The date of the sale. If no date is selected, it will auto-fill with the current date and time | ❌ |
| Sale amount | The amount of the sale in USD. | Required if not reusing existing events |
| Invoice ID | The invoice ID of the sale. Can be used to fetch the commission later via the API | ❌ |
| Product ID | The product ID of the sale. Can be used to fetch the commission later via the API | ❌ |
### Creating a new customer
If the customer you need to associate the commission with doesn't exist, you can create one in Dub to match your records. To do this, when searching for a customer in the customer field, click on **Create new customer**.
This will open up a modal where you can add your customer's details or import from Stripe.
![Create new customer location]() Once the customer is created, you can then associate any commissions to them, and future commissions will automatically be associated with that customer.
Once the customer is created, you can then associate any commissions to them, and future commissions will automatically be associated with that customer.
![Create customer modal]() | Input | Description | Required |
| ------------------ | -------------------------------------------------------------------- | -------- |
| Name | The name of the customer | ❌ |
| Email | The customer's email | ❌ |
| Country | The customer's country | ✅ |
| External ID | Your unique ID for this customer (e.g. database ID of email) | ✅ |
| Stripe Customer ID | Add a Stripe customer ID to attribute recurring sales to the partner | ❌ |
#### Importing customers from Stripe
If you've already [connected to Stripe](/docs/integrations/stripe#stripe), you can import your customer by clicking on **Import from Stripe**. This will allow you to search existing Stripe customers by their email, and click to import their details into Dub.
If a customer with the same Stripe Customer ID already exists in Dub, you
won't be able to import that customer.
>
| Input | Description | Required |
| ------------------ | -------------------------------------------------------------------- | -------- |
| Name | The name of the customer | ❌ |
| Email | The customer's email | ❌ |
| Country | The customer's country | ✅ |
| External ID | Your unique ID for this customer (e.g. database ID of email) | ✅ |
| Stripe Customer ID | Add a Stripe customer ID to attribute recurring sales to the partner | ❌ |
#### Importing customers from Stripe
If you've already [connected to Stripe](/docs/integrations/stripe#stripe), you can import your customer by clicking on **Import from Stripe**. This will allow you to search existing Stripe customers by their email, and click to import their details into Dub.
If a customer with the same Stripe Customer ID already exists in Dub, you
won't be able to import that customer.
>
![Importing a Stripe customer]() Once selected, it will auto-fill the customer profile details. Click **Create customer** to add them to Dub.
Once selected, it will auto-fill the customer profile details. Click **Create customer** to add them to Dub.
![Importing a Stripe customer]() ### Importing commissions from Stripe invoices
During the commission creation flow, you can choose between the following options:
1. **Create new events**: Create a new sale event entirely.
2. **Import from Stripe**: Create commissions from the customer's existing Stripe invoice payment events
### Importing commissions from Stripe invoices
During the commission creation flow, you can choose between the following options:
1. **Create new events**: Create a new sale event entirely.
2. **Import from Stripe**: Create commissions from the customer's existing Stripe invoice payment events
![Importing invoices from Stripe]() Then, once you click **Create commission**, this will import the customer's paid invoices and record them as sale events + partner commissions to their [customer page](help/article/customer-insights).
## Creating a clawback
In the event an incorrect commission has been paid to a partner, you can create a clawback commission, which results in a negative commission for the partner and is subtracted from their next payout.
To create a clawback, click the **More button** next to **Create commissions**, then **Create clawback**.
Then, once you click **Create commission**, this will import the customer's paid invoices and record them as sale events + partner commissions to their [customer page](help/article/customer-insights).
## Creating a clawback
In the event an incorrect commission has been paid to a partner, you can create a clawback commission, which results in a negative commission for the partner and is subtracted from their next payout.
To create a clawback, click the **More button** next to **Create commissions**, then **Create clawback**.
![Commissions dropdown]() Fields required to create a clawback:
* **Partner**: The partner receiving the clawback
* **Amount**: The clawback amount
* **Clawback reason**: *Order canceled, Fraud, Terms violation, Tracking error, Payment failed, Ineligible partner, Duplicate commission, Other*
After the clawback is created, you'll see a negative commission in your table view:
Fields required to create a clawback:
* **Partner**: The partner receiving the clawback
* **Amount**: The clawback amount
* **Clawback reason**: *Order canceled, Fraud, Terms violation, Tracking error, Payment failed, Ineligible partner, Duplicate commission, Other*
After the clawback is created, you'll see a negative commission in your table view:
![Clawback created]() The partner affected will see this reflected in their earnings view on their dashboard:
The partner affected will see this reflected in their earnings view on their dashboard:
![Clawback partner view]() ## Exporting commissions
To export your commissions, click the more button next to **Create commissions** then **Export as CSV**.
## Exporting commissions
To export your commissions, click the more button next to **Create commissions** then **Export as CSV**.
![Commissions dropdown with export option]() In the **Export commissions** modal, select which fields you want to include in your export, then click **Export commissions** to initiate. An email will be sent to you with a link to download the CSV file.
In the **Export commissions** modal, select which fields you want to include in your export, then click **Export commissions** to initiate. An email will be sent to you with a link to download the CSV file.
![Commission export options modal]() To export commissions with any filters you currently have applied, make sure to toggle on "Apply current filters". This will ensure that only the commissions matching your current filters will be included in the export.
After receiving the email, click **Download export** to download your commissions CSV file.
To export commissions with any filters you currently have applied, make sure to toggle on "Apply current filters". This will ensure that only the commissions matching your current filters will be included in the export.
After receiving the email, click **Download export** to download your commissions CSV file.
![Commission export email]() # Managing your partners with groups
Source: https://dub.co/help/article/partner-groups
Learn how you can create partner groups to segment partners by rewards, discounts, performance, location, and more.
This feature is only available on [Business plans and
above](https://dub.co/pricing/partners).
Partner groups help you organize your program so it runs more efficiently. You can segment partners by rewards, discounts, performance, location, and more, making it easier to tailor incentives and track results.
You can also filter your [program analytics](/help/article/program-analytics#filtering-your-data) and [commission analytics](/help/article/commission-analytics#filtering-commission-analytics) by partner group, or use [partner tags](/help/article/partner-tags) for more flexible labeling.
# Managing your partners with groups
Source: https://dub.co/help/article/partner-groups
Learn how you can create partner groups to segment partners by rewards, discounts, performance, location, and more.
This feature is only available on [Business plans and
above](https://dub.co/pricing/partners).
Partner groups help you organize your program so it runs more efficiently. You can segment partners by rewards, discounts, performance, location, and more, making it easier to tailor incentives and track results.
You can also filter your [program analytics](/help/article/program-analytics#filtering-your-data) and [commission analytics](/help/article/commission-analytics#filtering-commission-analytics) by partner group, or use [partner tags](/help/article/partner-tags) for more flexible labeling.
![Partner Groups]() ## What types of partner groups can I create?
Here are some examples of partner groups you can create on Dub:
**By persona**
* **Agencies** – Marketing or creative agencies promoting your product for their clients.
* **Content creators** – Bloggers, podcasters, or YouTubers producing relevant content.
* **Media publishers** – Websites, magazines, or networks with aligned audiences.
**By vertical**
* **Students** – University clubs, campus ambassadors, or student-led initiatives.
* **Finance** – Partners in banking, fintech, or investment sectors.
* **Tech** – Developers, SaaS providers, or technology-focused communities.
**By performance tier**
* **Rising stars** – New partners showing strong growth potential.
* **Top performers** – Consistently exceeding sales or referral targets.
* **Elite partners** – Highest earners driving significant revenue and strategic wins.
## Where can I view my partner groups?
In your **Partner Program** menu, click **Groups** in the Partners section to view your partner groups
## What types of partner groups can I create?
Here are some examples of partner groups you can create on Dub:
**By persona**
* **Agencies** – Marketing or creative agencies promoting your product for their clients.
* **Content creators** – Bloggers, podcasters, or YouTubers producing relevant content.
* **Media publishers** – Websites, magazines, or networks with aligned audiences.
**By vertical**
* **Students** – University clubs, campus ambassadors, or student-led initiatives.
* **Finance** – Partners in banking, fintech, or investment sectors.
* **Tech** – Developers, SaaS providers, or technology-focused communities.
**By performance tier**
* **Rising stars** – New partners showing strong growth potential.
* **Top performers** – Consistently exceeding sales or referral targets.
* **Elite partners** – Highest earners driving significant revenue and strategic wins.
## Where can I view my partner groups?
In your **Partner Program** menu, click **Groups** in the Partners section to view your partner groups
![Group navigation]() ## What is the default partner group?
Your program will always have a group labelled `Default Group` and it can be renamed at any time.
## What is the default partner group?
Your program will always have a group labelled `Default Group` and it can be renamed at any time.
![Default group]() You cannot delete your default partner group. This group will also be the
group that your partners will be reassigned to whenever you delete another
partner group.
## Creating a group
To create a group, click **Create group** in the top right corner or press `C` on your keyboard.
You cannot delete your default partner group. This group will also be the
group that your partners will be reassigned to whenever you delete another
partner group.
## Creating a group
To create a group, click **Create group** in the top right corner or press `C` on your keyboard.
![Create group]() | Field | Description |
| ----------- | ------------------------------------------------------------------------------------------------------------------------------------------------------------------------------------------------------------------------------------------------------------------------------------------------------------ |
| Group name | Add a name to your group to help easily identify it later.
| Field | Description |
| ----------- | ------------------------------------------------------------------------------------------------------------------------------------------------------------------------------------------------------------------------------------------------------------------------------------------------------------ |
| Group name | Add a name to your group to help easily identify it later.
**This name is for internal use only and is never visible to your partners.** |
| Group color | Set the color of the group with our simple color picker. |
| Group slug | Each partner group uses a unique application landing page, which you can use to share with partners you want to automatically add to that group when they apply.
**This name is for internal and external use**, so anyone you share the application link with can see the slug name provided. |
| Group ID | This non-editable item is used for embedding the Dub white-labeled referral dashboard within your app. [Learn more](/docs/partners/embedded-referrals). |
## Group rewards
Every partner group can have one of each of the following:
| Reward type | Description |
| --------------------------- | -------------------------------------------------------------------------------------------------------------------------------------------------- |
| Click-based (pay-per-click) | Rewarding partners for driving clicks to your product – similar to how Google Ads' pay-per-click works. |
| Lead-based (pay-per-lead) | A more effective alternative to pay-per-click, where you reward partners for leads generated (e.g. demo requests, free trial signups, etc.) |
| Sale-based (pay-per-sale) | This is the most common reward type, where you reward partners for driving sales to your product either via a rev-share or fixed-price commission. |
![Group rewards]() To create a reward, click **Create** on any of the reward types. Learn more about [creating rewards here](/help/article/partner-rewards).
If you want to duplicate your default group rewards on other groups, click **Duplicate default group** to copy over the parameters to save time.
## Group discounts
You can also create dual-sided incentives for your affiliate/referral programs, which give special discounts to customers who sign up via a referral link.
Some examples include:
* 25% discount for the first 12 months
* 30% lifetime discount
* \$50 one-off discount
This can drive powerful word-of-mouth growth as partners are more likely to share their link if it gives their audience/user base additional discounts, and on the other hand, their users are more likely to click on their links as well if they're getting a special deal.
To create a reward, click **Create** on any of the reward types. Learn more about [creating rewards here](/help/article/partner-rewards).
If you want to duplicate your default group rewards on other groups, click **Duplicate default group** to copy over the parameters to save time.
## Group discounts
You can also create dual-sided incentives for your affiliate/referral programs, which give special discounts to customers who sign up via a referral link.
Some examples include:
* 25% discount for the first 12 months
* 30% lifetime discount
* \$50 one-off discount
This can drive powerful word-of-mouth growth as partners are more likely to share their link if it gives their audience/user base additional discounts, and on the other hand, their users are more likely to click on their links as well if they're getting a special deal.
![Group discounts]() You can create only one discount per group. To create a discount, click **Create** on the discount block.
Learn more about [creating discounts here](/help/article/dual-sided-incentives).
## Group settings
Each group has individual settings that allow you to customize the name and additional settings.
You can create only one discount per group. To create a discount, click **Create** on the discount block.
Learn more about [creating discounts here](/help/article/dual-sided-incentives).
## Group settings
Each group has individual settings that allow you to customize the name and additional settings.
![Group settings]() ### Group name
The name of the partner group can be changed at any time. It's for internal use only and is never visible to your partners.
### Group slug
By default, the group slug will auto-generate based on the group name, but you're able to change this at any time. For program landing pages and internal group page URLs.
The default group slug cannot be changed.
### Group ID
When setting up the [Dub embedded referral dashboard](/docs/partners/embedded-referrals), you'll use this group ID. The ID cannot be changed.
### Payout holding period
Specify how long your commissions will be held in "pending" status before becoming eligible for payout. [Learn more.](/help/article/partner-payouts#payout-holding-period)
### Auto-approve
Enable or disable auto-approving new applicants to this group. [Learn more](/help/article/program-applications#auto-approve).
### Group move rules
Automatically move partners into a selected group when they meet specific criteria. This is useful when you want partners to earn higher rewards as they progress in your program, without needing to manage groups manually.
### Group name
The name of the partner group can be changed at any time. It's for internal use only and is never visible to your partners.
### Group slug
By default, the group slug will auto-generate based on the group name, but you're able to change this at any time. For program landing pages and internal group page URLs.
The default group slug cannot be changed.
### Group ID
When setting up the [Dub embedded referral dashboard](/docs/partners/embedded-referrals), you'll use this group ID. The ID cannot be changed.
### Payout holding period
Specify how long your commissions will be held in "pending" status before becoming eligible for payout. [Learn more.](/help/article/partner-payouts#payout-holding-period)
### Auto-approve
Enable or disable auto-approving new applicants to this group. [Learn more](/help/article/program-applications#auto-approve).
### Group move rules
Automatically move partners into a selected group when they meet specific criteria. This is useful when you want partners to earn higher rewards as they progress in your program, without needing to manage groups manually.
![Example group move settings]() You can move partners based on performance metrics like total leads, conversions, revenue, or commissions. Multiple conditions can be combined so only partners who meet your exact requirements are moved into the selected group.
**Example:** Move partners to the `VIP Group` once their total commissions reach \$100.
Group move rules are only available on the [Advanced plan and
above](https://dub.co/pricing/partners).
## Adding partners to a group
There are many ways to add partners to a group, depending on whether they're already enrolled or haven't joined your program yet.
### Inviting partners to apply
After your group is created, when you share the unique application URL, all new applicants who applied through that page will be assigned to that group.
You can move partners based on performance metrics like total leads, conversions, revenue, or commissions. Multiple conditions can be combined so only partners who meet your exact requirements are moved into the selected group.
**Example:** Move partners to the `VIP Group` once their total commissions reach \$100.
Group move rules are only available on the [Advanced plan and
above](https://dub.co/pricing/partners).
## Adding partners to a group
There are many ways to add partners to a group, depending on whether they're already enrolled or haven't joined your program yet.
### Inviting partners to apply
After your group is created, when you share the unique application URL, all new applicants who applied through that page will be assigned to that group.
![Applications table]() ### Approving applications
When reviewing new applications, you'll be asked to confirm their assigned group, and you can also change their assigned group if you need to.
### Approving applications
When reviewing new applications, you'll be asked to confirm their assigned group, and you can also change their assigned group if you need to.
![Select group]() ### Adding multiple partners to a group
When [viewing all your partners](http://app.dub.co/program/partners), you can use the multi-select function to add one or many partners at a time to any group.
Simply click the checkbox beside their name and click **Add to group** to move them to your desired partner group.
### Adding multiple partners to a group
When [viewing all your partners](http://app.dub.co/program/partners), you can use the multi-select function to add one or many partners at a time to any group.
Simply click the checkbox beside their name and click **Add to group** to move them to your desired partner group.
![All partners]() ## Moving partners between groups
There are a few ways to move partners between groups:
**Via the partner details page**
You can move a partner to a new group from their [partner details page](/help/article/managing-program-partners#viewing-partner-details):
## Moving partners between groups
There are a few ways to move partners between groups:
**Via the partner details page**
You can move a partner to a new group from their [partner details page](/help/article/managing-program-partners#viewing-partner-details):
![Partner profile page group]() Anytime you're changing a partner's group, you can enable **keep partner in selected group** to ignore any group move rules. This setting is also available from the partner's [advanced settings](/help/article/managing-program-partners#advanced-settings).
Anytime you're changing a partner's group, you can enable **keep partner in selected group** to ignore any group move rules. This setting is also available from the partner's [advanced settings](/help/article/managing-program-partners#advanced-settings).
![Partner move modal]() **Via the partner table**
As mentioned above, you can also use the multi-select function in the [partners table](http://app.dub.co/program/partners) to move one or many partners at a time to any group.
Simply click the checkbox beside their name and click **Add to group** to move them to your desired partner group.
**Via the partner table**
As mentioned above, you can also use the multi-select function in the [partners table](http://app.dub.co/program/partners) to move one or many partners at a time to any group.
Simply click the checkbox beside their name and click **Add to group** to move them to your desired partner group.
![All partners]() **Via group move rules**
You can also automatically move partners to a new group based on their performance metrics. This is useful when you want partners to earn higher rewards as they progress in your program, without needing to manage groups manually.
**Via group move rules**
You can also automatically move partners to a new group based on their performance metrics. This is useful when you want partners to earn higher rewards as they progress in your program, without needing to manage groups manually.
![Group move rules example]() Partners that have [ignore group move rules](/help/article/managing-program-partners#ignore-group-move-rules) enabled will stay within their current group and not be affected by any move rules.
### Partner notification emails
When partners are moved to another group, they'll receive an email like the one below, informing them of any reward and bounty changes associated with the move.
Partners that have [ignore group move rules](/help/article/managing-program-partners#ignore-group-move-rules) enabled will stay within their current group and not be affected by any move rules.
### Partner notification emails
When partners are moved to another group, they'll receive an email like the one below, informing them of any reward and bounty changes associated with the move.
![Group move email]() ### Group move logs
For transparency and auditability, we also keep a history of all group moves for each partner – both from manual moves and via group move rules:
### Group move logs
For transparency and auditability, we also keep a history of all group moves for each partner – both from manual moves and via group move rules:
![Partner profile page group history]() This gives you a complete history of a given partner's group membership changes, which can affect their [rewards](/help/article/partner-rewards), [discounts](/help/article/dual-sided-incentives), and [referral links](/help/article/partner-link-settings).
## How many partner groups can I create?
All Dub Partners customers can create partner groups, with the number allowed based on your plan.
| Plan | Partner groups |
| ------------------------------------------- | ---------------------------------------- |
| [Business](https://dub.co/pricing/partners) | Up to 3 groups (including Default group) |
| [Advanced](https://dub.co/pricing/partners) | Unlimited groups |
| [Enterprise](https://dub.co/enterprise) | Unlimited groups |
# Configuring referral links for your partner groups
Source: https://dub.co/help/article/partner-link-settings
Learn how set default referral links, additional links, and UTM parameters for each partner group in your Dub partner program
This feature is only available on [Business plans and
above](https://dub.co/pricing/partners).
## Where to find your referral link settings
Each [partner group](/help/article/partner-groups) has its own referral link settings. To find them, open a group and click **Links** in the top navigation.
This gives you a complete history of a given partner's group membership changes, which can affect their [rewards](/help/article/partner-rewards), [discounts](/help/article/dual-sided-incentives), and [referral links](/help/article/partner-link-settings).
## How many partner groups can I create?
All Dub Partners customers can create partner groups, with the number allowed based on your plan.
| Plan | Partner groups |
| ------------------------------------------- | ---------------------------------------- |
| [Business](https://dub.co/pricing/partners) | Up to 3 groups (including Default group) |
| [Advanced](https://dub.co/pricing/partners) | Unlimited groups |
| [Enterprise](https://dub.co/enterprise) | Unlimited groups |
# Configuring referral links for your partner groups
Source: https://dub.co/help/article/partner-link-settings
Learn how set default referral links, additional links, and UTM parameters for each partner group in your Dub partner program
This feature is only available on [Business plans and
above](https://dub.co/pricing/partners).
## Where to find your referral link settings
Each [partner group](/help/article/partner-groups) has its own referral link settings. To find them, open a group and click **Links** in the top navigation.
![Group referral link settings]() ## Default referral links
A default link is created during program setup, so new [partner groups](/help/article/partner-groups) always have a referral link. You can also set up additional default links that are automatically created when a partner is enrolled in the partner group.
Click **Create Link** to add more default links:
## Default referral links
A default link is created during program setup, so new [partner groups](/help/article/partner-groups) always have a referral link. You can also set up additional default links that are automatically created when a partner is enrolled in the partner group.
Click **Create Link** to add more default links:
![Group default links]() When creating a default link, you'll be asked to enter a **Destination URL**.
This is the page users land on after clicking a referral link. It’s often your
homepage or a dedicated program landing page.
**Default Link Behavior**
* **When you create a default link**, a new link is generated for every partner in that group. This includes both current and future partners in that group.
* **When you update a default link's** destination URL, it updates all the corresponding partner links in that group with the destination URL you set.
* **When you delete a default link**, the link remains for existing partners in that group to ensure historical stats/commissions are preserved.
## Additional partner links
You can also let your partners create their own links beyond the defaults:
When creating a default link, you'll be asked to enter a **Destination URL**.
This is the page users land on after clicking a referral link. It’s often your
homepage or a dedicated program landing page.
**Default Link Behavior**
* **When you create a default link**, a new link is generated for every partner in that group. This includes both current and future partners in that group.
* **When you update a default link's** destination URL, it updates all the corresponding partner links in that group with the destination URL you set.
* **When you delete a default link**, the link remains for existing partners in that group to ensure historical stats/commissions are preserved.
## Additional partner links
You can also let your partners create their own links beyond the defaults:
![Additional partner links]() For your additional partner links, you can specify the following:
* **Link limit**: the maximum number of links partners can create
* **Link domains**: the domains that your partner's links must match (either any page on that domain, or the homepage only)
For your additional partner links, you can specify the following:
* **Link limit**: the maximum number of links partners can create
* **Link domains**: the domains that your partner's links must match (either any page on that domain, or the homepage only)
![Adding link domain]() Ensure the domain you're adding has conversion tracking set up, or your links
won't be tracking correctly. [Learn more here.](/docs/quickstart/server)
## Link settings
Define the link structure and UTM parameters for all partners in the group.
Ensure the domain you're adding has conversion tracking set up, or your links
won't be tracking correctly. [Learn more here.](/docs/quickstart/server)
## Link settings
Define the link structure and UTM parameters for all partners in the group.
![Adding link domain]() ### Link structure
Dub supports two referral link formats. Choose based on how you want links to look and where they’ll be shared. Both formats work the same for attribution.
### Link structure
Dub supports two referral link formats. Choose based on how you want links to look and where they’ll be shared. Both formats work the same for attribution.
![Link structure]() You can use any of the referral link types interchangeably – the option above
is to determine which format is shown in the partner dashboard.
**Option 1: Short Links**
**Format:** `getacme.link/{partnerName}`
A clean, branded short link that’s easy to remember and perfect for sharing in social posts, bios, or messages.
We recommend using short links for several reasons:
1. Some web browsers block [client-side click tracking](/docs/sdks/client-side/features/click-tracking), which breaks attribution – with `getacme.link/john` the click will be tracked server-side too, which improves attribution accuracy
2. Some web browsers drop query params, which breaks attribution as well
3. It's cleaner ✨
**Option 2: Query Parameter**
**Format:** `acme.com?via={partnerName}`
Appends the partner name as a query string on your destination URL. Ideal for users who are [migrating from Rewardful](/help/article/migrating-from-rewardful) and want to maintain backwards compatibility for existing partner links.
### UTM parameters
Set default [UTM parameters](/help/article/utm-builder) for all links in this group. This gives you group-specific insights in analytics.
You can use any of the referral link types interchangeably – the option above
is to determine which format is shown in the partner dashboard.
**Option 1: Short Links**
**Format:** `getacme.link/{partnerName}`
A clean, branded short link that’s easy to remember and perfect for sharing in social posts, bios, or messages.
We recommend using short links for several reasons:
1. Some web browsers block [client-side click tracking](/docs/sdks/client-side/features/click-tracking), which breaks attribution – with `getacme.link/john` the click will be tracked server-side too, which improves attribution accuracy
2. Some web browsers drop query params, which breaks attribution as well
3. It's cleaner ✨
**Option 2: Query Parameter**
**Format:** `acme.com?via={partnerName}`
Appends the partner name as a query string on your destination URL. Ideal for users who are [migrating from Rewardful](/help/article/migrating-from-rewardful) and want to maintain backwards compatibility for existing partner links.
### UTM parameters
Set default [UTM parameters](/help/article/utm-builder) for all links in this group. This gives you group-specific insights in analytics.
![Link UTM]() When you update a group’s [UTM template](/help/article/how-to-create-utm-templates), all partner links in the
group are refreshed and overwritten with the new UTM tags.
## Changing your referral link domain
If you need to change the domain used for your referral links (for example, from `ref.getacme.com` to `ref.acme.com`), you must follow the steps below in order. Skipping or reordering these steps will break your existing partner links.
Add your new domain (`ref.acme.com`) in your [domains settings page](https://app.dub.co/settings/domains).
Set up a redirect from your old domain to your new domain so that any traffic hitting an existing partner link is forwarded to the new domain. You'll want a wildcard redirect that maps `ref.getacme.com/:path*` to `ref.acme.com/:path*`.
Most hosting providers and CDNs support wildcard redirects. Check your provider's documentation for how to configure them (often via a configuration file, dashboard setting, or rewrite/redirect rule). If you're on [Vercel](https://vercel.com/docs/routing/redirects/configuration-redirects), you can add this to your `vercel.json` file.
Once both the new domain and the redirect are in place, update your **Default Link** to use the new domain on your [group links page](https://app.dub.co/program/groups/default/links).
## How partner group changes affect referral links
As mentioned earlier, a partner's link settings are tied to the [partner group](/help/article/partner-groups) they're in. When you update a partner's group, or delete groups, their partner links will be updated as well.
### Moving partners to a group
When a partner is moved to a new group, their links automatically update to match the new group’s defaults and UTM parameters.
**Why would you move partners?**
* To promote them from a starter group to a group with a higher reward tier
* To try out new rewards in a test group
* To tidy up your structure and general reorganization
### Deleting groups
If you delete a group, all partners in that group are moved to the default group. Their links are updated to match the default group’s settings.
**Why would you delete a group?**
* The campaign has ended
* You created a duplicate group by mistake
* A beta trial group is no longer needed
# Setting business details in partner payout invoices
Source: https://dub.co/help/article/partner-payout-invoice
Learn how to set custom business details (company name, address, tax ID) in your partner payout invoices.
Every time you [receive a payout](/help/article/receiving-payouts) on Dub, our platform automatically generates an invoice for accounting purposes.
With Dub, you can also set your business details (company name, address, tax ID) in your payout invoices for tax compliance.
First, go to your [payout settings page](https://partners.dub.co/settings/payouts) and click on the **Payout settings** button:
When you update a group’s [UTM template](/help/article/how-to-create-utm-templates), all partner links in the
group are refreshed and overwritten with the new UTM tags.
## Changing your referral link domain
If you need to change the domain used for your referral links (for example, from `ref.getacme.com` to `ref.acme.com`), you must follow the steps below in order. Skipping or reordering these steps will break your existing partner links.
Add your new domain (`ref.acme.com`) in your [domains settings page](https://app.dub.co/settings/domains).
Set up a redirect from your old domain to your new domain so that any traffic hitting an existing partner link is forwarded to the new domain. You'll want a wildcard redirect that maps `ref.getacme.com/:path*` to `ref.acme.com/:path*`.
Most hosting providers and CDNs support wildcard redirects. Check your provider's documentation for how to configure them (often via a configuration file, dashboard setting, or rewrite/redirect rule). If you're on [Vercel](https://vercel.com/docs/routing/redirects/configuration-redirects), you can add this to your `vercel.json` file.
Once both the new domain and the redirect are in place, update your **Default Link** to use the new domain on your [group links page](https://app.dub.co/program/groups/default/links).
## How partner group changes affect referral links
As mentioned earlier, a partner's link settings are tied to the [partner group](/help/article/partner-groups) they're in. When you update a partner's group, or delete groups, their partner links will be updated as well.
### Moving partners to a group
When a partner is moved to a new group, their links automatically update to match the new group’s defaults and UTM parameters.
**Why would you move partners?**
* To promote them from a starter group to a group with a higher reward tier
* To try out new rewards in a test group
* To tidy up your structure and general reorganization
### Deleting groups
If you delete a group, all partners in that group are moved to the default group. Their links are updated to match the default group’s settings.
**Why would you delete a group?**
* The campaign has ended
* You created a duplicate group by mistake
* A beta trial group is no longer needed
# Setting business details in partner payout invoices
Source: https://dub.co/help/article/partner-payout-invoice
Learn how to set custom business details (company name, address, tax ID) in your partner payout invoices.
Every time you [receive a payout](/help/article/receiving-payouts) on Dub, our platform automatically generates an invoice for accounting purposes.
With Dub, you can also set your business details (company name, address, tax ID) in your payout invoices for tax compliance.
First, go to your [payout settings page](https://partners.dub.co/settings/payouts) and click on the **Payout settings** button:
![partner invoice settings button]() This will open up the Payout settings modal, where you can set your business name, address, and tax ID:
This will open up the Payout settings modal, where you can set your business name, address, and tax ID:
![partner invoice settings]() Once the changes are saved, they are automatically reflected in your payout invoices:
Once the changes are saved, they are automatically reflected in your payout invoices:
![partner invoice example]() # Sending partner payouts on Dub
Source: https://dub.co/help/article/partner-payouts
Learn more about how you can send payouts to your affiliate partners globally with Dub.
This feature is only available on [Business plans and
above](https://dub.co/pricing/partners).
Dub Partners supports one-click (or fully automated) payouts to your partners around the world, [saving you upwards of 40+ hours a month](https://dub.co/customers/tella).
If you're running a partner program with hundreds of partners, you can avoid manually sending each payout or [having to worry about payout failures](https://dub.co/blog/dub-vs-rewardful#partner-payouts). Dub lets you pay partners in one click, with tax compliance built in.
## Supported payout countries
Here's the full list of countries we support:
## Tax compliance
Dub Partners automatically handles tax compliance for your US-based partners by collecting [W-9 forms](https://support.stripe.com/express/questions/what-is-a-w-9-form) and sending out [1099-NEC forms](https://support.stripe.com/questions/intro-to-1099-nec-tax-forms-for-platforms-and-marketplaces) to individuals or entities that received \$600 or more in payments for a given fiscal year.
For non-US partners, Dub collects [W-8 forms](https://support.stripe.com/express/questions/what-is-a-w-8-form) to confirm they are not a US resident for tax purposes.
## Payouts dashboard
To view your payouts, go to your **Partner Program** tab and click on the **Payouts** page.
# Sending partner payouts on Dub
Source: https://dub.co/help/article/partner-payouts
Learn more about how you can send payouts to your affiliate partners globally with Dub.
This feature is only available on [Business plans and
above](https://dub.co/pricing/partners).
Dub Partners supports one-click (or fully automated) payouts to your partners around the world, [saving you upwards of 40+ hours a month](https://dub.co/customers/tella).
If you're running a partner program with hundreds of partners, you can avoid manually sending each payout or [having to worry about payout failures](https://dub.co/blog/dub-vs-rewardful#partner-payouts). Dub lets you pay partners in one click, with tax compliance built in.
## Supported payout countries
Here's the full list of countries we support:
## Tax compliance
Dub Partners automatically handles tax compliance for your US-based partners by collecting [W-9 forms](https://support.stripe.com/express/questions/what-is-a-w-9-form) and sending out [1099-NEC forms](https://support.stripe.com/questions/intro-to-1099-nec-tax-forms-for-platforms-and-marketplaces) to individuals or entities that received \$600 or more in payments for a given fiscal year.
For non-US partners, Dub collects [W-8 forms](https://support.stripe.com/express/questions/what-is-a-w-8-form) to confirm they are not a US resident for tax purposes.
## Payouts dashboard
To view your payouts, go to your **Partner Program** tab and click on the **Payouts** page.
![Partner payouts tab]() At the top of the page, you'll see a summary of your pending and completed payouts:
At the top of the page, you'll see a summary of your pending and completed payouts:
![Payout summary header]() **Pending payouts**
This shows the total amount of commissions that are eligible for payment.
Hovering over the total will show you:
* **Eligible payouts** – due commissions for partners that have [configured their payout method](/help/article/receiving-payouts)).
* **Ineligible payouts** – due commissions for partners that have not [configured their payout methods yet](/help/article/receiving-payouts)).
Once you have at least one pending payout on Dub, you can click the **Confirm payouts** button to [review and confirm them](/help/article/partner-payouts#how-to-pay-your-partners).
**Total paid**
This shows the total amount of all commissions you've paid out to your partners.
Hovering over the total will show you:
* **Completed payouts** - Payouts that have been sent and confirmed
* **Processing payouts** - Payouts that are in progress (timing may vary based on the [selected payout method](/help/article/partner-payouts#payout-fees-and-timing))
Click **View invoices** to access past payout invoices.
In the payout table below, you can track and manage your payouts, confirm pending ones, and review past activity.
**Pending payouts**
This shows the total amount of commissions that are eligible for payment.
Hovering over the total will show you:
* **Eligible payouts** – due commissions for partners that have [configured their payout method](/help/article/receiving-payouts)).
* **Ineligible payouts** – due commissions for partners that have not [configured their payout methods yet](/help/article/receiving-payouts)).
Once you have at least one pending payout on Dub, you can click the **Confirm payouts** button to [review and confirm them](/help/article/partner-payouts#how-to-pay-your-partners).
**Total paid**
This shows the total amount of all commissions you've paid out to your partners.
Hovering over the total will show you:
* **Completed payouts** - Payouts that have been sent and confirmed
* **Processing payouts** - Payouts that are in progress (timing may vary based on the [selected payout method](/help/article/partner-payouts#payout-fees-and-timing))
Click **View invoices** to access past payout invoices.
In the payout table below, you can track and manage your payouts, confirm pending ones, and review past activity.
![Payouts table]() | Column | Description |
| ------- | --------------------------------------------------------------------------------------------------------------------------- |
| Period | The payout range, starting from the date of the partner’s first commission to the end of the month of their last commission |
| Partner | The partner receiving the payout |
| Status | The current payout [status](/help/article/partner-payouts#payout-statuses) |
| Paid | The date the payout was confirmed, and by whom |
| Amount | The total amount paid to the partner |
## Payout statuses
A payout can have one of the following statuses:
| Status | Description |
| ---------- | ------------------------------------------------------------------------------------------------------------------------------------------------------------------------------------------------------------------------------------------------------------------------------------------------------ |
| Pending | Payouts that have not been processed yet, which can either be currently due or remain in pending status (in cases where the partner has not [configured their payout method](/help/article/receiving-payouts), or the payout has not yet reached the [minimum payout amount](#minimum-payout-amount)). |
| Processing | Payouts that have been [confirmed](#how-to-pay-your-partners) – depending on your [payout method](#payout-fees-and-timing), this step can take up to 4 business days. |
| Sent | When the funds have been sent to the partner's connected bank account. |
| Completed | When the payout has been fully paid out to the partner. |
| Failed | This is an edge case that happens with PayPal payouts, where the partner's PayPal is not set up to receive payouts. No action is required from your end in these cases – the partner will need to sort out their PayPal account and retry the payout from their end. |
| Canceled | For payouts that have been canceled – usually when a partner is banned from the program. |
## Payout holding period
On Dub, you can also set a "payout holding period" to specify how long your commissions will be held in "pending" status before becoming eligible for payout.
This is useful for safeguarding against potential refunds, chargebacks, or fraudulent transactions.
If you're using our [Stripe integration](/docs/integrations/stripe), any
refunds that happen on Stripe will be automatically detected by Dub and the
[corresponding commission will also be marked as
refunded](/help/article/partner-commissions#commission-statuses).
To set a payout holding period for your program, go to your [individual groups](/help/article/partner-groups) and click on the **Settings** tab. Here you'll find the payout holding period settings in the "Addtional settings" group.
| Column | Description |
| ------- | --------------------------------------------------------------------------------------------------------------------------- |
| Period | The payout range, starting from the date of the partner’s first commission to the end of the month of their last commission |
| Partner | The partner receiving the payout |
| Status | The current payout [status](/help/article/partner-payouts#payout-statuses) |
| Paid | The date the payout was confirmed, and by whom |
| Amount | The total amount paid to the partner |
## Payout statuses
A payout can have one of the following statuses:
| Status | Description |
| ---------- | ------------------------------------------------------------------------------------------------------------------------------------------------------------------------------------------------------------------------------------------------------------------------------------------------------ |
| Pending | Payouts that have not been processed yet, which can either be currently due or remain in pending status (in cases where the partner has not [configured their payout method](/help/article/receiving-payouts), or the payout has not yet reached the [minimum payout amount](#minimum-payout-amount)). |
| Processing | Payouts that have been [confirmed](#how-to-pay-your-partners) – depending on your [payout method](#payout-fees-and-timing), this step can take up to 4 business days. |
| Sent | When the funds have been sent to the partner's connected bank account. |
| Completed | When the payout has been fully paid out to the partner. |
| Failed | This is an edge case that happens with PayPal payouts, where the partner's PayPal is not set up to receive payouts. No action is required from your end in these cases – the partner will need to sort out their PayPal account and retry the payout from their end. |
| Canceled | For payouts that have been canceled – usually when a partner is banned from the program. |
## Payout holding period
On Dub, you can also set a "payout holding period" to specify how long your commissions will be held in "pending" status before becoming eligible for payout.
This is useful for safeguarding against potential refunds, chargebacks, or fraudulent transactions.
If you're using our [Stripe integration](/docs/integrations/stripe), any
refunds that happen on Stripe will be automatically detected by Dub and the
[corresponding commission will also be marked as
refunded](/help/article/partner-commissions#commission-statuses).
To set a payout holding period for your program, go to your [individual groups](/help/article/partner-groups) and click on the **Settings** tab. Here you'll find the payout holding period settings in the "Addtional settings" group.
![Program payout settings]() Your options include the following:
* 0 days (default)
* 7 days
* 14 days
* 30 days
* 60 days
* 90 days
When you update the payout holding period, you can apply the new setting to every group at once. Just select the box labelled `Apply to all groups` before confirming. The change will take effect right away.
Your options include the following:
* 0 days (default)
* 7 days
* 14 days
* 30 days
* 60 days
* 90 days
When you update the payout holding period, you can apply the new setting to every group at once. Just select the box labelled `Apply to all groups` before confirming. The change will take effect right away.
![payout holding period]() ## Minimum payout amount
You can also set an optional "minimum payout amount" (e.g. \$100). When this is set, partners with earnings below the minimum payout amount won't be eligible for payout until they reach the specific threshold set.
Click the button in the top right to show the **Payout settings**. Unlike the payout holding period, this setting is program-wide.
## Minimum payout amount
You can also set an optional "minimum payout amount" (e.g. \$100). When this is set, partners with earnings below the minimum payout amount won't be eligible for payout until they reach the specific threshold set.
Click the button in the top right to show the **Payout settings**. Unlike the payout holding period, this setting is program-wide.
![Payout settings button]() Your options include the following:
* \$0 (default)
* \$10
* \$20
* \$50
* \$100
Your options include the following:
* \$0 (default)
* \$10
* \$20
* \$50
* \$100
![Payout settings]() ## How to pay your partners
When one or more of your partners have earned more than the minimum payout amount, click **Confirm payouts** from the [summary header](/help/article/partner-payouts#summary-header) to open the payout details.
* **Payout method:** Choose your payout method based on the accounts you’ve connected. Click the gear icon to manage [connected payment methods](https://app.dub.co/settings/billing).
* **Cutoff Period:** If set, only commissions earned on or before this date will be paid. Useful for reconciliation payouts for a specific fiscal period (e.g. last month, last quarter) without including newer commissions.
If everything looks right, click **Confirm payout** to trigger a new payout to your partners.
### Selecting payouts
When confirming payouts, it will include all pending payouts, but there are times you only want to payout certain partners.
To do this, select the `Pending` status payouts and click **Confirm selected** at the top of the table. This will allow to review andconfirm payouts for the selected partners only.
## How to pay your partners
When one or more of your partners have earned more than the minimum payout amount, click **Confirm payouts** from the [summary header](/help/article/partner-payouts#summary-header) to open the payout details.
* **Payout method:** Choose your payout method based on the accounts you’ve connected. Click the gear icon to manage [connected payment methods](https://app.dub.co/settings/billing).
* **Cutoff Period:** If set, only commissions earned on or before this date will be paid. Useful for reconciliation payouts for a specific fiscal period (e.g. last month, last quarter) without including newer commissions.
If everything looks right, click **Confirm payout** to trigger a new payout to your partners.
### Selecting payouts
When confirming payouts, it will include all pending payouts, but there are times you only want to payout certain partners.
To do this, select the `Pending` status payouts and click **Confirm selected** at the top of the table. This will allow to review andconfirm payouts for the selected partners only.
![Multi-selecting partners for payout]() ### Excluding payouts
If you need to exclude specific partners when confirming payouts, hover over the partner row in the payouts table and click **Exclude**. This excludes the partner from the current payout batch.
### Excluding payouts
If you need to exclude specific partners when confirming payouts, hover over the partner row in the payouts table and click **Exclude**. This excludes the partner from the current payout batch.
![Excluding payouts]() If you need to include the partner again, hover over their row and click **Include**.
## Payout fees and timing
On Dub, you can send payouts using various payment methods such as ACH, credit card, and more. Depending on your Dub plan and the payment method you choose, your payout fees and timing will vary:
| Payment method | Fee | Timing |
| --------------------------------------------------------------------- | ---------------------------------------------------------------------------------------------------- | --------------------- |
| [ACH](/help/article/how-to-set-up-bank-account) | [Business / Advanced](https://dub.co/pricing): 5%
If you need to include the partner again, hover over their row and click **Include**.
## Payout fees and timing
On Dub, you can send payouts using various payment methods such as ACH, credit card, and more. Depending on your Dub plan and the payment method you choose, your payout fees and timing will vary:
| Payment method | Fee | Timing |
| --------------------------------------------------------------------- | ---------------------------------------------------------------------------------------------------- | --------------------- |
| [ACH](/help/article/how-to-set-up-bank-account) | [Business / Advanced](https://dub.co/pricing): 5%
[Enterprise](https://dub.co/enterprise): 3% | Up to 4 business days |
| Credit card / [Link](https://link.com/)
Apple Pay / Google Pay | [Business / Advanced](https://dub.co/pricing): 8%
[Enterprise](https://dub.co/enterprise): 6% | Instant |
For larger payouts, we recommend using ACH as it is the most cost-effective option. Here's [how you can set up your bank account](/help/article/how-to-set-up-bank-account) for ACH payouts.
# Customizing your partner profile
Source: https://dub.co/help/article/partner-profile
Create a strong partner profile to build trust, credibility, and increase partnership opportunities on Dub.
Having a strong partner profile is key to getting accepted into partner programs. Follow this guide for help and tips to make your profile stand out.
## Where to find your partner profile
From your main navigation, click the **Partner Profile** icon. Here you can find the fields to add more details about yourself, your interests, and how you earn online.
![Partner profile location]() ## Profile Details
Your entire partner profile is viewable by all enrolled programs, and when you submit your application, make sure it looks great and stands out!
## Profile Details
Your entire partner profile is viewable by all enrolled programs, and when you submit your application, make sure it looks great and stands out!
![Profile details]() ### Basic information
The section is for your core details and information that's required to set up your Dub account.
#### Profile photo
Upload a clear, professional or on-brand image. Using a profile image or a recognized logo helps build trust.
It's recommended to upload a JPG or PNG that's at least 160px x 160px to fill the profile image.
#### Full name
Input your first and last name so that program owners can easily find you within their program. Some program owners might search for you via your name, so it makes it easier to find your profile quickly in their program.
#### Email
Your email address is used for all partner communications. So when you get paid out or you get accepted into other programs, this email will be used to receive those notifications.
#### Location
This helps if programs are geo-specific and consider that during the application process, or want to understand your audience reach.
#### Profile Type
During your initial account setup, you would've selected one of the following options:
* Individual
* Company
If you are listed as a company, you'll also need to provide your company name. This information is shown to the program owners.
### Basic information
The section is for your core details and information that's required to set up your Dub account.
#### Profile photo
Upload a clear, professional or on-brand image. Using a profile image or a recognized logo helps build trust.
It's recommended to upload a JPG or PNG that's at least 160px x 160px to fill the profile image.
#### Full name
Input your first and last name so that program owners can easily find you within their program. Some program owners might search for you via your name, so it makes it easier to find your profile quickly in their program.
#### Email
Your email address is used for all partner communications. So when you get paid out or you get accepted into other programs, this email will be used to receive those notifications.
#### Location
This helps if programs are geo-specific and consider that during the application process, or want to understand your audience reach.
#### Profile Type
During your initial account setup, you would've selected one of the following options:
* Individual
* Company
If you are listed as a company, you'll also need to provide your company name. This information is shown to the program owners.
![Partner type]() Updating your email, country, or profile type will reset your Stripe account,
which will require you to restart the [payout connection
process](/help/article/receiving-payouts).
Once you've received payouts on Dub, you won't be able to update your email,
country, or profile type. [Reach out to
support](https://dub.co/contact/support) if you still need to make any
updates.
### Identity verification
To verify your identity, you'll need to upload a valid government-issued picture ID. This helps programs ensure you're a real person and not a bot.
Updating your email, country, or profile type will reset your Stripe account,
which will require you to restart the [payout connection
process](/help/article/receiving-payouts).
Once you've received payouts on Dub, you won't be able to update your email,
country, or profile type. [Reach out to
support](https://dub.co/contact/support) if you still need to make any
updates.
### Identity verification
To verify your identity, you'll need to upload a valid government-issued picture ID. This helps programs ensure you're a real person and not a bot.
![Identity verification]() During verification, you'll also be asked to take a live selfie to match your picture ID. The process takes less than 30 seconds and helps build trust on the network.
### Website and socials
Add and verify your website and social accounts to prove ownership and build trust with programs.
This helps programs understand your presence and where you’re active, so they can evaluate your fit for their program.
During verification, you'll also be asked to take a live selfie to match your picture ID. The process takes less than 30 seconds and helps build trust on the network.
### Website and socials
Add and verify your website and social accounts to prove ownership and build trust with programs.
This helps programs understand your presence and where you’re active, so they can evaluate your fit for their program.
![Partner type]() You can verify one of each:
#### Website
To verify your website, you'll need to add a TXT record to your domain's DNS settings.
You can verify one of each:
#### Website
To verify your website, you'll need to add a TXT record to your domain's DNS settings.
![Website verification]() #### YouTube
To verify your YouTube profile, you'll need to add the unique code provided to your YouTube channel description temporarily. Once the code has been added to your profile, click **Verify**. After the verifications is complete, you can remove the temporary code from your description.
If you have an additional English channel description, add the code to that description to verify the channel.
#### YouTube
To verify your YouTube profile, you'll need to add the unique code provided to your YouTube channel description temporarily. Once the code has been added to your profile, click **Verify**. After the verifications is complete, you can remove the temporary code from your description.
If you have an additional English channel description, add the code to that description to verify the channel.
![YouTube verification]() #### Instagram
To verify your Instagram profile, you'll need to add the unique code provided to your Instagram bio temporarily. Once the code has been added to your profile, click **Verify**. After the verifications is complete, you can remove the temporary code from your profile.
#### Instagram
To verify your Instagram profile, you'll need to add the unique code provided to your Instagram bio temporarily. Once the code has been added to your profile, click **Verify**. After the verifications is complete, you can remove the temporary code from your profile.
![Instagram verification]() #### X (Twitter)
To verify your X profile, enter your username and click **Verify**. This will open the X app authorization for Dub. Click authorize to verify your account, and you'll redirect back to your profile.
#### TikTok
To verify your TikTok profile, enter your username and click **Verify**. This will open the TikTok app authorization for Dub. Click authorize to verify your account, and you'll redirect back to your profile.
#### LinkedIn
To verify your LinkedIn profile, you'll need to add the unique code provided to a new LinkedIn post. Once that post is live, paste the URL of that post into the verification field and click **Verify account**.
You can only verify personal LinkedIn profiles, not company pages.
#### X (Twitter)
To verify your X profile, enter your username and click **Verify**. This will open the X app authorization for Dub. Click authorize to verify your account, and you'll redirect back to your profile.
#### TikTok
To verify your TikTok profile, enter your username and click **Verify**. This will open the TikTok app authorization for Dub. Click authorize to verify your account, and you'll redirect back to your profile.
#### LinkedIn
To verify your LinkedIn profile, you'll need to add the unique code provided to a new LinkedIn post. Once that post is live, paste the URL of that post into the verification field and click **Verify account**.
You can only verify personal LinkedIn profiles, not company pages.
![LinkedIn verification]() ## About you and your expertise
Consider this section to be your pitch when program owners are deciding who to accept into their program. A well-written profile, with aligned interests, helps you stand out and get accepted into more programs.
## About you and your expertise
Consider this section to be your pitch when program owners are deciding who to accept into their program. A well-written profile, with aligned interests, helps you stand out and get accepted into more programs.
![About you and your expertise]() ### About you
Craft a strong bio to help you stand out alongside other applicants. Your bio should clearly explain who you are, what you do, and who your audience is. For example:
> “I’m a creator who has a large audience across YouTube, TikTok, and email newsletters. I focus on product reviews, how-to videos, and educational content. My audience is mostly US-based and interested in finance and tech, with over 2 million monthly views across my channels.”
This gives program owners a quick sense of your reach and focus area.
You can also share any results that prove your ability to drive impact. You might mention how many signups, clicks, or sales you’ve generated for past brands. You can also highlight which industries you’ve worked with and the types of content that tend to perform best for you. For example:
> “I’ve driven over 2,500 signups for SaaS products in the past three months. I’ve worked with brands in DTC, health & wellness, and crypto, and I’ve seen the strongest results from short-form UGC, newsletter placements, and search ads.”
Make your bio brief and to the point. Consider your reader and respect their
time.
### Industry interests
Add the industries you care about and post content about. This helps programs ensure your content is aligned with theirs and allows them to discover you as well. You can select up to eight industries.
### About you
Craft a strong bio to help you stand out alongside other applicants. Your bio should clearly explain who you are, what you do, and who your audience is. For example:
> “I’m a creator who has a large audience across YouTube, TikTok, and email newsletters. I focus on product reviews, how-to videos, and educational content. My audience is mostly US-based and interested in finance and tech, with over 2 million monthly views across my channels.”
This gives program owners a quick sense of your reach and focus area.
You can also share any results that prove your ability to drive impact. You might mention how many signups, clicks, or sales you’ve generated for past brands. You can also highlight which industries you’ve worked with and the types of content that tend to perform best for you. For example:
> “I’ve driven over 2,500 signups for SaaS products in the past three months. I’ve worked with brands in DTC, health & wellness, and crypto, and I’ve seen the strongest results from short-form UGC, newsletter placements, and search ads.”
Make your bio brief and to the point. Consider your reader and respect their
time.
### Industry interests
Add the industries you care about and post content about. This helps programs ensure your content is aligned with theirs and allows them to discover you as well. You can select up to eight industries.
![Industry interests]() Click **Edit interests** to add or remove industries.
Click **Edit interests** to add or remove industries.
![Industry interests]() ### Estimated monthly traffic
Provide your best estimate of your actual total monthly traffic, including your websites, newsletters, and social accounts. You can select from:
* 0 - 1,000
* 1,000 - 10,000
* 10,000 - 50,000
* 50,000 - 100,000
* 100,000+
## How you work
Share how you prefer to earn and promote products to help programs understand your style of partnership.
### Estimated monthly traffic
Provide your best estimate of your actual total monthly traffic, including your websites, newsletters, and social accounts. You can select from:
* 0 - 1,000
* 1,000 - 10,000
* 10,000 - 50,000
* 50,000 - 100,000
* 100,000+
## How you work
Share how you prefer to earn and promote products to help programs understand your style of partnership.
![How you work]() ### Preferred earning structure
Choose how you prefer to be rewarded, and select all that apply. Select from:
| Structure | Example |
| --------------------- | ------------------------------------------------- |
| Rev-share (% of sale) | Earn 20% of the sale value |
| Per sale (CPS) | Earn \$20 for each sale you refer |
| Per lead (CPL) | Earn \$5 for every qualified lead you send |
| Per click (CPC) | Earn \$0.50 for every click on your referral link |
| One-time payment | Earn \$50 one-time for each sale referred |
### Sales channels
Provide the channel where you intend to share your referral links, and select all that apply. Select from:
* Blogs
* Direct selling
* Social media
* Company referrals
* Coupons
* Newsletters
* Events
# Partner referrals
Source: https://dub.co/help/article/partner-referrals
Learn how to reward partners when they refer other partners to your program.
This feature is only available on [Advanced plans and
above](https://dub.co/pricing/partners).
With Dub's Partner Referral feature, you can reward existing partners for referring other **influencers, affiliates, and publishers** to join your partner program.
This is exceptionally useful when your best partners already know other high quality partners who would be a good fit for your program.
## How partner referrals work
Partner referrals lets you reward partners when another partner they refer to your program meets a certain condition.
When a prospective partner visits your program application page, Dub automatically tracks where they came from (e.g. via your footer link, Google search, etc.) and displays these stats in your [Application Analytics](/help/article/application-analytics) dashboard.
### Preferred earning structure
Choose how you prefer to be rewarded, and select all that apply. Select from:
| Structure | Example |
| --------------------- | ------------------------------------------------- |
| Rev-share (% of sale) | Earn 20% of the sale value |
| Per sale (CPS) | Earn \$20 for each sale you refer |
| Per lead (CPL) | Earn \$5 for every qualified lead you send |
| Per click (CPC) | Earn \$0.50 for every click on your referral link |
| One-time payment | Earn \$50 one-time for each sale referred |
### Sales channels
Provide the channel where you intend to share your referral links, and select all that apply. Select from:
* Blogs
* Direct selling
* Social media
* Company referrals
* Coupons
* Newsletters
* Events
# Partner referrals
Source: https://dub.co/help/article/partner-referrals
Learn how to reward partners when they refer other partners to your program.
This feature is only available on [Advanced plans and
above](https://dub.co/pricing/partners).
With Dub's Partner Referral feature, you can reward existing partners for referring other **influencers, affiliates, and publishers** to join your partner program.
This is exceptionally useful when your best partners already know other high quality partners who would be a good fit for your program.
## How partner referrals work
Partner referrals lets you reward partners when another partner they refer to your program meets a certain condition.
When a prospective partner visits your program application page, Dub automatically tracks where they came from (e.g. via your footer link, Google search, etc.) and displays these stats in your [Application Analytics](/help/article/application-analytics) dashboard.
![Application analytics funnel chart]() Similarly, if the referred partner visits your program application page through an existing partner's referral link, Dub tracks and attributes the application to the referring partner.
## Creating a partner referral reward
In your [group rewards](https://app.dub.co/program/groups/default/rewards) tab, you'll see the "Partner Referral" reward type. Click **Create** to set up a partner referral reward for that [partner group](https://dub.co/help/article/partner-groups).
Similarly, if the referred partner visits your program application page through an existing partner's referral link, Dub tracks and attributes the application to the referring partner.
## Creating a partner referral reward
In your [group rewards](https://app.dub.co/program/groups/default/rewards) tab, you'll see the "Partner Referral" reward type. Click **Create** to set up a partner referral reward for that [partner group](https://dub.co/help/article/partner-groups).
![Group reward view]() From the referral reward creation view, you can select the reward type between [percentage-based](#percentage-based-rewards) or [flat-fee](#flat-fee-rewards) – the differences between the two are explained below.
From the referral reward creation view, you can select the reward type between [percentage-based](#percentage-based-rewards) or [flat-fee](#flat-fee-rewards) – the differences between the two are explained below.
![Default reward view]() ## Flat fee rewards
For flat fee rewards, you can set a fixed one-time amount that the referring partner will earn when the referred partner meets a condition, such as:
| Condition | Description |
| ------------------ | ---------------------------------------------------------------------------------------------------------------- |
| **Is approved** | The referring partner earns a reward when their referred partner is approved to your program. |
| **Earns at least** | The referring partner earns a reward when their referred partner earns at least a certain amount in commissions. |
### When the referred partner is approved to your program
When you select the **is approved** option, the referring partner will earn a fixed reward amount when the referred partner is approved to your program.
## Flat fee rewards
For flat fee rewards, you can set a fixed one-time amount that the referring partner will earn when the referred partner meets a condition, such as:
| Condition | Description |
| ------------------ | ---------------------------------------------------------------------------------------------------------------- |
| **Is approved** | The referring partner earns a reward when their referred partner is approved to your program. |
| **Earns at least** | The referring partner earns a reward when their referred partner earns at least a certain amount in commissions. |
### When the referred partner is approved to your program
When you select the **is approved** option, the referring partner will earn a fixed reward amount when the referred partner is approved to your program.
![Referral reward is approved]() ### When the referred partner earns at least a certain amount in commissions
When you select the **earns at least** option, the referring partner will earn a fixed reward amount when the referred partner earns at least a certain amount in commissions.
For example, if you set the condition to **earns at least** \$100 and the reward amount to \$20, the referring partner will earn a \$20 referral reward when the referred partner earns at least \$100 in commissions.
### When the referred partner earns at least a certain amount in commissions
When you select the **earns at least** option, the referring partner will earn a fixed reward amount when the referred partner earns at least a certain amount in commissions.
For example, if you set the condition to **earns at least** \$100 and the reward amount to \$20, the referring partner will earn a \$20 referral reward when the referred partner earns at least \$100 in commissions.
![Referral reward earns at least]() ## Percentage-based rewards
For percentage-based rewards, you can select between two options:
| Condition | Description |
| --------------------------------- | ---------------------------------------------------------------------------------------- |
| **Original sale amount** | The referring partner earns a percentage of the referred partner's original sale amount. |
| **Referred partner's commission** | The referring partner earns a percentage of the referred partner's commission. |
### Original sale amount
When you select the **original sale amount** option, the referring partner will earn a percentage of the total sale amount that the referred partner generates.
For example, if a partner group has a 20% sale reward + 10% partner referral reward (based on the original sale amount), and the referred partner generates a **\$100 sale**:
* The referred partner will earn a **\$20 commission** (20% sale reward \* \$100 = \$20).
* The referring partner will earn a **\$10 referral** reward (10% partner referral reward \* \$100 = \$10).
## Percentage-based rewards
For percentage-based rewards, you can select between two options:
| Condition | Description |
| --------------------------------- | ---------------------------------------------------------------------------------------- |
| **Original sale amount** | The referring partner earns a percentage of the referred partner's original sale amount. |
| **Referred partner's commission** | The referring partner earns a percentage of the referred partner's commission. |
### Original sale amount
When you select the **original sale amount** option, the referring partner will earn a percentage of the total sale amount that the referred partner generates.
For example, if a partner group has a 20% sale reward + 10% partner referral reward (based on the original sale amount), and the referred partner generates a **\$100 sale**:
* The referred partner will earn a **\$20 commission** (20% sale reward \* \$100 = \$20).
* The referring partner will earn a **\$10 referral** reward (10% partner referral reward \* \$100 = \$10).
![Referral reward original sale amount]() ### Referred partner's commission
When you select the **referred partner's commission** option, the referring partner will earn a percentage of the commission that the referred partner earns.
For example, if a partner group has a 20% sale reward + a 10% partner referral reward (based on the referred partner's commission), and the referred partner generates a **\$100 sale**:
* The referred partner will earn a **\$20 commission** (20% sale reward \* \$100 = \$20).
* The referring partner will earn a **\$2 referral** reward (10% partner referral reward \* \$20 commission = \$2).
### Referred partner's commission
When you select the **referred partner's commission** option, the referring partner will earn a percentage of the commission that the referred partner earns.
For example, if a partner group has a 20% sale reward + a 10% partner referral reward (based on the referred partner's commission), and the referred partner generates a **\$100 sale**:
* The referred partner will earn a **\$20 commission** (20% sale reward \* \$100 = \$20).
* The referring partner will earn a **\$2 referral** reward (10% partner referral reward \* \$20 commission = \$2).
![Referral reward referred partner's commission]() ## Partner view
When your program has a partner referral reward set up, partners will see a **Partner referral rewards** section in the program overview page.
Here they'll find their reward details, and a link to your program's [application form](/help/article/program-application-form) with their referral tracking parameter automatically added.
## Partner view
When your program has a partner referral reward set up, partners will see a **Partner referral rewards** section in the program overview page.
Here they'll find their reward details, and a link to your program's [application form](/help/article/program-application-form) with their referral tracking parameter automatically added.
![Partner referrals view]() ## Manually attribute referring partner
If a partner is not attributed to a referring partner, you can assign them manually through the partner's profile page. To assign a referring partner, click **Attribute referring partner** from their profile details section.
## Manually attribute referring partner
If a partner is not attributed to a referring partner, you can assign them manually through the partner's profile page. To assign a referring partner, click **Attribute referring partner** from their profile details section.
![Attribute referring button]() From the **Attribute referring partner** modal, select the partner you want to attribute as the referring partner.
From the **Attribute referring partner** modal, select the partner you want to attribute as the referring partner.
![Attribute referring partner modal]() After selecting the referring partner, you can also select to create commissions for eligible past events. This will generate partner referral commissions for the referring partner based on the referred partner's historical commissions.
After selecting the referring partner, you can also select to create commissions for eligible past events. This will generate partner referral commissions for the referring partner based on the referred partner's historical commissions.
![Attribute referring partner modal with create commissions option]() Be sure to confirm your changes, as this action cannot be undone. Click **Attribute partner** to save your changes.
# Configuring partner rewards
Source: https://dub.co/help/article/partner-rewards
Learn how to create custom rewards (pay-per-click, pay-per-lead, pay-per-sale) tailored to each partner with Dub Partners.
This feature is only available on [Business plans and
above](https://dub.co/pricing/partners).
On [Dub Partners](/help/article/dub-partners), you can offer different incentives for your partners to incentivize them to create high-quality content to spread the word about your product:
| Reward type | Description |
| --------------------------- | -------------------------------------------------------------------------------------------------------------------------------------------------- |
| Click-based (pay-per-click) | Rewarding partners for driving clicks to your product – similar to how Google Ads' pay-per-click works. |
| Lead-based (pay-per-lead) | A more effective alternative to pay-per-click, where you reward partners for leads generated (e.g. demo requests, free trial signups, etc.) |
| Sale-based (pay-per-sale) | This is the most common reward type, where you reward partners for driving sales to your product either via a rev-share or fixed-price commission. |
During the program onboarding flow, you'll be asked to create a [default group reward](#program-wide-rewards) that will be automatically applied to all new partners who join your program.
This initial reward will be either a lead or a sale-based reward by default, but you can customize the reward terms accordingly.
## Default group rewards
After initial onboarding, you can create additional rewards for clicks, leads, or sales, depending on how you initially set up the group. These rewards will be made available to all partners who join your program.
Be sure to confirm your changes, as this action cannot be undone. Click **Attribute partner** to save your changes.
# Configuring partner rewards
Source: https://dub.co/help/article/partner-rewards
Learn how to create custom rewards (pay-per-click, pay-per-lead, pay-per-sale) tailored to each partner with Dub Partners.
This feature is only available on [Business plans and
above](https://dub.co/pricing/partners).
On [Dub Partners](/help/article/dub-partners), you can offer different incentives for your partners to incentivize them to create high-quality content to spread the word about your product:
| Reward type | Description |
| --------------------------- | -------------------------------------------------------------------------------------------------------------------------------------------------- |
| Click-based (pay-per-click) | Rewarding partners for driving clicks to your product – similar to how Google Ads' pay-per-click works. |
| Lead-based (pay-per-lead) | A more effective alternative to pay-per-click, where you reward partners for leads generated (e.g. demo requests, free trial signups, etc.) |
| Sale-based (pay-per-sale) | This is the most common reward type, where you reward partners for driving sales to your product either via a rev-share or fixed-price commission. |
During the program onboarding flow, you'll be asked to create a [default group reward](#program-wide-rewards) that will be automatically applied to all new partners who join your program.
This initial reward will be either a lead or a sale-based reward by default, but you can customize the reward terms accordingly.
## Default group rewards
After initial onboarding, you can create additional rewards for clicks, leads, or sales, depending on how you initially set up the group. These rewards will be made available to all partners who join your program.
![Default group rewards]() You can create additional rewards for [partner referrals](/help/article/partner-referrals), which allow partners to earn from bringing on new partners to your program.
## Creating a reward
Our reward builder lets you create simple and complex rewards quickly and easily. When the reward builder initially opens, you'll see the basics required to create a reward. Clicking on the different `Blue` and `Orange` input prompts allow you to change the structure of the reward.
You can create additional rewards for [partner referrals](/help/article/partner-referrals), which allow partners to earn from bringing on new partners to your program.
## Creating a reward
Our reward builder lets you create simple and complex rewards quickly and easily. When the reward builder initially opens, you'll see the basics required to create a reward. Clicking on the different `Blue` and `Orange` input prompts allow you to change the structure of the reward.
![Initial create sale reward state]() ### Configuring reward types
Depending on the type of reward you're creating, you can choose between a flat fee or a percentage-based commission:
| Reward Type | Model | Description | Example |
| ----------- | ---------- | ------------------------------------------------------ | ----------------- |
| **Click** | Flat | Partners receive a fixed fee for each click generated | \$2 per click |
| **Lead** | Flat | Partners receive a fixed fee for each qualified lead | \$50 per lead |
| **Sale** | Percentage | Partners receive a percentage of sales (revenue share) | 30% of sale value |
| **Sale** | Flat | Partners receive a fixed fee for each completed sale | \$50 per sale |
For sale rewards, you can further customize the recurring nature of the commission:
* One time
* For a set period (anywhere between 3 months to 3 years)
* For the customer's lifetime
### Adding reward conditions
Customizing reward conditions is only available on the [Advanced plan and
above](https://dub.co/pricing/partners).
On Dub, you can also set specific requirements for reward completion and can even reward a different type (flat rate or percentage), amount, and duration when they are met. They are available for sale and lead rewards only, and allow you to set conditions like the following:
* [Geo-specific rewards](#geo-specific) (e.g. higher rewards for sales and leads from a specific country)
* [Product-specific rewards](#product-spotlight) (e.g. higher rewards for sales of specific products)
* [Partner performance tiers](#partner-performance-tiers) (e.g. higher rewards for partners with more than 100 conversions)
* [Staggered reward durations](#staggered-reward-durations) (e.g. higher rewards for the first 12 months, then a lower reward for the rest of the customer's lifetime)
* [Sale amount modifiers](#sale-amount-modifiers) (e.g. higher rewards for sales over a specific amount)
Click **Add condition** to set these parameters.
### Configuring reward types
Depending on the type of reward you're creating, you can choose between a flat fee or a percentage-based commission:
| Reward Type | Model | Description | Example |
| ----------- | ---------- | ------------------------------------------------------ | ----------------- |
| **Click** | Flat | Partners receive a fixed fee for each click generated | \$2 per click |
| **Lead** | Flat | Partners receive a fixed fee for each qualified lead | \$50 per lead |
| **Sale** | Percentage | Partners receive a percentage of sales (revenue share) | 30% of sale value |
| **Sale** | Flat | Partners receive a fixed fee for each completed sale | \$50 per sale |
For sale rewards, you can further customize the recurring nature of the commission:
* One time
* For a set period (anywhere between 3 months to 3 years)
* For the customer's lifetime
### Adding reward conditions
Customizing reward conditions is only available on the [Advanced plan and
above](https://dub.co/pricing/partners).
On Dub, you can also set specific requirements for reward completion and can even reward a different type (flat rate or percentage), amount, and duration when they are met. They are available for sale and lead rewards only, and allow you to set conditions like the following:
* [Geo-specific rewards](#geo-specific) (e.g. higher rewards for sales and leads from a specific country)
* [Product-specific rewards](#product-spotlight) (e.g. higher rewards for sales of specific products)
* [Partner performance tiers](#partner-performance-tiers) (e.g. higher rewards for partners with more than 100 conversions)
* [Staggered reward durations](#staggered-reward-durations) (e.g. higher rewards for the first 12 months, then a lower reward for the rest of the customer's lifetime)
* [Sale amount modifiers](#sale-amount-modifiers) (e.g. higher rewards for sales over a specific amount)
Click **Add condition** to set these parameters.
![Initial create sale reward state]() Each condition can be based on either `Customer`, `Sale`, or `Partner`, allowing you to mix and match reward conditions to suit your program best.
Conditions let you use `AND` or `OR` statements to control how they work. Each condition is tied only to its own reward and doesn't affect others. As shown in the example below, your conditions can be as simple or as complex as you need.
Each condition can be based on either `Customer`, `Sale`, or `Partner`, allowing you to mix and match reward conditions to suit your program best.
Conditions let you use `AND` or `OR` statements to control how they work. Each condition is tied only to its own reward and doesn't affect others. As shown in the example below, your conditions can be as simple or as complex as you need.
![Initial create sale reward state]() ### Custom reward descriptions
By default, Dub automatically generates reward descriptions when rewards are created. In some cases, you may want to customize how those rewards are presented to partners, whether that’s to better match your brand voice or to make a complex reward easier to understand.
To edit a reward’s content, click the **pencil icon** next to the main reward builder. This opens the content editor, where you can update the primary reward description and optionally add more context using the reward tooltip.
### Custom reward descriptions
By default, Dub automatically generates reward descriptions when rewards are created. In some cases, you may want to customize how those rewards are presented to partners, whether that’s to better match your brand voice or to make a complex reward easier to understand.
To edit a reward’s content, click the **pencil icon** next to the main reward builder. This opens the content editor, where you can update the primary reward description and optionally add more context using the reward tooltip.
![Custom reward description]() Click `Reward description` to update the main description. You can enter up to 100 characters to clearly explain the reward at a glance.
Click `Reward description` to update the main description. You can enter up to 100 characters to clearly explain the reward at a glance.
![Editing the reward description]() Click `Reward tooltip` to edit the tooltip content. Tooltips support basic markdown and allow up to 2,000 characters, making them ideal for adding detailed explanations or terms.
Click `Reward tooltip` to edit the tooltip content. Tooltips support basic markdown and allow up to 2,000 characters, making them ideal for adding detailed explanations or terms.
![Editing the reward tooltip]() You can customize each field independently. For example, you might only update the tooltip for a more complex reward while leaving the main description unchanged. You can also do the opposite, updating the description without touching the tooltip. This flexibility lets you tailor each reward without extra work.
You can customize each field independently. For example, you might only update the tooltip for a more complex reward while leaving the main description unchanged. You can also do the opposite, updating the description without touching the tooltip. This flexibility lets you tailor each reward without extra work.
![Reward preview tooltip hover]() If you want to remove your custom content, click the **X** icon next to the custom description. The reward will revert to Dub’s default description.
### Reward preview
During the creation of your rewards, the reward preview will populate with the settings you've provided. This preview allows you to see exactly what your partner will see on your [program details](/help/article/program-marketplace#program-details) and within [their dashboard](/help/article/navigating-partner-program#overview).
If you want to remove your custom content, click the **X** icon next to the custom description. The reward will revert to Dub’s default description.
### Reward preview
During the creation of your rewards, the reward preview will populate with the settings you've provided. This preview allows you to see exactly what your partner will see on your [program details](/help/article/program-marketplace#program-details) and within [their dashboard](/help/article/navigating-partner-program#overview).
![Reward preview]() ### Reward quality
When you're creating or editing a reward, we'll provide you with a reward quality score based on how attractive and compelling your reward is for potential partners. This score is designed to help you optimize your rewards for maximum partner engagement.
### Reward quality
When you're creating or editing a reward, we'll provide you with a reward quality score based on how attractive and compelling your reward is for potential partners. This score is designed to help you optimize your rewards for maximum partner engagement.
![Reward quality score]() | Quality Score | Reason | Details |
| ------------- | --------------------------------------- | ----------------------------------------------------------------------------------------------------- |
| Low | **May struggle to attract partners** | The reward set is below typical ranges, or there is limited earning potential. |
| Limited | **May struggle to attract partners** | This is a one-time reward, and there's no long-term earning potential. |
| Good | **Solid reward with room to grow** | The reward meets minimum partner expectations, and there's opportunity to increase earning potential. |
| Strong | **High earning potential for partners** | The reward level is competitive, and the partner continues to earn after the first sale. |
Hover over the quality score to see which specific reward factors are contributing to the score.
| Quality Score | Reason | Details |
| ------------- | --------------------------------------- | ----------------------------------------------------------------------------------------------------- |
| Low | **May struggle to attract partners** | The reward set is below typical ranges, or there is limited earning potential. |
| Limited | **May struggle to attract partners** | This is a one-time reward, and there's no long-term earning potential. |
| Good | **Solid reward with room to grow** | The reward meets minimum partner expectations, and there's opportunity to increase earning potential. |
| Strong | **High earning potential for partners** | The reward level is competitive, and the partner continues to earn after the first sale. |
Hover over the quality score to see which specific reward factors are contributing to the score.
![Reward quality score example]() ## Reward examples
Here are a few reward examples with their conditions to give you some starting ideas.
Customizing reward conditions is only available on the [Advanced plan and
above](https://dub.co/pricing/partners).
### Geo-specific
Tailor your reward amount by customer country. In this example, we're rewarding partners with a higher percentage for conversions from Canada and the United States:
## Reward examples
Here are a few reward examples with their conditions to give you some starting ideas.
Customizing reward conditions is only available on the [Advanced plan and
above](https://dub.co/pricing/partners).
### Geo-specific
Tailor your reward amount by customer country. In this example, we're rewarding partners with a higher percentage for conversions from Canada and the United States:
![Global Boost condition example]() | Condition | Reward | Description |
| ----------------------------------------------------------- | ----------------------------------------- | ------------------------------------------- |
| If `Customer` `Country` `is one of` `Canada, United States` | Then pay a `Percentage` of `40%` per sale | Higher reward for US and Canadian customers |
| If `Customer` `Country` `is not` `United States` | Then pay a `Percentage` of `10%` per sale | Lower reward for non-US customers |
### Staggered reward durations
Tailor your reward amount by the customer's subscription duration, subscription start date, or signup date.
In this example, we're offering a 25% reward for the first 12 months and a 10% reward for all other sales:
| Condition | Reward | Description |
| ----------------------------------------------------------- | ----------------------------------------- | ------------------------------------------- |
| If `Customer` `Country` `is one of` `Canada, United States` | Then pay a `Percentage` of `40%` per sale | Higher reward for US and Canadian customers |
| If `Customer` `Country` `is not` `United States` | Then pay a `Percentage` of `10%` per sale | Lower reward for non-US customers |
### Staggered reward durations
Tailor your reward amount by the customer's subscription duration, subscription start date, or signup date.
In this example, we're offering a 25% reward for the first 12 months and a 10% reward for all other sales:
![Staggered rewards example]() There are 3 different conditions for staggered reward durations:
| Condition type | Description | Example |
| -------------------------------------- | ------------------------------------------------ | ------------------------------------------------------------------------ |
| **Customer's subscription duration** | How long the customer has been subscribed for | 25% for the first 12 months, 10% for the rest of the customer's lifetime |
| **Customer's subscription start date** | The date the customer started their subscription | 25% if subscribed before Jan 1, 2026, else 10% |
| **Customer's signup date** | The date the customer signed up for your product | 25% if signed up before Jan 1, 2026, else 10% |
### Partner performance tiers
Tailor your reward amount by partner performance. In this example, we offer a 50% base reward and increase it to 60% based on how many conversions the partner has:
There are 3 different conditions for staggered reward durations:
| Condition type | Description | Example |
| -------------------------------------- | ------------------------------------------------ | ------------------------------------------------------------------------ |
| **Customer's subscription duration** | How long the customer has been subscribed for | 25% for the first 12 months, 10% for the rest of the customer's lifetime |
| **Customer's subscription start date** | The date the customer started their subscription | 25% if subscribed before Jan 1, 2026, else 10% |
| **Customer's signup date** | The date the customer signed up for your product | 25% if signed up before Jan 1, 2026, else 10% |
### Partner performance tiers
Tailor your reward amount by partner performance. In this example, we offer a 50% base reward and increase it to 60% based on how many conversions the partner has:
![The Climb condition example]() | Condition | Reward | Description |
| ----------------------------------------------------------------------- | ----------------------------------------- | ------------------------------------------------------------------------ |
| If `Partner` `Total conversions` `is greater than or equal to` `200` | Then pay a `Percentage` of `60%` per sale | Higher reward for partners with more than 200 conversions |
| If `Partner` `Total revenue` `is greater than or equal to` `$10,000` | Then pay a `Percentage` of `60%` per sale | Higher reward for partners with more than \$10K in referral revenue |
| If `Partner` `Total commissions` `is greater than or equal to` `$1,000` | Then pay a `Percentage` of `60%` per sale | Higher reward for partners who have earned more than \$1K in commissions |
Want to move partners to a different partner group based on their performance
instead? [Learn more about group move
rules](/help/article/partner-groups#group-move-rules).
### Product spotlight
Tailor your reward amount by product. In this example, we're rewarding more when the sale is for the Gold Plan:
| Condition | Reward | Description |
| ----------------------------------------------------------------------- | ----------------------------------------- | ------------------------------------------------------------------------ |
| If `Partner` `Total conversions` `is greater than or equal to` `200` | Then pay a `Percentage` of `60%` per sale | Higher reward for partners with more than 200 conversions |
| If `Partner` `Total revenue` `is greater than or equal to` `$10,000` | Then pay a `Percentage` of `60%` per sale | Higher reward for partners with more than \$10K in referral revenue |
| If `Partner` `Total commissions` `is greater than or equal to` `$1,000` | Then pay a `Percentage` of `60%` per sale | Higher reward for partners who have earned more than \$1K in commissions |
Want to move partners to a different partner group based on their performance
instead? [Learn more about group move
rules](/help/article/partner-groups#group-move-rules).
### Product spotlight
Tailor your reward amount by product. In this example, we're rewarding more when the sale is for the Gold Plan:
![Product Spotlight condition example]() | Condition | Reward | Description |
| ------------------------------------------ | ----------------------------------------- | ------------------------------------- |
| If `Sale` `Product ID` `is` `prod_xxx` | Then pay a `Percentage` of `40%` per sale | Higher reward for `prod_xxx` sales |
| If `Sale` `Product ID` `is not` `prod_xxx` | Then pay a `Percentage` of `10%` per sale | Lower reward for non-`prod_xxx` sales |
You can also set what the partner sees as the product name by adding a `Shown
as` field to the reward.
For example, if you want to show the product as "Gold Plan" instead of the
actual product ID, you can set the `Shown as` to `Gold Plan`.
Where `Your product ID` is listed, you'll enter your product ID (the
screenshot uses an example product ID)
If you're manually tracking a sale event via our `/track/sale` endpoint, you
can pass along the product ID via the [metadata
prop](/docs/api-reference/track/sale#body-metadata-one-of-0)
(e.g. `metadata.productId = "prod_xxx"`).
If you're using our [Stripe
integration](/docs/integrations/stripe), the product ID will be the Stripe
product ID that the subscription is for (starts with `prod_xxx`). If a Stripe invoice contains multiple line
items (e.g. a base subscription plus an add-on), Dub
calculate the commission for each line item using the matching reward
rate. [See full example here](/docs/integrations/stripe#multiple-line-items-per-invoice).
### Sale amount modifiers
For creating tiered rewards based on the sale amount. In this example, we're giving our partners a higher reward if the sale amount is over a specific dollar amount:
| Condition | Reward | Description |
| ------------------------------------------ | ----------------------------------------- | ------------------------------------- |
| If `Sale` `Product ID` `is` `prod_xxx` | Then pay a `Percentage` of `40%` per sale | Higher reward for `prod_xxx` sales |
| If `Sale` `Product ID` `is not` `prod_xxx` | Then pay a `Percentage` of `10%` per sale | Lower reward for non-`prod_xxx` sales |
You can also set what the partner sees as the product name by adding a `Shown
as` field to the reward.
For example, if you want to show the product as "Gold Plan" instead of the
actual product ID, you can set the `Shown as` to `Gold Plan`.
Where `Your product ID` is listed, you'll enter your product ID (the
screenshot uses an example product ID)
If you're manually tracking a sale event via our `/track/sale` endpoint, you
can pass along the product ID via the [metadata
prop](/docs/api-reference/track/sale#body-metadata-one-of-0)
(e.g. `metadata.productId = "prod_xxx"`).
If you're using our [Stripe
integration](/docs/integrations/stripe), the product ID will be the Stripe
product ID that the subscription is for (starts with `prod_xxx`). If a Stripe invoice contains multiple line
items (e.g. a base subscription plus an add-on), Dub
calculate the commission for each line item using the matching reward
rate. [See full example here](/docs/integrations/stripe#multiple-line-items-per-invoice).
### Sale amount modifiers
For creating tiered rewards based on the sale amount. In this example, we're giving our partners a higher reward if the sale amount is over a specific dollar amount:
![The Climb condition example]() | Condition | Reward | Description |
| ------------------------------------------------------- | ----------------------------------------- | ---------------------------------- |
| If `Sale` `Amount` `is greater than or equal to` `$100` | Then pay a `Percentage` of `60%` per sale | Higher reward for sales over \$100 |
| If `Sale` `Amount` `is less than or equal to` `$100` | Then pay a `Percentage` of `60%` per sale | Lower reward for sales under \$100 |
### New vs. recurring sales
Tailor your reward amount based on whether the sale is the customer's first sale or a recurring sale. During reward creation, select `Sale` as the condition type and then choose `Type` as the condition field. This will allow you to differentiate between new and recurring sales.
| Condition | Reward | Description |
| ------------------------------------------------------- | ----------------------------------------- | ---------------------------------- |
| If `Sale` `Amount` `is greater than or equal to` `$100` | Then pay a `Percentage` of `60%` per sale | Higher reward for sales over \$100 |
| If `Sale` `Amount` `is less than or equal to` `$100` | Then pay a `Percentage` of `60%` per sale | Lower reward for sales under \$100 |
### New vs. recurring sales
Tailor your reward amount based on whether the sale is the customer's first sale or a recurring sale. During reward creation, select `Sale` as the condition type and then choose `Type` as the condition field. This will allow you to differentiate between new and recurring sales.
![First-sale bonus condition example]() In this example, we're rewarding partners with a 80% reward for the first sale while keeping the standard recurring commission for all other sales:
In this example, we're rewarding partners with a 80% reward for the first sale while keeping the standard recurring commission for all other sales:
![First-sale bonus selected condition example]() This is especially useful for subscription-based products, where you may want to offer a higher reward for the first sale to incentivize partners to acquire new customers, while offering a lower reward for recurring sales, while combining with other conditions.
| Condition | Reward | Description |
| --------------------------------- | ----------------------------------------- | ----------------------------------- |
| If `Sale` `Type` `is` `new` | Then pay a `Percentage` of `80%` per sale | First-sale bonus for new customers |
| If `Sale` `Type` `is` `recurring` | Then pay a `Percentage` of `30%` per sale | Standard reward for recurring sales |
## Updating a partner group's reward configuration
You can update a [partner group's](/help/article/partner-groups) reward configuration at any time. When this happens, historical commissions won't be updated.
However, the reward configuration for a partner-customer pair will be updated. E.g., if a partner used to be on a one-time reward and was switched to recurring rewards, all subsequent subscription renewals from their **previous referrals** will be eligible for commission again.
To avoid this, instead of editing a given partner group's reward configuration directly, create separate partner groups for one-time vs recurring rewards. This way, when you move partners from one group to the other, the reward configuration for the partner's previous referrals will be preserved.
### Group reward update logs
For transparency and auditability, we also keep a history of all reward updates for a given group:
This is especially useful for subscription-based products, where you may want to offer a higher reward for the first sale to incentivize partners to acquire new customers, while offering a lower reward for recurring sales, while combining with other conditions.
| Condition | Reward | Description |
| --------------------------------- | ----------------------------------------- | ----------------------------------- |
| If `Sale` `Type` `is` `new` | Then pay a `Percentage` of `80%` per sale | First-sale bonus for new customers |
| If `Sale` `Type` `is` `recurring` | Then pay a `Percentage` of `30%` per sale | Standard reward for recurring sales |
## Updating a partner group's reward configuration
You can update a [partner group's](/help/article/partner-groups) reward configuration at any time. When this happens, historical commissions won't be updated.
However, the reward configuration for a partner-customer pair will be updated. E.g., if a partner used to be on a one-time reward and was switched to recurring rewards, all subsequent subscription renewals from their **previous referrals** will be eligible for commission again.
To avoid this, instead of editing a given partner group's reward configuration directly, create separate partner groups for one-time vs recurring rewards. This way, when you move partners from one group to the other, the reward configuration for the partner's previous referrals will be preserved.
### Group reward update logs
For transparency and auditability, we also keep a history of all reward updates for a given group:
![Partner profile page group history.]() This helps you track changes over time and understand the impact of your reward configurations on the [generated partner commissions](/help/article/partner-commissions).
# Partner tags
Source: https://dub.co/help/article/partner-tags
Learn how to organize, filter, and manage partners with tags in your partner program.
This feature is only available on [Business plans and
above](https://dub.co/pricing/partners).
Partner tags help you organize partners with flexible labels. You can use tags to track partner types, campaigns, outreach status, lifecycle stage, or any other internal classification that helps your team manage the program.
Unlike [partner groups](/help/article/partner-groups), tags do not control rewards, discounts, or referral link settings. Use groups for program configuration, and use tags for flexible organization and filtering.
Common examples include:
* **Source**: `YouTube`, `Newsletter`, `Agency`, or `Customer referral`
* **Status**: `Needs follow-up`, `Contract sent`, or `High intent`
* **Campaign**: `Q2 launch`, `Black Friday`, or `Webinar cohort`
* **Relationship**: `VIP`, `Strategic`, or `Community`
## Adding tags to partners
This can be done from either the partner table or the partner details view.
### Partner table
With the [tag column](/help/article/managing-program-partners#columns) enabled, click the **tag icon button** to add tags to a partner. This will open the modal view for all your created tags.
This helps you track changes over time and understand the impact of your reward configurations on the [generated partner commissions](/help/article/partner-commissions).
# Partner tags
Source: https://dub.co/help/article/partner-tags
Learn how to organize, filter, and manage partners with tags in your partner program.
This feature is only available on [Business plans and
above](https://dub.co/pricing/partners).
Partner tags help you organize partners with flexible labels. You can use tags to track partner types, campaigns, outreach status, lifecycle stage, or any other internal classification that helps your team manage the program.
Unlike [partner groups](/help/article/partner-groups), tags do not control rewards, discounts, or referral link settings. Use groups for program configuration, and use tags for flexible organization and filtering.
Common examples include:
* **Source**: `YouTube`, `Newsletter`, `Agency`, or `Customer referral`
* **Status**: `Needs follow-up`, `Contract sent`, or `High intent`
* **Campaign**: `Q2 launch`, `Black Friday`, or `Webinar cohort`
* **Relationship**: `VIP`, `Strategic`, or `Community`
## Adding tags to partners
This can be done from either the partner table or the partner details view.
### Partner table
With the [tag column](/help/article/managing-program-partners#columns) enabled, click the **tag icon button** to add tags to a partner. This will open the modal view for all your created tags.
![Adding partner tags from the partner table]() You can also bulk edit partner tags using the multi-select checkboxes on each partner row, then click **Update tags** at the top of the table.
You can also bulk edit partner tags using the multi-select checkboxes on each partner row, then click **Update tags** at the top of the table.
![Bulk editing partner tags in the partner table]() ### Partner details
In the partner details view, manage tags from the partner's profile side panel by clicking the **Add tag** or the **Manage** button.
### Partner details
In the partner details view, manage tags from the partner's profile side panel by clicking the **Add tag** or the **Manage** button.
![Adding partner tags from the partner details view]() ### Tags modal
Both the partner table and partner details view will open the same tags modal, where you can manage all your tags in one place. Any changes you make here will update across the entire program.
From here, you can select any number of existing tags to assign to your partners. Learn more about [managing tags](/help/article/partner-tags#managing-tags).
### Tags modal
Both the partner table and partner details view will open the same tags modal, where you can manage all your tags in one place. Any changes you make here will update across the entire program.
From here, you can select any number of existing tags to assign to your partners. Learn more about [managing tags](/help/article/partner-tags#managing-tags).
![Selecting partner tags from the tags modal]() ## Managing tags
With the tags modal open, you'll be able to see all the tags that you've created and the number of partners assigned. Here you can create new tags, search, update, and delete existing tags.
### Adding new tags
To add a new tag, click into the text field and type the tag you'd like to create. If one already exists, you'll see the match below. If one doesn't exist, click **Create new tag** to create one.
## Managing tags
With the tags modal open, you'll be able to see all the tags that you've created and the number of partners assigned. Here you can create new tags, search, update, and delete existing tags.
### Adding new tags
To add a new tag, click into the text field and type the tag you'd like to create. If one already exists, you'll see the match below. If one doesn't exist, click **Create new tag** to create one.
![Creating partner tags from the tags modal]() This will create the tag and assign it to the partner you're currently editing. You can create as many tags as you'd like and assign multiple tags to a single partner.
### Updating tags
To update an existing tag, click the **Edit** option from the tag dropdown. This will open a text field where you can update the name of the tag. This will update the tag name for all partners assigned.
This will create the tag and assign it to the partner you're currently editing. You can create as many tags as you'd like and assign multiple tags to a single partner.
### Updating tags
To update an existing tag, click the **Edit** option from the tag dropdown. This will open a text field where you can update the name of the tag. This will update the tag name for all partners assigned.
![Editing partner tags from the tags modal]() ### Searching tags
Using the text field, search for the tag you're looking for. If there are any matches, you'll see them below. This is especially helpful for programs with a large number of tags.
### Searching tags
Using the text field, search for the tag you're looking for. If there are any matches, you'll see them below. This is especially helpful for programs with a large number of tags.
![Searching partner tags from the tags modal]() ### Deleting tags
To delete an existing tag, click the **Delete** option from the tag dropdown. This will remove the tag from all partners assigned, so be sure as this isn't reversible.
### Deleting tags
To delete an existing tag, click the **Delete** option from the tag dropdown. This will remove the tag from all partners assigned, so be sure as this isn't reversible.
![Deleting partner tags from the tags modal]() ## Filtering partners by tags
Partner tags can be used alongside other partner filters such as group, status, and location. This makes it easier to segment your partner table for follow-up, reporting, and other workflows.
## Filtering partners by tags
Partner tags can be used alongside other partner filters such as group, status, and location. This makes it easier to segment your partner table for follow-up, reporting, and other workflows.
![Filtering partners by tags]() For example, you can filter for partners tagged `VIP` who are also in a specific [partner group](/help/article/partner-groups), or partners tagged `Needs follow-up` after an outreach campaign.
You can also use the same filtering when viewing your [program analytics](/help/article/program-analytics#filtering-your-data) and [commission analytics](/help/article/commission-analytics#filtering-commission-analytics).
For example, you can filter for partners tagged `VIP` who are also in a specific [partner group](/help/article/partner-groups), or partners tagged `Needs follow-up` after an outreach campaign.
You can also use the same filtering when viewing your [program analytics](/help/article/program-analytics#filtering-your-data) and [commission analytics](/help/article/commission-analytics#filtering-commission-analytics).
![Filtering partners by tags in analytics]() ## Partner tags vs Partner groups
| Feature | Tags | Groups |
| ------------------------------- | -------------------------------- | ------------------------------------------------------ |
| Primary use | Flexible internal organization | Program configuration and segmentation |
| Relationship to partners | Many-to-many | One-to-many |
| Controls rewards | No | Yes |
| Controls discounts | No | Yes |
| Controls referral link settings | No | Yes |
| Best for | Labels, workflows, and filtering | Rewards, discounts, applications, and partner movement |
# Frequently Asked Questions
Source: https://dub.co/help/article/partners-faq
Your quick guide to the most common partner questions.
We’ve compiled the most common partner questions in one place, so you can quickly find answers and get back to growing your earnings.
## Account & Settings
### How can I change my country?
You can change your country under your [partner profile settings](https://partners.dub.co/profile).
For compliance reasons, you cannot change your country once you've [received payouts on Dub](/help/article/receiving-payouts). If you still need to change your country, please [reach out to support](https://dub.co/contact/support).
### How can I change my account type – Business / Individual?
You can change your country under your [partner profile settings](https://partners.dub.co/profile).
For compliance reasons, you cannot change your account type once you've [received payouts on Dub](/help/article/receiving-payouts). If you still need to change your country, please [reach out to support](https://dub.co/contact/support).
### How can I update my affiliate link?
You can update your affiliate link under the Links tab of your program.
### How can I update my name, email, or phone number while setting up Stripe Express?
You can set up your account as-is and skip any verification steps. After you have access to your Stripe account, you can update your personal information under the Profile tab. If you are having any issues, please reach out to the Stripe Express team: [https://support.stripe.com/express/](https://support.stripe.com/express/)
## Payouts & Earnings
### Why is my payout still pending?
Your payout is still [pending](/help/article/commissions-payouts#payout-statuses) because the program hasn't paid its affiliates yet. Please reach out directly to your program to learn more about their payout schedule.
Some programs might also require a minimum payout amount before your payouts can be processed (e.g. Framer requires a [\$200 minimum balance](https://www.framer.com/help/articles/getting-started-with-dub/#getting-paid)).
### Why is my commission still pending?
Your commission is pending because there is a [30-day holding period](/help/article/commissions-payouts#what-does-holding-period-mean). After 30 days, your commission will be confirmed and eligible for payout.
### I referred a user but haven't received a commission, what should I do?
If you are certain that you followed the instructions to receive a commission, please wait 48 business hours for the commission to appear. If it is still missing, please reach out to your program and they will investigate.
### My payout is stuck in a "processed" status, what should I do?
If your payout is marked as "processed", it hasn’t been deposited into your connected bank account yet because it is below the `$10` minimum for automatic payouts.
If you want, you can still [withdraw it for a `$0.50` fee](/help/article/receiving-payouts#what-is-the-minimum-withdrawal-amount-and-how-does-it-work). Payouts above \$10 are automatically deposited to your bank account at no additional cost.
### Do you support payouts via Payoneer, PayPal, or crypto?
Unfortunately, those payout methods are not supported at this time. We will let you know as soon as anything changes.
## Stripe Express
### Stripe is invite-only in my country, how do I get an invite?
You don't need an invite. Dub uses [Stripe Express](https://support.stripe.com/express) to process payouts, which is different from the standard Stripe account. If your country is supported by Stripe Express, you will be able to see "Connect bank account" under the [Payouts](https://partners.dub.co/settings/payouts) tab.
Here's the full list of countries that we support sending payouts to:
### My country is not supported by Stripe Express, what should I do?
If your country is still not supported by Stripe Express, you can create a legal entity in any of the supported countries above and use that to receive payouts instead. For example, you can create a US LLC (e.g., with [Stripe Atlas](http://stripe.com/atlas)), which would let you receive payouts in USD.
### Can I connect a savings account instead of a checking account?
While it is possible to connect your savings account instead of a checking account, we highly recommend against it for two main reasons:
1. Some banks do not allow third-party deposits into savings accounts, which may cause your payout to fail;
2. Payouts sent to savings accounts can take significantly longer to process (up to 30 business days, depending on the bank), resulting in payout delays.
### My payout is marked as "Paid" on Stripe but it was not deposited, what should I do?
Some banks process payouts longer than usual. Stripe will show the expected arrival date – for example, *"Can’t find your payout? Banks can take up to 5 business days to process payouts. Wait until **\[DATE]** and then contact your bank."*
If you still cannot find your payout after the expected arrival date, please contact your bank and ask to locate the payout (you can find the trace ID in your email). Some banks might require additional information from you to release the funds. If your bank cannot find the payout, please reach out to Dub's support and send us:
* a letter from your bank, confirming that the payout was not received;
* your bank statement.
We will reach out to Stripe on your behalf and investigate this further. Once the payout is marked as "Failed" on Stripe, it will be re-sent again to your bank account. Please update your bank account in advance to ensure you can receive your payouts.
**Common reasons why payouts fail:**
* your local bank account is in USD but your local currency is not USD;
* your bank account number is incorrect;
* your bank account name does not match your name on Stripe.
### Can I connect my company's Stripe account to Dub?
No, you need to create a new account on Stripe Express to receive payouts. Stripe Express and Stripe Standard are different account types.
# How to create password-protected links on Dub?
Source: https://dub.co/help/article/password-protected-links
Learn how to protect your short links with a password on Dub to prevent unauthorized access.
This feature is only available on [Pro plans and
above](https://dub.co/pricing).
Dub's password protection feature is useful when you want to share a link with a group of people and you want to make sure that only the intended recipients can access the link.
In this guide, we will learn how to create password-protected links on Dub.
First, create a link by clicking on the **Create Link** button on the top right corner of the Dub dashboard.
Then, enter the destination URL and optionally, a custom short link for it.
## Partner tags vs Partner groups
| Feature | Tags | Groups |
| ------------------------------- | -------------------------------- | ------------------------------------------------------ |
| Primary use | Flexible internal organization | Program configuration and segmentation |
| Relationship to partners | Many-to-many | One-to-many |
| Controls rewards | No | Yes |
| Controls discounts | No | Yes |
| Controls referral link settings | No | Yes |
| Best for | Labels, workflows, and filtering | Rewards, discounts, applications, and partner movement |
# Frequently Asked Questions
Source: https://dub.co/help/article/partners-faq
Your quick guide to the most common partner questions.
We’ve compiled the most common partner questions in one place, so you can quickly find answers and get back to growing your earnings.
## Account & Settings
### How can I change my country?
You can change your country under your [partner profile settings](https://partners.dub.co/profile).
For compliance reasons, you cannot change your country once you've [received payouts on Dub](/help/article/receiving-payouts). If you still need to change your country, please [reach out to support](https://dub.co/contact/support).
### How can I change my account type – Business / Individual?
You can change your country under your [partner profile settings](https://partners.dub.co/profile).
For compliance reasons, you cannot change your account type once you've [received payouts on Dub](/help/article/receiving-payouts). If you still need to change your country, please [reach out to support](https://dub.co/contact/support).
### How can I update my affiliate link?
You can update your affiliate link under the Links tab of your program.
### How can I update my name, email, or phone number while setting up Stripe Express?
You can set up your account as-is and skip any verification steps. After you have access to your Stripe account, you can update your personal information under the Profile tab. If you are having any issues, please reach out to the Stripe Express team: [https://support.stripe.com/express/](https://support.stripe.com/express/)
## Payouts & Earnings
### Why is my payout still pending?
Your payout is still [pending](/help/article/commissions-payouts#payout-statuses) because the program hasn't paid its affiliates yet. Please reach out directly to your program to learn more about their payout schedule.
Some programs might also require a minimum payout amount before your payouts can be processed (e.g. Framer requires a [\$200 minimum balance](https://www.framer.com/help/articles/getting-started-with-dub/#getting-paid)).
### Why is my commission still pending?
Your commission is pending because there is a [30-day holding period](/help/article/commissions-payouts#what-does-holding-period-mean). After 30 days, your commission will be confirmed and eligible for payout.
### I referred a user but haven't received a commission, what should I do?
If you are certain that you followed the instructions to receive a commission, please wait 48 business hours for the commission to appear. If it is still missing, please reach out to your program and they will investigate.
### My payout is stuck in a "processed" status, what should I do?
If your payout is marked as "processed", it hasn’t been deposited into your connected bank account yet because it is below the `$10` minimum for automatic payouts.
If you want, you can still [withdraw it for a `$0.50` fee](/help/article/receiving-payouts#what-is-the-minimum-withdrawal-amount-and-how-does-it-work). Payouts above \$10 are automatically deposited to your bank account at no additional cost.
### Do you support payouts via Payoneer, PayPal, or crypto?
Unfortunately, those payout methods are not supported at this time. We will let you know as soon as anything changes.
## Stripe Express
### Stripe is invite-only in my country, how do I get an invite?
You don't need an invite. Dub uses [Stripe Express](https://support.stripe.com/express) to process payouts, which is different from the standard Stripe account. If your country is supported by Stripe Express, you will be able to see "Connect bank account" under the [Payouts](https://partners.dub.co/settings/payouts) tab.
Here's the full list of countries that we support sending payouts to:
### My country is not supported by Stripe Express, what should I do?
If your country is still not supported by Stripe Express, you can create a legal entity in any of the supported countries above and use that to receive payouts instead. For example, you can create a US LLC (e.g., with [Stripe Atlas](http://stripe.com/atlas)), which would let you receive payouts in USD.
### Can I connect a savings account instead of a checking account?
While it is possible to connect your savings account instead of a checking account, we highly recommend against it for two main reasons:
1. Some banks do not allow third-party deposits into savings accounts, which may cause your payout to fail;
2. Payouts sent to savings accounts can take significantly longer to process (up to 30 business days, depending on the bank), resulting in payout delays.
### My payout is marked as "Paid" on Stripe but it was not deposited, what should I do?
Some banks process payouts longer than usual. Stripe will show the expected arrival date – for example, *"Can’t find your payout? Banks can take up to 5 business days to process payouts. Wait until **\[DATE]** and then contact your bank."*
If you still cannot find your payout after the expected arrival date, please contact your bank and ask to locate the payout (you can find the trace ID in your email). Some banks might require additional information from you to release the funds. If your bank cannot find the payout, please reach out to Dub's support and send us:
* a letter from your bank, confirming that the payout was not received;
* your bank statement.
We will reach out to Stripe on your behalf and investigate this further. Once the payout is marked as "Failed" on Stripe, it will be re-sent again to your bank account. Please update your bank account in advance to ensure you can receive your payouts.
**Common reasons why payouts fail:**
* your local bank account is in USD but your local currency is not USD;
* your bank account number is incorrect;
* your bank account name does not match your name on Stripe.
### Can I connect my company's Stripe account to Dub?
No, you need to create a new account on Stripe Express to receive payouts. Stripe Express and Stripe Standard are different account types.
# How to create password-protected links on Dub?
Source: https://dub.co/help/article/password-protected-links
Learn how to protect your short links with a password on Dub to prevent unauthorized access.
This feature is only available on [Pro plans and
above](https://dub.co/pricing).
Dub's password protection feature is useful when you want to share a link with a group of people and you want to make sure that only the intended recipients can access the link.
In this guide, we will learn how to create password-protected links on Dub.
First, create a link by clicking on the **Create Link** button on the top right corner of the Dub dashboard.
Then, enter the destination URL and optionally, a custom short link for it.
![Create a link with the Dub link builder]() To use this feature, click on the **Password** button in the link builder. This will open a new modal **Link Password**.
Then, enter a password for the link or generate a random one and click on the **Add password** button.
You can also quickly access the **Link Password** feature by using the keyboard shortcut `P` while in the link builder.
To use this feature, click on the **Password** button in the link builder. This will open a new modal **Link Password**.
Then, enter a password for the link or generate a random one and click on the **Add password** button.
You can also quickly access the **Link Password** feature by using the keyboard shortcut `P` while in the link builder.
![Entering a password for the link]() Then, when you share your link, the user will be prompted to enter a password before they can access the destination URL.
Then, when you share your link, the user will be prompted to enter a password before they can access the destination URL.
![An example of a password-protected page]() Optionally, you can also pass a `pw` query parameter to the link to automatically authenticate and redirect the user to the destination URL.
Here's an example:
* Password-protected link: [dub.sh/password](https://dub.sh/password)
* Password-protected link with the password included in the URL as a query parameter: [dub.sh/password?pw=dub](https://dub.sh/password?pw=dub)
On the [Pro plan](https://dub.co/pricing) and above, you can also set a custom logo for the password page. This is useful if you want to brand the password page with your company's logo.
Your password page logo is connected to your workspace's logo on Dub. You can set that by following the steps below:
1. Go to your workspace settings page by clicking on the **Settings** link in the menu bar at the top of your workspace dashboard.
2. Scroll down to the **Workspace Logo** section and upload your company's logo. We recommend using a square image for the best results.
Optionally, you can also pass a `pw` query parameter to the link to automatically authenticate and redirect the user to the destination URL.
Here's an example:
* Password-protected link: [dub.sh/password](https://dub.sh/password)
* Password-protected link with the password included in the URL as a query parameter: [dub.sh/password?pw=dub](https://dub.sh/password?pw=dub)
On the [Pro plan](https://dub.co/pricing) and above, you can also set a custom logo for the password page. This is useful if you want to brand the password page with your company's logo.
Your password page logo is connected to your workspace's logo on Dub. You can set that by following the steps below:
1. Go to your workspace settings page by clicking on the **Settings** link in the menu bar at the top of your workspace dashboard.
2. Scroll down to the **Workspace Logo** section and upload your company's logo. We recommend using a square image for the best results.
![Workspace Logo section]() Once you've set your workspace's logo, your password page will automatically update to use your workspace's logo.
Once you've set your workspace's logo, your password page will automatically update to use your workspace's logo.
![Password page with custom logo]() # Measuring program performance
Source: https://dub.co/help/article/program-analytics
Track conversion rates, referral sources, UTM parameters, geolocation data and more to understand ROI and performance of your partner program.
This feature is only available on [Business plans and
above](https://dub.co/pricing/partners).
On any given day, Dub tracks upwards of **10 million events across clicks, [conversions](/help/article/dub-conversions), and [commissions](/help/article/partner-commissions).**
With the sheer volume of data that's tracked, it is important to be able to easily filter and create reports to help marketing teams make informed decisions.
In this guide, we'll walk you through how to use the program analytics tab get the most out of your partner program's events and engagement data.
## Where to find your program analytics?
When viewing your Partner Program navigation, click on the **Analytics** page, in the **Insights** group:
# Measuring program performance
Source: https://dub.co/help/article/program-analytics
Track conversion rates, referral sources, UTM parameters, geolocation data and more to understand ROI and performance of your partner program.
This feature is only available on [Business plans and
above](https://dub.co/pricing/partners).
On any given day, Dub tracks upwards of **10 million events across clicks, [conversions](/help/article/dub-conversions), and [commissions](/help/article/partner-commissions).**
With the sheer volume of data that's tracked, it is important to be able to easily filter and create reports to help marketing teams make informed decisions.
In this guide, we'll walk you through how to use the program analytics tab get the most out of your partner program's events and engagement data.
## Where to find your program analytics?
When viewing your Partner Program navigation, click on the **Analytics** page, in the **Insights** group:
![Program analytics location]() ## Program analytics views
Your program analytics dashboard consists of several views:
1. [Analytics chart](#1-analytics-chart)
2. [Partner data table](#2-partner-data-table)
3. [Aggregated data for different facets (top views)](#3-aggregated-data-for-different-facets-top-views)
### 1. Analytics chart
This is the default view and shows you the number of click events in a time-series chart over time. You can also select leads or sales to view their chart and data.
**Performance and Commissions data selector**
At the top of the analytics chart, you can switch between **Performance** and **Commissions**. Use **Performance** to analyze clicks, leads, sales, and conversion trends. Use **Commissions** to focus on commission earnings over time.
For a deeper look at commission-specific reporting, see [Commission analytics](/help/article/commission-analytics).
## Program analytics views
Your program analytics dashboard consists of several views:
1. [Analytics chart](#1-analytics-chart)
2. [Partner data table](#2-partner-data-table)
3. [Aggregated data for different facets (top views)](#3-aggregated-data-for-different-facets-top-views)
### 1. Analytics chart
This is the default view and shows you the number of click events in a time-series chart over time. You can also select leads or sales to view their chart and data.
**Performance and Commissions data selector**
At the top of the analytics chart, you can switch between **Performance** and **Commissions**. Use **Performance** to analyze clicks, leads, sales, and conversion trends. Use **Commissions** to focus on commission earnings over time.
For a deeper look at commission-specific reporting, see [Commission analytics](/help/article/commission-analytics).
![Time-series chart]() **Data toggle**
You can change the data displayed by clicking the `$ | 123` toggle in the top right of the data type section.
By default `$` is selected, as it related directly to your [reward types](/help/article/partner-rewards). Switching to `123` will change any monetary values to their specific reward count. If your program has other monetary rewards (clicks, leads, sales), their dollar amount will show as well.
**Data toggle**
You can change the data displayed by clicking the `$ | 123` toggle in the top right of the data type section.
By default `$` is selected, as it related directly to your [reward types](/help/article/partner-rewards). Switching to `123` will change any monetary values to their specific reward count. If your program has other monetary rewards (clicks, leads, sales), their dollar amount will show as well.
![Time-series chart]() **Chart toggle**
You can change the chart type displayed by clicking the `time-chart | conversion funnel` toggle in the top right of the chart area.
**Chart toggle**
You can change the chart type displayed by clicking the `time-chart | conversion funnel` toggle in the top right of the chart area.
![Time-series chart]() When the chart type is switched to **conversion funnel**, you can view the percentage of customers that complete each stage of the sale conversion. In this example, 0.58% of clicks have resulted in a customer making a purchase.
When the chart type is switched to **conversion funnel**, you can view the percentage of customers that complete each stage of the sale conversion. In this example, 0.58% of clicks have resulted in a customer making a purchase.
![Time-series chart]() ### 2. Partner data table
This table shows your partners performance for each of the data types from the time-series chart (clicks, leads, and sales). The matching data column is sorted by most-to-least, so you can quickly see who is the top performer for that category.
### 2. Partner data table
This table shows your partners performance for each of the data types from the time-series chart (clicks, leads, and sales). The matching data column is sorted by most-to-least, so you can quickly see who is the top performer for that category.
![Partner data table]() ### 3. Aggregated data for different facets (top views)
These are more commonly known as the "Top Views" in Dub Analytics. These views show your top links, countries, cities, devices, and more.
### 3. Aggregated data for different facets (top views)
These are more commonly known as the "Top Views" in Dub Analytics. These views show your top links, countries, cities, devices, and more.
![Aggregated data for different facets]() Each section has their own tabs to select different data for you to explore your program data further. These are grouped by the following categories:
* **Links** - Short Links and Destination URLs
* **Referrals** - Referrers and UTM Parameters
* **Location** - Countries, Cities, Regions, and Continents
* **Tech** - Devices, Browser, OS, and Triggers
## Filtering your data
With all this data, it's important to be able to filter and make better decisions. You can click the **Filter** button in the top left will show you the options available.
Each section has their own tabs to select different data for you to explore your program data further. These are grouped by the following categories:
* **Links** - Short Links and Destination URLs
* **Referrals** - Referrers and UTM Parameters
* **Location** - Countries, Cities, Regions, and Continents
* **Tech** - Devices, Browser, OS, and Triggers
## Filtering your data
With all this data, it's important to be able to filter and make better decisions. You can click the **Filter** button in the top left will show you the options available.
![Filtering your program analytics]() | Filter | Description |
| --------- | ---------------------------------------------------------------------------------------------------- |
| Ask AI | Use natural language to query your analytics - eg: "mobile chrome users US only", "UK android users" |
| Group | Select a specific [partner group](/help/article/partner-groups) |
| Tag | Select a specific [partner tag](/help/article/partner-tags) |
| Partner | Select a specific program partner |
| Country | Select a specific county |
| City | Select a specific city |
| Continent | Select a specific continent - N. America, Europe, etc |
| Device | Select a specific device - Desktop, Mobile, Tablet, etc |
| Browser | Select a specific browser - Chrome, Safari, Firefox, etc |
| OS | Select a specific operating system - Windows, Mac OS, etc |
| Referer | Select the specific website a visitor arrived from |
# Customizing your program application form
Source: https://dub.co/help/article/program-application-form
Learn how to customize your program application form to collect the right information you need and select the best partners to work with for your program.
This feature is only available on [Business plans and
above](https://dub.co/pricing/partners).
## What is the program application form?
The program application form collects the information you want from people applying to [your program](/help/article/dub-partners). Use it to ask about websites, social accounts, experience, audience size, or any details that help you decide who to accept.
On Dub, you can create a custom application form for each [partner
group](/help/article/partner-groups) in your program. This is helpful for
collecting different information from different partner types – e.g.
influencers vs affiliates vs resellers.
By default, when you create a new partner group, it reuses the application
form details from your default partner group, but you can always edit them
afterwards.
## Where to find the application form builder?
From your **Groups** page, open the [partner group](/help/article/partner-groups) you want to tailor the application form for.
| Filter | Description |
| --------- | ---------------------------------------------------------------------------------------------------- |
| Ask AI | Use natural language to query your analytics - eg: "mobile chrome users US only", "UK android users" |
| Group | Select a specific [partner group](/help/article/partner-groups) |
| Tag | Select a specific [partner tag](/help/article/partner-tags) |
| Partner | Select a specific program partner |
| Country | Select a specific county |
| City | Select a specific city |
| Continent | Select a specific continent - N. America, Europe, etc |
| Device | Select a specific device - Desktop, Mobile, Tablet, etc |
| Browser | Select a specific browser - Chrome, Safari, Firefox, etc |
| OS | Select a specific operating system - Windows, Mac OS, etc |
| Referer | Select the specific website a visitor arrived from |
# Customizing your program application form
Source: https://dub.co/help/article/program-application-form
Learn how to customize your program application form to collect the right information you need and select the best partners to work with for your program.
This feature is only available on [Business plans and
above](https://dub.co/pricing/partners).
## What is the program application form?
The program application form collects the information you want from people applying to [your program](/help/article/dub-partners). Use it to ask about websites, social accounts, experience, audience size, or any details that help you decide who to accept.
On Dub, you can create a custom application form for each [partner
group](/help/article/partner-groups) in your program. This is helpful for
collecting different information from different partner types – e.g.
influencers vs affiliates vs resellers.
By default, when you create a new partner group, it reuses the application
form details from your default partner group, but you can always edit them
afterwards.
## Where to find the application form builder?
From your **Groups** page, open the [partner group](/help/article/partner-groups) you want to tailor the application form for.
![Group selection]() From the tab navigation, click **Branding,** then in the content panel, choose **Application form** to open the editor.
From the tab navigation, click **Branding,** then in the content panel, choose **Application form** to open the editor.
![Branding page within your dashboard]() For your convenience, [here's a quick link](https://app.dub.co/program/groups/default/branding?tab=application) that brings you directly to the application form builder for your program's default group.
## Mandatory fields
Name, email, and country are always required and appear at the top of every form. You cannot remove or rename them.
For your convenience, [here's a quick link](https://app.dub.co/program/groups/default/branding?tab=application) that brings you directly to the application form builder for your program's default group.
## Mandatory fields
Name, email, and country are always required and appear at the top of every form. You cannot remove or rename them.
![Mandatory fields]() ## Editing and adding fields
Hover over form content in the builder to reveal actions for adding, editing, deleting, and reordering fields. Content that appears above the form can only be edited. This keeps the page layout consistent for applicants.
## Editing and adding fields
Hover over form content in the builder to reveal actions for adding, editing, deleting, and reordering fields. Content that appears above the form can only be edited. This keeps the page layout consistent for applicants.
![Brand page within your dashboard]() ## Input field types
Click **Insert field** to open the selector, then pick the input type you want to add.
## Input field types
Click **Insert field** to open the selector, then pick the input type you want to add.
![Insert field]() ### Short text
Use for short answers like names, one-line bios, or URLs.
### Short text
Use for short answers like names, one-line bios, or URLs.
![Adding short text fields]() | Option | Details | Example |
| ----------------- | ------------------------------------- | ----------------------------------- |
| Input label | The text above the field | *"Link to your top social profile"* |
| Input placeholder | Guidance shown inside the empty field | *"x.com/steventey"* |
| Required | Make the field mandatory | Yes |
| Max characters | Set a character limit when needed | 120 |
### Long text
Use for longer responses that need multiple lines.
| Option | Details | Example |
| ----------------- | ------------------------------------- | ----------------------------------- |
| Input label | The text above the field | *"Link to your top social profile"* |
| Input placeholder | Guidance shown inside the empty field | *"x.com/steventey"* |
| Required | Make the field mandatory | Yes |
| Max characters | Set a character limit when needed | 120 |
### Long text
Use for longer responses that need multiple lines.
![Adding long text fields]() | Option | Details | Example |
| ----------------- | ------------------------------------- | ----------------------------------------------------------- |
| Input label | The text above the field | "Tell us about your content strategy" |
| Input placeholder | Guidance shown inside the empty field | "Describe your approach to creating and sharing content..." |
| Required | Make the field mandatory | Yes |
| Max characters | Set a character limit when needed | 500 |
### Dropdown
Best when you have more than five options. You can add, reorder, and delete options at any time.
| Option | Details | Example |
| ----------------- | ------------------------------------- | ----------------------------------------------------------- |
| Input label | The text above the field | "Tell us about your content strategy" |
| Input placeholder | Guidance shown inside the empty field | "Describe your approach to creating and sharing content..." |
| Required | Make the field mandatory | Yes |
| Max characters | Set a character limit when needed | 500 |
### Dropdown
Best when you have more than five options. You can add, reorder, and delete options at any time.
![Adding files]() | Option | Details | Example |
| ------------------------- | ----------------------------------------- | ----------------------------------------------------------- |
| Input label | The text above the field | "Which platforms do you use?" |
| Required | Make this field mandatory | No |
| Allow multiple selections | Toggle this to allow more than one choice | Yes (for checkboxes) |
| Options | The choices the applicant sees | "Instagram", "TikTok", "YouTube", "LinkedIn", "X (Twitter)" |
### Multiple choice
The multiple-choice input can serve multiple purposes:
1. **Radio** - A list of items that an applicant can select only one from
2. **Checkbox** - A list of items that an applicant can select one or many from
By default, the initial input is set to the radio option, but the input can adapt to your needs.
| Option | Details | Example |
| ------------------------- | ----------------------------------------- | ----------------------------------------------------------- |
| Input label | The text above the field | "Which platforms do you use?" |
| Required | Make this field mandatory | No |
| Allow multiple selections | Toggle this to allow more than one choice | Yes (for checkboxes) |
| Options | The choices the applicant sees | "Instagram", "TikTok", "YouTube", "LinkedIn", "X (Twitter)" |
### Multiple choice
The multiple-choice input can serve multiple purposes:
1. **Radio** - A list of items that an applicant can select only one from
2. **Checkbox** - A list of items that an applicant can select one or many from
By default, the initial input is set to the radio option, but the input can adapt to your needs.
![Adding accordion content]() | Option | Details | Example |
| ----------- | ------------------------------ | ------------------------------------ |
| Input label | The text above the field | "What's your primary content focus?" |
| Required | Make the field mandatory | Yes |
| Options | The choices the applicant sees | "Tech & SaaS", "Business & Finance" |
### Image upload
Add an image field to your application so partners can share proof, examples, or supporting materials.
| Option | Details | Example |
| ----------- | ------------------------------ | ------------------------------------ |
| Input label | The text above the field | "What's your primary content focus?" |
| Required | Make the field mandatory | Yes |
| Options | The choices the applicant sees | "Tech & SaaS", "Business & Finance" |
### Image upload
Add an image field to your application so partners can share proof, examples, or supporting materials.
![Adding image upload]() | Option | Details | Example |
| --------------------- | --------------------------------------------------------------------- | ----------------------- |
| Input label | The text above the field | "Analytics screenshots" |
| Allow multiple images | Enable partners to upload multiple images. Minimum 2, and maximum 10. | |
| Required | Make the field mandatory | |
### Website and socials
Ask for specific website or social accounts. Toggle each network on or off and mark any required. For example, you might require Instagram but make X optional.
| Option | Details | Example |
| --------------------- | --------------------------------------------------------------------- | ----------------------- |
| Input label | The text above the field | "Analytics screenshots" |
| Allow multiple images | Enable partners to upload multiple images. Minimum 2, and maximum 10. | |
| Required | Make the field mandatory | |
### Website and socials
Ask for specific website or social accounts. Toggle each network on or off and mark any required. For example, you might require Instagram but make X optional.
![Adding website and social inputs]() You can only add one website and socials section per form. If one is already
present the input type will not appear in the Insert field menu.
## Publishing your changes
When you are ready, click Publish in the top right to make your changes live.
You can only add one website and socials section per form. If one is already
present the input type will not appear in the Insert field menu.
## Publishing your changes
When you are ready, click Publish in the top right to make your changes live.
![Publish button]() ##
# Reviewing program applications
Source: https://dub.co/help/article/program-applications
Learn how to manage your pending applications, and to bring the best partners to your program.
This feature is only available on [Business plans and
above](https://dub.co/pricing/partners).
## Where to find your program applications
In the **Partner Program** menu, click **Applications** to view your pending applications. We also show you a count badge, so you can see how many pending applicants you have at all times.
##
# Reviewing program applications
Source: https://dub.co/help/article/program-applications
Learn how to manage your pending applications, and to bring the best partners to your program.
This feature is only available on [Business plans and
above](https://dub.co/pricing/partners).
## Where to find your program applications
In the **Partner Program** menu, click **Applications** to view your pending applications. We also show you a count badge, so you can see how many pending applicants you have at all times.
![Program applications location]() ## Applicant table
On your applications table, you'll be able to view key information, including:
* The applicant's name
* When they applied
* Their provided location
* Their website and social media profiles
## Applicant table
On your applications table, you'll be able to view key information, including:
* The applicant's name
* When they applied
* Their provided location
* Their website and social media profiles
![Applications table]() Click on any of the rows to view their profile and application form.
## Application settings
Click the **Application settings** button in the top right corner to configure your application and [marketplace settings](#marketplace-settings).
Click on any of the rows to view their profile and application form.
## Application settings
Click the **Application settings** button in the top right corner to configure your application and [marketplace settings](#marketplace-settings).
![Application settings button]() ### Eligibility requirements
Adding eligibility criteria allows you to define the conditions that must be satisfied for an applicant to apply. Click **Add condition** to start defining your criteria.
### Eligibility requirements
Adding eligibility criteria allows you to define the conditions that must be satisfied for an applicant to apply. Click **Add condition** to start defining your criteria.
![Application settings criteria]() In the example above, the applicant must be from Canada, United States, or Mexico to apply. If they're from any country other than these, they won't be able to apply.
| Logic | Description |
| --------- | ------------------------------ |
| Condition | Select from `is` or `is not` |
| Country | Select any number of countries |
### Marketplace settings
If your program is listed in the [Dub program marketplace](https://dub.co/help/article/program-marketplace), click the **Marketplace** toggle to access the marketplace settings. Here you can set the description that's shown to partners, and categories to help find your program more easily.
In the example above, the applicant must be from Canada, United States, or Mexico to apply. If they're from any country other than these, they won't be able to apply.
| Logic | Description |
| --------- | ------------------------------ |
| Condition | Select from `is` or `is not` |
| Country | Select any number of countries |
### Marketplace settings
If your program is listed in the [Dub program marketplace](https://dub.co/help/article/program-marketplace), click the **Marketplace** toggle to access the marketplace settings. Here you can set the description that's shown to partners, and categories to help find your program more easily.
![Marketplace settings]() For product categories, you can select from the following options:
* Finance
* Marketing
* AI
* Development
* Design
* Productivity
* Ecommerce
* Security
* Education
* Health
* Consumer
## Partner application
When the application is open, we show additional information collected during the application process and their account creation. This is a good opportunity to get to know more about this partner and their background if they've provided it.
For product categories, you can select from the following options:
* Finance
* Marketing
* AI
* Development
* Design
* Productivity
* Ecommerce
* Security
* Education
* Health
* Consumer
## Partner application
When the application is open, we show additional information collected during the application process and their account creation. This is a good opportunity to get to know more about this partner and their background if they've provided it.
![Application details]() ### Online presence
During account creation, we allow the partners to provide their website and any social media accounts. As part of this, we also allow partners to verify each of these items to increase trust with their application.
Verification isn't required, but encouraged as it reduces the time it takes to review applications.
### Verified badge
If a partner has verified their website or social media accounts, a green check mark badge will be shown beside the item. In some scenarios, it will also show statistics from that verified account.
### Online presence
During account creation, we allow the partners to provide their website and any social media accounts. As part of this, we also allow partners to verify each of these items to increase trust with their application.
Verification isn't required, but encouraged as it reduces the time it takes to review applications.
### Verified badge
If a partner has verified their website or social media accounts, a green check mark badge will be shown beside the item. In some scenarios, it will also show statistics from that verified account.
![Verified account badge]() ### Additional information
The partner card will provide additional information about the partner, helping you understand how their profile is set up, and optional details they've provided.
### Additional information
The partner card will provide additional information about the partner, helping you understand how their profile is set up, and optional details they've provided.
![Additional information]() | Item | Description |
| ---------------------------- | ----------------------------------------------------------------------------------------------------------------------------------- |
| Location | Declared country of residence |
| Company name (optional) | Partner's company name, if they've chosen to have a company profile |
| Application date | Date of application submission |
| Payout method connected | Shown when the partner has connected a [payout method](/help/article/receiving-payouts), and what that type is |
| Verified identity (optional) | Whether the partner has verified their identity by submitting a government-issued ID (Powered by [Veriff](https://www.veriff.com/)) |
### Application history
If a partner previously applied and was [rejected](#rejecting-applicants), you can review their application history by clicking on the **Application** dropdown to select previous versions. This is helpful to see if the application has changed since the last time it was reviewed, and if feedback provided has been addressed.
When viewing historical applications, you can see the reason for rejection and additional notes if they were provided by your team.
| Item | Description |
| ---------------------------- | ----------------------------------------------------------------------------------------------------------------------------------- |
| Location | Declared country of residence |
| Company name (optional) | Partner's company name, if they've chosen to have a company profile |
| Application date | Date of application submission |
| Payout method connected | Shown when the partner has connected a [payout method](/help/article/receiving-payouts), and what that type is |
| Verified identity (optional) | Whether the partner has verified their identity by submitting a government-issued ID (Powered by [Veriff](https://www.veriff.com/)) |
### Application history
If a partner previously applied and was [rejected](#rejecting-applicants), you can review their application history by clicking on the **Application** dropdown to select previous versions. This is helpful to see if the application has changed since the last time it was reviewed, and if feedback provided has been addressed.
When viewing historical applications, you can see the reason for rejection and additional notes if they were provided by your team.
![Previous applications]() ## Applicant risk flags
We recommended that you review partners flagged for fraud and the information
provided before making a final decision.
Occasionally, certain applications to your program might trigger a risk flag that you should review before approving them.
These signals are powered by our [Risk Monitoring](/help/article/risk-monitoring) feature and are meant to protect your partner program from risk and potential fraud.
## Applicant risk flags
We recommended that you review partners flagged for fraud and the information
provided before making a final decision.
Occasionally, certain applications to your program might trigger a risk flag that you should review before approving them.
These signals are powered by our [Risk Monitoring](/help/article/risk-monitoring) feature and are meant to protect your partner program from risk and potential fraud.
![Application risk flag]() Here are the reasons an application will be flagged for review:
### High risk
Indicates strong signs of potential fraud or past issues. These applicants need careful review before you move forward.
| Flag | Description |
| -------------------------- | --------------------------------------------------------------------------------------------------------------------------------------------------------- |
| Fraud report | This partner was reported for suspected fraud by another program. |
| Cross-program ban | This partner was banned from another program on Dub. Our team reviewed this decision and confirmed the fraudulent behavior or terms of service violation. |
| Duplicate account detected | This partner was flagged by our system for having 2 or more Dub accounts. Please review to prevent abuse of program restrictions, caps, or bonuses. |
| Duplicate partner account | Multiple partner accounts originate from the same device, suggesting duplicate account creation or fraudulent behavior. |
### Medium risk
Generally signals missing or incomplete information. These applicants need a closer look before approving.
| Flag | Description |
| -------------------------------- | ------------------------------------------------------------------------------------------------------------- |
| No website or social links added | This partner hasn't provided any social or web presence, making verification harder. |
| Geolocation mismatch | This partner's physical location doesn't match their profile country, which may indicate a location mismatch. |
### Low risk
These tend to be generally low risk and more common, but worth reviewing.
| Flag | Description |
| ----------------------------------- | ----------------------------------------------------------------------------------------- |
| Email domain mismatch with website | The custom email domain doesn't match the website provided. |
| Masked email address | Uses a masked email address. Not harmful but harder to verify or contact directly. |
| No verified website or social links | Partner hasn't verified their website or any social presence, making verification harder. |
Learn more about how [Risk Monitoring](/help/article/risk-monitoring) works on
Dub.
## Approving applicants
There are 3 ways to approve pending applicants to your program:
### Via the application form
When the application form is open, click **Approve** at the bottom of the screen.
Here are the reasons an application will be flagged for review:
### High risk
Indicates strong signs of potential fraud or past issues. These applicants need careful review before you move forward.
| Flag | Description |
| -------------------------- | --------------------------------------------------------------------------------------------------------------------------------------------------------- |
| Fraud report | This partner was reported for suspected fraud by another program. |
| Cross-program ban | This partner was banned from another program on Dub. Our team reviewed this decision and confirmed the fraudulent behavior or terms of service violation. |
| Duplicate account detected | This partner was flagged by our system for having 2 or more Dub accounts. Please review to prevent abuse of program restrictions, caps, or bonuses. |
| Duplicate partner account | Multiple partner accounts originate from the same device, suggesting duplicate account creation or fraudulent behavior. |
### Medium risk
Generally signals missing or incomplete information. These applicants need a closer look before approving.
| Flag | Description |
| -------------------------------- | ------------------------------------------------------------------------------------------------------------- |
| No website or social links added | This partner hasn't provided any social or web presence, making verification harder. |
| Geolocation mismatch | This partner's physical location doesn't match their profile country, which may indicate a location mismatch. |
### Low risk
These tend to be generally low risk and more common, but worth reviewing.
| Flag | Description |
| ----------------------------------- | ----------------------------------------------------------------------------------------- |
| Email domain mismatch with website | The custom email domain doesn't match the website provided. |
| Masked email address | Uses a masked email address. Not harmful but harder to verify or contact directly. |
| No verified website or social links | Partner hasn't verified their website or any social presence, making verification harder. |
Learn more about how [Risk Monitoring](/help/article/risk-monitoring) works on
Dub.
## Approving applicants
There are 3 ways to approve pending applicants to your program:
### Via the application form
When the application form is open, click **Approve** at the bottom of the screen.
![Approve button]() Once you're finished reviewing the application, click **Approve,** and the applicant is now part of your program.
### Bulk approve
If you have multiple applications, use the checkboxes to the left of each applicant to select any that are ready to be approved. You can also select all, by clicking the checkbox in the top left of the application table.
Once you're finished reviewing the application, click **Approve,** and the applicant is now part of your program.
### Bulk approve
If you have multiple applications, use the checkboxes to the left of each applicant to select any that are ready to be approved. You can also select all, by clicking the checkbox in the top left of the application table.
![Select all]() Once selected, click **Approve** to add them to your program instantly.
### Auto-approve
To auto-approve any new pending applications for your program, go to your [individual groups](/help/article/partner-groups) and click on the **Settings** tab. Here you'll find the auto-approve toggle in the "Additional settings" group.
Once selected, click **Approve** to add them to your program instantly.
### Auto-approve
To auto-approve any new pending applications for your program, go to your [individual groups](/help/article/partner-groups) and click on the **Settings** tab. Here you'll find the auto-approve toggle in the "Additional settings" group.
![Group settings]() When you update the auto-approve options, you can apply the new setting to every group at once. Just select the box labelled `Apply to all groups` before confirming. The change will take effect right away.
When you update the auto-approve options, you can apply the new setting to every group at once. Just select the box labelled `Apply to all groups` before confirming. The change will take effect right away.
![Group settings]() With **auto-approve enabled**, any new pending applications will be automatically approved for your program with no review period. Any existing pending applications will still need manual approval before being accepted.
Applications with a [risk flag](#applicant-risk-flags) are never auto-approved
and will always require manual review.
To disable auto-approve, click the toggle and confirm your choice. When confirming the change, you're able to apply to all groups as well.
## Rejecting applicants
Similar to the approval process, you can reject an application from the [applicant form](/help/article/program-applications#applicant-form) or use [bulk selection](/help/article/program-applications#bulk-approve) for more than one applicant at a time.
With **auto-approve enabled**, any new pending applications will be automatically approved for your program with no review period. Any existing pending applications will still need manual approval before being accepted.
Applications with a [risk flag](#applicant-risk-flags) are never auto-approved
and will always require manual review.
To disable auto-approve, click the toggle and confirm your choice. When confirming the change, you're able to apply to all groups as well.
## Rejecting applicants
Similar to the approval process, you can reject an application from the [applicant form](/help/article/program-applications#applicant-form) or use [bulk selection](/help/article/program-applications#bulk-approve) for more than one applicant at a time.
![Reject application]() #### Optional fields
When rejecting an applicant, optionally you can add:
* **Reason for rejection** - Select from a list of common reasons for the rejection.
* **Add additional notes** - Provide more context to the applicant about why they were rejected, and what they can do to improve their chances in the future.
Both fields are shared with the applicant if provided.
#### Reapplication timeframe
By default, rejected applicants cannot reapply to your program for **30 days**, but you can allow them to reapply immediately if you think they have potential and want to give them another chance, or set to **Never** to block them from reapplying at again.
#### Flagging for potential fraud
If you have concerns about the legitimacy of an applicant, you can flag them for potential fraud. This will trigger a review by our team and may result in a ban from all programs on Dub if fraudulent behavior is confirmed. Please provide as much information as possible in the notes when flagging for fraud to help our team with the review.
### Approving a previously rejected partner
If you rejected a partner by mistake, or have changed your decision, you can approve them at any time. Open the **`⋮`** menu in the Applications view and select **View rejected partners**.
#### Optional fields
When rejecting an applicant, optionally you can add:
* **Reason for rejection** - Select from a list of common reasons for the rejection.
* **Add additional notes** - Provide more context to the applicant about why they were rejected, and what they can do to improve their chances in the future.
Both fields are shared with the applicant if provided.
#### Reapplication timeframe
By default, rejected applicants cannot reapply to your program for **30 days**, but you can allow them to reapply immediately if you think they have potential and want to give them another chance, or set to **Never** to block them from reapplying at again.
#### Flagging for potential fraud
If you have concerns about the legitimacy of an applicant, you can flag them for potential fraud. This will trigger a review by our team and may result in a ban from all programs on Dub if fraudulent behavior is confirmed. Please provide as much information as possible in the notes when flagging for fraud to help our team with the review.
### Approving a previously rejected partner
If you rejected a partner by mistake, or have changed your decision, you can approve them at any time. Open the **`⋮`** menu in the Applications view and select **View rejected partners**.
![Application dropdown]() From the rejected partners table, find the application you’d like to revisit and click the row to open it.
From the rejected partners table, find the application you’d like to revisit and click the row to open it.
![Application dropdown]() Once inside the application, click **Approve**. The partner will immediately be enrolled in your program.
Once inside the application, click **Approve**. The partner will immediately be enrolled in your program.
![Application dropdown]() ##
# Program bounties
Source: https://dub.co/help/article/program-bounties
Drive partner engagement by creating performance and submission bounties for your partner program
This feature is only available on [Business plans and
above](https://dub.co/pricing/partners).
##
# Program bounties
Source: https://dub.co/help/article/program-bounties
Drive partner engagement by creating performance and submission bounties for your partner program
This feature is only available on [Business plans and
above](https://dub.co/pricing/partners).
![Program bounties]() Bounties on [Dub Partners](https://dub.co/partners) let you reward partners for achieving goals or creating content about your product. This guide walks you through creating bounties, setting requirements, and managing submissions.
To view and manage your bounties, go to your **Partner Program** menu and click on **Bounties** under the *Engagement* section:
Bounties on [Dub Partners](https://dub.co/partners) let you reward partners for achieving goals or creating content about your product. This guide walks you through creating bounties, setting requirements, and managing submissions.
To view and manage your bounties, go to your **Partner Program** menu and click on **Bounties** under the *Engagement* section:
![Bounty navigation location]() ## Creating a bounty
Click **Create bounty** (or use the `C` keyboard shortcut) to open the bounty creation panel. From here, select the type of bounty you want to create:
* [Performance bounties](#performance-bounties)
* [Submission bounties](#submission-bounties)
Whenever you create a new bounty, an email notification will be sent to all
eligible partners at the scheduled start date of the bounty. Make sure to
finalize your bounty before creating it.
## Creating a bounty
Click **Create bounty** (or use the `C` keyboard shortcut) to open the bounty creation panel. From here, select the type of bounty you want to create:
* [Performance bounties](#performance-bounties)
* [Submission bounties](#submission-bounties)
Whenever you create a new bounty, an email notification will be sent to all
eligible partners at the scheduled start date of the bounty. Make sure to
finalize your bounty before creating it.
![Bounty email notification]() ## Performance bounties
Performance bounties reward partners for achieving measurable milestones, such as a specific number of leads, conversions, revenue, or commissions. They’re tracked automatically and paid out once completed, with no approval needed.
## Performance bounties
Performance bounties reward partners for achieving measurable milestones, such as a specific number of leads, conversions, revenue, or commissions. They’re tracked automatically and paid out once completed, with no approval needed.
![Create performance bounty]() Examples:
* Drive 500 leads and earn an additional \$1,000 bonus
* Generate \$1,000 in revenue and earn an additional \$250 bonus
* Earn \$5,000 in commissions and receive an additional \$500 bonus
| Input | Description |
| ---------------------- | ------------------------------------------------------------------------------------------------------------------------------------------------------------------------------------- |
| Description (optional) | Provide additional bounty details. E.g. "This is a one-time promotional period for you to earn additional commissions on top of what you're already earning with our program" |
| Start date (optional) | Bounty start date. Partners will receive an email notification on this date about the bounty. If one is not selected, the bounty will start on the creation date. |
| End date (optional) | Bounty end date. If set, bounty will "expire" after the end date and will no longer be eligible for commission. |
| Logic | The success criteria are based on: total leads, total conversions, total revenue, or total commissions. [Learn more](/help/article/program-bounties#performance-logic). |
| Reward | The reward amount the partner will receive upon completing the bounty. |
| Groups | [Partner group](/help/article/partner-groups) eligibility. The same bounty can be applied to multiple [partner groups](/help/article/partner-groups) – or all groups in your program. |
### Performance logic
When setting the logic for a performance bounty, you can choose from several options depending on how you want performance to be measured.
Examples:
* Drive 500 leads and earn an additional \$1,000 bonus
* Generate \$1,000 in revenue and earn an additional \$250 bonus
* Earn \$5,000 in commissions and receive an additional \$500 bonus
| Input | Description |
| ---------------------- | ------------------------------------------------------------------------------------------------------------------------------------------------------------------------------------- |
| Description (optional) | Provide additional bounty details. E.g. "This is a one-time promotional period for you to earn additional commissions on top of what you're already earning with our program" |
| Start date (optional) | Bounty start date. Partners will receive an email notification on this date about the bounty. If one is not selected, the bounty will start on the creation date. |
| End date (optional) | Bounty end date. If set, bounty will "expire" after the end date and will no longer be eligible for commission. |
| Logic | The success criteria are based on: total leads, total conversions, total revenue, or total commissions. [Learn more](/help/article/program-bounties#performance-logic). |
| Reward | The reward amount the partner will receive upon completing the bounty. |
| Groups | [Partner group](/help/article/partner-groups) eligibility. The same bounty can be applied to multiple [partner groups](/help/article/partner-groups) – or all groups in your program. |
### Performance logic
When setting the logic for a performance bounty, you can choose from several options depending on how you want performance to be measured.
![Performance bounty logic]() **Scope** determines how performance is tracked over a specific period.
* **New** - Tracks only performance generated after the bounty starts. For example, if you set a bounty that rewards partners after 10 leads, each partner must generate 10 new leads after the bounty goes live, regardless of how many leads they had before. For revenue-based bounties, only revenue from customers whose first sale happens after the bounty starts is counted.
* **Lifetime** - Counts performance across the partner’s entire lifetime. For example, if you set a bounty that rewards after 10 leads, any partner who already has at least 10 leads will immediately qualify for the reward.
**Activity** determines which metric is tracked for the bounty. Revenue and commissions require a dollar amount to be set.
* Leads
* Conversions
* Revenue
* Commissions
## Submission bounties
Submission bounties reward partners for completing activities that require review, such as creating social media content, publishing a blog post, or hosting an event. Partners submit proof, and rewards are approved once requirements are met.
**Scope** determines how performance is tracked over a specific period.
* **New** - Tracks only performance generated after the bounty starts. For example, if you set a bounty that rewards partners after 10 leads, each partner must generate 10 new leads after the bounty goes live, regardless of how many leads they had before. For revenue-based bounties, only revenue from customers whose first sale happens after the bounty starts is counted.
* **Lifetime** - Counts performance across the partner’s entire lifetime. For example, if you set a bounty that rewards after 10 leads, any partner who already has at least 10 leads will immediately qualify for the reward.
**Activity** determines which metric is tracked for the bounty. Revenue and commissions require a dollar amount to be set.
* Leads
* Conversions
* Revenue
* Commissions
## Submission bounties
Submission bounties reward partners for completing activities that require review, such as creating social media content, publishing a blog post, or hosting an event. Partners submit proof, and rewards are approved once requirements are met.
![Create submission bounty]() Examples:
* Release a YouTube video to drive awareness
* Publish a blog post highlighting your product
* Host an event (in-person or online) promoting your brand
| Input | Description |
| -------------------------------------------------------- | ----------------------------------------------------------------------------------------------------------------------------------------------------------------- |
| Name | The name that will be shown to your partners and internally. |
| Description (optional) | Provide additional bounty details. E.g. "Make sure to attach up to 3 photos of your event as proof for bounty completion." |
| Start date (optional) | Bounty start date. Partners will receive an email notification on this date about the bounty. If one is not selected, the bounty will start on the creation date. |
| End date (optional) | Bounty end date. If set, bounty will "expire" after the end date and will no longer be eligible for commission. |
| Allowed submissions | The number of submissions required for a partner to complete the bounty. Partners must submit this many entries to complete it. |
| [Submission window](#submission-window) (optional) | Set how many days before the end date partners can start submitting entries. An end date is required to enter a submission window. |
| [Submission frequency](#submission-frequency) (optional) | Set the time between submissions partners can make. |
| Submission type | This is the criteria for which partners will submit their entry. Select between manual submission and social metrics. |
| Reward | The reward amount the partner will receive upon completing the bounty. |
| Groups | Partner group eligibility. The same bounty can be applied to multiple [partner groups](/help/article/partner-groups) – or all groups in your program. |
### Submission window
This is the number of days before the end date that partners can start submitting entries. **An end date is required to enter a submission window.**
Examples:
* Release a YouTube video to drive awareness
* Publish a blog post highlighting your product
* Host an event (in-person or online) promoting your brand
| Input | Description |
| -------------------------------------------------------- | ----------------------------------------------------------------------------------------------------------------------------------------------------------------- |
| Name | The name that will be shown to your partners and internally. |
| Description (optional) | Provide additional bounty details. E.g. "Make sure to attach up to 3 photos of your event as proof for bounty completion." |
| Start date (optional) | Bounty start date. Partners will receive an email notification on this date about the bounty. If one is not selected, the bounty will start on the creation date. |
| End date (optional) | Bounty end date. If set, bounty will "expire" after the end date and will no longer be eligible for commission. |
| Allowed submissions | The number of submissions required for a partner to complete the bounty. Partners must submit this many entries to complete it. |
| [Submission window](#submission-window) (optional) | Set how many days before the end date partners can start submitting entries. An end date is required to enter a submission window. |
| [Submission frequency](#submission-frequency) (optional) | Set the time between submissions partners can make. |
| Submission type | This is the criteria for which partners will submit their entry. Select between manual submission and social metrics. |
| Reward | The reward amount the partner will receive upon completing the bounty. |
| Groups | Partner group eligibility. The same bounty can be applied to multiple [partner groups](/help/article/partner-groups) – or all groups in your program. |
### Submission window
This is the number of days before the end date that partners can start submitting entries. **An end date is required to enter a submission window.**
![Submission window]() ### Submission frequency
Set the time between submissions partners can make when `Allowed submissions` is greater than one. Partners must submit the full number of allowed submissions to complete the bounty. You can select from:
* Once a day
* Once a week
* Once a month
**Set `Allowed submissions` to greater than one to set a submission frequency.**
### Submission frequency
Set the time between submissions partners can make when `Allowed submissions` is greater than one. Partners must submit the full number of allowed submissions to complete the bounty. You can select from:
* Once a day
* Once a week
* Once a month
**Set `Allowed submissions` to greater than one to set a submission frequency.**
![Submission frequency]() If no submission frequency is set, partners can submit all required entries any time the bounty is open for submissions.
### Manual submission
Manual submission is best used for when you want to reward partners for specific actions or achievements, such as publishing a blog post highlighting your product or hosting an event (in-person or online) promoting your brand.
During bounty creation, you can optionally require partners to include images
and URLs as part of their submission.
If no submission frequency is set, partners can submit all required entries any time the bounty is open for submissions.
### Manual submission
Manual submission is best used for when you want to reward partners for specific actions or achievements, such as publishing a blog post highlighting your product or hosting an event (in-person or online) promoting your brand.
During bounty creation, you can optionally require partners to include images
and URLs as part of their submission.
![Submission requirements]() By default, partners claiming a manual submission reward are asked to describe how they completed the bounty using a text field.
By default, partners claiming a manual submission reward are asked to describe how they completed the bounty using a text field.
![Submission default]() #### Require at least one image
When enabled, partners must upload at least one
image as part of their submission. Up to four images can be included.
#### Require at least one URL
Require at least one URL When enabled, partners must include at least one URL in
their submission. Up to 100 URLs can be provided.
#### Allowed domains
You can restrict submissions to specific domains by defining an allowed domain list.
#### Require at least one image
When enabled, partners must upload at least one
image as part of their submission. Up to four images can be included.
#### Require at least one URL
Require at least one URL When enabled, partners must include at least one URL in
their submission. Up to 100 URLs can be provided.
#### Allowed domains
You can restrict submissions to specific domains by defining an allowed domain list.
![Allowed domains]() This is helpful when submissions must come from specific platforms or websites,
such as approved social networks or owned domains.
Looking to run bounties for social posts with outcome-based rewards? Check out
the [social metrics submission type](#social-metrics) instead.
#### Custom reward
For certain submission bounties, you may want to have a custom reward for each submission. Here are some examples:
* Pay a custom reward amount for an arbitrary task (e.g. organizing a meetup/webinar)
* Reward 10% if the partner reaches a goal they set by a specific date (e.g. [#FramerChallenge](https://www.framer.com/challenge/))
This is helpful when submissions must come from specific platforms or websites,
such as approved social networks or owned domains.
Looking to run bounties for social posts with outcome-based rewards? Check out
the [social metrics submission type](#social-metrics) instead.
#### Custom reward
For certain submission bounties, you may want to have a custom reward for each submission. Here are some examples:
* Pay a custom reward amount for an arbitrary task (e.g. organizing a meetup/webinar)
* Reward 10% if the partner reaches a goal they set by a specific date (e.g. [#FramerChallenge](https://www.framer.com/challenge/))
![Create submission bounty]() ### Social metrics
Social metrics bounties are only available on the [Advanced plan and
above](https://dub.co/pricing/partners).
Social metric submissions are best used for when you want to reward partners based on the performance of their social posts. Their performance is automatically tracked and measured against your set criteria.
When submitting these bounties, the partner can only provide one link, and it's required to be from a verified account on their profile. The post they submit must also be created after the bounty has started. This is to avoid partners submitting older content that already has activity.
### Social metrics
Social metrics bounties are only available on the [Advanced plan and
above](https://dub.co/pricing/partners).
Social metric submissions are best used for when you want to reward partners based on the performance of their social posts. Their performance is automatically tracked and measured against your set criteria.
When submitting these bounties, the partner can only provide one link, and it's required to be from a verified account on their profile. The post they submit must also be created after the bounty has started. This is to avoid partners submitting older content that already has activity.
![Social metric — empty state (no data)]() #### Select a social platform and target metric
You can track performance on one social platform per bounty, and can select from:
| YouTube | |
| ------- | ----------------- |
| Likes | Total video likes |
| Views | Total video views |
| Instagram | |
| --------- | ------------------------ |
| Likes | Total post or reel likes |
| Views | Total post or reel views |
| TikTok | |
| ------ | ---------------- |
| Likes | Total post likes |
| Views | Total post views |
| X/Twitter | |
| --------- | ---------------- |
| Likes | Total post likes |
| Views | Total post views |
| LinkedIn | |
| --------- | -------------------- |
| Reactions | Total post reactions |
#### Add a variable bonus
You can also optionally reward for additional performance beyond the base criteria.
#### Select a social platform and target metric
You can track performance on one social platform per bounty, and can select from:
| YouTube | |
| ------- | ----------------- |
| Likes | Total video likes |
| Views | Total video views |
| Instagram | |
| --------- | ------------------------ |
| Likes | Total post or reel likes |
| Views | Total post or reel views |
| TikTok | |
| ------ | ---------------- |
| Likes | Total post likes |
| Views | Total post views |
| X/Twitter | |
| --------- | ---------------- |
| Likes | Total post likes |
| Views | Total post views |
| LinkedIn | |
| --------- | -------------------- |
| Reactions | Total post reactions |
#### Add a variable bonus
You can also optionally reward for additional performance beyond the base criteria.
![Social metric — variable bonus configuration]() In this example, the program is rewarding an additional \$5 per 100 views on the submitted post, up to 1,000 views.
## Reviewing bounties
For submission bounties, you must review partner submission entries before [approving](#approving-submissions) or [rejecting](#rejecting-submissions) them. To view a submission, click its row in the submissions table.
In this example, the program is rewarding an additional \$5 per 100 views on the submitted post, up to 1,000 views.
## Reviewing bounties
For submission bounties, you must review partner submission entries before [approving](#approving-submissions) or [rejecting](#rejecting-submissions) them. To view a submission, click its row in the submissions table.
![Bounty review table]() In the submission review, you'll see something similar to the examples below, but your view may differ based on the requirements and criteria you've set for the bounty. Each review includes partner information, submission details, and the proof or social content provided to fulfill the criteria.
In the submission review, you'll see something similar to the examples below, but your view may differ based on the requirements and criteria you've set for the bounty. Each review includes partner information, submission details, and the proof or social content provided to fulfill the criteria.
![Bounty review examples]() From this view, you can either [approve](#approving-submissions) or [reject](#rejecting-submissions) the submission.
### Approving submissions
Once you approve a bounty submission, a [commission](/help/article/partner-commissions) will be automatically created and due at your next payout. The partner will also receive a notification email:
From this view, you can either [approve](#approving-submissions) or [reject](#rejecting-submissions) the submission.
### Approving submissions
Once you approve a bounty submission, a [commission](/help/article/partner-commissions) will be automatically created and due at your next payout. The partner will also receive a notification email:
![Bounty approved email]() If you set your reward to **custom** during the approval process, you'll be
asked to enter the flat rate amount to reward this partner.
### Rejecting submissions
When rejecting a bounty submission, you can also select a reason and provide more details for the rejection. This information will be added to the submission record, and will also be sent in an email to the partner.
If you set your reward to **custom** during the approval process, you'll be
asked to enter the flat rate amount to reward this partner.
### Rejecting submissions
When rejecting a bounty submission, you can also select a reason and provide more details for the rejection. This information will be added to the submission record, and will also be sent in an email to the partner.
![Bounty rejected modal]() For the rejection reason, you can select from:
* Invalid proof
* Duplicate submission
* Out of time window
* Did not meet criteria
* Other
When rejected, no commission will be created, and the partner email will look similar to the example below.
For the rejection reason, you can select from:
* Invalid proof
* Duplicate submission
* Out of time window
* Did not meet criteria
* Other
When rejected, no commission will be created, and the partner email will look similar to the example below.
![Bounty rejected email]() # Creating a landing page for your partner program
Source: https://dub.co/help/article/program-landing-page
Create an effective and compelling landing page to attract high-quality partners to join your program and promote your product.
This feature is only available on [Business plans and
above](https://dub.co/pricing/partners).
On Dub, you can also create a branded landing page with details about your [partner program](/help/article/dub-partners):
## What is the program landing page?
The program landing page gives your applicants information about your program and the rewards offered. This also includes brand or marketing files, FAQ sections, and any other content you want to add that will help an applicant understand your program, what your product is, and why they should apply.
On Dub, you can create a custom landing page for each [partner
group](/help/article/partner-groups) in your program. This is helpful for
showcasing different information about your program tailored to different
partner types – e.g. influencers vs affiliates vs resellers.
By default, when you create a new partner group, it reuses the landing page
details from your default partner group, but you can always edit them
afterwards.
## Where to find the landing page builder?
From your **Groups** page, open the group you want to customize the landing page for:
# Creating a landing page for your partner program
Source: https://dub.co/help/article/program-landing-page
Create an effective and compelling landing page to attract high-quality partners to join your program and promote your product.
This feature is only available on [Business plans and
above](https://dub.co/pricing/partners).
On Dub, you can also create a branded landing page with details about your [partner program](/help/article/dub-partners):
## What is the program landing page?
The program landing page gives your applicants information about your program and the rewards offered. This also includes brand or marketing files, FAQ sections, and any other content you want to add that will help an applicant understand your program, what your product is, and why they should apply.
On Dub, you can create a custom landing page for each [partner
group](/help/article/partner-groups) in your program. This is helpful for
showcasing different information about your program tailored to different
partner types – e.g. influencers vs affiliates vs resellers.
By default, when you create a new partner group, it reuses the landing page
details from your default partner group, but you can always edit them
afterwards.
## Where to find the landing page builder?
From your **Groups** page, open the group you want to customize the landing page for:
![Group selection]() From the tab navigation, click **Branding,** then in the content panel, choose **Landing page** to open the editor.
From the tab navigation, click **Branding,** then in the content panel, choose **Landing page** to open the editor.
![Branding page within your dashboard]() ## Editing and adding content
As you hover over the landing page content in the builder, you'll notice that actions will show, allowing you to add, edit, delete, and reorder content blocks within the page.
## Editing and adding content
As you hover over the landing page content in the builder, you'll notice that actions will show, allowing you to add, edit, delete, and reorder content blocks within the page.
![Brand page within your dashboard]() Content above the reward section can only be edited. This is to maintain content
consistency. Content below the **"Apply today"** button can be added, edited,
removed, and reordered. ## Content types Clicking on "Insert block" allows you
to select the content type you want to add.
Content above the reward section can only be edited. This is to maintain content
consistency. Content below the **"Apply today"** button can be added, edited,
removed, and reordered. ## Content types Clicking on "Insert block" allows you
to select the content type you want to add.
![Brand page within your dashboard]() ### Text
Best used for text and paragraph content. This section also uses markdown formatting when editing.
### Text
Best used for text and paragraph content. This section also uses markdown formatting when editing.
![Adding text content]() ### Image
For adding product screenshots and other complementary visuals to the program.
### Image
For adding product screenshots and other complementary visuals to the program.
![Adding image content]() ### Files
For adding product screenshots and other complementary visuals to the program.
### Files
For adding product screenshots and other complementary visuals to the program.
![Adding files]() ### Accordion
Best used for FAQ sections and other collapsible related content.
This section also uses markdown formatting when editing.
### Accordion
Best used for FAQ sections and other collapsible related content.
This section also uses markdown formatting when editing.
![Adding accordion content]() ### Earnings calculator
Give your partners a sense of how much they can earn, based on your default rewards.
### Earnings calculator
Give your partners a sense of how much they can earn, based on your default rewards.
![Adding earnings calculator]() ## Generating your landing page with AI
You can also use our AI landing page generator to quickly scaffold a landing page for your affiliate program.
Our AI will scrape your website, retrieve all relevant information, and craft a compelling landing page with your company's details, pricing information, features, and more.
To get started, simply click the "Generate" button and enter your website URL (it should already be prefilled from your program settings):
## Generating your landing page with AI
You can also use our AI landing page generator to quickly scaffold a landing page for your affiliate program.
Our AI will scrape your website, retrieve all relevant information, and craft a compelling landing page with your company's details, pricing information, features, and more.
To get started, simply click the "Generate" button and enter your website URL (it should already be prefilled from your program settings):
![Generate lander AI button]() Here's a quick demo of how it looks:
AI can make mistakes – make sure to review all generated content for accuracy
and style before publishing your changes.
## Publishing your changes
Once you're finished making your content changes, click the Publish button in the top right corner to make sure the changes go live.
Here's a quick demo of how it looks:
AI can make mistakes – make sure to review all generated content for accuracy
and style before publishing your changes.
## Publishing your changes
Once you're finished making your content changes, click the Publish button in the top right corner to make sure the changes go live.
![Publish button]() ## Landing page examples
Get inspired and check out some of these great examples that companies have already created:
## Markdown styles available
| Content | Example |
| --------------- | ---------------------------------------------------- |
| Headings | `# H1` , `# H2` , `# H3` |
| Bold | `**bold text**` |
| Italic | `*italicized text*` |
| Blockquote | `> blockquote` |
| Horizontal rule | `---` |
| Link | `[title](https://www.example.com)` |
| Ordered list | `1. First item` , `2. Second item` , `3. Third item` |
| Unordered list | `- First item` , `- Second item` , `- Third item` |
# Applying to programs via the Dub Program Marketplace
Source: https://dub.co/help/article/program-marketplace
Explore the Dub program marketplace to discover new programs, learn what rewards they offer, and apply to the ones that fit your content and audience.
If you want to expand your partnerships or join new programs on Dub, this guide walks you through how to browse available programs, review their details, and submit an application.
## Where to find the Program Marketplace
From the **All Programs** navigation, click **Marketplace**.
## Landing page examples
Get inspired and check out some of these great examples that companies have already created:
## Markdown styles available
| Content | Example |
| --------------- | ---------------------------------------------------- |
| Headings | `# H1` , `# H2` , `# H3` |
| Bold | `**bold text**` |
| Italic | `*italicized text*` |
| Blockquote | `> blockquote` |
| Horizontal rule | `---` |
| Link | `[title](https://www.example.com)` |
| Ordered list | `1. First item` , `2. Second item` , `3. Third item` |
| Unordered list | `- First item` , `- Second item` , `- Third item` |
# Applying to programs via the Dub Program Marketplace
Source: https://dub.co/help/article/program-marketplace
Explore the Dub program marketplace to discover new programs, learn what rewards they offer, and apply to the ones that fit your content and audience.
If you want to expand your partnerships or join new programs on Dub, this guide walks you through how to browse available programs, review their details, and submit an application.
## Where to find the Program Marketplace
From the **All Programs** navigation, click **Marketplace**.
![Program Marketplace in the navigation]() Here you can browse featured programs and a full list of programs available to learn more about and [apply to](/help/article/program-marketplace#applying-to-a-program).
## Filters and sorting
Within the program grid, you can refine what you see by applying filters or sorting options. This helps narrow programs based on categories or the reward types available.
You can filter by several criteria, then sort the results by most popular, newest, or name order.
Here you can browse featured programs and a full list of programs available to learn more about and [apply to](/help/article/program-marketplace#applying-to-a-program).
## Filters and sorting
Within the program grid, you can refine what you see by applying filters or sorting options. This helps narrow programs based on categories or the reward types available.
You can filter by several criteria, then sort the results by most popular, newest, or name order.
![Program Marketplace filters and sorting]() ## Viewing program details
To view details about a program, click any program card.
## Viewing program details
To view details about a program, click any program card.
![Program details]() The program details page includes:
* Product description
* Rewards offered
* Program categories
* Additional supporting content to help you understand the partnership
## Joining the Dub Partner Network
Before you can apply to programs in the marketplace, your [partner profile](https://partners.dub.co/profile) needs to be accepted into the Dub Partner Network.
The program details page includes:
* Product description
* Rewards offered
* Program categories
* Additional supporting content to help you understand the partnership
## Joining the Dub Partner Network
Before you can apply to programs in the marketplace, your [partner profile](https://partners.dub.co/profile) needs to be accepted into the Dub Partner Network.
![Dub partner network acceptance tasks]() To submit your Dub Partner Network application, complete all 6 tasks in your [profile page](https://partners.dub.co/profile):
* Upload your logo
* Verify at least 2 social accounts/website
* Fill out your profile description
* Specify your estimated monthly traffic
* Select your preferred earning structures
* Choose your sales channels
Once all tasks are complete, click **Submit application**. Your application will be reviewed by the Dub team.
| Status | Description |
| --------- | ---------------------------------------------------------------------------------------------------------------------------- |
| Submitted | Your Dub Partner Network application is under review. You will be able to apply to marketplace programs once it is approved. |
| Approved | You can apply to programs in the marketplace and get discovered by brands in the Dub Partner Network. |
| Rejected | Your Dub Partner Network application was not approved. Continue improving your profile and reapply in the future. |
A complete, verified profile helps programs understand who you are, where you
reach your audience, and which partnerships are the best fit for you.
## Applying to a program
After your Dub Partner Network application is approved, click the **Apply** button in the top right of the Program details page.
To submit your Dub Partner Network application, complete all 6 tasks in your [profile page](https://partners.dub.co/profile):
* Upload your logo
* Verify at least 2 social accounts/website
* Fill out your profile description
* Specify your estimated monthly traffic
* Select your preferred earning structures
* Choose your sales channels
Once all tasks are complete, click **Submit application**. Your application will be reviewed by the Dub team.
| Status | Description |
| --------- | ---------------------------------------------------------------------------------------------------------------------------- |
| Submitted | Your Dub Partner Network application is under review. You will be able to apply to marketplace programs once it is approved. |
| Approved | You can apply to programs in the marketplace and get discovered by brands in the Dub Partner Network. |
| Rejected | Your Dub Partner Network application was not approved. Continue improving your profile and reapply in the future. |
A complete, verified profile helps programs understand who you are, where you
reach your audience, and which partnerships are the best fit for you.
## Applying to a program
After your Dub Partner Network application is approved, click the **Apply** button in the top right of the Program details page.
![Program apply button]() Each program has its own application requirements. Fill out the form as accurately as possible to increase your chance of approval.
Each program has its own application requirements. Fill out the form as accurately as possible to increase your chance of approval.
![Program application]() Before applying, make sure your profile is up to date and as complete as
possible. [Learn more](/help/article/partner-profile)
After completing the form, click **Submit application**. You will be notified by email once your application is approved.
# Configuring brand and support resources for your partners
Source: https://dub.co/help/article/program-resources
Provide partners support, help docs, program terms of service, and brand assets in their dashboard.
This feature is only available on [Business plans and
above](https://dub.co/pricing/partners).
Set partners up for success by providing support, clear docs, program terms, and brand assets in the dashboard so they can launch faster, avoid mistakes, and represent your brand consistently to drive better performance.
## Where to find your program resources
When viewing your Partner Program navigation, click on the **Resources** page under the **Engagement** group.
Before applying, make sure your profile is up to date and as complete as
possible. [Learn more](/help/article/partner-profile)
After completing the form, click **Submit application**. You will be notified by email once your application is approved.
# Configuring brand and support resources for your partners
Source: https://dub.co/help/article/program-resources
Provide partners support, help docs, program terms of service, and brand assets in their dashboard.
This feature is only available on [Business plans and
above](https://dub.co/pricing/partners).
Set partners up for success by providing support, clear docs, program terms, and brand assets in the dashboard so they can launch faster, avoid mistakes, and represent your brand consistently to drive better performance.
## Where to find your program resources
When viewing your Partner Program navigation, click on the **Resources** page under the **Engagement** group.
![Program communication location]() ## Help and support fields
To give your partners the best experience, make sure all fields in your communication settings are filled out:
## Help and support fields
To give your partners the best experience, make sure all fields in your communication settings are filled out:
![Help and support fields]() ### Support Email
The email address your partners should use to contact you with questions or issues about your program. **This field is required.**
Your program's support email will be added to all email communications with your partners, and it will also be added to the program support resources section on the partner dashboard sidebar:
### Support Email
The email address your partners should use to contact you with questions or issues about your program. **This field is required.**
Your program's support email will be added to all email communications with your partners, and it will also be added to the program support resources section on the partner dashboard sidebar:
![Program support resources]() ### Messaging center
This feature is only available on [Advanced plans and
above](https://dub.co/pricing/partners).
Enabling this allows you to directly [message your partners](/help/article/messaging-partners) in the Dub platform. This also allows partners to message you as well.
### Messaging center
This feature is only available on [Advanced plans and
above](https://dub.co/pricing/partners).
Enabling this allows you to directly [message your partners](/help/article/messaging-partners) in the Dub platform. This also allows partners to message you as well.
![Messaging center]() ### Help Center
Provide the link to any documentation or self-serve resources that can help your partners succeed.
This will also be added to the program support resources section on the partner dashboard sidebar:
### Help Center
Provide the link to any documentation or self-serve resources that can help your partners succeed.
This will also be added to the program support resources section on the partner dashboard sidebar:
![Program support resources]() ### Terms of Service
A link to your partner program's Terms of Service (usually separate from your regular platform ToS).
When configured, this will be added to your [program application form](/help/article/program-application-form) as a mandatory checkbox that partners have to accept before submitting their application:
### Terms of Service
A link to your partner program's Terms of Service (usually separate from your regular platform ToS).
When configured, this will be added to your [program application form](/help/article/program-application-form) as a mandatory checkbox that partners have to accept before submitting their application:
![Terms of service checkbox]() ## Brand Assets
Add logo files, colors, or any other documents relating to your brand and the program. These will be available to all your partners from their partner dashboard.
## Brand Assets
Add logo files, colors, or any other documents relating to your brand and the program. These will be available to all your partners from their partner dashboard.
![Brand asset fields]() ### Brand logos
Provide the official brand logos so that your partners have the current versions. You can upload JPG, PNG, or SVG files.
### Brand logos
Provide the official brand logos so that your partners have the current versions. You can upload JPG, PNG, or SVG files.
![Add logo modal]() ### Colors
Provide your official brand colors. You can use the color picker, or you can enter the hex code to select the color.
### Colors
Provide your official brand colors. You can use the color picker, or you can enter the hex code to select the color.
![Add color modal]() ### Additional Files
Add any additional file to support your partners. Common additional files:
* Brand guidelines
* Terms of Service
* Marketing strategies
### Additional Files
Add any additional file to support your partners. Common additional files:
* Brand guidelines
* Terms of Service
* Marketing strategies
![Add file modal]() # Real-time events stream
Source: https://dub.co/help/article/real-time-events-stream
Learn more about Dub's real-time events stream feature and how you can use it to gain deeper insights into your engagement data.
This feature is only available on [Dub's Business
plan](https://dub.co/pricing) and above.
On any given day, we track upwards of **1,000,000 click events** at Dub.
These events are ingested into our data warehouse, which is then materialized in a comprehensive, [real-time analytics dashboard](/help/article/dub-analytics) that gives you powerful insights into your user base.
While this is great, it is still an aggregated view of your data. What if you want to see a chronological stream of click events and export them for further analysis?
**This is where Dub's Real-time Events Stream feature comes in.**
Dub's Real-time Events Stream is a detailed, real-time stream of events across your entire Dub workspace.
# Real-time events stream
Source: https://dub.co/help/article/real-time-events-stream
Learn more about Dub's real-time events stream feature and how you can use it to gain deeper insights into your engagement data.
This feature is only available on [Dub's Business
plan](https://dub.co/pricing) and above.
On any given day, we track upwards of **1,000,000 click events** at Dub.
These events are ingested into our data warehouse, which is then materialized in a comprehensive, [real-time analytics dashboard](/help/article/dub-analytics) that gives you powerful insights into your user base.
While this is great, it is still an aggregated view of your data. What if you want to see a chronological stream of click events and export them for further analysis?
**This is where Dub's Real-time Events Stream feature comes in.**
Dub's Real-time Events Stream is a detailed, real-time stream of events across your entire Dub workspace.
![The Events Stream dashboard on Dub]() ## Where can I access it?
The real-time events stream lives in your workspace's [**Events** tab](https://app.dub.co/events), but you can also access it via the **View Events** button in the Analytics tab:
## Where can I access it?
The real-time events stream lives in your workspace's [**Events** tab](https://app.dub.co/events), but you can also access it via the **View Events** button in the Analytics tab:
![Quick link to open-up the events stream from the Analytics tab]() When you click on the **View Events** button, the same filters you have
applied in the Analytics tab are applied to the Events tab as well.
The events stream is real-time by default – meaning every click event that is recorded will show up in your Events tab in real-time.
## Customizing your events table
You can also customize the dashboard to only show the columns you are interested in:
When you click on the **View Events** button, the same filters you have
applied in the Analytics tab are applied to the Events tab as well.
The events stream is real-time by default – meaning every click event that is recorded will show up in your Events tab in real-time.
## Customizing your events table
You can also customize the dashboard to only show the columns you are interested in:
![Selecting which columns to be displayed in the Events table]() Here are the columns you can choose from:
* **Link**: The link that was clicked/scanned
* **Country**: The country that the event originated from
* **City**: The city that the event originated from
* **Continent**: The continent that the event originated from
* **Device**: The device that was used to trigger the event
* **Browser**: The browser that was used to trigger the event
* **OS**: The operating system that was used to trigger the event
* **Referrer**: The referrer information for the event
* **IP Address**: The IP address that the event originated from (non-EU only)
## Filtering and exporting events
You can also filter the events by the [same filter options as the analytics dashboard](/help/article/dub-analytics#filtering-data).
There are two ways you can filter the events stream:
1. By clicking on the **Filter** button in the top right of the dashboard.
2. Clicking on the filter icon that appears when you hover over a given column value.
Here are the columns you can choose from:
* **Link**: The link that was clicked/scanned
* **Country**: The country that the event originated from
* **City**: The city that the event originated from
* **Continent**: The continent that the event originated from
* **Device**: The device that was used to trigger the event
* **Browser**: The browser that was used to trigger the event
* **OS**: The operating system that was used to trigger the event
* **Referrer**: The referrer information for the event
* **IP Address**: The IP address that the event originated from (non-EU only)
## Filtering and exporting events
You can also filter the events by the [same filter options as the analytics dashboard](/help/article/dub-analytics#filtering-data).
There are two ways you can filter the events stream:
1. By clicking on the **Filter** button in the top right of the dashboard.
2. Clicking on the filter icon that appears when you hover over a given column value.
![Filtering the events stream by link]() Once you've filtered the events to your liking, you can export them by clicking `⋮` button and selecting **Download as CSV**.
Once you've filtered the events to your liking, you can export them by clicking `⋮` button and selecting **Download as CSV**.
![Exporting the filtered events stream to CSV]() # Connecting your payout method to receive payouts
Source: https://dub.co/help/article/receiving-payouts
Learn how to connect a payout method and start receiving payouts from the affiliate programs you're working with.
Once you've set up a [partner profile on Dub](https://partners.dub.co/), you can connect a payout method to start receiving payouts from the programs you're working with.
Depending on your [country of residence](#supported-payout-countries), you can choose between a [stablecoin wallet](#connecting-a-stablecoin-wallet) or a [bank account](#connecting-a-bank-account) to receive payouts.
| | Stablecoin | Bank account |
| ------------------- | ------------------------------------------ | ------------------------------------------ |
| Fees | 0.5% transaction fee | 1% FX conversion fee |
| Payout currency | USDC | Local currency |
| Payout timing | Within minutes | Up to 15 business days |
| Supported countries | [Refer below](#supported-payout-countries) | [Refer below](#supported-payout-countries) |
During onboarding, you must select the country where you legally reside for
tax purposes. Providing incorrect information may result in account
suspension, loss of payouts, and legal action.
## Connecting a stablecoin wallet
Stablecoin payouts is the easiest and fastest way to receive payouts on Dub (especially for non-US partners):
* **Get paid in USD** – instead of your local currency, you can receive payouts in USDC all around the world
* **Faster payouts** – payouts are sent within minutes instead of having to wait up to 15 business days for regular bank transfers
* **Lower fees** – 0.5% transaction fee vs 1% FX conversion fee for international payouts
First, go to your [payout settings on Dub](https://partners.dub.co/payouts?settings=true) and select "Connect stablecoin wallet":
# Connecting your payout method to receive payouts
Source: https://dub.co/help/article/receiving-payouts
Learn how to connect a payout method and start receiving payouts from the affiliate programs you're working with.
Once you've set up a [partner profile on Dub](https://partners.dub.co/), you can connect a payout method to start receiving payouts from the programs you're working with.
Depending on your [country of residence](#supported-payout-countries), you can choose between a [stablecoin wallet](#connecting-a-stablecoin-wallet) or a [bank account](#connecting-a-bank-account) to receive payouts.
| | Stablecoin | Bank account |
| ------------------- | ------------------------------------------ | ------------------------------------------ |
| Fees | 0.5% transaction fee | 1% FX conversion fee |
| Payout currency | USDC | Local currency |
| Payout timing | Within minutes | Up to 15 business days |
| Supported countries | [Refer below](#supported-payout-countries) | [Refer below](#supported-payout-countries) |
During onboarding, you must select the country where you legally reside for
tax purposes. Providing incorrect information may result in account
suspension, loss of payouts, and legal action.
## Connecting a stablecoin wallet
Stablecoin payouts is the easiest and fastest way to receive payouts on Dub (especially for non-US partners):
* **Get paid in USD** – instead of your local currency, you can receive payouts in USDC all around the world
* **Faster payouts** – payouts are sent within minutes instead of having to wait up to 15 business days for regular bank transfers
* **Lower fees** – 0.5% transaction fee vs 1% FX conversion fee for international payouts
First, go to your [payout settings on Dub](https://partners.dub.co/payouts?settings=true) and select "Connect stablecoin wallet":
![Payout settings stablecoin]() This will open up the stablecoin wallet onboarding flow (`accounts.stripe.com/r/acct_xxx...`).
Then, follow the steps in the onboarding flow to connect your stablecoin wallet. You can either use the 1-click connect flow (recommended), or manually input your stablecoin wallet details.
Make sure to triple-check that you've entered the correct stablecoin wallet
address and network to receive USDC payouts. Incorrect details may result in
payout failures and lost funds.
## Connecting a bank account
Dub partners with Stripe for secure global payouts. To receive payouts directly to your bank account, you'll need to follow these steps to set up a [Stripe Express](https://support.stripe.com/express) account and connect your bank account:
International (non-US) bank payouts are subject to a 1% FX conversion fee.
First, go to your [payout settings on Dub](https://partners.dub.co/payouts?settings=true) and select "Connect bank account":
This will open up the stablecoin wallet onboarding flow (`accounts.stripe.com/r/acct_xxx...`).
Then, follow the steps in the onboarding flow to connect your stablecoin wallet. You can either use the 1-click connect flow (recommended), or manually input your stablecoin wallet details.
Make sure to triple-check that you've entered the correct stablecoin wallet
address and network to receive USDC payouts. Incorrect details may result in
payout failures and lost funds.
## Connecting a bank account
Dub partners with Stripe for secure global payouts. To receive payouts directly to your bank account, you'll need to follow these steps to set up a [Stripe Express](https://support.stripe.com/express) account and connect your bank account:
International (non-US) bank payouts are subject to a 1% FX conversion fee.
First, go to your [payout settings on Dub](https://partners.dub.co/payouts?settings=true) and select "Connect bank account":
![Payout settings bank account]() This will open up the Stripe Express account onboarding flow (`connect.stripe.com/setup/e/acct_xxx...`).
Then, follow the steps in the onboarding flow to create your Stripe Express account:
If you have any questions about the Stripe Express account creation flow, you
can try the following:
* Refer to the official [Stripe Express help articles](https://support.stripe.com/express)
* Reach out to [Stripe Express support](https://support.stripe.com/?contact=true)
* Reach out to [Dub support](https://dub.co/contact/support)
For the final step, you'll be asked to connect your bank account to receive payouts. You can either connect your account using Stripe's [Financial Connections](https://stripe.com/financial-connections) flow, or by manually inputting your bank account details.
**Your payout bank account must match your local currency for compliance
reasons.** E.g. if you're based in the UK, you will need to connect a GBP bank
account to receive payouts.
Related FAQ: ["Can I receive payouts in USD?"](#can-i-receive-payouts-in-usd)
## Default payout method
If you reside in a [country](#supported-payout-countries) that supports multiple payout methods, you can select a default payout method if more than one has been added.
From the payout settings panel, click the payout account dropdown and select **"Set as default"** on the payout method you want to set as your default:
This will open up the Stripe Express account onboarding flow (`connect.stripe.com/setup/e/acct_xxx...`).
Then, follow the steps in the onboarding flow to create your Stripe Express account:
If you have any questions about the Stripe Express account creation flow, you
can try the following:
* Refer to the official [Stripe Express help articles](https://support.stripe.com/express)
* Reach out to [Stripe Express support](https://support.stripe.com/?contact=true)
* Reach out to [Dub support](https://dub.co/contact/support)
For the final step, you'll be asked to connect your bank account to receive payouts. You can either connect your account using Stripe's [Financial Connections](https://stripe.com/financial-connections) flow, or by manually inputting your bank account details.
**Your payout bank account must match your local currency for compliance
reasons.** E.g. if you're based in the UK, you will need to connect a GBP bank
account to receive payouts.
Related FAQ: ["Can I receive payouts in USD?"](#can-i-receive-payouts-in-usd)
## Default payout method
If you reside in a [country](#supported-payout-countries) that supports multiple payout methods, you can select a default payout method if more than one has been added.
From the payout settings panel, click the payout account dropdown and select **"Set as default"** on the payout method you want to set as your default:
![Selecting your default payout method]() After your default payout method is set, you'll also receive an email informing you of the change.
## Supported payout countries
Here's the full list of countries that we support sending payouts to, along with the available payout methods for each of them:
## FAQs
### My country is not supported by Dub, what should I do?
If you're not in a [supported country](#supported-payout-countries), one workaround is to create a legal entity in any of the supported countries above and use that to receive payouts instead.
For example, you can create a US LLC (using something like [Stripe Atlas](http://stripe.com/atlas)), which would let you receive payouts in USD.
Once you have an LLC ready, you can go to your [partner profile settings](https://partners.dub.co/settings) and update your profile details accordingly:
* **Country** – Set to "United States"
* **Profile Type** – Set to "Company"
* **Legal company name** – Enter your LLC's legal name
After your default payout method is set, you'll also receive an email informing you of the change.
## Supported payout countries
Here's the full list of countries that we support sending payouts to, along with the available payout methods for each of them:
## FAQs
### My country is not supported by Dub, what should I do?
If you're not in a [supported country](#supported-payout-countries), one workaround is to create a legal entity in any of the supported countries above and use that to receive payouts instead.
For example, you can create a US LLC (using something like [Stripe Atlas](http://stripe.com/atlas)), which would let you receive payouts in USD.
Once you have an LLC ready, you can go to your [partner profile settings](https://partners.dub.co/settings) and update your profile details accordingly:
* **Country** – Set to "United States"
* **Profile Type** – Set to "Company"
* **Legal company name** – Enter your LLC's legal name
![update partner profile]() ### Can I receive payouts in USD?
If you're receiving payouts via [bank account](#connecting-a-bank-account), we can only send payouts in your local currency for compliance reasons. For example, if you are based in Australia, you will receive payouts in AUD.
To receive payouts in USD, we recommend switching to [stablecoin payouts](#connecting-a-stablecoin-wallet) instead, which not only lets you receive payouts in USDC, but is also a [lot faster and cheaper](#connecting-a-stablecoin-wallet).
### Can I connect a savings account instead of a checking account?
While it is possible to connect your savings account instead of a checking account, we highly recommend against it for two main reasons:
1. Some banks do not allow third-party deposits into savings accounts, which may cause your payout to fail;
2. Payouts sent to savings accounts can take significantly longer to process (up to 30 business days, depending on the bank), resulting in payout delays.
### Can I connect to my existing Stripe account instead of creating a new one?
Since we use [Stripe Express](https://support.stripe.com/express) for partner payouts, you can only connect an existing Stripe Express account to Dub (and *not an existing Stripe account*).
Here's the difference between the two:
* Stripe Express – login on `connect.stripe.com`
* Regular Stripe accounts – login on `dashboard.stripe.com`
To connect an existing Stripe Express account to Dub, make sure your partner account email matches your Stripe Express account email.
### Do I need to manually withdraw my earnings from Dub?
Unlike platforms like [PartnerStack](https://dub.co/compare/partnerstack), where you have to manually withdraw your earnings to your bank account – you do not need to manually withdraw your earnings on Dub.
Instead, your earnings/payouts are **automatically deposited into your connected bank account** the moment they are paid by the company.
### What is the minimum withdrawal amount, and how does it work?
All payouts above `$10` will be automatically deposited into your bank account as soon as the program processes its payment.
If your payouts are below `$10`, you can still withdraw them for a `$0.50` fee. Go to your [Payouts page](https://partners.dub.co/payouts) and click on "Pay out now" in the "Processed" box to withdraw your payout.
### Can I receive payouts in USD?
If you're receiving payouts via [bank account](#connecting-a-bank-account), we can only send payouts in your local currency for compliance reasons. For example, if you are based in Australia, you will receive payouts in AUD.
To receive payouts in USD, we recommend switching to [stablecoin payouts](#connecting-a-stablecoin-wallet) instead, which not only lets you receive payouts in USDC, but is also a [lot faster and cheaper](#connecting-a-stablecoin-wallet).
### Can I connect a savings account instead of a checking account?
While it is possible to connect your savings account instead of a checking account, we highly recommend against it for two main reasons:
1. Some banks do not allow third-party deposits into savings accounts, which may cause your payout to fail;
2. Payouts sent to savings accounts can take significantly longer to process (up to 30 business days, depending on the bank), resulting in payout delays.
### Can I connect to my existing Stripe account instead of creating a new one?
Since we use [Stripe Express](https://support.stripe.com/express) for partner payouts, you can only connect an existing Stripe Express account to Dub (and *not an existing Stripe account*).
Here's the difference between the two:
* Stripe Express – login on `connect.stripe.com`
* Regular Stripe accounts – login on `dashboard.stripe.com`
To connect an existing Stripe Express account to Dub, make sure your partner account email matches your Stripe Express account email.
### Do I need to manually withdraw my earnings from Dub?
Unlike platforms like [PartnerStack](https://dub.co/compare/partnerstack), where you have to manually withdraw your earnings to your bank account – you do not need to manually withdraw your earnings on Dub.
Instead, your earnings/payouts are **automatically deposited into your connected bank account** the moment they are paid by the company.
### What is the minimum withdrawal amount, and how does it work?
All payouts above `$10` will be automatically deposited into your bank account as soon as the program processes its payment.
If your payouts are below `$10`, you can still withdraw them for a `$0.50` fee. Go to your [Payouts page](https://partners.dub.co/payouts) and click on "Pay out now" in the "Processed" box to withdraw your payout.
![Pay Out Now Button]() # Risk monitoring
Source: https://dub.co/help/article/risk-monitoring
Safeguard your partner program by automatically flagging, reviewing, and resolving suspicious activity.
This feature is only available on [Advanced plans and
above](https://dub.co/pricing/partners).
Dub's Risk Monitoring feature helps you catch and take action on any potentially fraudulent or compliance activity in your program. We give you the details for each event so you can make the best decision for your program and customers.
# Risk monitoring
Source: https://dub.co/help/article/risk-monitoring
Safeguard your partner program by automatically flagging, reviewing, and resolving suspicious activity.
This feature is only available on [Advanced plans and
above](https://dub.co/pricing/partners).
Dub's Risk Monitoring feature helps you catch and take action on any potentially fraudulent or compliance activity in your program. We give you the details for each event so you can make the best decision for your program and customers.
![Risk table view]() The table view contains the following columns:
* **Event:** The specific unique risk event associated with a partner.
* **Partner:** The partner associated with the risk event.
* **Last Detected:** The date and time of the most recent occurrence of this risk event.
Each row is a single event type for a given partner and can contain multiple event occurrences within it. There may be times when you see multiple rows for the same partner, and in this scenario, the partner has been flagged for multiple events that require your review.
## Risk event types
Here are the event types you might see flagged and detected in your program.
### Duplicate account detected
This partner was flagged by our system for having 2 or more Dub accounts. Please review to prevent abuse of program restrictions, caps, or bonuses.
If the partner is legitimate and has multiple accounts, it's recommended they [merge their accounts](/help/article/merging-partner-accounts#merging-your-partner-accounts) to prevent any future issues. If the accounts are not merged, this can be a sign of self-referral, which is when a partner refers themselves to earn commissions or rewards.
### Matching customer email
This partner's email address matches with a customer's email address in your system. This can be a sign of self-referral, which is when a partner refers themselves to earn commissions or rewards.
### Suspicious customer email domain
This partner has referred a customer with an email address that uses a suspicious domain, such as a disposable or temporary email provider. This can be a sign of fraudulent activity, as these types of email addresses are often used to create fake accounts or to hide the identity of the referrer.
### Banned referral source
This partner has traffic coming from a referral source that you've banned in your [risk rules](#risk-rules). This can be a violation of your program's terms if you don't allow traffic from certain sources, and can also be a sign of fraudulent activity if the partner is running unauthorized ads to generate commissions.
### Paid traffic
This partner has traffic coming from paid sources like Google Ads, Facebook Ads, etc. and can be a violation of your program's terms. It can also be a sign of fraudulent activity if the partner is running unauthorized ads to generate commissions.
We recommend getting clarification from the partner before banning them from your program. To make this easier, you can click the **Request details** button to auto-generate a message to the partner.
The table view contains the following columns:
* **Event:** The specific unique risk event associated with a partner.
* **Partner:** The partner associated with the risk event.
* **Last Detected:** The date and time of the most recent occurrence of this risk event.
Each row is a single event type for a given partner and can contain multiple event occurrences within it. There may be times when you see multiple rows for the same partner, and in this scenario, the partner has been flagged for multiple events that require your review.
## Risk event types
Here are the event types you might see flagged and detected in your program.
### Duplicate account detected
This partner was flagged by our system for having 2 or more Dub accounts. Please review to prevent abuse of program restrictions, caps, or bonuses.
If the partner is legitimate and has multiple accounts, it's recommended they [merge their accounts](/help/article/merging-partner-accounts#merging-your-partner-accounts) to prevent any future issues. If the accounts are not merged, this can be a sign of self-referral, which is when a partner refers themselves to earn commissions or rewards.
### Matching customer email
This partner's email address matches with a customer's email address in your system. This can be a sign of self-referral, which is when a partner refers themselves to earn commissions or rewards.
### Suspicious customer email domain
This partner has referred a customer with an email address that uses a suspicious domain, such as a disposable or temporary email provider. This can be a sign of fraudulent activity, as these types of email addresses are often used to create fake accounts or to hide the identity of the referrer.
### Banned referral source
This partner has traffic coming from a referral source that you've banned in your [risk rules](#risk-rules). This can be a violation of your program's terms if you don't allow traffic from certain sources, and can also be a sign of fraudulent activity if the partner is running unauthorized ads to generate commissions.
### Paid traffic
This partner has traffic coming from paid sources like Google Ads, Facebook Ads, etc. and can be a violation of your program's terms. It can also be a sign of fraudulent activity if the partner is running unauthorized ads to generate commissions.
We recommend getting clarification from the partner before banning them from your program. To make this easier, you can click the **Request details** button to auto-generate a message to the partner.
![Paid traffic event details]() Click **Send** when you're ready to send the message, and then wait for the partner's response before making a decision on whether to ban or resolve the event.
Click **Send** when you're ready to send the message, and then wait for the partner's response before making a decision on whether to ban or resolve the event.
![Request details]() ### Cross-program ban
This partner was banned from one-or-more programs on Dub. Our risk team has reviewed this decision and confirmed the fraudulent behavior or terms of service violation.
## Reviewing risk events
We recommended reviewing the risk events thoroughly and potentially reaching out to the partner before making a decision.
All unresolved risk events expire after 30 days, at which point they will be automatically removed from your Risk Center.
Click on any table row to open the review panel. When reviewing events, there are three panels of information for each item.
### Cross-program ban
This partner was banned from one-or-more programs on Dub. Our risk team has reviewed this decision and confirmed the fraudulent behavior or terms of service violation.
## Reviewing risk events
We recommended reviewing the risk events thoroughly and potentially reaching out to the partner before making a decision.
All unresolved risk events expire after 30 days, at which point they will be automatically removed from your Risk Center.
Click on any table row to open the review panel. When reviewing events, there are three panels of information for each item.
![Risk review]() This is the partner associated with the event. From this section, you can click to message them or to view their profile.
This is the partner associated with the event. From this section, you can click to message them or to view their profile.
![Event partner]() Here you'll see the event type, description, and a line item for each flagged event for the same type associated with this partner.
Here you'll see the event type, description, and a line item for each flagged event for the same type associated with this partner.
![Event type]() If this partner has any pending commissions, you'll see the list of all commissions on hold. These are any commissions that have occurred since the flagged event. [Learn more here](#associated-commissions).
If this partner has any pending commissions, you'll see the list of all commissions on hold. These are any commissions that have occurred since the flagged event. [Learn more here](#associated-commissions).
![Event commissions]() ## Resolving risk events
When reviewing events, we recommend taking your time and ensuring a proper investigation is done. This could involve:
1. Viewing multiple partner/customer profiles to verify if they are duplicates/self-referrals.
2. Reviewing your internal sales information for any fraud signals (e.g. via [Stripe Radar](https://stripe.com/radar)).
3. Reaching out to the partner in question via our [built-in messaging center](/help/article/messaging-partners) to get clarification on their referral activity.
## Resolving risk events
When reviewing events, we recommend taking your time and ensuring a proper investigation is done. This could involve:
1. Viewing multiple partner/customer profiles to verify if they are duplicates/self-referrals.
2. Reviewing your internal sales information for any fraud signals (e.g. via [Stripe Radar](https://stripe.com/radar)).
3. Reaching out to the partner in question via our [built-in messaging center](/help/article/messaging-partners) to get clarification on their referral activity.
![Resolving events]() Then, once you've confirmed the veracity of the reports, you can move on to the
next step.
### Associated commissions
For commissions that are on hold for this partner, you can perform the following:
* Click **Mark all as fraud** to mark all commissions on hold as fraud and cancel them.
* You can individually change the commission status to `Fraud` by clicking the `⋯` button and selecting **Edit commission**.
* When [resolving](#resolve-risk-event) the event, any commissions not marked as `Fraud` will move to `Pending`
* When [banning](#ban-partner) the partner, this will change any `On hold` commissions to `Canceled`.
### Resolve risk event
If a risk event is deemed to be benign, you can select the **Resolve event** option to mark the event as safe and keep the partner in your program.
When confirming the decision, you're able to provide optional additional notes about the steps taken to confirm the details, or any other information.
If you trust this partner completely, you're also able to **Exclude from risk monitoring**. When enabled, any future risk events won't be flagged for this partner. This can be changed anytime in the partner's [advanced settings](/help/article/managing-program-partners#advanced-settings).
Then, once you've confirmed the veracity of the reports, you can move on to the
next step.
### Associated commissions
For commissions that are on hold for this partner, you can perform the following:
* Click **Mark all as fraud** to mark all commissions on hold as fraud and cancel them.
* You can individually change the commission status to `Fraud` by clicking the `⋯` button and selecting **Edit commission**.
* When [resolving](#resolve-risk-event) the event, any commissions not marked as `Fraud` will move to `Pending`
* When [banning](#ban-partner) the partner, this will change any `On hold` commissions to `Canceled`.
### Resolve risk event
If a risk event is deemed to be benign, you can select the **Resolve event** option to mark the event as safe and keep the partner in your program.
When confirming the decision, you're able to provide optional additional notes about the steps taken to confirm the details, or any other information.
If you trust this partner completely, you're also able to **Exclude from risk monitoring**. When enabled, any future risk events won't be flagged for this partner. This can be changed anytime in the partner's [advanced settings](/help/article/managing-program-partners#advanced-settings).
![Resolving]() ### Ban partner
If the risk event turns out to be malicious, you can select the **Ban partner** option to mark the event as fraudulent and ban the partner from your program.
If the partner has other risk events for review, those events will automatically be resolved as well when the partner is banned.
### Ban partner
If the risk event turns out to be malicious, you can select the **Ban partner** option to mark the event as fraudulent and ban the partner from your program.
If the partner has other risk events for review, those events will automatically be resolved as well when the partner is banned.
![Ban partner]() A reason must also be selected from the following options:
| Reason | Definition |
| ----------------------------------- | ----------------------------------------------------------------------------------------------- |
| Terms of Service Violation | Partner violated your program rules or Dub’s terms of service. |
| Inappropriate or Offensive Content | Partner associated your brand or program link with harmful, explicit, or inappropriate content. |
| Artificial Traffic Generation | Partner used bots, fake clicks, or other methods to inflate traffic. |
| Fraudulent Activity | Partner generated fake clicks, leads, or other tracked actions to earn rewards. |
| Spam or Misleading Content | Partner used deceptive messaging, false claims, impersonation, or unsolicited promotion. |
| Brand Abuse or Trademark Violations | Partner misused your brand name, trademarks, or created confusion. |
### Reporting fraud events
When banning a partner, you may want to report them to Dub for further investigation or a network ban. To do this, click the toggle **Flag partner for potential fraud**, and provide as much detail as you can about the event.
Our fraud team will review your submission, and if deemed fraudulent, will ban the partner across the entire network and take necessary action to prevent further abuse.
A reason must also be selected from the following options:
| Reason | Definition |
| ----------------------------------- | ----------------------------------------------------------------------------------------------- |
| Terms of Service Violation | Partner violated your program rules or Dub’s terms of service. |
| Inappropriate or Offensive Content | Partner associated your brand or program link with harmful, explicit, or inappropriate content. |
| Artificial Traffic Generation | Partner used bots, fake clicks, or other methods to inflate traffic. |
| Fraudulent Activity | Partner generated fake clicks, leads, or other tracked actions to earn rewards. |
| Spam or Misleading Content | Partner used deceptive messaging, false claims, impersonation, or unsolicited promotion. |
| Brand Abuse or Trademark Violations | Partner misused your brand name, trademarks, or created confusion. |
### Reporting fraud events
When banning a partner, you may want to report them to Dub for further investigation or a network ban. To do this, click the toggle **Flag partner for potential fraud**, and provide as much detail as you can about the event.
Our fraud team will review your submission, and if deemed fraudulent, will ban the partner across the entire network and take necessary action to prevent further abuse.
![Report partner to Dub]() ## Resolved risk events
To view your resolved events, click the `⋮` dropdown in the top right and select **Resolved events**.
## Resolved risk events
To view your resolved events, click the `⋮` dropdown in the top right and select **Resolved events**.
![Resolved events]() Click on any of the resolved items to see the event details, who resolved the event, and any additional notes.
## Risk rules
We give you the option to customize risk signal detection settings on a program-level, as well as choose which [risk event types](#risk-event-types) you want to receive alerts for.
To edit these, click the **Risk rules** button in the top right.
Click on any of the resolved items to see the event details, who resolved the event, and any additional notes.
## Risk rules
We give you the option to customize risk signal detection settings on a program-level, as well as choose which [risk event types](#risk-event-types) you want to receive alerts for.
To edit these, click the **Risk rules** button in the top right.
![Risk rules button]() ### Paid traffic
If your program doesn't allow traffic from advertisers, ensure this setting is enabled.
### Paid traffic
If your program doesn't allow traffic from advertisers, ensure this setting is enabled.
![Risk rules paid traffic]() When enabled, it will flag all partner traffic that has been generated from several sources, including:
* Google
* Facebook
* X
* Bing
* LinkedIn
* Reddit
* TikTok
#### Google campaign IDs whitelist
Add your internal Google Campaign IDs here to prevent your own Google Ads traffic from being flagged as fraudulent and associated with a partner.
When enabled, it will flag all partner traffic that has been generated from several sources, including:
* Google
* Facebook
* X
* Bing
* LinkedIn
* Reddit
* TikTok
#### Google campaign IDs whitelist
Add your internal Google Campaign IDs here to prevent your own Google Ads traffic from being flagged as fraudulent and associated with a partner.
![Google campaign whitelist]() **Why this matters for Dynamic Search Ads (DSA):** If you run DSA campaigns, Google crawls your site and automatically selects landing pages to serve as ads. Sometimes Google indexes pages that already contain affiliate tracking parameters (e.g., `?via=affiliate`) from affiliate links being shared around the web.
When these pages are served as ads, the affiliate parameter carries through – making it appear that an affiliate is running unauthorized paid ads when it's actually your own campaign. Whitelisting your Google Campaign IDs ensures this internal traffic is correctly attributed to you and not flagged as partner fraud.
### Referral source
If you want to flag traffic from a specific URL, enable this setting and then add the URLs you wish to monitor.
**Why this matters for Dynamic Search Ads (DSA):** If you run DSA campaigns, Google crawls your site and automatically selects landing pages to serve as ads. Sometimes Google indexes pages that already contain affiliate tracking parameters (e.g., `?via=affiliate`) from affiliate links being shared around the web.
When these pages are served as ads, the affiliate parameter carries through – making it appear that an affiliate is running unauthorized paid ads when it's actually your own campaign. Whitelisting your Google Campaign IDs ensures this internal traffic is correctly attributed to you and not flagged as partner fraud.
### Referral source
If you want to flag traffic from a specific URL, enable this setting and then add the URLs you wish to monitor.
![Referral settings]() When adding URLs, you can also use `*` wildcards to match any part of a domain. These a great when monitoring for a specific page and not all traffic from the specific URL.
### Disabling risk settings
If you don't want to receive alerts for a specific risk event type, you can disable it by toggling the switch to the right of the event type.
When adding URLs, you can also use `*` wildcards to match any part of a domain. These a great when monitoring for a specific page and not all traffic from the specific URL.
### Disabling risk settings
If you don't want to receive alerts for a specific risk event type, you can disable it by toggling the switch to the right of the event type.
![Risk rules]() When you disable any of the current active settings, you're also given the option to mark and pending events that match that criteria as "Resolved".
To do this, check the box labelled "Mark all pending events for this rule as `Resolved`" in the confirmation modal.
When you disable any of the current active settings, you're also given the option to mark and pending events that match that criteria as "Resolved".
To do this, check the box labelled "Mark all pending events for this rule as `Resolved`" in the confirmation modal.
![Setting confirmation]() # How to set a not found URL for your custom domains
Source: https://dub.co/help/article/setting-not-found-url
Learn more about how you can set a custom not found URL for your domains on Dub.
This feature is only available on [Pro plans and
above](https://dub.co/pricing).
By default, when a user visits a short link that doesn't exist on Dub, they will see a placeholder "Link Not Found" page:
# How to set a not found URL for your custom domains
Source: https://dub.co/help/article/setting-not-found-url
Learn more about how you can set a custom not found URL for your domains on Dub.
This feature is only available on [Pro plans and
above](https://dub.co/pricing).
By default, when a user visits a short link that doesn't exist on Dub, they will see a placeholder "Link Not Found" page:
![Placeholder 404 page on Dub]() If you are [using a custom domain on Dub](/help/article/how-to-add-custom-domain), you can set a custom URL to redirect users to when a short link under your domain is not found.
To set a custom not found URL for your domains, you can follow the steps below:
1. Go to your [workspace Domains settings tab](https://app.dub.co/domains).
2. Click on the `⋮` button next to the domain you want to set a custom not found URL for.
3. Select **Edit Domain** to edit the domain settings.
4. Toggle the **Not Found URL** section to enable it, and enter the custom URL to redirect users to when a short link under your domain is not found.
5. Click on the **Save changes** button to save the changes.
If you are [using a custom domain on Dub](/help/article/how-to-add-custom-domain), you can set a custom URL to redirect users to when a short link under your domain is not found.
To set a custom not found URL for your domains, you can follow the steps below:
1. Go to your [workspace Domains settings tab](https://app.dub.co/domains).
2. Click on the `⋮` button next to the domain you want to set a custom not found URL for.
3. Select **Edit Domain** to edit the domain settings.
4. Toggle the **Not Found URL** section to enable it, and enter the custom URL to redirect users to when a short link under your domain is not found.
5. Click on the **Save changes** button to save the changes.
![Setting a not found URL for a custom domain]() # Setting up your program
Source: https://dub.co/help/article/setting-up-your-program
Step-by-step guide to go from zero to a live partner program on Dub.
This feature is only available on [Business plans and
above](https://dub.co/pricing/partners).
In this guide, we will walk you through step-by-step how to set up your partner program on [Dub Partners](https://dub.co/partners) and start growing your affiliate revenue.
## The flow at a glance
Set up your program name, logo, and referral link settings.
Choose your primary reward type, structure, duration, and amount.
Invite your first partners to your program.
Add support resources (support email, terms of service, help center) that
partners see on their dashboard.
Review your selection and create your program.
Migrating from another platform? Check out our [migration
guides](/help/article/migrating-from-rewardful) or [contact
support](https://dub.co/contact/support).
## Step 1: Getting started
**Goal**: Set up your program name, logo, and [referral link settings](/help/article/partner-link-settings).
# Setting up your program
Source: https://dub.co/help/article/setting-up-your-program
Step-by-step guide to go from zero to a live partner program on Dub.
This feature is only available on [Business plans and
above](https://dub.co/pricing/partners).
In this guide, we will walk you through step-by-step how to set up your partner program on [Dub Partners](https://dub.co/partners) and start growing your affiliate revenue.
## The flow at a glance
Set up your program name, logo, and referral link settings.
Choose your primary reward type, structure, duration, and amount.
Invite your first partners to your program.
Add support resources (support email, terms of service, help center) that
partners see on their dashboard.
Review your selection and create your program.
Migrating from another platform? Check out our [migration
guides](/help/article/migrating-from-rewardful) or [contact
support](https://dub.co/contact/support).
## Step 1: Getting started
**Goal**: Set up your program name, logo, and [referral link settings](/help/article/partner-link-settings).
![Getting started step in Create partner program]() 1. **Company name**: The name of your company (e.g., "Acme").
2. **Logo**: Upload a square logo. It appears on your program landing page and in partner materials.
3. **Referral link**: Set the domain and destination for partner links:
* **Program domain**
* **Claim a free .link domain**: No setup. Free for one year with your paid account.
* **Connect a domain you own** DNS setup required. Use a domain dedicated to your program (e.g., `refer.yourcompany.com`).
* **Website URL**: Where visitors go when they click a partner's referral link (e.g., `https://yourcompany.com`).
Click **Continue** to go to the next step.
## Step 2: Configure rewards
**Goal**: Choose your primary reward type, structure, duration, and amount.
1. **Company name**: The name of your company (e.g., "Acme").
2. **Logo**: Upload a square logo. It appears on your program landing page and in partner materials.
3. **Referral link**: Set the domain and destination for partner links:
* **Program domain**
* **Claim a free .link domain**: No setup. Free for one year with your paid account.
* **Connect a domain you own** DNS setup required. Use a domain dedicated to your program (e.g., `refer.yourcompany.com`).
* **Website URL**: Where visitors go when they click a partner's referral link (e.g., `https://yourcompany.com`).
Click **Continue** to go to the next step.
## Step 2: Configure rewards
**Goal**: Choose your primary reward type, structure, duration, and amount.
![Configure rewards step in Create partner program]() 1. **Reward type**
* **Sale**: When customers subscribe to your product (most common for SaaS).
* **Lead**: For sign-ups and demos.
2. **Commission structure (only for sale rewards)**
* **Recurring**: Ongoing revenue share (e.g., 15% of each payment for 12 months)
* **One-off**: Fixed payout per conversion (e.g., \$20 per sale)
3. **Duration (only for recurring rewards)**: How long partners earn (e.g., 12 months)
4. **Reward amount**:
* **Percentage**: Share of revenue (e.g., 15% per sale)
* **Flat**: Fixed amount per conversion (e.g., \$20 per lead)
Select your reward conditions and click **Continue**.
You can add more [reward conditions](/help/article/partner-rewards) and
[partner groups](/help/article/partner-groups) later in your program settings.
## Step 3: Invite partners
**Goal**: Invite your first partners to your program.
You can skip this step and [invite partners
later](/help/article/inviting-partners) from the Partners tab.
1. **Reward type**
* **Sale**: When customers subscribe to your product (most common for SaaS).
* **Lead**: For sign-ups and demos.
2. **Commission structure (only for sale rewards)**
* **Recurring**: Ongoing revenue share (e.g., 15% of each payment for 12 months)
* **One-off**: Fixed payout per conversion (e.g., \$20 per sale)
3. **Duration (only for recurring rewards)**: How long partners earn (e.g., 12 months)
4. **Reward amount**:
* **Percentage**: Share of revenue (e.g., 15% per sale)
* **Flat**: Fixed amount per conversion (e.g., \$20 per lead)
Select your reward conditions and click **Continue**.
You can add more [reward conditions](/help/article/partner-rewards) and
[partner groups](/help/article/partner-groups) later in your program settings.
## Step 3: Invite partners
**Goal**: Invite your first partners to your program.
You can skip this step and [invite partners
later](/help/article/inviting-partners) from the Partners tab.
![Invite partners step in Create partner program]() 1. Enter partner **email addresses**.
2. Click **+ Add partner** to add each one.
3. Click **Continue** to proceed (you can also skip and invite later from the Partners tab).
## Step 4: Help and Support
**Goal**: Add support resources (support email, terms of service, help center) that partners see on their dashboard.
1. Enter partner **email addresses**.
2. Click **+ Add partner** to add each one.
3. Click **Continue** to proceed (you can also skip and invite later from the Partners tab).
## Step 4: Help and Support
**Goal**: Add support resources (support email, terms of service, help center) that partners see on their dashboard.
![Help and Support step in Create partner program]() 1. **Support email (required)**: Email partners can reach you for questions.
2. **Help center URL**: Link to your help docs or FAQ (e.g. `https://yourcompany.com/help`).
3. **Terms of Service URL**: Link to your affiliate/partner terms (e.g. `https://yourcompany.com/legal/affiliates`).
These appear on the partner dashboard. You can add or update them later in your [program resources tab](/help/article/program-resources).
***
## Step 5: Overview
**Goal**: Review your selection and create your program.
1. **Support email (required)**: Email partners can reach you for questions.
2. **Help center URL**: Link to your help docs or FAQ (e.g. `https://yourcompany.com/help`).
3. **Terms of Service URL**: Link to your affiliate/partner terms (e.g. `https://yourcompany.com/legal/affiliates`).
These appear on the partner dashboard. You can add or update them later in your [program resources tab](/help/article/program-resources).
***
## Step 5: Overview
**Goal**: Review your selection and create your program.
![Overview step in Create partner program]() You'll see a summary of:
* **Reward**: e.g. "Earn 15% for the first sale"
* **Referral link type**: e.g. `refer.dub.co/{partner-link-key}`
* **Website URL**: Where partner links redirect
Use the pencil icon on each card to edit. When everything looks correct, click **Create program**.
***
## What's next?
Track conversions and attribute sign-ups and purchases
Set up a bank account for sending partner payouts
Segment partners by rewards, discounts, and performance
Add partners via dashboard, API, or application form
Create flexible reward structures for partners
Enroll partners directly from wihin your app
# How to create public analytics dashboards on Dub
Source: https://dub.co/help/article/share-analytics
Learn how to create public analytics pages for your Dub short links and link folders – with password protection and search engine indexing options.
On Dub, you can create a public analytics dashboard for your short links or link folders.
This allows you to share the analytics for a given short link (or a folder of links) with clients or other external stakeholders without having to invite them to your Dub workspace.
For further control, you can also show [conversion analytics](#show-conversion-data), [set a password](#setting-a-password), or [enable search engine indexing](#search-engine-indexing) for the dashboard.
In this guide, we'll go over how to set up public analytics dashboards and the options available.
## Creating a shared analytics dashboard for a short link
There are two ways to enable a public analytics dashboard for a given short link:
**Option 1**: On the links dashboard, hover over the `perfomance` counter button for a given short link and click on the **Share dashboard** button.
You'll see a summary of:
* **Reward**: e.g. "Earn 15% for the first sale"
* **Referral link type**: e.g. `refer.dub.co/{partner-link-key}`
* **Website URL**: Where partner links redirect
Use the pencil icon on each card to edit. When everything looks correct, click **Create program**.
***
## What's next?
Track conversions and attribute sign-ups and purchases
Set up a bank account for sending partner payouts
Segment partners by rewards, discounts, and performance
Add partners via dashboard, API, or application form
Create flexible reward structures for partners
Enroll partners directly from wihin your app
# How to create public analytics dashboards on Dub
Source: https://dub.co/help/article/share-analytics
Learn how to create public analytics pages for your Dub short links and link folders – with password protection and search engine indexing options.
On Dub, you can create a public analytics dashboard for your short links or link folders.
This allows you to share the analytics for a given short link (or a folder of links) with clients or other external stakeholders without having to invite them to your Dub workspace.
For further control, you can also show [conversion analytics](#show-conversion-data), [set a password](#setting-a-password), or [enable search engine indexing](#search-engine-indexing) for the dashboard.
In this guide, we'll go over how to set up public analytics dashboards and the options available.
## Creating a shared analytics dashboard for a short link
There are two ways to enable a public analytics dashboard for a given short link:
**Option 1**: On the links dashboard, hover over the `perfomance` counter button for a given short link and click on the **Share dashboard** button.
![More options dropdown menu on the links dashboard]() **Option 2**: On the analytics page for a given short link, click on the **Share** button in the top right corner.
**Option 2**: On the analytics page for a given short link, click on the **Share** button in the top right corner.
![Share button on the link's analytics page]() Then, inside the **Share Dashboard** modal, toggle the **Enable public sharing** switch to **ON**.
Then, inside the **Share Dashboard** modal, toggle the **Enable public sharing** switch to **ON**.
![Share short link dashboard modal]() Behind the scenes, Dub creates a public page for your link's analytics and automatically copies the link to your clipboard. [Here's an example](https://d.to/stats/try).
## Creating a shared analytics dashboard for a link folder
Only workspace owners can create shared dashboards for link folders.
There are two ways to enable a public analytics dashboard for a given link folder:
**Option 1**: On the folder view, click the `⋮` dropdown and select **Share analytics**.
Behind the scenes, Dub creates a public page for your link's analytics and automatically copies the link to your clipboard. [Here's an example](https://d.to/stats/try).
## Creating a shared analytics dashboard for a link folder
Only workspace owners can create shared dashboards for link folders.
There are two ways to enable a public analytics dashboard for a given link folder:
**Option 1**: On the folder view, click the `⋮` dropdown and select **Share analytics**.
![Folder dropdown options]() **Option 2**: On the analytics page for a given link folder, click on the **Share** button in the top right corner.
**Option 2**: On the analytics page for a given link folder, click on the **Share** button in the top right corner.
![Share button on the folder's analytics page]() Then, inside the **Share Dashboard** modal, toggle the **Enable public sharing** switch to **ON**.
Then, inside the **Share Dashboard** modal, toggle the **Enable public sharing** switch to **ON**.
![Share folder dashboard modal]() ## Sharing settings
The following settings are available for both short links and link folders.
### Show conversion analytics
If you enable Conversions analytics, this will change what's visible on the shared dashboard to include your lead and sales analytics.
Here's how the dashboard looks with conversion analytics enabled:
## Sharing settings
The following settings are available for both short links and link folders.
### Show conversion analytics
If you enable Conversions analytics, this will change what's visible on the shared dashboard to include your lead and sales analytics.
Here's how the dashboard looks with conversion analytics enabled:
![Shared folder dashboard with conversion analytics]() Here's how the dashboard looks without conversion analytics enabled:
Here's how the dashboard looks without conversion analytics enabled:
![Shared folder dashboard with no conversion analytics]() ### Setting a password
You can also set a password for your public analytics dashboard to further secure the page. To do that, toggle the **Password protection** switch to **ON** and set a password in the field below.
### Setting a password
You can also set a password for your public analytics dashboard to further secure the page. To do that, toggle the **Password protection** switch to **ON** and set a password in the field below.
![Share Dashboard modal with password protection enabled]() Then, when someone visits the public analytics dashboard, they will be prompted to enter the password in order to view the page.
Then, when someone visits the public analytics dashboard, they will be prompted to enter the password in order to view the page.
![Public analytics dashboard with password protection enabled]() ### Search engine indexing
If you want to enable search engine indexing for your public analytics dashboard, toggle the **Search engine indexing** switch to **ON**.
This will make the page more discoverable by search engines like Google.
Otherwise, public analytics dashboards are served with a `noindex` meta tag by default, which tells search engines not to index the page.
`html `
## How to disable a public analytics dashboard
Follow the same steps as the ["How to create a public analytics dashboard"](#how-to-create-a-public-analytics-dashboard) section above, but toggle the **Enable public sharing** switch to **OFF**.
Dub will automatically disable the public analytics page for the given link. You will still be able to view the analytics for the link on your Dub dashboard, but the public page will no longer be accessible.
Warning: By disabling a public analytics dashboard for a given link, your
existing dashboard link will break and you'll have to create a new one – which
will have a different URL. This action is irreversible.
# Troubleshooting custom domains
Source: https://dub.co/help/article/troubleshooting-domains
Learn how to troubleshoot common issues with custom domains on Dub.
When you're [setting up a custom domain on Dub](/help/article/how-to-add-custom-domain), you might run into some issues. Here are some common ones:
## domain.com redirected you too many times (ERR\_TOO\_MANY\_REDIRECTS)
### Search engine indexing
If you want to enable search engine indexing for your public analytics dashboard, toggle the **Search engine indexing** switch to **ON**.
This will make the page more discoverable by search engines like Google.
Otherwise, public analytics dashboards are served with a `noindex` meta tag by default, which tells search engines not to index the page.
`html `
## How to disable a public analytics dashboard
Follow the same steps as the ["How to create a public analytics dashboard"](#how-to-create-a-public-analytics-dashboard) section above, but toggle the **Enable public sharing** switch to **OFF**.
Dub will automatically disable the public analytics page for the given link. You will still be able to view the analytics for the link on your Dub dashboard, but the public page will no longer be accessible.
Warning: By disabling a public analytics dashboard for a given link, your
existing dashboard link will break and you'll have to create a new one – which
will have a different URL. This action is irreversible.
# Troubleshooting custom domains
Source: https://dub.co/help/article/troubleshooting-domains
Learn how to troubleshoot common issues with custom domains on Dub.
When you're [setting up a custom domain on Dub](/help/article/how-to-add-custom-domain), you might run into some issues. Here are some common ones:
## domain.com redirected you too many times (ERR\_TOO\_MANY\_REDIRECTS)
![Browser error message saying 'dub.engineering redirected you too many times']() If you're getting a `domain.com redirected you too many times` error in your browser, chances are you're [using Cloudflare for your domain hosting](/help/article/using-cloudflare-domains) and are missing an extra configuration step to make this work.
To fix this, all you have to do is set your domain to use [Cloudflare DNS only](/help/article/using-cloudflare-domains#using-cloudflares-dns-only-recommended) (without Cloudflare Proxy).
## This site can't provide a secure connection (ERR\_SSL\_PROTOCOL\_ERROR)
If you're getting a `domain.com redirected you too many times` error in your browser, chances are you're [using Cloudflare for your domain hosting](/help/article/using-cloudflare-domains) and are missing an extra configuration step to make this work.
To fix this, all you have to do is set your domain to use [Cloudflare DNS only](/help/article/using-cloudflare-domains#using-cloudflares-dns-only-recommended) (without Cloudflare Proxy).
## This site can't provide a secure connection (ERR\_SSL\_PROTOCOL\_ERROR)
![Browser error message saying 'This site can't provide a secure connection']() Another common error is when the `https` version of your domain doesn't work (but the `http` version does). When that happens, you'll get a **This site can't provide a secure connection** error in your browser.
The reason for this error is that the SSL certificate for your domain has not been generated yet, and it should automatically be resolved anywhere between 1 to 24 hours. If your domain still doesn't work after 24 hours, please [reach out to us](https://dub.co/contact/support) and we'll be happy to help you out.
# Using Cloudflare domains with Dub
Source: https://dub.co/help/article/using-cloudflare-domains
Learn how to use Cloudflare domains for your Dub workspace
If you're using a domain on Cloudflare for your Dub workspace, you might need to configure a few extra steps to make sure that your domain works properly.
## Using Cloudflare's DNS only (recommended)
We recommend using Cloudflare's DNS only mode for your custom domain. This makes sure that requests/clicks to your short links will always reach Dub directly instead of being served through Cloudflare – which can lead to [inaccurate analytics data](/help/article/incorrect-analytics-geolocation-data).
Configuring Cloudflare as DNS only is also better for redirect speeds, since you avoid having your users' requests get proxied through Cloudflare, which adds additional latency.
To set this up, all you need to do is [set your domain's DNS records](/help/article/how-to-add-custom-domain#step-2-configure-your-domain) to point to Dub's servers and make sure that you're using the **DNS only** option on Cloudflare.
1. Go to your Cloudflare dashboard and select your domain.
2. Click on the **DNS** tab on the sidebar menu.
3. Under **Records**, click on the **Edit** button.
4. Change the **Proxy status** to **DNS only**.
5. Click on the **Save** button.
Another common error is when the `https` version of your domain doesn't work (but the `http` version does). When that happens, you'll get a **This site can't provide a secure connection** error in your browser.
The reason for this error is that the SSL certificate for your domain has not been generated yet, and it should automatically be resolved anywhere between 1 to 24 hours. If your domain still doesn't work after 24 hours, please [reach out to us](https://dub.co/contact/support) and we'll be happy to help you out.
# Using Cloudflare domains with Dub
Source: https://dub.co/help/article/using-cloudflare-domains
Learn how to use Cloudflare domains for your Dub workspace
If you're using a domain on Cloudflare for your Dub workspace, you might need to configure a few extra steps to make sure that your domain works properly.
## Using Cloudflare's DNS only (recommended)
We recommend using Cloudflare's DNS only mode for your custom domain. This makes sure that requests/clicks to your short links will always reach Dub directly instead of being served through Cloudflare – which can lead to [inaccurate analytics data](/help/article/incorrect-analytics-geolocation-data).
Configuring Cloudflare as DNS only is also better for redirect speeds, since you avoid having your users' requests get proxied through Cloudflare, which adds additional latency.
To set this up, all you need to do is [set your domain's DNS records](/help/article/how-to-add-custom-domain#step-2-configure-your-domain) to point to Dub's servers and make sure that you're using the **DNS only** option on Cloudflare.
1. Go to your Cloudflare dashboard and select your domain.
2. Click on the **DNS** tab on the sidebar menu.
3. Under **Records**, click on the **Edit** button.
4. Change the **Proxy status** to **DNS only**.
5. Click on the **Save** button.
![]() This will make sure that the traffic to your domain is *not proxied through Cloudflare* and is sent directly to Dub.
## Using Cloudflare's Proxy
If you really want to use Cloudflare's proxy for your custom domain, you'll need to make sure that your SSL/TLS encryption mode is set to "Full" on Cloudflare.
This will make sure that the traffic to your domain is *not proxied through Cloudflare* and is sent directly to Dub.
## Using Cloudflare's Proxy
If you really want to use Cloudflare's proxy for your custom domain, you'll need to make sure that your SSL/TLS encryption mode is set to "Full" on Cloudflare.
![Using Cloudflare's proxy for your custom domain]() You can do that by following these steps:
1. Go to your Cloudflare dashboard and select your domain.
2. Click on the **SSL/TLS** tab on the sidebar menu.
3. Under **Overview**, click on the **Configure** button.
4. Select the **Custom SSL/TLS** option and then select the **Full** option.
5. Click on **Save** to apply the changes.
You can do that by following these steps:
1. Go to your Cloudflare dashboard and select your domain.
2. Click on the **SSL/TLS** tab on the sidebar menu.
3. Under **Overview**, click on the **Configure** button.
4. Select the **Custom SSL/TLS** option and then select the **Full** option.
5. Click on **Save** to apply the changes.
![]() Using Cloudflare's Proxy can potentially **cause [inaccuracies in analytics
data](/help/article/incorrect-analytics-geolocation-data)**. This is because using a proxy will send all traffic through the proxy
first, then to Dub. This will result in incorrect geolocation data being
presented and the public IP address of your proxy being sent.
To avoid this, we recommend using [Cloudflare's DNS only mode](#using-cloudflares-dns-only-without-proxy) instead of using
their proxy.
# Can I use a proxy on top of my Dub custom domain?
Source: https://dub.co/help/article/using-proxies-on-custom-domains
We do not recommend using a proxy (e.g. Cloudflare, Cloudfront) on top of your Dub custom domain. Here are a few reasons why.
When [using a custom domain on Dub](/help/article/how-to-add-custom-domain), we do not recommend using a proxy (e.g. Cloudflare Proxy, Cloudfront CDN) in front of your custom domain.
Here are a few reasons why:
1. [**Inaccurate analytics data**](/help/article/incorrect-analytics-geolocation-data): The proxy will send all your click traffic through the proxy first, then to Dub. This will result in incorrect geolocation data being presented and the public IP address of your proxy being sent.
2. **Increased redirect latency**: If you're using a proxy, all requests to your links will have to pass through the proxy before reaching Dub, which can result in increased redirect latency, ranging from 2x to 10x slower link redirects.
3. **Reduced reliability**: By adding a proxy in front of your links, you're essentially introducing an external dependency that can cause your links to go down if the proxy fails.
4. **Link redirect issues**: Proxies can also lead to [ERR\_TOO\_MANY\_REDIRECTS issues](/help/article/troubleshooting-domains#domaincom-redirected-you-too-many-times-err_too_many_redirects), which will break your redirects and result in a subpar user experience.
## How do I know if my domain is using a proxy?
If you're [using Cloudflare for your domains](/help/article/using-cloudflare-domains), you can use [this tool](https://checkforcloudflare.selesti.com/) to check if you're using Cloudflare Proxy. And [here's how you can turn off Cloudflare Proxy for your domains](/help/article/using-cloudflare-domains).
For all other DNS/proxy providers, you can use a tool like [digger.tools](https://digger.tools/) to check if your domain is using the [correct DNS records](/help/article/how-to-add-custom-domain#step-2-configure-your-domain).
# How do I add UTM parameters to a link?
Source: https://dub.co/help/article/utm-builder
Learn more about why UTM parameters are important for marketing links and how to add them to your links using the Dub UTM Builder.
UTM (short for *Urchin Tracking Module*) parameters are great for marketing links because they provide detailed tracking and analytics. Here’s why:
* **Source Identification**: They specify the source of traffic (e.g., Facebook, Google), helping to identify which platforms are driving traffic.
* **Campaign Tracking**: They track specific marketing campaigns, allowing marketers to evaluate the effectiveness of each campaign.
* **Medium Differentiation**: They distinguish between different types of marketing mediums (e.g., email, social media, PPC).
* **Content Performance**: They track different content pieces within a campaign, providing insights on what content resonates best with the audience.
* **ROI Measurement**: They help in calculating the return on investment (ROI) for different marketing efforts.
Learn more about the best practices when it comes to UTM tracking with our
[Ultimate Guide to UTM Tracking](https://dub.co/blog/utm-guide).
## Dub's UTM Builder
To make it easier to add UTM parameters to your links, Dub provides a UTM builder that allows you to easily populate UTM parameters for your links. [Here's a live demo](https://dub.co/tools/utm-builder) that you can play around with.
Here are the UTM parameters that Dub supports:
| Parameter | Code | Description |
| ---------------- | -------------- | ---------------------------------------------------------- |
| **UTM Source** | `utm_source` | The source of your traffic (e.g. Facebook, Twitter, etc.). |
| **UTM Medium** | `utm_medium` | The medium of your traffic (e.g. social, email, etc.). |
| **UTM Campaign** | `utm_campaign` | The name of your campaign (e.g. summer2023) |
| **UTM Term** | `utm_term` | The term of your campaign (e.g. running+shoes) |
| **UTM Content** | `utm_content` | The content of your campaign (e.g. logo+link) |
| **Referral** | `ref` | The website that is sending traffic to your link. |
As you can see, we also support an increasingly common parameter `ref` – as popularized by sites like [Product Hunt](https://www.producthunt.com/) and [OSS Gallery](https://oss.gallery/).
## How to use the Dub UTM Builder
To use the Dub UTM builder, follow these steps:
First, [create a link](/help/article/how-to-create-link) using the [Dub link builder](/help/article/dub-link-builder).
Using Cloudflare's Proxy can potentially **cause [inaccuracies in analytics
data](/help/article/incorrect-analytics-geolocation-data)**. This is because using a proxy will send all traffic through the proxy
first, then to Dub. This will result in incorrect geolocation data being
presented and the public IP address of your proxy being sent.
To avoid this, we recommend using [Cloudflare's DNS only mode](#using-cloudflares-dns-only-without-proxy) instead of using
their proxy.
# Can I use a proxy on top of my Dub custom domain?
Source: https://dub.co/help/article/using-proxies-on-custom-domains
We do not recommend using a proxy (e.g. Cloudflare, Cloudfront) on top of your Dub custom domain. Here are a few reasons why.
When [using a custom domain on Dub](/help/article/how-to-add-custom-domain), we do not recommend using a proxy (e.g. Cloudflare Proxy, Cloudfront CDN) in front of your custom domain.
Here are a few reasons why:
1. [**Inaccurate analytics data**](/help/article/incorrect-analytics-geolocation-data): The proxy will send all your click traffic through the proxy first, then to Dub. This will result in incorrect geolocation data being presented and the public IP address of your proxy being sent.
2. **Increased redirect latency**: If you're using a proxy, all requests to your links will have to pass through the proxy before reaching Dub, which can result in increased redirect latency, ranging from 2x to 10x slower link redirects.
3. **Reduced reliability**: By adding a proxy in front of your links, you're essentially introducing an external dependency that can cause your links to go down if the proxy fails.
4. **Link redirect issues**: Proxies can also lead to [ERR\_TOO\_MANY\_REDIRECTS issues](/help/article/troubleshooting-domains#domaincom-redirected-you-too-many-times-err_too_many_redirects), which will break your redirects and result in a subpar user experience.
## How do I know if my domain is using a proxy?
If you're [using Cloudflare for your domains](/help/article/using-cloudflare-domains), you can use [this tool](https://checkforcloudflare.selesti.com/) to check if you're using Cloudflare Proxy. And [here's how you can turn off Cloudflare Proxy for your domains](/help/article/using-cloudflare-domains).
For all other DNS/proxy providers, you can use a tool like [digger.tools](https://digger.tools/) to check if your domain is using the [correct DNS records](/help/article/how-to-add-custom-domain#step-2-configure-your-domain).
# How do I add UTM parameters to a link?
Source: https://dub.co/help/article/utm-builder
Learn more about why UTM parameters are important for marketing links and how to add them to your links using the Dub UTM Builder.
UTM (short for *Urchin Tracking Module*) parameters are great for marketing links because they provide detailed tracking and analytics. Here’s why:
* **Source Identification**: They specify the source of traffic (e.g., Facebook, Google), helping to identify which platforms are driving traffic.
* **Campaign Tracking**: They track specific marketing campaigns, allowing marketers to evaluate the effectiveness of each campaign.
* **Medium Differentiation**: They distinguish between different types of marketing mediums (e.g., email, social media, PPC).
* **Content Performance**: They track different content pieces within a campaign, providing insights on what content resonates best with the audience.
* **ROI Measurement**: They help in calculating the return on investment (ROI) for different marketing efforts.
Learn more about the best practices when it comes to UTM tracking with our
[Ultimate Guide to UTM Tracking](https://dub.co/blog/utm-guide).
## Dub's UTM Builder
To make it easier to add UTM parameters to your links, Dub provides a UTM builder that allows you to easily populate UTM parameters for your links. [Here's a live demo](https://dub.co/tools/utm-builder) that you can play around with.
Here are the UTM parameters that Dub supports:
| Parameter | Code | Description |
| ---------------- | -------------- | ---------------------------------------------------------- |
| **UTM Source** | `utm_source` | The source of your traffic (e.g. Facebook, Twitter, etc.). |
| **UTM Medium** | `utm_medium` | The medium of your traffic (e.g. social, email, etc.). |
| **UTM Campaign** | `utm_campaign` | The name of your campaign (e.g. summer2023) |
| **UTM Term** | `utm_term` | The term of your campaign (e.g. running+shoes) |
| **UTM Content** | `utm_content` | The content of your campaign (e.g. logo+link) |
| **Referral** | `ref` | The website that is sending traffic to your link. |
As you can see, we also support an increasingly common parameter `ref` – as popularized by sites like [Product Hunt](https://www.producthunt.com/) and [OSS Gallery](https://oss.gallery/).
## How to use the Dub UTM Builder
To use the Dub UTM builder, follow these steps:
First, [create a link](/help/article/how-to-create-link) using the [Dub link builder](/help/article/dub-link-builder).
![The Dub link builder]() Click on the **UTM** button in the link builder. This will open the **UTM Builder** modal.
You can also quickly access the **UTM Builder** feature by using the keyboard shortcut `U` while in the link builder.
Click on the **UTM** button in the link builder. This will open the **UTM Builder** modal.
You can also quickly access the **UTM Builder** feature by using the keyboard shortcut `U` while in the link builder.
![Use the UTM builder to populate UTM parameters for your links]() Here, you can populate the UTM parameters for your link. Some example values include:
* **UTM Source**: `twitter`
* **UTM Medium**: `social`
* **UTM Campaign**: `summer2023`
Click on the **Save** button to add the UTM parameters to your link.
Click the **Create link** button to generate the link with the UTM parameters.
Voila! You've got a link with UTM parameters.
## UTM Templates
Dub also supports the ability to [create UTM templates](/help/article/how-to-create-utm-templates) that you can reuse across your team, which leads to better campaign management & tracking accuracy.
Here, you can populate the UTM parameters for your link. Some example values include:
* **UTM Source**: `twitter`
* **UTM Medium**: `social`
* **UTM Campaign**: `summer2023`
Click on the **Save** button to add the UTM parameters to your link.
Click the **Create link** button to generate the link with the UTM parameters.
Voila! You've got a link with UTM parameters.
## UTM Templates
Dub also supports the ability to [create UTM templates](/help/article/how-to-create-utm-templates) that you can reuse across your team, which leads to better campaign management & tracking accuracy.
![Selecting a UTM template from the dropdown]() [Read the guide on how to create UTM templates](/help/article/how-to-create-utm-templates) or [try out the demo here](https://dub.co/tools/utm-builder).
# What is a "Workspace" on Dub?
Source: https://dub.co/help/article/what-is-a-workspace
Learn more about what a "Workspace" is on Dub and how you can use it to organize your links.
On Dub, a "Workspace" is a space that you can use to store all the short links for your website, app, or business.
You can think of a Dub workspace as a "Team" or an "Organization" where you can [invite your teammates](/help/article/how-to-invite-teammates) to join and manage the links together.
## How to create a workspace
To create a workspace, go to the [Dub Dashboard](https://app.dub.co).
[Read the guide on how to create UTM templates](/help/article/how-to-create-utm-templates) or [try out the demo here](https://dub.co/tools/utm-builder).
# What is a "Workspace" on Dub?
Source: https://dub.co/help/article/what-is-a-workspace
Learn more about what a "Workspace" is on Dub and how you can use it to organize your links.
On Dub, a "Workspace" is a space that you can use to store all the short links for your website, app, or business.
You can think of a Dub workspace as a "Team" or an "Organization" where you can [invite your teammates](/help/article/how-to-invite-teammates) to join and manage the links together.
## How to create a workspace
To create a workspace, go to the [Dub Dashboard](https://app.dub.co).
![The workspace creation modal on Dub]() Here are the fields in the workspace creation modal:
1. **Workspace Name**: This is the name of your workspace on Dub.
2. **Workspace Slug**: This is your workspace's unique slug on Dub.
Once you have filled in the fields, click on the **Create workspace** button to create your workspace.
## Onboarding checklist
After you have created your workspace, you will be redirected to the workspace dashboard. Here, you will see a checklist of things that you can do to get started with your workspace.
Here are the fields in the workspace creation modal:
1. **Workspace Name**: This is the name of your workspace on Dub.
2. **Workspace Slug**: This is your workspace's unique slug on Dub.
Once you have filled in the fields, click on the **Create workspace** button to create your workspace.
## Onboarding checklist
After you have created your workspace, you will be redirected to the workspace dashboard. Here, you will see a checklist of things that you can do to get started with your workspace.
![Onboarding checklist for a new workspace in Dub]() 1. **Configure your custom domain**: You can [configure your custom domain](/help/article/how-to-add-custom-domain) to use your own domain for your short links.
2. **Create or import your links**: You can [create links](/help/article/how-to-create-link) or [import existing ones](/help/article/how-to-import-csv) to your workspace.
3. **Invite your teammates**: You can [invite your teammates](/help/article/how-to-invite-teammates) to join your workspace and manage the links together.
## How many domains can I add to a workspace?
Dub is the only link management platform that allows you to [add custom domains](/help/article/how-to-add-custom-domain) for free. The number of domains that you can add to a workspace depends on your plan:
* **Free plan**: 3 domains
* **Pro plan**: 10 domains
* **Business plan**: 100 domains
* **Advanced plan**: 250 domains
* **Enterprise plan**: Unlimited domains
If your workspace has multiple domains, you will be able to filter the links in the workspace by their respective domains.
1. **Configure your custom domain**: You can [configure your custom domain](/help/article/how-to-add-custom-domain) to use your own domain for your short links.
2. **Create or import your links**: You can [create links](/help/article/how-to-create-link) or [import existing ones](/help/article/how-to-import-csv) to your workspace.
3. **Invite your teammates**: You can [invite your teammates](/help/article/how-to-invite-teammates) to join your workspace and manage the links together.
## How many domains can I add to a workspace?
Dub is the only link management platform that allows you to [add custom domains](/help/article/how-to-add-custom-domain) for free. The number of domains that you can add to a workspace depends on your plan:
* **Free plan**: 3 domains
* **Pro plan**: 10 domains
* **Business plan**: 100 domains
* **Advanced plan**: 250 domains
* **Enterprise plan**: Unlimited domains
If your workspace has multiple domains, you will be able to filter the links in the workspace by their respective domains.
![Filtering links by domain in Dub]() ## Limits and Billing for Workspaces
On Dub, you can create as many workspaces as you want, and each workspace will be billed separately.
However, to prevent abuse, you can only create up to 2 workspaces on the Free plan. If you need more workspaces, you can [upgrade to the Pro plan](https://dub.co/pricing).
# Managing workspace members with roles
Source: https://dub.co/help/article/workspace-roles
Learn how to use roles to manage your workspace members' permissions on Dub.
On Dub, you can [invite your teammates](/help/article/how-to-invite-teammates) to join your workspace. This is useful if you want to collaborate with your team on your short links.
When you invite your teammates, it is important to understand that you can manage their permissions and roles in your workspace. This is where roles come in.
There are four roles you can assign to your team members:
## Owner role
The owner of a workspace has the highest level of access. When you create a new workspace, you are automatically assigned the owner role by default. Then, when you invite your teammates, you can assign them either the owner or member role.
## Member role
When you invite your teammates to join your workspace, they are assigned the member role by default.
The member role is limited in what they can do compared to the owner role – this can be useful for security purposes, e.g. you may want to give your team members the ability to manage short links and tags, but not the ability to manage domains or the workspace settings.
## Viewer role
The viewer role is meant for teammates who need visibility into what is happening in the workspace, without the ability to make changes. This is a good fit for stakeholders, clients, or teammates who want to review links, performance, and partner activity, but should not be able to edit, create, or delete anything.
The Viewer role is only available on [Business plans and
above](https://dub.co/pricing).
## Billing role
The billing role is intended for teammates who are responsible for [partner payouts](/help/article/partner-payouts) and [managing billing information](/help/article/how-to-change-billing-information). This role gives them access to billing details (e.g. [setting up a bank account for partner payouts](/help/article/how-to-set-up-bank-account)) and payout actions, while keeping the rest of the workspace locked down.
The Billing role is only available on [Advanced plans and
above](https://dub.co/pricing/partners).
## Comparison grid
Here's a comparison grid of the features available to owners and members.
| Feature | Owner | Member | Viewer | Billing |
| ----------------------------------------------------------------------------------- | ----- | ------ | ------ | ------- |
| 👥 [**Dub Partners**](https://dub.co/partners) | | | | |
| Access [groups](/help/article/partner-groups) | ✅ | ✅ | ✅ | ✅ |
| Create, update, and delete [groups](/help/article/partner-groups) | ✅ | ✅ | ❌ | ❌ |
| [Confirm payouts](/help/article/partner-payouts#how-to-pay-your-partners) | ✅ | ❌ | ❌ | ✅ |
| View [messages](/help/article/messaging-partners) | ✅ | ✅ | ✅ | ✅ |
| Create [messages](/help/article/messaging-partners) | ✅ | ✅ | ❌ | ❌ |
| 📈 [Dub Analytics](https://dub.co/analytics) | | | | |
| View [analytics](/help/article/dub-analytics) | ✅ | ✅ | ✅ | ✅ |
| 🔗 [**Dub Links**](https://dub.co/links) | | | | |
| View links | ✅ | ✅ | ✅ | ✅ |
| Create, update, or delete links | ✅ | ✅ | ❌ | ❌ |
| View [folders](/help/article/link-folders) | ✅ | ✅ | ✅ | ✅ |
| Create, update, or delete [folders](/help/article/link-folders) | ✅ | ✅ | ❌ | ❌ |
| View [tags](/help/article/how-to-use-tags) | ✅ | ✅ | ✅ | ✅ |
| Create, update, or delete [tags](/help/article/how-to-use-tags) | ✅ | ✅ | ❌ | ❌ |
| View [domains](/help/article/how-to-add-custom-domain) | ✅ | ✅ | ✅ | ✅ |
| Create, update, or delete [domains](/help/article/how-to-add-custom-domain) | ✅ | ❌ | ❌ | ❌ |
| 🔌 **Dub Integrations** | | | | |
| View [integrations](https://dub.co/integrations) | ✅ | ✅ | ✅ | ✅ |
| Install/Uninstall [integrations](https://dub.co/integrations) | ✅ | ✅ | ❌ | ❌ |
| View [API keys](/docs/api-reference/tokens) | ✅ | ✅ | ✅ | ✅ |
| Create, update, or delete [API keys](/docs/api-reference/tokens) | ✅ | ✅ | ❌ | ❌ |
| View [webhooks](/docs/webhooks/introduction) | ✅ | ✅ | ✅ | ✅ |
| Create, update, or delete [webhooks](/docs/webhooks/introduction) | ✅ | ❌ | ❌ | ❌ |
| View [OAuth apps](/docs/integrations/quickstart) | ✅ | ✅ | ✅ | ✅ |
| Create, update, or delete OAuth apps | ✅ | ❌ | ❌ | ❌ |
| 🏛️ [**Workspace management**](/help/article/what-is-a-workspace) | | | | |
| View workspace | ✅ | ✅ | ✅ | ✅ |
| Update or delete workspace | ✅ | ❌ | ❌ | ❌ |
| [Manage teammates](/help/article/how-to-invite-teammates) | ✅ | ❌ | ❌ | ❌ |
| [Manage billing information](/help/article/how-to-change-billing-information) | ✅ | ❌ | ❌ | ✅ |
| [Set up bank account for partner payouts](/help/article/how-to-set-up-bank-account) | ✅ | ❌ | ❌ | ✅ |
## Limits and Billing for Workspaces
On Dub, you can create as many workspaces as you want, and each workspace will be billed separately.
However, to prevent abuse, you can only create up to 2 workspaces on the Free plan. If you need more workspaces, you can [upgrade to the Pro plan](https://dub.co/pricing).
# Managing workspace members with roles
Source: https://dub.co/help/article/workspace-roles
Learn how to use roles to manage your workspace members' permissions on Dub.
On Dub, you can [invite your teammates](/help/article/how-to-invite-teammates) to join your workspace. This is useful if you want to collaborate with your team on your short links.
When you invite your teammates, it is important to understand that you can manage their permissions and roles in your workspace. This is where roles come in.
There are four roles you can assign to your team members:
## Owner role
The owner of a workspace has the highest level of access. When you create a new workspace, you are automatically assigned the owner role by default. Then, when you invite your teammates, you can assign them either the owner or member role.
## Member role
When you invite your teammates to join your workspace, they are assigned the member role by default.
The member role is limited in what they can do compared to the owner role – this can be useful for security purposes, e.g. you may want to give your team members the ability to manage short links and tags, but not the ability to manage domains or the workspace settings.
## Viewer role
The viewer role is meant for teammates who need visibility into what is happening in the workspace, without the ability to make changes. This is a good fit for stakeholders, clients, or teammates who want to review links, performance, and partner activity, but should not be able to edit, create, or delete anything.
The Viewer role is only available on [Business plans and
above](https://dub.co/pricing).
## Billing role
The billing role is intended for teammates who are responsible for [partner payouts](/help/article/partner-payouts) and [managing billing information](/help/article/how-to-change-billing-information). This role gives them access to billing details (e.g. [setting up a bank account for partner payouts](/help/article/how-to-set-up-bank-account)) and payout actions, while keeping the rest of the workspace locked down.
The Billing role is only available on [Advanced plans and
above](https://dub.co/pricing/partners).
## Comparison grid
Here's a comparison grid of the features available to owners and members.
| Feature | Owner | Member | Viewer | Billing |
| ----------------------------------------------------------------------------------- | ----- | ------ | ------ | ------- |
| 👥 [**Dub Partners**](https://dub.co/partners) | | | | |
| Access [groups](/help/article/partner-groups) | ✅ | ✅ | ✅ | ✅ |
| Create, update, and delete [groups](/help/article/partner-groups) | ✅ | ✅ | ❌ | ❌ |
| [Confirm payouts](/help/article/partner-payouts#how-to-pay-your-partners) | ✅ | ❌ | ❌ | ✅ |
| View [messages](/help/article/messaging-partners) | ✅ | ✅ | ✅ | ✅ |
| Create [messages](/help/article/messaging-partners) | ✅ | ✅ | ❌ | ❌ |
| 📈 [Dub Analytics](https://dub.co/analytics) | | | | |
| View [analytics](/help/article/dub-analytics) | ✅ | ✅ | ✅ | ✅ |
| 🔗 [**Dub Links**](https://dub.co/links) | | | | |
| View links | ✅ | ✅ | ✅ | ✅ |
| Create, update, or delete links | ✅ | ✅ | ❌ | ❌ |
| View [folders](/help/article/link-folders) | ✅ | ✅ | ✅ | ✅ |
| Create, update, or delete [folders](/help/article/link-folders) | ✅ | ✅ | ❌ | ❌ |
| View [tags](/help/article/how-to-use-tags) | ✅ | ✅ | ✅ | ✅ |
| Create, update, or delete [tags](/help/article/how-to-use-tags) | ✅ | ✅ | ❌ | ❌ |
| View [domains](/help/article/how-to-add-custom-domain) | ✅ | ✅ | ✅ | ✅ |
| Create, update, or delete [domains](/help/article/how-to-add-custom-domain) | ✅ | ❌ | ❌ | ❌ |
| 🔌 **Dub Integrations** | | | | |
| View [integrations](https://dub.co/integrations) | ✅ | ✅ | ✅ | ✅ |
| Install/Uninstall [integrations](https://dub.co/integrations) | ✅ | ✅ | ❌ | ❌ |
| View [API keys](/docs/api-reference/tokens) | ✅ | ✅ | ✅ | ✅ |
| Create, update, or delete [API keys](/docs/api-reference/tokens) | ✅ | ✅ | ❌ | ❌ |
| View [webhooks](/docs/webhooks/introduction) | ✅ | ✅ | ✅ | ✅ |
| Create, update, or delete [webhooks](/docs/webhooks/introduction) | ✅ | ❌ | ❌ | ❌ |
| View [OAuth apps](/docs/integrations/quickstart) | ✅ | ✅ | ✅ | ✅ |
| Create, update, or delete OAuth apps | ✅ | ❌ | ❌ | ❌ |
| 🏛️ [**Workspace management**](/help/article/what-is-a-workspace) | | | | |
| View workspace | ✅ | ✅ | ✅ | ✅ |
| Update or delete workspace | ✅ | ❌ | ❌ | ❌ |
| [Manage teammates](/help/article/how-to-invite-teammates) | ✅ | ❌ | ❌ | ❌ |
| [Manage billing information](/help/article/how-to-change-billing-information) | ✅ | ❌ | ❌ | ✅ |
| [Set up bank account for partner payouts](/help/article/how-to-set-up-bank-account) | ✅ | ❌ | ❌ | ✅ |